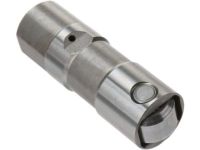
Make sure this part fits

GM 10448575
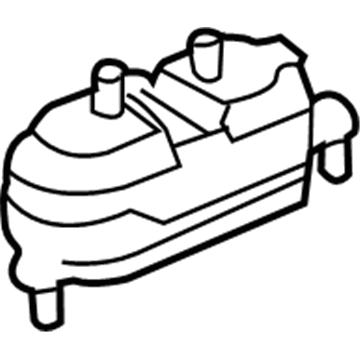
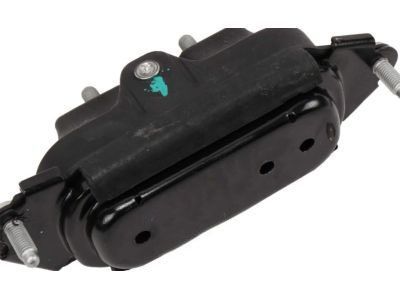
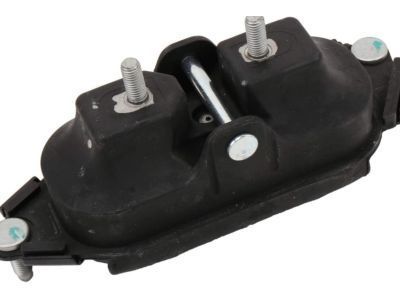
Motor Mount

1988-2011 GM

Customer Questions & Expert Answers (90)
GM 10448575 Motor Mount
  • Part Description
    Mount, Engine Mount Dampening; Engine Mount Torque Strut; Engine Mount Bracket
  • Replaces
    17998813, 22113282, 22178657, 22146018, 22175206, 10340740, 10448574, 10448576, 22146466
  • Manufacturer
    General Motors
Make sure this part fits
$67.67 MSRP: $147.42
You Save: $79.75 (55%)
Ships in 1-3 Business Days
1
ADD TO CART
  • Related Parts
  • Product Specifications
  • Vehicle Fitment
  • Customer Questions & Expert Answers
  • Product Specifications

    BrandGenuine GM
    Manufacturer Part Number10448575
    Part DescriptionMount, Engine Mount Dampening; Engine Mount Torque Strut; Engine Mount Bracket
    Other NamesSpring Insulator; Lower Mount; Mount Insulator; Mount; Mount, Engine Mounting; Engine Mount
    Item Dimensions11.6 x 5.1 x 5.2 inches
    Item Weight4.20 Pounds
    ConditionNew
    Fitment TypeDirect Replacement
    Replaces17998813, 22113282, 22178657, 22146018, 22175206, 10340740, 10448574, 10448576, 22146466
    ManufacturerGeneral Motors
    SKU10448575
    WarrantyThis genuine GM part is guaranteed by GM's factory warranty.
    Shipping & ReturnShipping Policy Return Policy
    Warning: California's Proposition 65
  • Vehicle Fitment

    Year Make Model Trim Engine
    1997-2005 Buick CenturyCustom, Limited, Special Edition6 Cyl 3.1 L GAS
    2005-2009 Buick LaCrosseCX, CXL, CXS6 Cyl 3.6 L GAS, 6 Cyl 3.8 L GAS
    1988-2004 Buick Regal25th Anniversary Edition, Custom, Gran Sport, GS, GSE, Limited, LS, LSE, Olympic Gold Edition6 Cyl 2.8 L GAS, 6 Cyl 3.1 L GAS, 6 Cyl 3.8 L GAS
    2002-2007 Buick RendezvousCX, CX Plus, CXL, CXL Plus, Ultra6 Cyl 3.4 L GAS, 6 Cyl 3.5 L GAS, 6 Cyl 3.6 L GAS
    2005-2007 Buick TerrazaCX, CXL6 Cyl 3.5 L GAS, 6 Cyl 3.9 L FLEX, 6 Cyl 3.9 L GAS
    2000-2011 Chevrolet Impala50th Anniversary Edition, Base, LS, LS Sport, LT, LTZ, Police, SS6 Cyl 3.4 L GAS, 6 Cyl 3.5 L FLEX, 6 Cyl 3.5 L GAS, 6 Cyl 3.8 L GAS, 6 Cyl 3.9 L FLEX, 6 Cyl 3.9 L GAS
    1990-2001 Chevrolet LuminaBase, Euro, LS, LTZ4 Cyl 2.5 L GAS, 6 Cyl 3.1 L FLEX, 6 Cyl 3.1 L GAS, 6 Cyl 3.4 L GAS, 6 Cyl 3.8 L GAS
    1995-2007 Chevrolet Monte CarloIndianapolis 500 Pace Car, LS, LS Competition, LS Sport, LT, LTZ, SS, SS 35th Anniversary Edition, SS Dale Earnhardt Signature Edition, SS High Sport, SS Pace Car, Z346 Cyl 3.1 L GAS, 6 Cyl 3.4 L GAS, 6 Cyl 3.5 L FLEX, 6 Cyl 3.5 L GAS, 6 Cyl 3.8 L GAS, 6 Cyl 3.9 L GAS
    2005-2008 Chevrolet UplanderBase, LS, LT6 Cyl 3.5 L GAS, 6 Cyl 3.9 L FLEX, 6 Cyl 3.9 L GAS
    1997-2005 Chevrolet VentureBase, LS, LT, Plus, Value, Warner Bros.6 Cyl 3.4 L GAS
    View More
  • Customer Questions & Expert Answers

    Q:
    Is this 10448575 designed for my car? Posted by ChevyPartsGiant Specialist
    A:
    Please Select Your Vehicle model to see if part number 10448575 is suitable before ordering.
    Posted by ChevyPartsGiant Specialist
    Q:
    How to replace the right engine mount on Buick LaCrosse? Posted by Customer
    A:
    The first step to replace the right Engine Mount requires users to disconnect the battery ground (negative) cable together with the throttle body air inlet duct. Begin by taking out the Engine Mount struts while using methods to raise and support the vehicle. The first step involves removing the right engine splash shield then the three-way catalytic converter pipe from its position connecting the engine right side Exhaust Manifold. After removing Engine Mount lower nuts you should position a block of wood between the Oil Pan and jack support to avoid any damage. First position the engine with the utility stand and wood block until it reaches the proper height and afterward eliminate the bolts which anchor the Engine Mount bracket to the Oil Pan and the Engine Mount bracket to the engine bolt. Remove the Engine Mount first and then disconnect both the Engine Mount upper nuts and the Engine Mount bracket and finally the Engine Mount from the Engine Mount bracket. Install the Engine Mount onto the Engine Mount bracket before putting on the Engine Mount upper nuts which should be tightened to 53 n.m (39 lb ft). Begin by setting up the Engine Mount bracket and its corresponding Engine Mount onto the Oil Pan. After completing hand-tightening for all of the Engine Mount bracket bolts (1, 2), proceed with the next step. Use the utility stand to lower the engine after screwing the bolts to 58 n.m (43 lb ft). Fit the Engine Mount lower nuts and torque them to 47 n.m (35 lb ft). First install the right engine splash shield followed by the right front wheel and tire before connecting the three-way catalytic converter pipe into the engine right side Exhaust Manifold. Installation of Engine Mount struts along with throttle body air inlet duct needs to be performed together with battery ground (negative) cable reattachment.
    Posted by ChevyPartsGiant Specialist
    Q:
    How to verify and replace an engine mount due to suspected fluid loss on Buick Century? Posted by Customer
    A:
    Test that absent Engine Mount fluid loss stems from the mount itself rather than nearby engine or accessory fluid leaks before doing a replacement. Attach the engine support fixture to lift the engine until the weight falls off the mount which produces elastic tension in the rubber. Compare the appearance of the Engine Mount hard rubber surface during engine elevation: replacement is mandatory when heat check cracks appear, when rubber loses contact with metal or if rubber splits along the center. Check for rubber separation between the Engine Mount metal plate and its mounting points. Lower the engine to tighten bolts or nuts between the Engine Mount and frame or Engine Mount bracket. The manual for automatic transmission mount replacement contains the necessary information about the transaxle mount.
    Posted by ChevyPartsGiant Specialist
    Q:
    How to Perform an Engine Mount Replacement on Buick LaCrosse? Posted by Customer
    A:
    Start by taking off the negative cable from the battery then remove the air inlet duct of the throttle body before beginning the right Engine Mount replacement. Proceed to take out the Engine Mount struts and then securely position the vehicle. The work begins with extraction of the three-way catalytic converter pipe from the engine right side Exhaust Manifold and subsequent removal of the right front wheel and tire and right engine splash shield. After removing the lower Engine Mount nuts you should place a wooden block between the Oil Pan and the jack support to avoid damage. You need to use both a utility stand with a wooden block to lift the engine before you take out the brackets connecting the Engine Mount to the Oil Pan and to the Engine Mount to the engine. Succeeding the removal of the Engine Mount bracket follows the extraction of the Engine Mount from its bracket, then you should take out the Engine Mount upper nuts. Placement of the Engine Mount on the Engine Mount bracket begins the installation process before tightening the Engine Mount upper nuts to 53 nm (39 ft. Lbs.). Use your hands to initially fasten all Engine Mount bracket bolts that connect the mount bracket to the Oil Pan before tightening them properly. Position the Engine Mount bracket bolt then fasten it to 58 nm torque (43 ft. Lbs.) before using a utility stand to lower the engine. Next install the lower Engine Mount nuts to 47 nm (35 ft. Lbs.) torque specification while installing the right engine splash shield and then the right front wheel with tire. Reconnect the three-way catalytic converter pipe to the engine right side Exhaust Manifold then lower the vehicle. After that, reinstall the Engine Mount struts and finally attach the throttle body air inlet duct before reconnecting the battery ground (negative) cable.
    Posted by ChevyPartsGiant Specialist
    Q:
    How to replace the Motor and Transmission Mount on Buick Terraza? Posted by Customer
    A:
    The replacement process starts with removing the transaxle mount bracket followed by tightening the transaxle mount lower nuts between the transaxle mount and transaxle mount frame bracket. Starting with the removal of the transaxle mount from its position within the transaxle mount frame bracket. Position the transaxle mount first onto the transaxle mount frame bracket following the fastener notice requirements. Install the transaxle mount lower nuts into the transaxle mount frame bracket while tightening them to 47 n.m (35 lb ft). Reposition the transaxle mount bracket onto its proper position on the transaxle.
    Posted by ChevyPartsGiant Specialist
    Q:
    How to Inspect the Motor and Transmission Mount on Buick Rendezvous? Posted by Customer
    A:
    In order to examine the transmission mount, begin by placing a wooden plank wide enough to cover the width of the Oil Pan bottom between the Oil Pan and the jack support in order to avoid Oil Pan damage and potential engine disassembly. Then, you could use a jack or a utility stand to lift the transmission/transaxle to relieve the weight on the transmission/transaxle mount and to stretch the mount slightly. Pay close attention to the transmission/transaxle mount for any type of wear and tear, such as the occurrence of cracks on the rubber side, separation of rubber from the metal plate or splits all the way through the center. In the event of the above conditions, replace the transmission/transaxle mount. Also if there is any movement between the plate (metal plate of transmission/transaxle mount) and transmission make the mount fasteners of transmission tighter, as per the correct tightening specification.
    Posted by ChevyPartsGiant Specialist
    Q:
    How to replace the engine mount bracket for a front-wheel drive on Buick Rendezvous? Posted by Customer
    A:
    The replacement process for an Engine Mount bracket in front-wheel drive vehicles begins by taking off the throttle body air inlet duct as well as the Engine Mount struts. Rise and stabilize the vehicle before disconnecting the catalytic converter tubing from the Exhaust Manifold on the engine right side. The maintenance work begins with removing the right front wheel and tire from the vehicle and continuing with removing the right engine splash shield. Use a block of wood which covers the full width of the Oil Pan bottom when separating Engine Mount bracket-to-Oil Pan bolts before you insert the wood piece between the Oil Pan and the jack support to prevent any damages. A block of wood must be inserted between the utility stand and Oil Pan before you use the utility stand to lift the Oil Pan. First disconnect the Engine Mount upper nuts before separating the Engine Mount bracket from its mounting position on the Engine Mount. The installation process must begin with bracket attachment to the Engine Mount followed by mounting the upper nuts which should be tightened to 53 nm (39 ft. Lbs.). The utility stand helps lower the engine before you install the Engine Mount bracket on the Oil Pan while tightening its bolts to 58 nm (43ft. Lbs.). Reposition the right engine splash shield and right front wheel and tire before joining the catalytic converter pipe with the engine right side Exhaust Manifold. The last step includes lowering the vehicle along with installation of Engine Mount struts and throttle body air inlet duct reinstallation.
    Posted by ChevyPartsGiant Specialist
    Q:
    How to replace the automatic Motor and Transmission Mount on Buick Regal? Posted by Customer
    A:
    Start by removing the transaxle bracket, then take out the lower nuts from the transaxle mount frame bracket, and finally take the transaxle mount off the bracket. Start by mounting the transaxle mount to the frame bracket, and pay attention to the Fastener Notice given in Cautions and Notices during installation. Following that, turn the transaxle mount lower nuts onto the frame bracket, fasten them with 47 Nm (35 ft. lbs.) of torque, and then fix the transaxle bracket onto the transaxle.
    Posted by ChevyPartsGiant Specialist
    Q:
    How to Inspect the Motor and Transmission Mount on Chevrolet Impala? Posted by Customer
    A:
    To inspect the transmission mount, first lift and secure the vehicle and place a block of wood the same width as the Oil Pan bottom in between the Oil Pan and the jack support to avoid damage. Do not replace any transmission/transaxle mount with the suspicion that the fluid might be lost before the sealant and the spiral body of the sealant are inspected. Next, lift up the transmission/transaxle to relieve it of the pressure from the mount and make a little tension in the rubber. During this, pay attention to whether the mount has any indications of damage, like heat check cracks on the hard rubber surface, separation of the rubber from the metal plate or the bucket, or splits running through the center. In case any of the mentioned conditions or the transaxle itself needs replacement, carry out corresponding measures. Lower the transmission/transaxle and tighten bolts or nuts attached to the mount frame or bracket if the mount of metal plate is loose at the attaching points. Finally, lower the vehicle.
    Posted by ChevyPartsGiant Specialist
    Q:
    How to replace the automatic Motor and Transmission Mount on Chevrolet Monte Carlo? Posted by Customer
    A:
    Start by elevating your vehicle to a stable position and then proceed to remove the parking brake cable then disconnect the left inner splash shield and finally the left tire assembly. Set up a transmission jack under the transaxle to remove the transaxle mount upper nuts which secure the transaxle bracket. Begin by lifting the transaxle assembly but with care before removing the transaxle mount lower nuts (Nuts) from the frame to extract the transaxle mount off the frame. Place the transaxle mount onto its designated frame position before installing the lower frame nuts (Nuts) and torquing them to 63 nm (46 ft. Lbs.). Position the transaxle to lock the mount studs into the transaxle bracket before tightening the mount upper nuts (Nuts) to the mount at 47 nm (35 ft. Lbs.). Complete the installation by taking away the transmission jack from the transaxle and reinstall the left inner splash shield and put back the left wheel with its tire. Lower the vehicle to its resting position.
    Posted by ChevyPartsGiant Specialist
    Q:
    How to replace the engine mount on Chevrolet Impala? Posted by Customer
    A:
    The first step to replace engine mounts should be removal of tire and wheel from the vehicle. You should remove the engine splash shield prior to moving on to the next step. The engineer should take out the nuts which hold the Engine Mount to the vehicle's frame. The first step involves placing an adjustable jack along with a block of wood under the Oil Pan then moving to remove the Engine Mount bracket bolts. Adjustable jack along with a block of wood will lift the engine up before removing the Engine Mount/bracket which later exits the vehicle. Place the Engine Mount/bracket to the engine and install the Engine Mount bracket bolts while following the specified sequence for tightening to 58 nm (43 lb ft). Let the engine reach the frame with the adjustable jack while removing the block of wood afterward. Take out the adjustable jack. Position the Engine Mount onto its frame nuts before torquing them to 50 nm (37 lb ft). After installation of the engine splash shield and tire and wheel the procedure is complete.
    Posted by ChevyPartsGiant Specialist
    Q:
    How to Inspect and Replace the Motor and Transmission Mount on Chevrolet Lumina? Posted by Customer
    A:
    To inspect a/t mount first a block of wood of the width of the Oil Pan bottom shall be inserted between the Oil Pan and jack support to prevent Oil Pan damage and potential engine disaster. One should check the source of the fluid that has been lost before any transmission/transaxle mount is replaced on suspicion of the fluid loss occurred elsewhere. Lift the transmission/transaxle away from the transmission/transaxle mount to relieve the weight for the mount and the creation of a slight amount of rubber tension. As you lift the transmission/transaxle, also notice the transmission/transaxle mount and replace it if it is hard rubber with heat check cracks on what is left of the hard rubber, if the rubber is separated from the metal plate it is supposed to be glued to, or if the rubber is split down the middle. When there is any movement between metal plate of transmission/transaxle mount and attachment points, lower the transmission/transaxle on transmission/transaxle mount and tighten bolts or nuts attached to transmission/transaxle mount to frame or transmission/transaxle mount bracket.
    Posted by ChevyPartsGiant Specialist
    Q:
    How to verify the source of fluid loss before replacing an engine mount on Chevrolet Monte Carlo? Posted by Customer
    A:
    Confirm that the engine mount contains the leaking fluid before deciding to replace it when inspecting the engine or accessories for the substance. The universal engine support fixture () lets you suspend the engine mount weight so it produces minor rubber tension. Check the engine mount when lifting the engine to see if heat check cracks appear on the hard rubber surface plus the rubber separates from its metal plate or the rubber breaks in the middle. A replacement is necessary under these conditions. Quake the engine with the mount until the metal plate maintains correct position to its connecting points. Tighten the frame or bracket bolts or nuts after the engine reaches its lowered position.
    Posted by ChevyPartsGiant Specialist
    Q:
    How to replace the engine mount on Chevrolet Lumina? Posted by Customer
    A:
    A replacement of the Engine Mount requires the first step to be disconnecting the negative cable from the battery. After disconnecting power the remove throttle body air inlet duct followed by the Engine Mount struts. Suspend the vehicle at appropriate height with engine support fixture (J28467-B) and combine it with engine support adapters (J28467-9OA) and engine support adapter leg set (J36462-A). In the replacement process you must first take out the right (rear) exhaust manifold three-way catalytic converter pipe as well as the right front wheel with tire and right engine splash shield. The next step requires you to remove Engine Mount lower nuts before lifting the engine with universal engine support fixture and uninstalling the Engine Mount bracket-to-Oil Pan bolts. Begin by removing the Engine Mount along with the Engine Mount bracket before removing Engine Mount upper nuts and the Engine Mount from the Engine Mount bracket. Your first step for installation involves mounting the Engine Mount onto the Engine Mount bracket followed by fastening upper Engine Mount nuts at 47 nm (35 ft. Lbs.). Surely you can install the Engine Mount bracket together with the Engine Mount to the Oil Pan before you fasten the bolts to 58 nm (43 ft. Lbs.). Position the engine into place before installing its lower mount nuts while torquing each to 43 nm (32 ft. Lbs.). Spare pieces include the right engine splash shield alongside the right front wheel and tire assembly together with connection of the three-way catalytic converter pipe to the right (rear) exhaust manifold. To conclude this process lower the vehicle then remove the engine support fixture while installing Engine Mount struts and the throttle body air inlet duct before connecting the battery ground cable.
    Posted by ChevyPartsGiant Specialist
    Q:
    What is the next step after removing the lower nuts for the 2002 Buick Century? Posted by Customer
    A:
    Detach the transaxle mount from the frame bracket.
    Posted by ChevyPartsGiant Specialist
    See expert answers on similar Motor And Transmission Mount
    Q:
    What is the final step in the process for the 2002 Buick Century? Posted by Customer
    A:
    Lower the vehicle, remove the engine support fixture, install the engine mount struts, and reconnect the battery ground (negative) cable.
    Posted by ChevyPartsGiant Specialist
    See expert answers on similar Engine Mount
    Q:
    What components should be reinstalled after tightening the lower nuts for the 2008 Buick LaCrosse? Posted by Customer
    A:
    The right engine splash shield, the right front wheel and tire, and the three-way catalytic converter pipe.
    Posted by ChevyPartsGiant Specialist
    See expert answers on similar Engine Mount
    Q:
    How should the transaxle mount be installed for the 2008 Buick LaCrosse? Posted by Customer
    A:
    Position the transaxle mount to the frame and install the transaxle mount lower nuts, tightening them to 63 N.m (46 lb ft).
    Posted by ChevyPartsGiant Specialist
    See expert answers on similar Motor And Transmission Mount
    Q:
    What should be done after raising and supporting the 2003 Buick Century? Posted by Customer
    A:
    Remove the three-way catalytic converter pipe from the right (rear) exhaust manifold, followed by the right front wheel and tire, and the right engine splash shield.
    Posted by ChevyPartsGiant Specialist
    See expert answers on similar Engine Mount
    Q:
    What should be ensured during the installation for the 2001 Buick Century? Posted by Customer
    A:
    Follow the Fastener Notice in Service Precautions.
    Posted by ChevyPartsGiant Specialist
    See expert answers on similar Motor And Transmission Mount
    Q:
    What is the first step to replace the automatic transmission mount for the 2005 Buick Century? Posted by Customer
    A:
    First, remove the transaxle bracket.
    Posted by ChevyPartsGiant Specialist
    See expert answers on similar Motor And Transmission Mount
    Q:
    What is the next step after removing the lower nuts for the 2006 Buick LaCrosse? Posted by Customer
    A:
    Take out the transaxle mount from the frame.
    Posted by ChevyPartsGiant Specialist
    See expert answers on similar Motor And Transmission Mount
    Q:
    What is the first step to inspect and service the engine mount for the 2000 Buick Century? Posted by Customer
    A:
    Install the Universal Engine Support Fixture (J28467-B) and raise the engine to relieve weight from the engine mount.
    Posted by ChevyPartsGiant Specialist
    See expert answers on similar Engine Mount
    Q:
    What is the first step to inspect the automatic transmission mount for the 2000 Buick Century? Posted by Customer
    A:
    Insert a block of wood that spans the width of the oil pan bottom between the oil pan and the jack support to avoid oil pan damage and potential engine failure.
    Posted by ChevyPartsGiant Specialist
    See expert answers on similar Motor And Transmission Mount
    Q:
    What is the last step to complete the process for the 2005 Buick Terraza? Posted by Customer
    A:
    Reinstall the transaxle mount bracket to the transaxle.
    Posted by ChevyPartsGiant Specialist
    See expert answers on similar Motor And Transmission Mount
    Q:
    What is the next step after lowering the engine using the utility stand for the 2002 Buick Rendezvous? Posted by Customer
    A:
    Install the engine mount lower nuts, tightening them to 47 Nm (35 ft. lbs.).
    Posted by ChevyPartsGiant Specialist
    See expert answers on similar Engine Mount
    Q:
    What is the first step to replace the engine mount for the 2007 Buick Terraza? Posted by Customer
    A:
    Remove the air cleaner outlet duct, engine mount struts, and raise and support the vehicle.
    Posted by ChevyPartsGiant Specialist
    See expert answers on similar Engine Mount
    Q:
    What is the next step after raising the engine for the 2006 Buick Terraza? Posted by Customer
    A:
    Remove the engine mount bracket-to-oil pan bolts, then take out the engine mount and engine mount bracket, separating the engine mount from the bracket.
    Posted by ChevyPartsGiant Specialist
    See expert answers on similar Engine Mount
    Q:
    What is the first step to replace the left side transmission mount for the 2007 Buick LaCrosse? Posted by Customer
    A:
    Raise and support the vehicle.
    Posted by ChevyPartsGiant Specialist
    See expert answers on similar Motor And Transmission Mount
    Q:
    What do you do once the left engine mount strut bracket is free for the 2001 Buick Regal? Posted by Customer
    A:
    Install the new left engine mount strut bracket onto the cylinder head, ensuring to follow the Fastener Notice in Service Precautions.
    Posted by ChevyPartsGiant Specialist
    See expert answers on similar Engine Mount
    Q:
    What should be done after raising the 2003 Buick Rendezvous? Posted by Customer
    A:
    Detach the catalytic converter pipe from the engine right side exhaust manifold, then remove the right front wheel and tire, followed by the right engine splash shield.
    Posted by ChevyPartsGiant Specialist
    See expert answers on similar Engine Mount
    Q:
    What should be removed after raising for the 2005 Buick LaCrosse? Posted by Customer
    A:
    The left tire and wheel assembly, followed by the left inner splash shield.
    Posted by ChevyPartsGiant Specialist
    See expert answers on similar Motor And Transmission Mount
    Q:
    What is the last step in the installation process for the 2006 Buick Terraza? Posted by Customer
    A:
    Reattach the transaxle mount bracket to the transaxle.
    Posted by ChevyPartsGiant Specialist
    See expert answers on similar Motor And Transmission Mount
    Q:
    What should be observed while raising the engine for the 2001 Buick Regal? Posted by Customer
    A:
    Observe the engine mount for any conditions that necessitate replacement, such as heat check cracks, separation of rubber from the metal plate, or splits through the center of the rubber.
    Posted by ChevyPartsGiant Specialist
    See expert answers on similar Engine Mount
    Q:
    What is the next step after positioning the transaxle mount for the 2000 Buick Regal? Posted by Customer
    A:
    Secure the transaxle mount lower nuts to the frame bracket, tightening them to 47 Nm (35 ft. lbs.).
    Posted by ChevyPartsGiant Specialist
    See expert answers on similar Motor And Transmission Mount
    Q:
    What is the first step to inspect the transmission mount for the 2003 Buick Regal? Posted by Customer
    A:
    Insert a block of wood that spans the width of the oil pan bottom between the oil pan and the jack support to prevent oil pan damage and potential engine failure.
    Posted by ChevyPartsGiant Specialist
    See expert answers on similar Motor And Transmission Mount
    Q:
    What components need to be reinstalled after the engine mount is secured for the 2005 Buick Rendezvous? Posted by Customer
    A:
    Reinstall the right engine splash shield, the right front wheel and tire, and connect the TWC pipe to the engine right side exhaust manifold.
    Posted by ChevyPartsGiant Specialist
    See expert answers on similar Engine Mount
    Q:
    What should be done if any signs of wear are present for the 2002 Buick Rendezvous? Posted by Customer
    A:
    Replace the transmission/transaxle mount.
    Posted by ChevyPartsGiant Specialist
    See expert answers on similar Motor And Transmission Mount
    Q:
    What components should be reinstalled after tightening the engine mount lower nuts for the 2005 Buick LaCrosse? Posted by Customer
    A:
    The right engine splash shield, the right front wheel and tire, and connect the three-way catalytic converter pipe to the engine right side exhaust manifold.
    Posted by ChevyPartsGiant Specialist
    See expert answers on similar Engine Mount
    Q:
    What should be done after removing the engine mount/bracket for the 2007 Buick Rendezvous? Posted by Customer
    A:
    Take out the engine mount/bracket and its associated nuts for both FWD and AWD.
    Posted by ChevyPartsGiant Specialist
    See expert answers on similar Engine Mount
    Q:
    What should be done after positioning the transaxle mount for the 2007 Buick Rendezvous? Posted by Customer
    A:
    Secure the transaxle mount lower nuts to the frame bracket, tightening them to 47 N.m (35 lb ft).
    Posted by ChevyPartsGiant Specialist
    See expert answers on similar Motor And Transmission Mount
    Q:
    What should you observe while raising the engine for the 2000 Buick Regal? Posted by Customer
    A:
    Look for conditions that necessitate replacement, such as heat check cracks on the hard rubber surface, separation of the rubber from the metal plate, or a split through the center of the engine mount.
    Posted by ChevyPartsGiant Specialist
    See expert answers on similar Engine Mount
    Q:
    How do you secure the engine mount/bracket during installation for the 2006 Buick Rendezvous? Posted by Customer
    A:
    Install the engine mount/bracket, securing it with the bracket bolts for AWD and FWD, tightening both to 58 Nm (43 ft. lbs.).
    Posted by ChevyPartsGiant Specialist
    See expert answers on similar Engine Mount
    Q:
    What should be done after securing the upper engine mount strut bracket for the 2002 Buick Regal? Posted by Customer
    A:
    Reinstall the fuel rail assembly and the EVAP emissions canister purge valve.
    Posted by ChevyPartsGiant Specialist
    See expert answers on similar Engine Mount
    Q:
    What should be done after installing the engine mount and bracket for the 2004 Buick Regal? Posted by Customer
    A:
    Hand-tighten the right rear and left front engine mount bracket bolts, then tighten the engine mount bracket bolts to 102 Nm (75 ft. lbs.).
    Posted by ChevyPartsGiant Specialist
    See expert answers on similar Engine Mount
    Q:
    What should be done if any of the inspected conditions are present for the 2006 Buick Rendezvous? Posted by Customer
    A:
    Replace the transmission/transaxle mount.
    Posted by ChevyPartsGiant Specialist
    See expert answers on similar Motor And Transmission Mount
    Q:
    What should be done if there is movement between the metal plate of the engine mount and its attaching points for the 2002 Buick Regal? Posted by Customer
    A:
    Lower the engine and tighten the bolts or nuts attaching the engine mount to the frame or engine mount bracket.
    Posted by ChevyPartsGiant Specialist
    See expert answers on similar Engine Mount
    Q:
    What is the first step in the installation process for the 2003 Buick Rendezvous? Posted by Customer
    A:
    Attach the transaxle mount to the frame bracket, ensuring to follow the Fastener Notice in Service Precautions.
    Posted by ChevyPartsGiant Specialist
    See expert answers on similar Motor And Transmission Mount
    Q:
    What should be done after removing the transaxle mount bracket for the 2005 Buick Rendezvous? Posted by Customer
    A:
    Remove the transaxle mount lower nuts securing the transaxle mount to the transaxle mount frame bracket.
    Posted by ChevyPartsGiant Specialist
    See expert answers on similar Motor And Transmission Mount
    Q:
    What should be removed after raising for the 2007 Chevrolet Impala? Posted by Customer
    A:
    Remove the left tire and wheel assembly, followed by the left engine splash shield.
    Posted by ChevyPartsGiant Specialist
    See expert answers on similar Motor And Transmission Mount
    Q:
    What should be done after removing the engine mount/bracket for the 2009 Chevrolet Impala? Posted by Customer
    A:
    Position the engine mount/bracket to the engine and install the engine mount bracket bolts, tightening them in the specified sequence to 50 Nm (37 lb ft).
    Posted by ChevyPartsGiant Specialist
    See expert answers on similar Engine Mount
    Q:
    What additional tools may be needed during the process for the 2000 Chevrolet Impala? Posted by Customer
    A:
    Use the Engine Support Adapters (J 28467-90A) and the Engine Support Adapter Leg Set (J 36462-A) as needed.
    Posted by ChevyPartsGiant Specialist
    See expert answers on similar Engine Mount
    Q:
    How should the A/C compressor be removed for the 2004 Chevrolet Impala? Posted by Customer
    A:
    Remove the A/C compressor and its bracket without discharging the A/C system, securing the compressor in place.
    Posted by ChevyPartsGiant Specialist
    See expert answers on similar Engine Mount
    Q:
    What is the first step to replace the left side transmission mount for the 2010 Chevrolet Impala? Posted by Customer
    A:
    Raise and support the vehicle.
    Posted by ChevyPartsGiant Specialist
    See expert answers on similar Motor And Transmission Mount
    Q:
    How do you raise the engine for the 2007 Chevrolet Impala? Posted by Customer
    A:
    Use the adjustable jack and block of wood to raise the engine until the engine mount/bracket can be removed.
    Posted by ChevyPartsGiant Specialist
    See expert answers on similar Engine Mount
    Q:
    What is the final step in the process for the 2002 Chevrolet Impala? Posted by Customer
    A:
    Lower the vehicle, remove the engine support fixture, reinstall the engine mount struts, and attach the throttle body air inlet duct before reconnecting the battery ground cable.
    Posted by ChevyPartsGiant Specialist
    See expert answers on similar Engine Mount
    Q:
    What should be done after removing the transaxle bracket for the 2001 Chevrolet Lumina? Posted by Customer
    A:
    Take off the transaxle mount lower nuts from the transaxle mount frame bracket and then detach the transaxle mount from the frame bracket.
    Posted by ChevyPartsGiant Specialist
    See expert answers on similar Motor And Transmission Mount
    Q:
    What should be removed after raising the 2004 Chevrolet Monte Carlo? Posted by Customer
    A:
    The left tire and wheel assembly along with the left inner splash shield.
    Posted by ChevyPartsGiant Specialist
    See expert answers on similar Motor And Transmission Mount
    Q:
    What is the next step after raising the engine for the 2006 Chevrolet Impala? Posted by Customer
    A:
    Remove the engine mount bracket bolts and the engine mount bracket, then raise and support the vehicle.
    Posted by ChevyPartsGiant Specialist
    See expert answers on similar Engine Mount
    Q:
    What should be done if there is movement between the metal plate of the mount and its attaching points for the 2000 Chevrolet Monte Carlo? Posted by Customer
    A:
    Lower the transmission/transaxle and tighten the bolts or nuts attaching the mount to the frame or mount bracket.
    Posted by ChevyPartsGiant Specialist
    See expert answers on similar Motor And Transmission Mount
    Q:
    What are the steps after securing the engine mount bracket for the 2003 Chevrolet Monte Carlo? Posted by Customer
    A:
    Lower the vehicle and the engine, then raise the vehicle again to install the engine mount lower nuts, tightening them to 43 Nm (32 ft. lbs.).
    Posted by ChevyPartsGiant Specialist
    See expert answers on similar Engine Mount
    Q:
    What should be done with the engine mount upper nuts for the 2004 Chevrolet Monte Carlo? Posted by Customer
    A:
    Remove the engine mount upper nuts and take the engine mount off the engine mount bracket.
    Posted by ChevyPartsGiant Specialist
    See expert answers on similar Engine Mount
    Q:
    What should be removed after raising for the 2008 Chevrolet Impala? Posted by Customer
    A:
    The left tire and wheel assembly, followed by the left engine splash shield.
    Posted by ChevyPartsGiant Specialist
    See expert answers on similar Motor And Transmission Mount
    Q:
    What should be done after fitting the studs into the bracket for the 2005 Chevrolet Monte Carlo? Posted by Customer
    A:
    Install the transaxle mount upper nuts (Nuts, Upper) and tighten them to 47 Nm (35 ft. lbs.).
    Posted by ChevyPartsGiant Specialist
    See expert answers on similar Motor And Transmission Mount
    Q:
    What should be done after reinstalling the engine mount bracket for the 2001 Chevrolet Monte Carlo? Posted by Customer
    A:
    Secure the bracket-to-oil pan bolts to 58 Nm (43 ft. lbs.).
    Posted by ChevyPartsGiant Specialist
    See expert answers on similar Engine Mount
    Q:
    How should the transaxle mount be installed for the 2001 Chevrolet Impala? Posted by Customer
    A:
    Position the transaxle mount to the frame and install the transaxle mount lower nuts, tightening them to 63 Nm (46 ft. lbs.).
    Posted by ChevyPartsGiant Specialist
    See expert answers on similar Motor And Transmission Mount
    Q:
    What should be done after lowering the transaxle for the 2006 Chevrolet Monte Carlo? Posted by Customer
    A:
    Ensure the mount studs fit into the transaxle bracket, then install the transaxle mount upper nuts, tightening them to 47 Nm (35 ft. lbs.).
    Posted by ChevyPartsGiant Specialist
    See expert answers on similar Motor And Transmission Mount
    Q:
    What should be observed while raising the engine for the 2002 Chevrolet Monte Carlo? Posted by Customer
    A:
    Observe the engine mount for any signs of damage.
    Posted by ChevyPartsGiant Specialist
    See expert answers on similar Engine Mount
    Q:
    How should the new transaxle mount be positioned for installation for the 2009 Chevrolet Impala? Posted by Customer
    A:
    Position the new transaxle mount to the frame and install the lower nuts.
    Posted by ChevyPartsGiant Specialist
    See expert answers on similar Motor And Transmission Mount
    Q:
    What components need to be reinstalled after tightening the lower nuts for the 2005 Chevrolet Monte Carlo? Posted by Customer
    A:
    Reinstall the right engine splash shield, the right front wheel and tire, and connect the three-way catalytic converter pipe to the right rear exhaust manifold.
    Posted by ChevyPartsGiant Specialist
    See expert answers on similar Engine Mount
    Q:
    What is the first step in the installation process for the 2006 Chevrolet Monte Carlo? Posted by Customer
    A:
    Begin by reinstalling the engine mount heat shield if it was removed.
    Posted by ChevyPartsGiant Specialist
    See expert answers on similar Engine Mount
    Q:
    How should the transaxle mount be installed for the 2002 Chevrolet Monte Carlo? Posted by Customer
    A:
    Position the transaxle mount to the frame and install the lower nuts, tightening them to 63 Nm (46 ft. lbs.).
    Posted by ChevyPartsGiant Specialist
    See expert answers on similar Motor And Transmission Mount
    Q:
    What is the first step to inspect the automatic transmission mount for the 2001 Chevrolet Monte Carlo? Posted by Customer
    A:
    Raise and support the vehicle, inserting a block of wood between the oil pan and the jack support to prevent damage.
    Posted by ChevyPartsGiant Specialist
    See expert answers on similar Motor And Transmission Mount
    Q:
    What should be done after removing the tire and wheel for the 2008 Chevrolet Impala? Posted by Customer
    A:
    Take off the engine splash shield.
    Posted by ChevyPartsGiant Specialist
    See expert answers on similar Engine Mount
    Q:
    How do you raise the engine for the 2008 Chevrolet Uplander? Posted by Customer
    A:
    Place a utility stand and a block of wood under the oil pan to raise the engine.
    Posted by ChevyPartsGiant Specialist
    See expert answers on similar Engine Mount
    Q:
    What should be used to raise the transmission/transaxle for the 2003 Chevrolet Venture? Posted by Customer
    A:
    Use a jack or a utility stand to raise the transmission/transaxle.
    Posted by ChevyPartsGiant Specialist
    See expert answers on similar Motor And Transmission Mount
    Q:
    What should be done after positioning the transaxle mount for the 2002 Chevrolet Venture? Posted by Customer
    A:
    Secure the transaxle mount lower nuts to the transaxle mount frame bracket, tightening them to 47 Nm (35 ft. lbs.).
    Posted by ChevyPartsGiant Specialist
    See expert answers on similar Motor And Transmission Mount
    Q:
    What should be done after removing the transaxle mount bracket for the 2004 Chevrolet Venture? Posted by Customer
    A:
    Take off the transaxle mount lower nuts from the transaxle mount frame bracket and then detach the transaxle mount from the frame bracket.
    Posted by ChevyPartsGiant Specialist
    See expert answers on similar Motor And Transmission Mount
    Q:
    What is the next step after taking out the engine mount struts for the 2000 Chevrolet Venture? Posted by Customer
    A:
    Raise and support the vehicle, then remove the three-way catalytic converter pipe from the engine right side exhaust manifold.
    Posted by ChevyPartsGiant Specialist
    See expert answers on similar Engine Mount
    Q:
    Where can one find information about the transaxle mount for the 2000 Chevrolet Venture? Posted by Customer
    A:
    Consult the Automatic Transmission Mount Inspection.
    Posted by ChevyPartsGiant Specialist
    See expert answers on similar Engine Mount
    Q:
    What should be reinstalled after tightening the engine mount lower nuts for the 2005 Chevrolet Uplander? Posted by Customer
    A:
    Reinstall the right engine splash shield, right front wheel and tire, connect the catalytic converter pipe to the engine exhaust manifold, install the engine mount struts, and finally, reinstall the throttle body air inlet duct.
    Posted by ChevyPartsGiant Specialist
    See expert answers on similar Engine Mount
    Q:
    What is the first step for installation of the new engine mount strut for the 2003 Chevrolet Venture? Posted by Customer
    A:
    Place the engine mount strut back in position.
    Posted by ChevyPartsGiant Specialist
    See expert answers on similar Engine Mount
    Q:
    What should be removed after the right engine mount strut for the 2005 Chevrolet Venture? Posted by Customer
    A:
    Remove the engine oil cooler coolant line bracket bolt and the engine wiring harness bracket bolt.
    Posted by ChevyPartsGiant Specialist
    See expert answers on similar Engine Mount
    Q:
    What should you use to raise the engine for the 2001 Chevrolet Venture? Posted by Customer
    A:
    A utility stand and a block of wood.
    Posted by ChevyPartsGiant Specialist
    See expert answers on similar Engine Mount
    Q:
    What should be done if any of the inspected conditions are present for the 2000 Chevrolet Venture? Posted by Customer
    A:
    Replace the transmission/transaxle mount.
    Posted by ChevyPartsGiant Specialist
    See expert answers on similar Motor And Transmission Mount
    Q:
    What should be checked regarding the movement of the transmission mount for the 2001 Chevrolet Venture? Posted by Customer
    A:
    If there is movement between the metal plate of the transmission/transaxle mount and the transmission, tighten the transmission mount fasteners to the correct tightening specification.
    Posted by ChevyPartsGiant Specialist
    See expert answers on similar Motor And Transmission Mount
    Q:
    What is the next step after removing the lower nuts for the 2008 Chevrolet Uplander? Posted by Customer
    A:
    Detach the transaxle mount from the frame bracket.
    Posted by ChevyPartsGiant Specialist
    See expert answers on similar Motor And Transmission Mount
    Q:
    What are the final steps to complete the process for the 2004 Chevrolet Venture? Posted by Customer
    A:
    Connect the three-way catalytic converter pipe to the engine right side exhaust manifold, lower the vehicle, and finally reinstall the engine mount struts and throttle body air inlet duct.
    Posted by ChevyPartsGiant Specialist
    See expert answers on similar Engine Mount
    Q:
    What is the next step after removing the lower nuts for the 2005 Chevrolet Venture? Posted by Customer
    A:
    Take out the transaxle mount from the transaxle mount frame bracket.
    Posted by ChevyPartsGiant Specialist
    See expert answers on similar Motor And Transmission Mount
    Q:
    What is the first step to replace the left engine mount strut bracket for the 2002 Chevrolet Venture? Posted by Customer
    A:
    First, remove the left engine mount strut from the left engine mount strut bracket, followed by the thermostat housing.
    Posted by ChevyPartsGiant Specialist
    See expert answers on similar Engine Mount
    If you have any questions about this product, please don't hesitate to ask us. We will be happy to help you!

OEM GM 10448575, Excellent Performance and Perfect Fitment

To ensure reliability, purchase GM part # 10448575 Motor Mount. It is sometimes referred to as GM Engine Mount, GM Motor And Transmission Mount. Choosing OEM parts is the optimal decision for guaranteeing superior quality and perfect performance. These components undergo stringent quality checks and are carefully constructed to comply with GM's factory specifications, ensuring a smooth installation process.

ChevyPartsGiant.com is a leading supplier of genuine GM parts such as GM 10448575 Motor Mount. Our website boasts an extensive inventory of OEM GM parts, available at highly competitive prices in the market. Should you require any new genuine GM parts, rest assured we will deliver them swiftly and efficiently to your doorstep. Furthermore, all our parts come with the assurance of a manufacturer's warranty. For detailed Chevy parts information, click here.
Choose ChevyPartsGiant for discounted prices, exceptional service and fast delivery