ChevyParts
My Garage
My Account
Cart
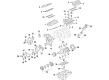
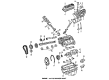
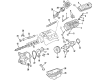
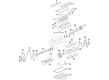
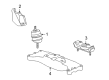
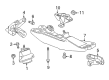
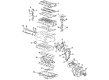
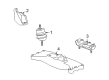
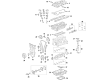
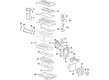
OEM Chevrolet Engine Mount
Engine Motor Mount- Select Vehicle by Model
- Select Vehicle by VIN
Select Vehicle by Model
orMake
Model
Year
Select Vehicle by VIN
For the most accurate results, select vehicle by your VIN (Vehicle Identification Number).
625 Engine Mounts found


Chevrolet Motor Mount Part Number: 22849845
$113.95 MSRP: $195.70You Save: $81.75 (42%)Ships in 1-2 Business DaysProduct Specifications- Other Name: Mount Assembly-Engine; Engine Mount Bracket; Mount; Mount, Engine Mount Dampening; Mount, Engine Mounting


Chevrolet Motor Mount Part Number: 15829209
$113.62 MSRP: $193.44You Save: $79.82 (42%)Product Specifications- Other Name: Mount Assembly-Engine; Engine Mount Bracket; Front Mount; Mount, Engine Mount Dampening; Mount, Engine Mounting


Chevrolet Motor Mount, Driver Side Part Number: 84175581
$121.91 MSRP: $209.37You Save: $87.46 (42%)Product Specifications- Other Name: Mount Assembly-Engine; Engine Mount Bracket; Front Mount; Mount, Engine Mount Dampening; Mount, Engine Mounting
- Position: Driver Side
- Replaced by: 85579396


Chevrolet Mount Bracket, Passenger Side Part Number: 23136567
$110.88 MSRP: $173.69You Save: $62.81 (37%)Ships in 1-3 Business DaysProduct Specifications- Other Name: Bracket-Engine Mount Engine Side; Engine Mount Bracket; Motor Mount; Bracket, Engine Mounting
- Position: Passenger Side


Chevrolet Strut Mount Part Number: 10420009
$45.32 MSRP: $77.17You Save: $31.85 (42%)Ships in 1-2 Business DaysProduct Specifications- Other Name: Strut, Engine Mount Dampening; Engine Mount Torque Strut; Engine Mount Bracket; Engine Torque Strut; Motor Mount; Strut; Strut, Engine Mounting


Chevrolet Motor Mount, Driver Side Part Number: 22957033
$152.82 MSRP: $260.18You Save: $107.36 (42%)Ships in 1-2 Business DaysProduct Specifications- Other Name: Mount, Engine Mounting; Engine Mount Bracket; Front Mount
- Position: Driver Side


Chevrolet Front Mount Part Number: 10348601
$101.25 MSRP: $172.39You Save: $71.14 (42%)Ships in 1-2 Business DaysProduct Specifications- Other Name: Mount, Engine Mount Dampening; Engine Mount Bracket; Motor Mount; Mount, Engine Mounting; Engine Mount
- Position: Front
- Replaces: 22188109


Chevrolet Motor Mount Part Number: 15854940
$160.70 MSRP: $276.00You Save: $115.30 (42%)Ships in 1-2 Business DaysProduct Specifications- Other Name: Mount Assembly-Engine; Engine Mount Bracket; Front Mount; Mount, Engine Mount Dampening; Mount, Engine Mounting


Chevrolet Front Mount Part Number: 22697409
$118.32 MSRP: $203.20You Save: $84.88 (42%)Ships in 1-2 Business DaysProduct Specifications- Other Name: Mount Assembly-Engine; Engine Mount Bracket; Motor Mount; Mount; Mount, Engine Mounting
- Replaces: 22661411


Chevrolet Mount Bracket Part Number: 92249329
$54.49 MSRP: $85.34You Save: $30.85 (37%)Ships in 1-3 Business DaysProduct Specifications- Other Name: Bracket, Engine Mounting; Engine Mount Bracket; Motor Mount
- Replaces: 92200267


Chevrolet Mount Bracket, Passenger Side Part Number: 23104519
$95.87 MSRP: $150.15You Save: $54.28 (37%)Product Specifications- Other Name: Bracket, Engine Mounting; Engine Mount Bracket; Motor Mount
- Position: Passenger Side


Chevrolet Mount Bracket Part Number: 92249330
$47.05 MSRP: $80.09You Save: $33.04 (42%)Ships in 1-3 Business DaysProduct Specifications- Other Name: Bracket, Engine Mounting; Engine Mount Bracket; Motor Mount
- Replaces: 92200268

Chevrolet Rear Mount Part Number: 10447321
$105.54 MSRP: $182.86You Save: $77.32 (43%)Ships in 1-2 Business DaysProduct Specifications- Other Name: Mount Assembly-Engine Rear; Engine Mount Bracket; Motor Mount; Mount, Engine Mount Dampening; Mount, Engine Mounting
- Position: Rear
- Replaces: 10420010

Chevrolet Motor Mount Part Number: 25852870
$79.65 MSRP: $135.60You Save: $55.95 (42%)Ships in 1-2 Business DaysProduct Specifications- Other Name: Mount; Engine Mount Bracket; Front Mount; Mount, Engine Mount Dampening; Mount, Engine Mounting

Chevrolet Mount Bracket, Passenger Side Part Number: 22843611
$62.27 MSRP: $97.51You Save: $35.24 (37%)Ships in 1-3 Business DaysProduct Specifications- Other Name: Bracket, Engine Mounting; Engine Mount Bracket; Motor Mount
- Position: Passenger Side
- Replaces: 92249332

Chevrolet Motor Mount, Driver Side Part Number: 23340392
$93.84 MSRP: $159.77You Save: $65.93 (42%)Ships in 1-2 Business DaysProduct Specifications- Other Name: Mount, Engine Mounting; Engine Mount Bracket; Side Mount; Mount, Engine Mount Dampening
- Position: Driver Side

Chevrolet Motor Mount, Driver Side Part Number: 84284435
$72.31 MSRP: $113.27You Save: $40.96 (37%)Ships in 1-3 Business DaysProduct Specifications- Other Name: Mount, Engine Mounting; Engine Mount Bracket; Front Mount
- Position: Driver Side

Chevrolet Motor Mount Part Number: 22744337
$86.02 MSRP: $146.46You Save: $60.44 (42%)Ships in 1-2 Business DaysProduct Specifications- Other Name: Mount Assembly-Engine; Engine Mount Bracket; Side Mount; Mount; Mount, Engine Mount Dampening; Mount, Engine Mounting
- Replaces: 13227714, 13227715

Chevrolet Mount Bracket Part Number: 13227756
$77.82 MSRP: $121.91You Save: $44.09 (37%)Ships in 1-3 Business DaysProduct Specifications- Other Name: Bracket-Engine Mount Engine Side; Engine Mount Bracket; Motor Mount; Bracket, Engine Mounting

Chevrolet Motor Mount Part Number: 20952437
$164.53 MSRP: $258.87You Save: $94.34 (37%)Product Specifications- Other Name: Mount, Engine Mounting; Engine Mount Bracket; Front Mount; Mount, Engine Mount Dampening
| Page 1 of 32 |Next >
1-20 of 625 Results
Chevrolet Engine Mount
Want to cut long-term maintenance and repair costs? Choose OEM Engine Mount. Those parts deliver top durability you can trust. On our site, you'll find a huge catalog of genuine Chevrolet parts. Prices are unbeatable, so you can keep more in your pocket. Every OEM Chevrolet Engine Mount includes a manufacturer's warranty. You can also get an easy return policy that keeps buying risk free. Fast delivery, get your car on the road quickly. It's simple to search, compare, and order. Stop guessing about quality or fit. Order today and save with parts that last.
Chevrolet Engine Mount Parts Questions & Experts Answers
- Q: How to replace the left engine mount on Chevrolet Colorado?A:A proper vehicle lifting system should be used first to replace the left Engine Mount. First remove the wheel assembly then take off the engine shield when it exists. For the replacement of the lower intermediate Steering Shaft the technician should first support the engine using a jack stand and wood block before disconnecting the Steering Shaft. Initiate replacement of a mount by detaching its through bolt which fastens the mount-to-frame bracket and next loosen the through bolt that secures the right side. Raise the engine using the jack stand to enable one-sided tilting once you remove the heater pipe bracket bolt from the Engine Mount. You should detach the Engine Mount bolts followed by the Engine Mount which you may need to manipulate during the removal process. Place the new Engine Mount into position and articulate it when needed before starting to install the Engine Mount bolts while using the first bolt to achieve alignment. Lower the engine while securing both bracket bolts to 85 nm (63 ft. Lbs.). Install the Engine Mount-to-frame bracket through bolt and tighten it to 50 nm (37 ft. Lbs.). After removing the jack stand and reinstalling the lower intermediate Steering Shaft proceed with reattaching the engine coolant pipe bracket bolt from the Engine Mount. End the procedure by reinstalling engine shield followed by wheel and tire assembly then lowering the vehicle.
- Q: How to replace the right engine mount on Chevrolet S10?A:The first step to replace a right Engine Mount requires vehicle elevation followed by removal of any underbody shields. Remove the through-bolt and nut which secure the Engine Mount of the side that needs replacement. Users should elevate the engine using a jack on its square tab at the engine block rear to delete the Engine Mount while right side work requires initial Starter removal. Initially remove all bolts which secure the Engine Mount frame bracket before proceeding to remove the bracket. Complete the process by taking out bolts that fasten the Engine Mount to the engine. The shield and Engine Mount must be detached together. First install one bolt to the Engine Mount alongside the shield then put together these components before mounting both pieces onto the engine. Secure the Engine Mount to the engine bolts by torquing them to 55 nm (41 ft. Lbs.). The installation of Engine Mount frame bracket begins by attaching it to the frame and completing bolting operations with a torque of 45 nm (33 ft. Lbs.). Reduce the engine before taking out the jack and begin installing through-bolts along with nuts to the Engine Mount. Apply 74 nm (55 ft. Lbs.) torque to the through-bolts while using 63 nm (46 ft. Lbs.) for the nuts. If you had to remove the Starter you need to install it at this time while simultaneously lowering the vehicle.
- Q: How to replace the left engine mount on Chevrolet Tahoe?A:You should start the left Engine Mount replacement process by unbolting the Engine Mount-to-Engine Mount bracket. The front wheelhouse opening becomes accessible through vehicle lift when dealing with 2wd vehicles but this method also suits 4wd models to remove front tires and wheels for service. The next step involves removing the left front wheel with tire and subsequently removing both wheelhouse inner panel push pin retainers and finally the complete inner panel. The procedure calls for removing engine shield bolts and engine shield before ensuring the engine receives no support through the crankshaft balancer or Oil Pan. Use screw type adjustable jack stands to lift the engine while supporting it and afterward uninstall Engine Mount bolts. The installation of the front propeller shaft requires removal before executing the left Engine Mount removal process in 4wd vehicles. The procedure for new mount installation demands placement against the motor followed by Engine Mount bolt installation using 50 nm (37 ft. Lbs.) torque settings. Proceed by lowering the engine after removing the jack stands and install the front propeller shaft. The engine shield should be put into position before securing its bolts with 20 nm (15 ft. Lbs.) force. Add the left front tire to the vehicle before you lower it down and then fasten the wheelhouse inner panel push pin retainers and inner panel. Complete the installation of Engine Mount-to-Engine Mount bracket bolts by applying torque of 65 nm (48 ft. Lbs.).


Related Chevrolet Parts
 Chevrolet Oil Pump
 Chevrolet Crankshaft Pulley
 Chevrolet Piston
 Chevrolet Timing Belt
 Chevrolet Balance Shaft Bearing Set
 Chevrolet Camshaft Seal
 Chevrolet Fuel Water Separator Filter
 Chevrolet Motor And Transmission Mount
 Chevrolet Rocker Arm
 Chevrolet Rod Bearing
 Chevrolet Timing Chain Tensioner
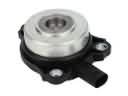 Chevrolet Variable Timing Adjuster Magnet
Browse Chevrolet Engine Mount by Models
Nova S10 Colorado C10 Tahoe Cruze Malibu Camaro Equinox Impala SS SSR Avalanche Silverado 1500 Silverado 2500 HD Caprice Classic Cobalt Suburban Traverse Blazer HHR Sonic Tracker Volt El Camino K10 Spark Trax Trailblazer Astro Cavalier Corvette C20 Aveo Beretta Bolt EUV Bolt EV C1500 C2500 C30 C3500 Celebrity Chevette City Express Corsica Express 1500 Express 2500 Express 3500 G10 G20 G30 K1500 K20 K2500 K30 K3500 K5 Blazer Lumina Metro Monte Carlo P30 Prizm S10 Blazer Silverado 2500 Sprint Uplander Venture Lumina APV Silverado 3500 Suburban 1500 Trailblazer EXT Avalanche 1500 Avalanche 2500 Aveo5 C10 Suburban C1500 Suburban C20 Suburban C2500 Suburban Captiva Sport Citation II Cruze Limited Impala Limited K10 Suburban K1500 Suburban K20 Suburban K2500 Suburban Malibu Limited P20 R10 R10 Suburban R1500 Suburban R20 R20 Suburban R2500 R2500 Suburban R30 R3500 Silverado 1500 Classic Silverado 1500 HD Silverado 1500 HD Classic Silverado 1500 LD Silverado 1500 LTD Silverado 2500 HD Classic Silverado 3500 Classic Silverado 3500 HD Spark EV Spectrum Suburban 2500 Suburban 3500 HD V10 V10 Suburban V1500 Suburban V20 V20 Suburban V2500 Suburban V30 V3500