ChevyParts
My Garage
My Account
Cart
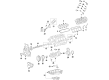
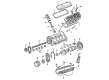
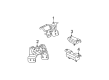
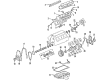
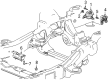
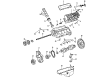
OEM Chevrolet Tahoe Engine Mount
Engine Motor Mount- Select Vehicle by Model
- Select Vehicle by VIN
Select Vehicle by Model
orMake
Model
Year
Select Vehicle by VIN
For the most accurate results, select vehicle by your VIN (Vehicle Identification Number).
22 Engine Mounts found


Chevrolet Tahoe Motor Mount, Driver Side Part Number: 84175583
$111.09 MSRP: $189.13You Save: $78.04 (42%)


Chevrolet Tahoe Motor Mount Part Number: 15854941
$170.53 MSRP: $292.89You Save: $122.36 (42%)


Chevrolet Tahoe Motor Mount Part Number: 15854939
$125.35 MSRP: $215.28You Save: $89.93 (42%)


Chevrolet Tahoe Motor Mount, Passenger Side Part Number: 15829208
$101.77 MSRP: $173.26You Save: $71.49 (42%)Ships in 1-2 Business Days

Chevrolet Tahoe Motor Mount Part Number: 15529450
$51.94 MSRP: $89.19You Save: $37.25 (42%)Ships in 1-2 Business Days


Chevrolet Tahoe Motor Mount, Passenger Side Part Number: 84175582
$121.90 MSRP: $209.35You Save: $87.45 (42%)

Chevrolet Tahoe Mount Bracket, Passenger Side Part Number: 15113847
$47.39 MSRP: $80.69You Save: $33.30 (42%)Ships in 1-2 Business Days


Chevrolet Tahoe Motor Mount, Driver Side Part Number: 15829207
$126.57 MSRP: $173.26You Save: $46.69 (27%)


Chevrolet Tahoe Motor Mount, Green Part Number: 25828247
$132.41 MSRP: $227.41You Save: $95.00 (42%)
Chevrolet Tahoe Mount Bracket, Driver Side Part Number: 23353404
$17.26 MSRP: $27.03You Save: $9.77 (37%)Ships in 1-3 Business Days
Chevrolet Tahoe Motor Mount, Passenger Side Part Number: 84718753
$80.23 MSRP: $137.75You Save: $57.52 (42%)Ships in 1-2 Business Days

Chevrolet Tahoe Motor Mount, Driver Side Part Number: 85151357
$71.33 MSRP: $111.71You Save: $40.38 (37%)Ships in 1-3 Business DaysChevrolet Tahoe Mount Bracket, Passenger Side Part Number: 85126631
$16.98 MSRP: $26.60You Save: $9.62 (37%)
Chevrolet Tahoe Motor Mount, Passenger Side Part Number: 85608073
$80.23 MSRP: $137.75You Save: $57.52 (42%)Chevrolet Tahoe Motor Mount, Driver Side Part Number: 85608074
$78.63 MSRP: $133.87You Save: $55.24 (42%)


Chevrolet Tahoe Mount Bracket Part Number: 15719194
Chevrolet Tahoe Motor Mount Part Number: 15592505

Chevrolet Tahoe Motor Mount Part Number: 15659675
Chevrolet Tahoe Mount Bracket, Driver Side Part Number: 15113849
$59.70 MSRP: $93.50You Save: $33.80 (37%)Chevrolet Tahoe Motor Mount, Driver Side Part Number: 84924369
$71.33 MSRP: $111.71You Save: $40.38 (37%)
| Page 1 of 2 |Next >
1-20 of 22 Results
Chevrolet Tahoe Engine Mount
Our website offers an extensive catalog of genuine Chevrolet Tahoe Engine Mount at unbeatable prices. Every OEM Chevrolet Tahoe Engine Mount comes with a manufacturer's warranty, an easy return policy, and rapid delivery service. Don't miss out on this great opportunity!
Chevrolet Tahoe Engine Mount Parts Questions & Experts Answers
- Q: How to replace the right side engine mount on Chevrolet Tahoe?A: The first process when replacing the right side Engine Mount requires complete removal of the air cleaner outlet duct. To replace the Engine Mount owners should first separate the vehicles front drive axle along with its bracket bolts and bracket if they have four wheel drive. The Exhaust Manifold together with the a/c compressor bracket must be taken off next. Before handling the Engine Mount to frame bolts always eliminate support from crankshaft balancer and Oil Pan. A screw type adjustable jack should be positioned under the tab on the engine block before removing the Engine Mount to engine bolts through the wheelhouse opening. Upper the engine by using the adjustable jack until you reach a suitable height for removing the Engine Mount. The Engine Mount should be positioned to the engine before working through the wheelhouse opening to install mounting bolts to the engine with a torque specification of 50 nm (37 lb ft). Adjust the engine position to make sure the frame surface touches the Engine Mount before removing the adjustable jack. Start installation of the middle Engine Mount bolt first before tightening it to 65 nm (48 lb ft) then proceeding with each of the side bolts. Reposition the a/c compressor bracket before tightening both 90 nm (67 lb ft) bolts securing the front drive axle bracket. Vehicles with 4wd require additional installation of the front drive axle bracket and bolts before tightener to this torque specification. Finally, reinstall the Exhaust Manifold.

Related Chevrolet Tahoe Parts
 Chevrolet Tahoe Coolant Filter
 Chevrolet Tahoe Crankshaft Pulley
 Chevrolet Tahoe Cylinder Head
 Chevrolet Tahoe Dipstick Tube
 Chevrolet Tahoe Harmonic Balancer
 Chevrolet Tahoe Lash Adjuster
 Chevrolet Tahoe Oil Drain Plug Gasket
 Chevrolet Tahoe Oil Filler Cap
 Chevrolet Tahoe Rocker Arm
 Chevrolet Tahoe Rod Bearing
 Chevrolet Tahoe Timing Belt
 Chevrolet Tahoe Valve Stem Oil Seal