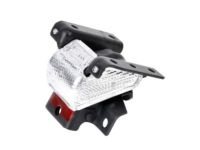
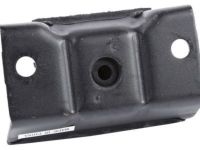
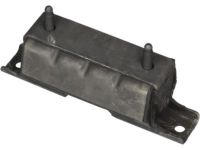
Make sure this part fits

GM 15113847
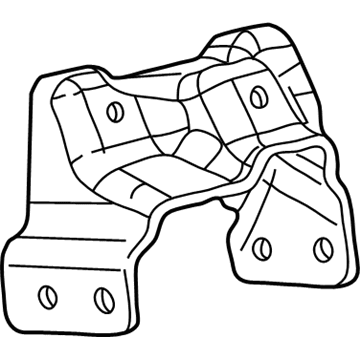
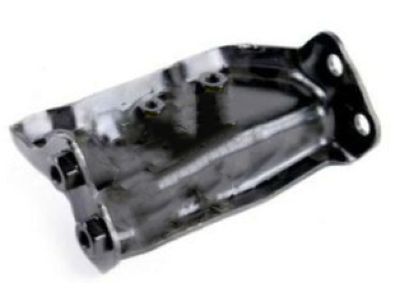
Mount Bracket, Passenger Side

1999-2007 GM

Customer Questions & Expert Answers (38)
GM 15113847 Mount Bracket, Passenger Side
  • Part Description
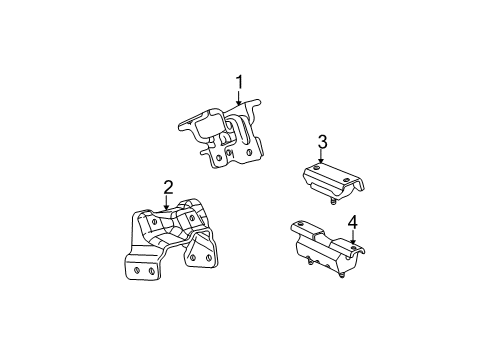
    Bracket, Engine Mounting; Engine Mount Bracket; Motor Mount
  • Position
    Passenger Side
  • Replaces
    15036523
  • Manufacturer
    General Motors
Make sure this part fits
$43.48 MSRP: $74.02
You Save: $30.54 (42%)
Ships in 1-2 Business Days
1
ADD TO CART
  • Related Parts
  • Product Specifications
  • Vehicle Fitment
  • Customer Questions & Expert Answers
  • Product Specifications

    BrandGenuine GM
    Manufacturer Part Number15113847
    Part DescriptionBracket, Engine Mounting; Engine Mount Bracket; Motor Mount
    Item Dimensions8.5 x 4.1 x 3.4 inches
    Item Weight2.40 Pounds
    PositionPassenger Side
    ConditionNew
    Fitment TypeDirect Replacement
    Replaces15036523
    ManufacturerGeneral Motors
    SKU15113847
    WarrantyThis genuine GM part is guaranteed by GM's factory warranty.
    Shipping & ReturnShipping Policy Return Policy
    Warning: California's Proposition 65
  • Vehicle Fitment

    Year Make Model Trim Engine
    2002-2006 Cadillac EscaladeBase8 Cyl 5.3 L GAS, 8 Cyl 6.0 L GAS
    2003-2006 Cadillac Escalade ESVBase8 Cyl 6.0 L GAS
    2002-2006 Cadillac Escalade EXTBase8 Cyl 6.0 L GAS
    2002-2006 Chevrolet Avalanche 1500Base, LS, LT, North Face, On Road Edition, WBH, Z66, Z718 Cyl 5.3 L FLEX, 8 Cyl 5.3 L GAS
    1999-2007 Chevrolet Silverado 1500Base, Hybrid, LS, LT, LTZ, SS, WT, Z71 Off-Road8 Cyl 4.8 L GAS, 8 Cyl 5.3 L FLEX, 8 Cyl 5.3 L FULL HYBRID EV-GAS (FHEV), 8 Cyl 5.3 L GAS, 8 Cyl 6.0 L GAS
    2007 Chevrolet Silverado 1500 ClassicHybrid, LS, LT, SS, WT8 Cyl 4.8 L GAS, 8 Cyl 5.3 L FLEX, 8 Cyl 5.3 L FULL HYBRID EV-GAS (FHEV), 8 Cyl 5.3 L GAS, 8 Cyl 6.0 L GAS
    2005-2006, 2001-2003 Chevrolet Silverado 1500 HDBase, LS, LT8 Cyl 6.0 L GAS
    2007 Chevrolet Silverado 1500 HD ClassicLT8 Cyl 6.0 L GAS
    2000-2006 Chevrolet Suburban 1500Base, LS, LT, LTZ, Z718 Cyl 5.3 L FLEX, 8 Cyl 5.3 L GAS, 8 Cyl 6.0 L GAS
    2000-2006 Chevrolet TahoeBase, LS, LT, Z718 Cyl 4.8 L GAS, 8 Cyl 5.3 L FLEX, 8 Cyl 5.3 L GAS
    View More
  • Customer Questions & Expert Answers

    Q:
    Is this 15113847 designed for my car? Posted by ChevyPartsGiant Specialist
    A:
    Please Select Your Vehicle model to see if part number 15113847 is suitable before ordering.
    Posted by ChevyPartsGiant Specialist
    Q:
    How to replace the left engine mount bracket on Cadillac Escalade? Posted by Customer
    A:
    The left Engine Mount Bracket replacement process starts by taking out the Engine Mount followed by removing the Engine Mount Bracket bolts before removing the Engine Mount Bracket. The installation process starts by mounting the engine bracket while following the fastener notice in service precautions. After installing the Engine Mount Bracket bolts with torque at 75 nm (55 ft. Lbs.), you should install the Engine Mount last.
    Posted by ChevyPartsGiant Specialist
    Q:
    How to replace the right engine mount bracket on Cadillac Escalade? Posted by Customer
    A:
    The process of bracket replacement starts with removing the Engine Mount before removing the mount bracket bolts for final removal of the mount bracket. The first step for installation includes installing the Engine Mount Bracket while following the service precautions regarding fasteners. After securing the Engine Mount Bracket bolts at 75 nm (55 ft. Lbs.) torque rate you must install the Engine Mount Bracket.
    Posted by ChevyPartsGiant Specialist
    Q:
    How to replace the right engine mount on Cadillac Escalade EXT? Posted by Customer
    A:
    Replacements of the right Engine Mount start with Exhaust Manifold removal along with the Engine Mount-to-Engine Mount bracket bolts. Turn up the vehicle and secure it properly followed by tire removal and wheel separation before progressing to the inner wheel house panel and engine protection shield maintenance when present. The crankshaft balancer and Oil Pan must never be used to raise or support the engine because appropriate screw type adjustable jack stands should be employed for this purpose. Start by removing the Engine Mount to engine bolts before taking out the right Engine Mount from its position. Position the right Engine Mount onto the engine according to service precautions for fastener notice before securing it. Finally install the Engine Mount bolts while tightening them to 50 nm (37 ft. Lbs.) then lower the engine and remove the adjustable jack stands. Replace the Engine Mount-to-Engine Mount bracket bolts and use torque at 65 nm (48 ft. Lbs.) before reinstalling the Exhaust Manifold and inner wheelhouse panel together with the tire and wheel and the engine protection shield in case of installation. Finally, lower the vehicle.
    Posted by ChevyPartsGiant Specialist
    Q:
    How to replace the right side engine mount on Chevrolet Silverado 1500 Classic? Posted by Customer
    A:
    You must first remove the Engine Mount to Engine Mount Bracket bolts before starting replacement of the right side Engine Mount. First lift and stabilize the vehicle while removing bolt assemblies from the oil pan skid plate as well as the plate itself. An adjustable jack should be positioned on the square tab at the rear of the engine block to lift the engine while the Starter must be removed first. Upon completion of the Engine Mount self and bolts removal process. It is necessary to take out additional components which include Engine Mount side bracket bolts together with the bracket before moving on to Engine Mount Bracket bolts and the bracket. Begin the installation procedure by installing the Engine Mount Bracket while removing complete traces of original adhesive patch then cleaning bolt threads with denatured alcohol followed by applying thread locker gm p/n 12345382 (Canadian P/N 10953489) to bolts. Fasten the Engine Mount Bracket bolts with a torque of 75 nm (55 ft. Lbs.). Install the side bracket to the engine and secure its bolts at 50 nm (37 ft. Lbs.). Install the Engine Mount along with its bolts and tighten them to 50 nm (37 ft. Lbs.). After lowering the engine reinstall the Starter. The procedure begins with installing the Engine Mount to Engine Mount Bracket bolts along with tightening them to 65 nm (48 ft. Lbs.). Afterward, lower the vehicle for completion before reinstalling the Engine Mount.
    Posted by ChevyPartsGiant Specialist
    Q:
    How to replace the engine mount on Chevrolet Suburban 1500? Posted by Customer
    A:
    First inspect your mount for damage along with looseness because broken and deteriorated mounts will lead to misaligned drive train components that stress remaining mounts beyond normal limits when a mount fails. Start the procedure by lifting the vehicle and unbolting the upper mount from the lower Engine Mount using its three retaining bolts while simultaneously taking out the underbody shield. Engine support must be achieved through a screw jack that holds the engine rather than by using the Oil Pan or crankshaft balancer. Remove the bolts from the upper mount to the engine before taking out the upper mount and then remove the lower Engine Mount Bracket through bolts together with the bracket from the frame structure. Begin by attaching the lower Engine Mount to the frame before inserting through bolts then tighten them initially by fingers only. Plant the upper Engine Mount on the engine block followed by securing its bolts until they reach 50 nm torque (37 ft. Lbs.). Follow by vehicle lowering and proceed with connecting the upper and lower Engine Mount using their three bolts until you achieve 50 nm (37 ft. Lbs.) torque. The through bolts require installation when the vehicle reaches its maximum height and the torque should be set to 92 nm (68 ft. Lbs.). Following this step finish by replacing the underbody shield before lowering the vehicle.
    Posted by ChevyPartsGiant Specialist
    Q:
    How to replace the left engine mount on Chevrolet Tahoe? Posted by Customer
    A:
    You should start the left Engine Mount replacement process by unbolting the Engine Mount-to-Engine Mount bracket. The front wheelhouse opening becomes accessible through vehicle lift when dealing with 2wd vehicles but this method also suits 4wd models to remove front tires and wheels for service. The next step involves removing the left front wheel with tire and subsequently removing both wheelhouse inner panel push pin retainers and finally the complete inner panel. The procedure calls for removing engine shield bolts and engine shield before ensuring the engine receives no support through the crankshaft balancer or Oil Pan. Use screw type adjustable jack stands to lift the engine while supporting it and afterward uninstall Engine Mount bolts. The installation of the front propeller shaft requires removal before executing the left Engine Mount removal process in 4wd vehicles. The procedure for new mount installation demands placement against the motor followed by Engine Mount bolt installation using 50 nm (37 ft. Lbs.) torque settings. Proceed by lowering the engine after removing the jack stands and install the front propeller shaft. The engine shield should be put into position before securing its bolts with 20 nm (15 ft. Lbs.) force. Add the left front tire to the vehicle before you lower it down and then fasten the wheelhouse inner panel push pin retainers and inner panel. Complete the installation of Engine Mount-to-Engine Mount bracket bolts by applying torque of 65 nm (48 ft. Lbs.).
    Posted by ChevyPartsGiant Specialist
    Q:
    How to replace the right engine mount bracket on Chevrolet Suburban 1500? Posted by Customer
    A:
    The procedure to replace a right Engine Mount Bracket includes first removing the Engine Mount followed by Engine Mount Bracket bolt removal then removing the Engine Mount Bracket. Start the installation by putting in the Engine Mount Bracket while following the fastener notice in service precautions. The replacement process begins by installing Engine Mount Bracket bolts at 75 nm torque followed by Engine Mount Bracket installation.
    Posted by ChevyPartsGiant Specialist
    Q:
    How to replace the left engine mount (1500 LY2) on Chevrolet Silverado 1500? Posted by Customer
    A:
    The replacement process for the left Engine Mount (1500 LY2) starts with removing the front drive axle only in vehicles equipped with four-wheel drive (4WD). Start the process by lowering the vehicle and afterward take out the left wheelhouse liner. First elevate the vehicle halfway by using an adjustable jack under the engine block tab but keep the engine unsupported from both the crankshaft balancer and Oil Pan. A screw-adjustable jack needs to sit on the engine block tab while removing left exhaust manifold heat shields and Engine Mount bolting to engine. Crank up the engine using the adjustable jack until you can easily get rid of the Engine Mount. Position the new Engine Mount to the engine after which install the Engine Mount to engine bolts while tightening them to 50 n.m (37 lb ft). Next adjust engine height while sliding the mount until it rests properly against the frame and remove the adjustable jack. Begin by installing the middle bolt followed by the opposite bolt to their specified torque of 65 n.m (48 lb ft) when you attach the Engine Mount to frame bolts after lowering the vehicle. Next reinstall the left side exhaust manifold heatshield. Complete installation by reattaching the left wheelhouse liner and if necessary install the front drive axle.
    Posted by ChevyPartsGiant Specialist
    Q:
    How to replace the right side engine mount on GMC Sierra 1500? Posted by Customer
    A:
    The first step to replace the right side Engine Mount begins with removing the Engine Mount to Engine Mount Bracket bolts. The first step requires vehicle support by a suitable lift method while removing all oil pan skid plate bolts and the plate itself. The adjustable jack needs placement on the square tab at the engine block rear to lift the engine body after Starter removal. Secondly you must unbolt the Engine Mount and then remove both the mount and its bolts. Remove both Engine Mount Bracket bolts from their positions and the respective bracket components before proceeding to remove the bolts on the Engine Mount Bracket with its bracket. The first step for installation begins with putting the Engine Mount Bracket into position by thoroughly cleaning all bolt threads with denatured alcohol or equivalent and then applying threadlocker gm p/n 12345382 (Canadian P/N 10953489) to the bolts. After cleaning and thread-locking the bolts, proceed with installation by securing the bracket. Fit and tighten Engine Mount Bracket bolts to 75 n.m (55 lb ft), after which position and install the Engine Mount side bracket with its attached bolts then tighten these bracket bolts to 50 n.m (37 lb ft). To complete the installation position the Engine Mount first before tightening its bolts to 50 n.m (37 lb ft) and finally remove the engine and reinstall the Starter. As the final steps install the oil pan skid plate and its bolts at 20 n.m (15 lb ft), drop the vehicle before installing the Engine Mount to Engine Mount Bracket bolts which must be tightened at 65 n.m (48 lb ft).
    Posted by ChevyPartsGiant Specialist
    Q:
    How to properly install an Engine Mount Bracket on GMC Yukon? Posted by Customer
    A:
    The replacement process for right Engine Mount Bracket involves first removing the Engine Mount followed by the Engine Mount Bracket bolts until the Engine Mount Bracket is free. Start Engine Mount Bracket installation by placing it correctly on its designated spot. Before tightening the Engine Mount Bracket bolts check that every last piece of the initial adhesive patch has been wiped away. Clean the threads of each bolt using denatured alcohol or equivalent solution and let them dry. Use threadlocker gm p/n 12345382 (Canadian P/N 10953489) or equivalent to apply on the bolts. The last step involves tightening Engine Mount Bracket bolts to 75 nm (55 ft. Lbs.) before installing the Engine Mount.
    Posted by ChevyPartsGiant Specialist
    Q:
    How to replace the right engine mount bracket on GMC Yukon? Posted by Customer
    A:
    The right Engine Mount Bracket replacement process requires Engine Mount removal followed by removal of the bracket bolts to extract the mount bracket. The first step for installation requires you to install the Engine Mount Bracket. Secure the bracket bolts only after eliminating all traces of the original adhesive as you clean the bolt threads with denatured alcohol then dry the bolts before applying threadlocker gm p/n 12345382 (Canadian P/N 10953489) or equivalent. Complete installation by mounting the engine bracket using bolts that should be tightened to 75 nm (55 ft. Lbs.) before adding the Engine Mount.
    Posted by ChevyPartsGiant Specialist
    Q:
    How to replace the left engine mount bracket on GMC Sierra 1500? Posted by Customer
    A:
    Before changing the left Engine Mount Bracket, uninstall both the Engine Mount and Engine Mount Bracket bolts to remove the Engine Mount Bracket. The first step during installation requires you to position the Engine Mount Bracket correctly. After cleaning all original adhesive residue from the bolts you must clean their threads with denatured alcohol followed by dried up threads before bolt tightening. Affix thread locker gm p/n 12345382 (Canadian P/N 10953489) or equivalent to the bolts before installation. Screw and securely tighten the Engine Mount Bracket bolts to 75 nm (55 ft. Lbs.). Finally, install the Engine Mount.
    Posted by ChevyPartsGiant Specialist
    Q:
    How to replace the right engine mount on GMC Yukon XL 1500? Posted by Customer
    A:
    The first step to replace the right Engine Mount requires you to remove the Engine Mount-to-Engine Mount bracket bolts before properly supporting the vehicle using stands. Work by first removing the engine shield bolts along with the engine shield and afterwards removing the air conditioning (A/C) compressor and the Starter motor yet ensure not to lift or support the engine through the crankshaft balancer or Oil Pan. Position adjustable (screw type) jack stands to lift the engine for support before eliminating the Engine Mount bolts and removing the right Engine Mount. Reinstall the right Engine Mount by placing it onto the engine before securing the Engine Mount bolts at 50 nm (37 ft. Lbs.). After lowering the engine and taking out the adjustable jack stands the technician should reinstall the Starter motor and A/C Compressor. The vehicle needs the engine shield back in position before tightening its bolts to 20 nm (15 ft. Lbs.). The next step requires to lower the vehicle before securing the Engine Mount-to-Engine Mount bracket bolts with a torque of 65 nm (48 ft. Lbs.).
    Posted by ChevyPartsGiant Specialist
    Q:
    What should be avoided while supporting the engine for the 2003 Cadillac Escalade? Posted by Customer
    A:
    Do not raise or support the engine by the crankshaft balancer or oil pan.
    Posted by ChevyPartsGiant Specialist
    See expert answers on similar Engine Mount
    Q:
    What indicates a potential issue with the engine mount during inspection for the 2002 Cadillac Escalade? Posted by Customer
    A:
    If the engine moves more than 24 mm (0.945 inch) from the at-rest position in either direction.
    Posted by ChevyPartsGiant Specialist
    See expert answers on similar Engine Mount
    Q:
    What is the first step to replace the right engine mount bracket for the 2004 Cadillac Escalade ESV? Posted by Customer
    A:
    First, remove the engine mount.
    Posted by ChevyPartsGiant Specialist
    See expert answers on similar Engine Mount
    Q:
    What is the next step after applying threadlocker for the 2005 Cadillac Escalade EXT? Posted by Customer
    A:
    Install the engine mount bracket bolts and tighten them to 75 Nm (55 ft. lbs.).
    Posted by ChevyPartsGiant Specialist
    See expert answers on similar Engine Mount Bracket
    Q:
    What should be done before securing the engine mount bracket bolts for the 2006 Chevrolet Avalanche 1500? Posted by Customer
    A:
    Ensure all traces of the original adhesive patch are removed, clean the threads of the bolts with denatured alcohol or equivalent, and allow them to dry.
    Posted by ChevyPartsGiant Specialist
    See expert answers on similar Engine Mount Bracket
    Q:
    What should be removed after the inner panel for the 2003 Chevrolet Avalanche 1500? Posted by Customer
    A:
    Take off the engine shield bolts and the engine shield.
    Posted by ChevyPartsGiant Specialist
    See expert answers on similar Engine Mount
    Q:
    What is the next step after installing the engine mount bracket for the 2003 Chevrolet Avalanche 1500? Posted by Customer
    A:
    Install the engine mount bracket bolts and tighten them to 75 Nm (55 ft. lbs.).
    Posted by ChevyPartsGiant Specialist
    See expert answers on similar Engine Mount
    Q:
    What are the final steps after completing the installation for the 2006 Chevrolet Avalanche 1500? Posted by Customer
    A:
    Reinstall the wheelhouse panel, the tire and wheel, and lower the vehicle.
    Posted by ChevyPartsGiant Specialist
    See expert answers on similar Engine Mount
    Q:
    What is the next step after raising the engine for the 2005 Chevrolet Silverado 1500? Posted by Customer
    A:
    Remove the engine mount bolts and the engine mount itself.
    Posted by ChevyPartsGiant Specialist
    See expert answers on similar Engine Mount
    Q:
    What bolts need to be removed next for the 2007 Chevrolet Silverado 1500? Posted by Customer
    A:
    Take out the two lower engine mount to engine bolts and the starter motor.
    Posted by ChevyPartsGiant Specialist
    See expert answers on similar Engine Mount
    Q:
    What is the first step to replace the left engine mount bracket for the 2003 Chevrolet Suburban 1500? Posted by Customer
    A:
    First, remove the engine mount.
    Posted by ChevyPartsGiant Specialist
    See expert answers on similar Engine Mount
    Q:
    What should be done after tightening the engine mount bolts for the 2002 Chevrolet Tahoe? Posted by Customer
    A:
    Lower the engine and remove the adjustable jack stands.
    Posted by ChevyPartsGiant Specialist
    See expert answers on similar Engine Mount
    Q:
    What is the next step after removing the engine mount and side bracket for the 2006 Chevrolet Silverado 1500? Posted by Customer
    A:
    Remove the engine mount bracket bolts and the bracket.
    Posted by ChevyPartsGiant Specialist
    See expert answers on similar Engine Mount
    Q:
    When should the transmission mount be replaced for the 2000 Chevrolet Suburban 1500? Posted by Customer
    A:
    Replace the mounting if the rubber cushion is separated from the metal plate, if it has bottomed out, or if the extension housing moves up but not down.
    Posted by ChevyPartsGiant Specialist
    See expert answers on similar Engine Mount
    Q:
    How should the engine be supported during the replacement for the 2004 Chevrolet Tahoe? Posted by Customer
    A:
    Use adjustable (screw type) jack stands, not the crankshaft balancer or oil pan.
    Posted by ChevyPartsGiant Specialist
    See expert answers on similar Engine Mount
    Q:
    How should the engine be supported during the process for the 2005 Chevrolet Tahoe? Posted by Customer
    A:
    It is crucial not to raise or support the engine by the crankshaft balancer or oil pan; instead, use adjustable (screw type) jack stands to support the engine.
    Posted by ChevyPartsGiant Specialist
    See expert answers on similar Engine Mount
    Q:
    What should be done after removing the engine mount for the 2004 GMC Sierra 1500? Posted by Customer
    A:
    Remove the engine mount bracket bolts.
    Posted by ChevyPartsGiant Specialist
    See expert answers on similar Engine Mount
    Q:
    What is the next step after raising the engine for the 2007 GMC Sierra 1500 Classic? Posted by Customer
    A:
    Remove the engine mount bolts and then take out the engine mount.
    Posted by ChevyPartsGiant Specialist
    See expert answers on similar Engine Mount
    Q:
    What is the next step after removing the engine mount bracket bolts for the 2001 GMC Yukon XL 1500? Posted by Customer
    A:
    Take out the engine mount bracket.
    Posted by ChevyPartsGiant Specialist
    See expert answers on similar Engine Mount Bracket
    Q:
    How should it be supported during the replacement for the 2001 GMC Yukon XL 1500? Posted by Customer
    A:
    Raise and suitably support the vehicle, ensuring not to raise or support the engine by the crankshaft balancer or oil pan.
    Posted by ChevyPartsGiant Specialist
    See expert answers on similar Engine Mount
    Q:
    How should the engine mount-to-engine mount bracket bolts be secured for the 2005 GMC Yukon? Posted by Customer
    A:
    Attach the bolts and tighten them to 65 Nm (48 ft. lbs.).
    Posted by ChevyPartsGiant Specialist
    See expert answers on similar Engine Mount
    Q:
    What should be done if applicable during installation for the 2006 GMC Sierra 1500? Posted by Customer
    A:
    Position the engine mount side bracket to the engine and install its bolts, tightening them to 50 Nm (37 ft. lbs.).
    Posted by ChevyPartsGiant Specialist
    See expert answers on similar Engine Mount
    Q:
    What should be applied to the bolts before installing them for the 2007 GMC Sierra 1500? Posted by Customer
    A:
    Apply threadlocker GM P/N 12345382 (Canadian P/N 10953489) to the bolts.
    Posted by ChevyPartsGiant Specialist
    See expert answers on similar Engine Mount
    Q:
    What are the final steps to complete the installation for the 2005 GMC Sierra 1500? Posted by Customer
    A:
    Install the engine mount-to-engine mount bracket bolts and tighten them to 65 Nm (48 ft. lbs.), then reinstall the exhaust manifold, inner wheelhouse panel, tire and wheel, and the engine protection shield if equipped, before lowering the vehicle.
    Posted by ChevyPartsGiant Specialist
    See expert answers on similar Engine Mount
    If you have any questions about this product, please don't hesitate to ask us. We will be happy to help you!

OEM GM 15113847, Excellent Performance and Perfect Fitment

To ensure reliability, purchase GM part # 15113847 Mount Bracket, Passenger Side. It is sometimes referred to as GM Engine Mount, GM Engine Mount Bracket. Choosing OEM parts is the optimal decision for guaranteeing superior quality and perfect performance. These components undergo stringent quality checks and are carefully constructed to comply with GM's factory specifications, ensuring a smooth installation process.

ChevyPartsGiant.com is a leading supplier of genuine GM parts such as GM 15113847 Mount Bracket, Passenger Side. Our website boasts an extensive inventory of OEM GM parts, available at highly competitive prices in the market. Should you require any new genuine GM parts, rest assured we will deliver them swiftly and efficiently to your doorstep. Furthermore, all our parts come with the assurance of a manufacturer's warranty. For detailed Chevy parts information, click here.
Choose ChevyPartsGiant for discounted prices, exceptional service and fast delivery