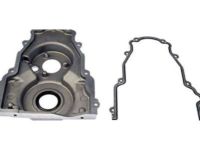
Make sure this part fits

GM 12640746
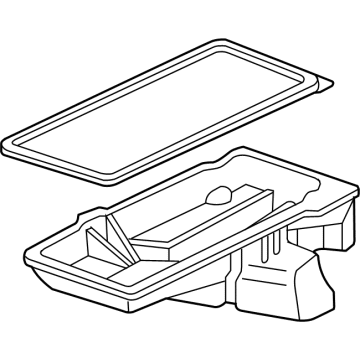
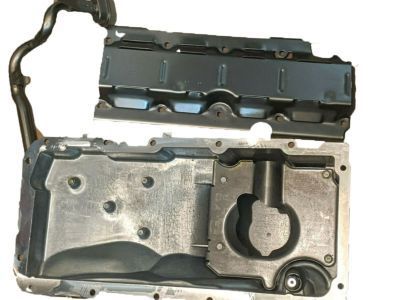
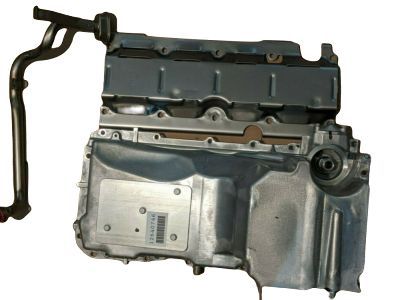
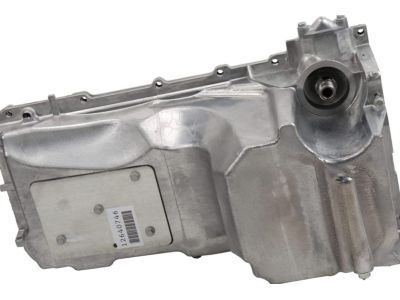
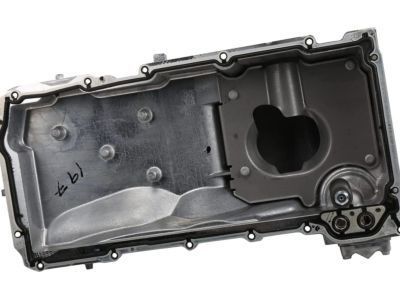
Oil Pan

2008-2020 GM

Customer Questions & Expert Answers (13)
GM 12640746 Oil Pan
GM 12640746 Oil Pan
  • Part Description
    Pan, Engine Oil; Engine Oil Pan
  • Replaces
    12627903, 12619776
  • Manufacturer
    General Motors
Make sure this part fits
$220.61 MSRP: $375.60
You Save: $154.99 (42%)
Ships in 1-2 Business Days
1
ADD TO CART
  • Related Parts
  • Product Specifications
  • Vehicle Fitment
  • Customer Questions & Expert Answers
  • Product Specifications

    BrandGenuine GM
    Manufacturer Part Number12640746
    Part DescriptionPan, Engine Oil; Engine Oil Pan
    Item Dimensions25.4 x 12.2 x 12.5 inches
    Item Weight5.10 Pounds
    ConditionNew
    Fitment TypeDirect Replacement
    Replaces12627903, 12619776
    ManufacturerGeneral Motors
    SKU12640746
    WarrantyThis genuine GM part is guaranteed by GM's factory warranty.
    Shipping & ReturnShipping Policy Return Policy
    Warning: California's Proposition 65
  • Vehicle Fitment

    Year Make Model Trim Engine
    2008-2014 Cadillac EscaladeBase, Luxury, Platinum, Premium8 Cyl 6.2 L FLEX, 8 Cyl 6.2 L GAS
    2008-2014 Cadillac Escalade ESVBase, Luxury, Platinum, Premium8 Cyl 6.2 L FLEX, 8 Cyl 6.2 L GAS
    2008-2013 Cadillac Escalade EXTBase, Luxury, Premium8 Cyl 6.2 L FLEX, 8 Cyl 6.2 L GAS
    2008-2013 Chevrolet AvalancheBlack Diamond LS, Black Diamond LT, Black Diamond LTZ, LS, LT, LTZ8 Cyl 5.3 L FLEX, 8 Cyl 5.3 L GAS, 8 Cyl 6.0 L GAS
    2010-2014 Chevrolet Express 1500Base, LS, LT8 Cyl 5.3 L FLEX
    2008-2020 Chevrolet Express 2500Base, LS, LT8 Cyl 4.8 L FLEX, 8 Cyl 4.8 L GAS, 8 Cyl 6.0 L CNG, 8 Cyl 6.0 L FLEX, 8 Cyl 6.0 L GAS
    2008-2020 Chevrolet Express 3500Base, LS, LT8 Cyl 4.8 L FLEX, 8 Cyl 4.8 L GAS, 8 Cyl 6.0 L CNG, 8 Cyl 6.0 L FLEX, 8 Cyl 6.0 L GAS
    2008-2013 Chevrolet Silverado 1500Hybrid, LS, LT, LTZ, WT, XFE6 Cyl 4.3 L GAS, 8 Cyl 4.8 L FLEX, 8 Cyl 4.8 L GAS, 8 Cyl 5.3 L FLEX, 8 Cyl 5.3 L GAS, 8 Cyl 6.0 L FULL HYBRID EV-FLEX (FHEV), 8 Cyl 6.0 L FULL HYBRID EV-GAS (FHEV), 8 Cyl 6.0 L GAS, 8 Cyl 6.2 L FLEX
    2008-2019 Chevrolet Silverado 2500 HDHigh Country, LT, LTZ, WT8 Cyl 6.0 L CNG, 8 Cyl 6.0 L FLEX, 8 Cyl 6.0 L GAS
    2008-2019 Chevrolet Silverado 3500 HDHigh Country, LT, LTZ, WT8 Cyl 6.0 L CNG, 8 Cyl 6.0 L FLEX, 8 Cyl 6.0 L GAS
    View More
  • Customer Questions & Expert Answers

    Q:
    Is this 12640746 designed for my car? Posted by ChevyPartsGiant Specialist
    A:
    Please Select Your Vehicle model to see if part number 12640746 is suitable before ordering.
    Posted by ChevyPartsGiant Specialist
    Q:
    How to replace the oil pan on 4WD on Chevrolet Tahoe? Posted by Customer
    A:
    To change the Oil Pan of the 4wd vehicles, first, jack up and support the vehicle. For 1500 series, unfasten the Oil Pan skid plate bolts and skid plate, where available. For 2500 series, loosen the two rear Oil Pan skid plate bolts and remove the 2 front bolts and the skid plate if equipped. Next you will take off the front differential carrier, unbolt and hang the steering rack downward, next you will put a suitable Oil Pan Drain Plug under the Oil Pan Drain Plug and take off the Oil Pan Drain Plug (430), so that the oil can drain out entirely. Replace the Drain Plug and tighten it to 25 nm (18 lb ft). Put the drain pan under the Oil Filter (437) and remove the Oil Filter allowing it to drain before re-installing it, and tighten to 30 nm (22 lb ft). Remove the right and left side transmission cover bolts and cover, followed by the removal of crossbar bolts/nuts and crossbar for both series. The involved work involves disjoining the engine harness electrical connector from the oil level sensor, and the a/c compressor bracket bolts; which are to be undone before you undo the Oil Pan bolts and the Oil Pan itself. If you are repurposing the Oil Pan, remove the old pan gasket rivets if needed, remove the old gasket and the old rivets. For installation, apply a new Oil Pan Gasket to the Oil Pan, apply a 5 mm (0.20 in) bead of sealant, 20 mm (0.80 in) long, to the engine block on the front and rear cover gasket tabs, and then install the Oil Pan and the remain of Oil Pan bolts, tighten m6 bolts 12 nm (106 lb in) and m8 bolts 25 nm (18 lb ft). Install 2 lower trans bolts and tighten them to a torque of 50 nm (37 lb ft), then install the a/c compressor bracket bolts and tighten it to a torque of 50 nm (37 lb ft). Connect the engine harness electrical connection to the oil level sensor get the threads of the crossbar bolts clean using denatured alcohol apply thread lock, gm p/n 12345493 (Canadian P/N1053488) or the equivalent and install the crossbar with bolts/nuts and zero head torque 120nm 21lbft on 2500 series, 100nm74lbft on 1500 series. Install the left side transmission cover bolt and bolt this down to 12 nm (106 lb in), then install the right side transmission cover bolt and tighten to 12 nm (106 lb in). If using the old Oil Pan, drain the old Oil Filter and replace with new Oil Filter (437), lubricating the seal with clean engine oil and applying 30 nm (22 lb ft) torque. Finally, install and tighten the Oil Pan Drain Plug (430) to 25 nm (18 lb ft), reinstall the front differential carrier with raising the steering rack and install the bolts tightening left side up to 200 nm (148 lb ft), and the right up to 100 nm (74 lb ft). For 2500 series place the Oil Pan skid plate you have to tighten 2 rear bolts and 2 front bolts if it is available tightening it to 28 nm (21 lb ft); for 1500 series, position the skid plate and install the bolts if equipped and tighten to 28 nm (21lb ft). Drop the vehicle, put oil in the engine as new oil, start the engine to check for leaks.
    Posted by ChevyPartsGiant Specialist
    Q:
    How to replace the oil pan on 2WD on Chevrolet Tahoe? Posted by Customer
    A:
    Raising and supporting the vehicle is first when replacing Oil Pan on 2wd vehicles. Remove the Oil Pan skid plate bolts and skid plate if equipped for 1500 series. For 2500 series remove skid plate if equipped remove the 2 rear bolts and 2 front bolts. For that purpose, unbolt the steering rack and suspend it downward, place a proper drain pan under the Oil Pan Drain Plug, and unscrew the plug (430). Allow the oil to completely drain before tightening the plug again. Put the drain pan below the Oil Filter and take off the Oil Filter (437), draining out all the oil completely and then reinstalling it tightly. Remove the right and left side transmission cover bolts and cover, crossbar bolts- nuts, and crossbar both series. For vehicles that are using 4l60-e- 4l70-e or 4l80-e automatic, pull out the 2 transmission lower bolts. For those with a 6l80-e automatic transmission, remove the lower left bolt and the lower right stud. Remove the engine harness electrical connector from the oil level sensor and engine harness clip from transmission oil cooler line bracket and remove battery cable channel bolt . Unscrew the channel pin from the Oil Pan tab, unscrew the oil cooler lines from the clip if had as well as the transmission oil cooler line clip bolt and clip from Oil Pan. Remove the oil-pan bolts and remove oil-pan itself. Drill out the Oil Pan Gasket rivets if required and, remove and dispose of the Oil Pan Gasket and rivets if using the Oil Pan again. For installation of the sealant, place a new Oil Pan Gasket on to the Oil Pan, apply a 5m(0.20in) area of sealant 20m(0.80 in) long on the engine blocks on the tabs of the front and rear cover gaskets; then install Oil Pan and bolting and tighten until snug. For the 6l80-e transmission, install lower right transmission stud and lower left bolt until snug; for 4l80-e and 4l60-e-4l70-e automatic transmissions, install the 2 lower transmission bolts that have been installed until they are only snug. Tighten Oil Pan and the Oil Pan-to-Oil Pan front cover bolts with a torque of 25 nm (18 lb ft), Oil Pan-to-rear cover bolts at 12 nm (106 lb in) and transmission bolts-stud to 50 nm (37 lb ft). Mount the transmission oil cool-line clip and bolt to the Oil Pan using 9 nm (80 lb in) and install the oil cooler lines to the clip if equipped. Locate the channy and slide in the channel pin to Oil Pan tab, install the battery channel bolt to 12nm (106 lb in), attach the engine harness electrical connector to the oil seqsor and install the engine harness clip to transmission oil cooler line bracket. For both series, erase all evidence of the original adhesive patch, clean the threads of the bolts, and apply thread lock gm p-n 12345493 (Canadian P-N 10953488) to the threads of the bolts. Attach the crossbar and bolts-nuts for the 2500 series vehicles with nuts on 120 nm (89 lb ft) and 1500 series vehicles with nuts on 100 nm (74 lb ft). Mount the left side transmission cover onto the transmission and bolt the cover bolt on with 12 nm (106 lb. In) torque, and then bolt on the cover on the right side. Reinstall the old Oil Pan and put on a new Oil Filter, lubricating the seal with clean engine oil and fastening it to 30 nm (22 lb ft). Make sure that Oil Pan Drain Plug (430) is fit by 25 nm (18 lb ft), lift the steering rack and screw in the bolts, the left with 200 nm (148 lb ft), the right by 100 (74 lb ft). For 2500 series vehicles position the Oil Pan skid plate and tighten the 2 rear bolts, install the two front bolts if equipped to 28 nm (21 lb ft). Repeat the same for vehicles of 1500 series skid plate bolts. Lastly, lower the vehicle, add new engine oil into the engine, start the engine and scan for leakages.
    Posted by ChevyPartsGiant Specialist
    Q:
    How to replace the oil pan on 4WD on GMC Sierra 1500? Posted by Customer
    A:
    Raising and supporting the vehicle should be the first step before replacing its Oil Pan on vehicles with 4wd capabilities. When working on 1500 series vehicles operators should unbolt the skid plate bolts together with the optional skid plate. On 2500 series vehicles, start by loosening the two rear Oil Pan skid plate bolts then remove the two front bolts alongside the skid plate if your vehicle has one. Start by removing the front differential carrier followed by unbolted steering rack installation before hanging it downward. Position a proper drain pan beneath the Oil Pan Drain Plug before you remove it (430) to allow complete oil drainage before tightening the Drain Plug into place. Set a drain pan directly under the Oil Filter before you remove the filter (437) to allow the oil to drain completely while you tighten the Oil Filter until it becomes snug. Detach right and left side transmission cover bolts before removing the cover and crossbar bolts/nuts and crossbar for both 1500 and 2500 series models. Vehicles with 4l60-e/4l70-e automatic transmission require bolt removal from the two lower transmission mounting points. For 4l80-e, remove the 2 lower transmission bolts; 4l80-e requires removal of two lower transmission bolts and 6l80-e demands removal of lower left transmission bolt along with lower right transmission stud. You need to disconnect the engine harness electrical connector at the oil level sensor point while removing the engine harness clip from the transmission oil cooler line bracket and removing the battery cable channel bolt. Insert the Oil Pan tab channel pin into position before removing oil cooler lines from the clip according to transmission type specification. Begin by removing the clip bolt from the transmission oil cooler line on the Oil Pan before taking out the bolts securing the Oil Pan then finally removing the pan itself. You must drill out existing Oil Pan Gasket rivets before removing the gasket when keeping the Oil Pan for use. Toss both the rivets and gasket into the trash. During installation users must place a new Oil Pan Gasket onto the Oil Pan. Users should then add sealant forming a 5 mm (0.20 in) bead that extends 20 mm (0.80 in) along the tabs of the front and rear cover gaskets protruding into the Oil Pan surface of the engine block. Put one Oil Pan bolt through its hole until it reaches the gasket then place the Oil Pan in position while adding remaining Oil Pan bolts before tightening those bolts to a secure fit. Position the oil cooler bracket first and install lower right transmission studs together with lower left transmission bolts until they are hand tight. The appropriate lower transmission bolts need to be installed until they reach their initial tightness for both 4l80-e and 4l60-e/4l70-e transmissions. Tighten all Oil Pan bolts and pan-to-front cover bolts to 25 nm (18 lb ft) torque and Oil Pan-to-rear cover bolts to 12 nm (106 lb in) torque. Additionally, install and torque transmission bolts/stud to 50 nm (37 lb ft). Mount the transmission oil cooler line clip then bolt it to the Oil Pan using a torque of 9 nm (80 lb in). First bolt the oil cooler lines to the clip (as applicable) then position the channel and slide the channel pin into the Oil Pan tab before installing the battery cable channel bolt and tightening it to 12 nm (106 lb in). After connecting the engine harness electrical connector to the oil level sensor route the engine harness clip toward the transmission oil cooler line bracket. Maintenance personnel must remove any existing adhesive from 1500 and 2500 series applications. They must wash the bolt threads with denatured alcohol before applying threadlock gm p/n 12345493 (or Canadian P/N 10953488) or equivalent to the bolt threads. For vehicles in the 2500 series tighten the crossbar bolts/nuts to 120 nm (89 lb ft) while vehicles in the 1500 series require a torque of 100 nm (74 lb ft). Before fastening either bolt you must torque the left side one to 12 nm (106 lb in) followed by torquing the right side one to 12 nm (106 lb in). Before tightening the Oil Filter,get new filter ready and apply clean oil around the seal. Tighten the filter to 30 nm (22 lb ft). After securing the Oil Pan Drain Plug (430) with a torque of 25 nm (18 lb ft) reposition the front differential carrier before raising the steering rack into position and tightening its left side bolts to 200 nm (148 lb ft) and the right side bolts to 100 nm (74 lb ft). Installation of Oil Pan skid plate should begin with tightening the rear Oil Pan skid plate bolts on 2500 series vehicles followed by front bolt installation if vehicle has this equipment, torque all bolts to 28 nm (21 lb ft). Install the Oil Pan skid plate for 1500 series vehicles when equipped with it and torque the bolts to 28 nm (21 lb ft). After dropping the vehicle you should start the motor and fill it with brand-new engine oil before checking for leaks.
    Posted by ChevyPartsGiant Specialist
    Q:
    How to replace the oil pan on 4WD on GMC Yukon? Posted by Customer
    A:
    4WD vehicle owners must raise their vehicle to perform Oil Pan replacement. Before work begins, 1500 series vehicle owners must remove skid plate bolts along with the skid plate itself while hybrid (HP2) operators need to remove steering gear motor shield components. In 2500 series vehicles owners should first loosen the rear pan skid plate bolts but must remove both front bolts and skid plate when present. You need to take the engine shield off next followed by the front differential carrier removal steps. Secure the steering rack to a lower position by using suitable oil drain pan placement underneath the Oil Pan Drain Plug. Drain oil from the pan while removing Drain Plug 430 and afterward tighten the plug to 25 nm (18 lb ft). Drain the Oil Filter into a pan located beneath it while you uninstall the filter (437). Reinstall and tighten the filter to 30 nm (22 lb ft) torque. For all 1500 and 2500 series vehicles remove transmission cover bolts from both right and left sides and crossbar bolts/nuts alongside the crossbar. First disconnect the engine harness from the oil level sensor electrical connector before removing the bolts that secure the air conditioning compressor bracket. After that remove the Oil Pan bolts and finally detach the Oil Pan. When using the existing Oil Pan, remove the gasket's rivets through drilling if needed before removing and discarding the gasket and rivets. Begin by putting on a new Oil Pan Gasket followed by applying 5 mm (0.20 in) of sealant on the engine block at both front and rear cover gasket tabs. Install one Oil Pan bolt through the gasket then place the Oil Pan into position with the remaining bolts which must be tightened to m6 bolts at 12 nm (106 lb in) and m8 bolts at 25 nm (18 lb ft). Position the lower transmission bolts first followed by bolt installation at the a/c compressor bracket. Remember to torque these bolts to 50 nm (37 lb ft). Position the engine harness electrical connector to the oil level sensor before cleaning the crossbar bolts threads with threadlock gm p/n 12345493 (Canadian P/N 10953488) or equivalent. The crossbar and bolts/nuts need to be installed with torque to 120 nm (89 lb ft) for 2500 series and 100 nm (74 lb ft) for 1500 series. Each transmission cover bolt should receive a torque of 12 nm (106 lb in) when finally installed. When using the existing Oil Pan install a fresh Oil Filter by lubricating the rubber seal with clean engine oil while achieving a torque of 30 nm (22 lb ft). After torquing the Drain Plug to 25 nm (18 lb ft), return the front differential carrier at this time. The steering rack should be raised while install bolts. Tighten the left bolt to 200 nm (148 lb ft) and the right bolt to 100 nm (74 lb ft). The engine shield installation should include positioning of the Oil Pan skid plate for 2500 series vehicles and tightening the rear bolts to 28 nm (21 lb ft) with optional front bolt installation. During hybrid (HP2) installation install the steering gear motor shield and during 1500 series maintenance install the Oil Pan skid plate then tighten all bolts to 28 nm (21 lb ft). Finish by lowering the vehicle before adding new engine oil and starting the engine to check for any fluid leaks.
    Posted by ChevyPartsGiant Specialist
    Q:
    What should be done with the steering rack for the 2008 Cadillac Escalade ESV? Posted by Customer
    A:
    Raise the steering rack in place and install the steering rack bolts, tightening the left side bolts to 200 N.m and the right side bolts to 100 N.m.
    Posted by ChevyPartsGiant Specialist
    See expert answers on similar Oil Pan
    Q:
    What should be done after connecting the oil level sensor electrical connector for the 2008 Chevrolet Express 3500? Posted by Customer
    A:
    Install the transmission cover and bolt, tightening the bolt to 12 N.m (106 lb in), then install the crossbar and crossbar bolts, tightening them to 100 N.m (74 lb ft).
    Posted by ChevyPartsGiant Specialist
    See expert answers on similar Oil Pan
    Q:
    What specific steps are needed for the 4L60-E automatic transmission for the 2010 Chevrolet Express 3500? Posted by Customer
    A:
    Remove the transmission bolt and stud on the right side, and the bottom bolt on the left side.
    Posted by ChevyPartsGiant Specialist
    See expert answers on similar Oil Pan
    Q:
    What should be done after supporting the front drive axle for the 2009 Chevrolet Express 2500? Posted by Customer
    A:
    Remove the differential carrier lower and upper mounting bolts and nuts, lower the front drive axle, and remove the transmission cover bolt and crossbar bolts before taking off the crossbar.
    Posted by ChevyPartsGiant Specialist
    See expert answers on similar Oil Pan
    Q:
    What should be done with the transmission cover for the 2010 Chevrolet Silverado 1500? Posted by Customer
    A:
    Reinstall the transmission cover, tightening the bolts to 12 Nm (106 lb in).
    Posted by ChevyPartsGiant Specialist
    See expert answers on similar Oil Pan
    Q:
    How do you remove the oil pan for the 2008 Chevrolet Silverado 1500? Posted by Customer
    A:
    Take out the oil pan bolts and nuts, then remove the oil pan itself, discarding the old gasket.
    Posted by ChevyPartsGiant Specialist
    See expert answers on similar Oil Pan
    Q:
    What should be done to the oil pan before installation for the 2009 Chevrolet Silverado 1500? Posted by Customer
    A:
    Clean and inspect the oil pan as needed.
    Posted by ChevyPartsGiant Specialist
    See expert answers on similar Oil Pan
    Q:
    What should be done if reusing the oil pan for the 2008 GMC Yukon? Posted by Customer
    A:
    Drill out the oil pan gasket rivets if necessary, remove and discard the oil pan gasket and rivets.
    Posted by ChevyPartsGiant Specialist
    See expert answers on similar Oil Pan
    If you have any questions about this product, please don't hesitate to ask us. We will be happy to help you!

OEM GM 12640746, Excellent Performance and Perfect Fitment

To ensure reliability, purchase GM part # 12640746 Oil Pan. It is sometimes referred to as GM Oil Pan. Choosing OEM parts is the optimal decision for guaranteeing superior quality and perfect performance. These components undergo stringent quality checks and are carefully constructed to comply with GM's factory specifications, ensuring a smooth installation process.

ChevyPartsGiant.com is a leading supplier of genuine GM parts such as GM 12640746 Oil Pan. Our website boasts an extensive inventory of OEM GM parts, available at highly competitive prices in the market. Should you require any new genuine GM parts, rest assured we will deliver them swiftly and efficiently to your doorstep. Furthermore, all our parts come with the assurance of a manufacturer's warranty. For detailed Chevy parts information, click here.
Choose ChevyPartsGiant for discounted prices, exceptional service and fast delivery