Make sure this part fits

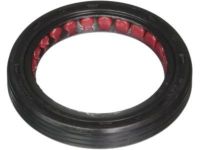
GM 12592195
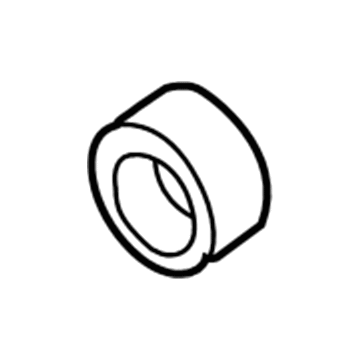
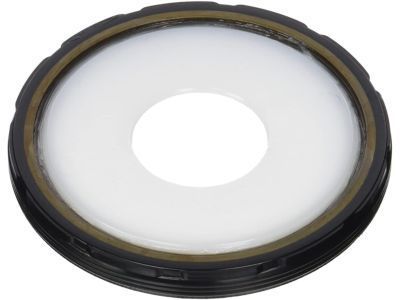
Rear Main Seal

1984-2011 GM

Customer Questions & Expert Answers (66)
GM 12592195 Rear Main Seal
  • Part Description
    Seal, Engine Rear Main Bearing; Crankshaft Seal
  • Position
    Rear
  • Replaces
    14085829
  • Manufacturer
    General Motors
Make sure this part fits
$43.74 MSRP: $75.13
You Save: $31.39 (42%)
Ships in 1-2 Business Days
1
ADD TO CART
  • Related Parts
  • Product Specifications
  • Vehicle Fitment
  • Customer Questions & Expert Answers
  • Product Specifications

    BrandGenuine GM
    Manufacturer Part Number12592195
    Part DescriptionSeal, Engine Rear Main Bearing; Crankshaft Seal
    Other NamesTiming Cover Seal; Rear Main Seal Retainer; Seal Kit, Engine Rear Main Bearing
    Item Dimensions4.3 x 4.1 x 0.5 inches
    Item Weight0.40 Pounds
    PositionRear
    ConditionNew
    Fitment TypeDirect Replacement
    Replaces14085829
    ManufacturerGeneral Motors
    SKU12592195
    WarrantyThis genuine GM part is guaranteed by GM's factory warranty.
    Shipping & ReturnShipping Policy Return Policy
    Warning: California's Proposition 65
  • Vehicle Fitment

    Year Make Model Trim Engine
    1993-2005, 1985-1989 Buick CenturyCustom, Estate Wagon, Limited, Special, Special Edition4 Cyl 2.2 L GAS, 6 Cyl 2.8 L GAS, 6 Cyl 3.1 L GAS
    2009-2011 Buick LucerneCX, CXL, CXL Special Edition6 Cyl 3.9 L FLEX, 6 Cyl 3.9 L GAS
    1992-1996 Buick RegalCustom, Limited6 Cyl 3.1 L GAS
    2002-2007 Buick RendezvousCX, CX Plus, CXL, CXL Plus6 Cyl 3.4 L GAS, 6 Cyl 3.5 L GAS
    1984-1989 Buick SkyhawkCustom, Limited, SE, Sport, T-Type4 Cyl 2.0 L GAS
    1994-1998, 1985 Buick SkylarkCustom, Gran Sport, Limited, Olympic Gold Edition6 Cyl 2.8 L GAS, 6 Cyl 3.1 L GAS
    2005-2007 Buick TerrazaCX, CXL6 Cyl 3.5 L GAS, 6 Cyl 3.9 L FLEX, 6 Cyl 3.9 L GAS
    1984-1986 Cadillac CimarronBase, d'Oro4 Cyl 2.0 L GAS
    1988-1996 Chevrolet BerettaBase, GT, GTZ, Indianapolis 500 Pace Car, Z264 Cyl 2.0 L GAS, 4 Cyl 2.2 L GAS, 6 Cyl 2.8 L GAS, 6 Cyl 3.1 L GAS
    1985-1995 Chevrolet CamaroBase, Berlinetta, LT, RS, RS Heritage Edition, Sport6 Cyl 2.8 L GAS, 6 Cyl 3.1 L GAS, 6 Cyl 3.4 L GAS
    View More
  • Customer Questions & Expert Answers

    Q:
    Is this 12592195 designed for my car? Posted by ChevyPartsGiant Specialist
    A:
    Please Select Your Vehicle model to see if part number 12592195 is suitable before ordering.
    Posted by ChevyPartsGiant Specialist
    Q:
    How to replace the rear crankshaft seal on Buick Century? Posted by Customer
    A:
    To replace the Crankshaft rear oil seal, initial, take the engine Flywheel out, making sure not to nick the Crankshaft sealing surface. Next, use a flat-bladed tool or another relevant tool by inserting through the dust lip at a small angle and pry the Crankshaft rear oil seal out by guide the tool towards the end of the Crankshaft doing the same in multiple times around the seal as needed. Before installing, apply some engine oil to the new Crankshaft rear oil seal and then place it onto the j 346b6 rear main seal installer(J 346B6). This can be done by placing the installer at the back side of the Crankshaft, hand tighten the screws so that the seal is installed squarely. Then install the Crankshaft rear oil seal on the Crankshaft by selecting the wing nut on the j346b6 and tighten until it bottoms out. Finally remove the j346b6 from the Crankshaft and reinstate the engine Flywheel.
    Posted by ChevyPartsGiant Specialist
    Q:
    How to replace the rear crankshaft seal on Buick Terraza? Posted by Customer
    A:
    To replace the crankshaft rear oil seal, you should remove the engine Flywheel first. During the removal of the crankshaft rear oil seal, do not nick the surface of the crankshaft sealing. Lift the seal out using a flat-bladed tool, insert it though the dust lip at an angle and apply the pressure towards the end of the crank-shaft, repeat as required. During the installation of the new seal, pay attention that it is the reverse style and there is "this side out" on it. Do not apply oil lubrication on the crankshaft rear oil seal and the seal installer (J 34686), as well as avoid putting the sealing lip when removing the protective sleeve so as not to cause damage to it. Clean the crankshaft sealing surface using a clean towel and inspect for burrs or sharp edge smoothing them with crocus cloth. Remove the protective sleeve from the new crankshaft rear oil seal very carefully after that you have to install it into the seal installer (J 34686). Slide it over the mandrel properly so that it bottoms in the collar of the tool. Mount the seal installer (J 34686) to the back of the crankshaft and tighten the screws manually to guarantee square installation of the seal installer. Tighten the wing nut then seal installer (J 34686) till it bottoms up the engine Flywheel; seal installer out, reinstall the engine Flywheel.
    Posted by ChevyPartsGiant Specialist
    Q:
    How to replace the rear crankshaft seal on Chevrolet Lumina? Posted by Customer
    A:
    After removing the transaxle, and the engine Flywheel, make sure that the Crankshaft sealing surface does not get nicked through the process. Second, unscrew the rear oil seal at the Crankshaft by sticking a flat-bladed tool at an angle through the dust lube and snapping it out by swinging the handle towards the end of the Crankshaft, continuing until removed. For installation apply rear main seal installer (J34686) coat the rear Crankshaft oil seal with engine oil and install to the j34686. Mount the j34686 on the back end of the Crankshaft and loosely fasten the screws, making sure that the seal is aligned properly. Tighten the wing nut on j34686 until it bottomed out, then remove j34686 off the Crankshaft. Finally, reinstall the engine Flywheel and transaxle.
    Posted by ChevyPartsGiant Specialist
    Q:
    How to replace the rear crankshaft seal on Chevrolet Monte Carlo? Posted by Customer
    A:
    Replacement of a crankshaft rear oil seal requires engine Flywheel removal as the first step. You must avoid scratching the crankshaft sealing surface when you take off its rear oil seal. A flat-bladed tool or equivalent tool needs insertion through the dust lip at an angle to remove the seal by moving its handle towards the crankshaft end until the seal comes loose. Repeat this procedure when needed. The crankshaft rear oil seal must never receive oil lubrication prior to installation nor should you contact the sealing lip of the oil seal after sleeve removal for any reason. Use a clean lint-free towel to wipe down the crankshaft sealing surface then examine the lead-in edge for any burrs or sharp edges before using crocus cloth to remove them. Look for the label on the new rear oil seal which reads "this side out" because it is a reverse-style design. Position the j 34686 rear main seal installer (J 34686) so the mandrel receives the new crankshaft rear oil seal by gently sliding the seal over the mandrel tip until it reaches the collar of the tool. The j 34686 operation requires aligning its dowel pin with the crankshaft dowel pin and manual screw installation up to 5 nm (45 inch lbs.) torque. Then rotate the t-handle to expand the collar until the seal sits tightly against the engine block. The last step involves screw removal followed by standard Flywheel reinstallation.
    Posted by ChevyPartsGiant Specialist
    Q:
    How to replace the Rear Crankshaft Seal Housing on Chevrolet S10? Posted by Customer
    A:
    Start the crankshaft rear oil seal housing replacement by removing the Oil Pan then the Transmission Assembly followed by the engine Flywheel. Start by removing the bolts and nut that fasten the crankshaft rear oil seal housing to the engine before extracting the housing itself and throwing away the gasket. Clean all sealing surfaces before checking the housing for warping or damage or cracks or wear by replacing it if any defects are found. New crankshaft rear oil seal housings should ship with an integrated oil seal. When keeping the housing you should install it per the manufacturer guidelines and add a fresh replacement seal using the crankshaft rear oil seal documentation. After implementing the new gasket start by putting in the new crankshaft rear oil seal housing with its oil seal on the engine block while avoiding oil or grease application on the seal lip or Crankshaft Seal area. The sleeve in the crankshaft rear oil seal functions as a tool to help the seal lip glide onto the crankshaft end before you apply full force to push the housing until it touches both the gasket and engine. Put the sleeve aside when you screw on the bolts and nut while tightening them to 12 nm (106 inch lbs.). Reinstall the engine Flywheel and Transmission Assembly and Oil Pan at the end of the procedure.
    Posted by ChevyPartsGiant Specialist
    Q:
    How to replace the rear crankshaft seal on Chevrolet S10? Posted by Customer
    A:
    In order to replace the crankshaft rear oil seal, it is important to remove the assembly of transmissions and engine Flywheel. Next, throttle, and using an appropriate tool, gently pry the crankshaft rear cover oil seal out of its seat and dispose of the old seal. Make sure the area is clean and free of any dirt and 2 to 3 drops of clean engine oil to the bore of the crankshaft rear oil seal housing, the outside diameter of the engine Flywheel pilot flange, the outside diameter of the fly wheel locator pin and the Crankshaft Seal surface. Check the j 35621-b (J 35621-B) flange for imperfection and remove a minor imperfection with a fine grade emery cloth and that no oil or lubricant contacts the seal lip surface. Take off the sleeve of the crankshaft rear oil seal and dab a little bit (2 to 3 drops) of clean oil engine oil out to its outside diameter. Mount the j 35621-b (J 35621-B) crankshaft rear oil seal onto the rear part of the j 35621-b (J 35621-B) and tighten the tool bolts snug by hand. Proper alignment is critical; make sure that the seal is flush and square to the housing to avoid timely failure. Turn the j 35621-b wing nut clockwise until the seal is properly installed while feeling the increased resistance when it is bottom meets the housing bore. Release the tool by rotating the wing nut counterclockwise and then take the j 35621-b (J 35621-B) off the crankshaft. Clean off any excess engine oil with a rag before reinstalling the engine Flywheel and Transmission Assembly.
    Posted by ChevyPartsGiant Specialist
    Q:
    How to replace the rear crankshaft seal on Chevrolet Venture? Posted by Customer
    A:
    Before installing the Crankshaft rear oil seal the engine Flywheel must be detached with caution to protect the Crankshaft sealing surface. You must extract the Crankshaft rear oil seal by driving a flatbladed tool or comparable tool through its dust lip at a diagonal angle to push the seal out while moving the handle towards the Crankshaft end. The process should be repeated as needed. Before installation remove the safety sleeve from the new Crankshaft rear oil seal while avoiding contact with both the sealing lip and any oil lubrication on the seal or installer. Use a lint-free towel to clean the Crankshaft sealing surface before inspecting the lead-in edge for burrs or sharp edges that deserve removal using crocus cloth. Make note of the rear oil seal direction since the new style operates backward with "this side out" text marked on it. Put the Crankshaft rear oil seal inside the j 34686 rear main seal installer (J 34686) by moving it against the tool's collar through rotating the mandrel until complete seal insertion. Before tightening the screws on the j 34686 install it onto the Crankshaft's rear end to guarantee proper seal location. First tighten the j 34686 wing nut to completion then eliminate the tool before placing the engine Flywheel back in position.
    Posted by ChevyPartsGiant Specialist
    Q:
    What should be done if any components are worn or damaged for the 2000 Buick Century? Posted by Customer
    A:
    Replace or repair components as necessary.
    Posted by ChevyPartsGiant Specialist
    See expert answers on similar Crankshaft Seal
    Q:
    What is the first step to replace the crankshaft rear oil seal for the 2002 Buick Century? Posted by Customer
    A:
    Remove the engine flywheel, taking care not to nick the crankshaft sealing surface.
    Posted by ChevyPartsGiant Specialist
    See expert answers on similar Crankshaft Seal
    Q:
    How do you align the new oil seal for installation for the 2009 Buick Lucerne? Posted by Customer
    A:
    Align the EN-48869 (Front Crankshaft Seal Installer) and the crankshaft front oil seal with the engine front cover and crankshaft.
    Posted by ChevyPartsGiant Specialist
    See expert answers on similar Crankshaft Seal
    Q:
    What is the first step to replace the crankshaft rear oil seal for the 2009 Buick Lucerne? Posted by Customer
    A:
    Remove the flywheel using the Engine Flywheel Replacement procedure.
    Posted by ChevyPartsGiant Specialist
    See expert answers on similar Crankshaft Seal
    Q:
    What tools are needed to install the crankshaft front oil seal for the 2010 Buick Lucerne? Posted by Customer
    A:
    Use (EN-48869) and a suitable tool to install the crankshaft front oil seal.
    Posted by ChevyPartsGiant Specialist
    See expert answers on similar Crankshaft Seal
    Q:
    How do you remove the crankshaft rear oil seal for the 2001 Buick Century? Posted by Customer
    A:
    Insert a flat-bladed tool or similar tool through the dust lip at an angle and pry the seal out by moving the handle of the tool towards the end of the crankshaft, repeating as necessary around the seal.
    Posted by ChevyPartsGiant Specialist
    See expert answers on similar Crankshaft Seal
    Q:
    How should the seal be removed for the 2005 Buick Rendezvous? Posted by Customer
    A:
    Use a screwdriver or a similar tool to carefully pry out the seal without damaging the crankshaft outside diameter (OD) surface or the chamfer.
    Posted by ChevyPartsGiant Specialist
    See expert answers on similar Crankshaft Seal
    Q:
    What is the final step in the installation process for the 2007 Buick Rendezvous? Posted by Customer
    A:
    Place the rear main seal and then reinstall the engine flywheel.
    Posted by ChevyPartsGiant Specialist
    See expert answers on similar Crankshaft Seal
    Q:
    How do you pry out the crankshaft rear oil seal for the 2006 Buick Rendezvous? Posted by Customer
    A:
    Use a flat-bladed tool to pry out the crankshaft rear oil seal by inserting it through the dust lip at an angle and moving the handle towards the end of the crankshaft, repeating as necessary.
    Posted by ChevyPartsGiant Specialist
    See expert answers on similar Crankshaft Seal
    Q:
    How should the crankshaft sealing surface be prepared for the 2006 Buick Terraza? Posted by Customer
    A:
    Clean it with a lint-free towel and inspect for burrs or sharp edges, removing any with crocus cloth.
    Posted by ChevyPartsGiant Specialist
    See expert answers on similar Crankshaft Seal
    Q:
    How do you remove the crankshaft front oil seal for the 2006 Buick Rendezvous? Posted by Customer
    A:
    Carefully pry out the crankshaft front oil seal using a suitable tool, ensuring not to damage the engine front cover.
    Posted by ChevyPartsGiant Specialist
    See expert answers on similar Crankshaft Seal
    Q:
    What is the first step to replace the crankshaft front oil seal for the 2004 Buick Rendezvous? Posted by Customer
    A:
    Remove the crankshaft balancer.
    Posted by ChevyPartsGiant Specialist
    See expert answers on similar Crankshaft Seal
    Q:
    How do you install the new crankshaft front oil seal for the 2002 Buick Rendezvous? Posted by Customer
    A:
    Align the crankshaft front oil seal with the engine front cover and crankshaft using the Crankshaft Front Oil Seal Installer (J 35468), then install the seal with the same tool.
    Posted by ChevyPartsGiant Specialist
    See expert answers on similar Crankshaft Seal
    Q:
    What should be done before installing the new crankshaft rear oil seal for the 2003 Buick Rendezvous? Posted by Customer
    A:
    Apply engine oil to both the inside and outside diameters of the new crankshaft rear oil seal.
    Posted by ChevyPartsGiant Specialist
    See expert answers on similar Crankshaft Seal
    Q:
    How do you remove an old style seal for the 2007 Buick Terraza? Posted by Customer
    A:
    For an old style seal with the lip facing inward, insert the tool between the outer seal casing and the engine block casting to pry the seal out.
    Posted by ChevyPartsGiant Specialist
    See expert answers on similar Crankshaft Seal
    Q:
    What is the first step to replace the crankshaft rear oil seal for the 2004 Chevrolet Malibu? Posted by Customer
    A:
    Remove the transmission.
    Posted by ChevyPartsGiant Specialist
    See expert answers on similar Crankshaft Seal
    Q:
    What is the final step after installing the oil seal for the 2003 Buick Century? Posted by Customer
    A:
    Reinstall the crankshaft balancer and inspect for any leaks.
    Posted by ChevyPartsGiant Specialist
    See expert answers on similar Crankshaft Seal
    Q:
    How do you install the new crankshaft rear oil seal for the 2009 Chevrolet Equinox? Posted by Customer
    A:
    Begin by placing the rear main seal in position as outlined in the Crankshaft Rear Oil Seal Installation procedure.
    Posted by ChevyPartsGiant Specialist
    See expert answers on similar Crankshaft Seal
    Q:
    What tool is used to install the new crankshaft front oil seal for the 2005 Chevrolet Equinox? Posted by Customer
    A:
    Use the Cover Aligner and Seal Installer (J 35468) along with a suitable tool.
    Posted by ChevyPartsGiant Specialist
    See expert answers on similar Crankshaft Seal
    Q:
    What should be done to the crankshaft sealing surface before installation for the 2006 Chevrolet Equinox? Posted by Customer
    A:
    Clean the crankshaft sealing surface with a lint-free towel and inspect for any burrs or sharp edges, removing them with crocus cloth if necessary.
    Posted by ChevyPartsGiant Specialist
    See expert answers on similar Crankshaft Seal
    Q:
    What should you inspect after removing the oil seal for the 2009 Chevrolet Equinox? Posted by Customer
    A:
    Inspect the crankshaft, crankshaft balancer, and engine front cover for wear or damage, replacing any components as necessary.
    Posted by ChevyPartsGiant Specialist
    See expert answers on similar Crankshaft Seal
    Q:
    What should you inspect after removing the oil seal for the 2008 Chevrolet Equinox? Posted by Customer
    A:
    Inspect the crankshaft, crankshaft balancer, and engine front cover for any wear or damage, replacing components as necessary.
    Posted by ChevyPartsGiant Specialist
    See expert answers on similar Crankshaft Seal
    Q:
    What is the final step in the process for the 2008 Chevrolet Impala? Posted by Customer
    A:
    Reinstall the crankshaft balancer.
    Posted by ChevyPartsGiant Specialist
    See expert answers on similar Crankshaft Seal
    Q:
    How do you remove the crankshaft rear oil seal for the 2000 Chevrolet Impala? Posted by Customer
    A:
    Insert a flat-bladed tool or similar tool through the dust lip at an angle and pry it out by moving the handle of the tool towards the end of the crankshaft, repeating as necessary around the seal.
    Posted by ChevyPartsGiant Specialist
    See expert answers on similar Crankshaft Seal
    Q:
    How should the new crankshaft front oil seal be prepared for installation for the 2002 Chevrolet Impala? Posted by Customer
    A:
    Lubricate the new crankshaft front oil seal with engine oil to facilitate installation.
    Posted by ChevyPartsGiant Specialist
    See expert answers on similar Crankshaft Seal
    Q:
    What is the final step in the process for the 2000 Chevrolet Malibu? Posted by Customer
    A:
    Reconnect the negative battery cable.
    Posted by ChevyPartsGiant Specialist
    See expert answers on similar Crankshaft Seal
    Q:
    What is the final step after installing the new seal for the 2007 Chevrolet Impala? Posted by Customer
    A:
    Reinstall the engine flywheel.
    Posted by ChevyPartsGiant Specialist
    See expert answers on similar Crankshaft Seal
    Q:
    How do you position the new crankshaft rear oil seal for installation for the 2002 Chevrolet Monte Carlo? Posted by Customer
    A:
    Place it onto the Rear Main Seal Installer (J34686) and position the J34686 onto the rear of the crankshaft.
    Posted by ChevyPartsGiant Specialist
    See expert answers on similar Crankshaft Seal
    Q:
    What tools are needed for the repair for the 2000 Chevrolet Malibu? Posted by Customer
    A:
    Engine Support Fixture (J 28467-360), Engine Support Fixture Adapters (J 28467-90), and Rear Main Bearing Oil Seal Installer (J 34686).
    Posted by ChevyPartsGiant Specialist
    See expert answers on similar Crankshaft Seal
    Q:
    How should the new oil seal be prepared for installation for the 2003 Chevrolet Malibu? Posted by Customer
    A:
    Lubricate the new oil seal with clean engine oil.
    Posted by ChevyPartsGiant Specialist
    See expert answers on similar Crankshaft Seal
    Q:
    What should be done after removing the transmission for the 2006 Chevrolet Malibu? Posted by Customer
    A:
    Remove the flywheel, taking care not to damage the outside diameter of the crankshaft or chamber with any tool.
    Posted by ChevyPartsGiant Specialist
    See expert answers on similar Crankshaft Seal
    Q:
    What is the next step after installing the oil seal for the 2009 Chevrolet Impala? Posted by Customer
    A:
    Reinstall the crankshaft key into the keyway.
    Posted by ChevyPartsGiant Specialist
    See expert answers on similar Crankshaft Seal
    Q:
    What should be noted before installing the new rear oil seal for the 2005 Chevrolet Malibu? Posted by Customer
    A:
    The direction of the new reverse style rear oil seal, which is marked "THIS SIDE OUT".
    Posted by ChevyPartsGiant Specialist
    See expert answers on similar Crankshaft Seal
    Q:
    How should the new oil seal be installed for the 2001 Chevrolet Malibu? Posted by Customer
    A:
    Insert it into the front cover with the lip facing the engine, utilizing the Crankshaft Seal Installer and Centering Tool (J35468).
    Posted by ChevyPartsGiant Specialist
    See expert answers on similar Crankshaft Seal
    Q:
    How should the crankshaft front oil seal be positioned during installation for the 2001 Chevrolet Lumina? Posted by Customer
    A:
    Ensure that the seal lip faces the engine and is flush with the engine front cover.
    Posted by ChevyPartsGiant Specialist
    See expert answers on similar Crankshaft Seal
    Q:
    How do you remove the crankshaft front oil seal for the 2003 Chevrolet Impala? Posted by Customer
    A:
    Use a flat-bladed tool, such as a large screwdriver, to pry out the crankshaft front oil seal.
    Posted by ChevyPartsGiant Specialist
    See expert answers on similar Crankshaft Seal
    Q:
    What is the first step to service and repair the front crankshaft seal for the 2000 Chevrolet Monte Carlo? Posted by Customer
    A:
    First, remove the crankshaft balancer, taking care not to damage the crankshaft.
    Posted by ChevyPartsGiant Specialist
    See expert answers on similar Crankshaft Seal
    Q:
    What is the final step after replacing the crankshaft rear oil seal for the 2008 Chevrolet Malibu? Posted by Customer
    A:
    Reinstall the automatic transmission.
    Posted by ChevyPartsGiant Specialist
    See expert answers on similar Crankshaft Seal
    Q:
    What are the final steps after installing the crankshaft front oil seal for the 2010 Chevrolet Impala? Posted by Customer
    A:
    Reinstall the crankshaft key into the keyway and finally the crankshaft balancer.
    Posted by ChevyPartsGiant Specialist
    See expert answers on similar Crankshaft Seal
    Q:
    What should you inspect after removing the seal for the 2002 Chevrolet Malibu? Posted by Customer
    A:
    Inspect the Inside Diameter (ID) of the bore for nicks or burrs and repair if needed, and also check the crankshaft for burrs or nicks on the sealing surfaces, repairing or replacing it as necessary.
    Posted by ChevyPartsGiant Specialist
    See expert answers on similar Crankshaft Seal
    Q:
    How do you remove the crankshaft rear oil seal for the 2004 Chevrolet Monte Carlo? Posted by Customer
    A:
    Use a flat-bladed tool to pry out the crankshaft rear oil seal by inserting it through the dust lip at an angle and moving the handle towards the end of the crankshaft, repeating as necessary.
    Posted by ChevyPartsGiant Specialist
    See expert answers on similar Crankshaft Seal
    Q:
    What tool is used for installing the crankshaft front oil seal for the 2009 Chevrolet Malibu? Posted by Customer
    A:
    Utilize the Camshaft/Front Main Seal Installer (J 35268-A).
    Posted by ChevyPartsGiant Specialist
    See expert answers on similar Crankshaft Seal
    Q:
    How do you position the J 34686 for installation for the 2003 Chevrolet Monte Carlo? Posted by Customer
    A:
    Position the J 34686 onto the rear of the crankshaft and hand tighten the screws to ensure the seal is installed squarely.
    Posted by ChevyPartsGiant Specialist
    See expert answers on similar Crankshaft Seal
    Q:
    What should be done after the oil seal is installed for the 2006 Chevrolet Impala? Posted by Customer
    A:
    Remove the J41478 and inspect the oil seal to ensure it is evenly and completely installed in the front cover bore.
    Posted by ChevyPartsGiant Specialist
    See expert answers on similar Crankshaft Seal
    Q:
    What is the first step to replace the crankshaft front oil seal for the 2005 Chevrolet Monte Carlo? Posted by Customer
    A:
    First, remove the crankshaft balancer.
    Posted by ChevyPartsGiant Specialist
    See expert answers on similar Crankshaft Seal
    Q:
    What should be avoided when handling the oil seal for the 2006 Chevrolet Monte Carlo? Posted by Customer
    A:
    It is crucial not to lubricate the inside diameter (ID) of the oil seal or the crankshaft surface, and the old oil seal must not be reused.
    Posted by ChevyPartsGiant Specialist
    See expert answers on similar Crankshaft Seal
    Q:
    How do you remove the crankshaft rear oil seal for the 2004 Chevrolet Impala? Posted by Customer
    A:
    Use a flat-bladed tool to pry out the crankshaft rear oil seal by inserting it through the dust lip at an angle and moving the handle towards the end of the crankshaft, repeating as necessary.
    Posted by ChevyPartsGiant Specialist
    See expert answers on similar Crankshaft Seal
    Q:
    How should the new crankshaft front oil seal be prepared for installation for the 2001 Chevrolet Monte Carlo? Posted by Customer
    A:
    Lubricate the new crankshaft front oil seal with engine oil to facilitate installation.
    Posted by ChevyPartsGiant Specialist
    See expert answers on similar Crankshaft Seal
    Q:
    What is the first step to replace the crankshaft rear oil seal for the 2001 Chevrolet Impala? Posted by Customer
    A:
    First, remove the transaxle and then the engine flywheel, taking care not to nick the crankshaft sealing surface during the process.
    Posted by ChevyPartsGiant Specialist
    See expert answers on similar Crankshaft Seal
    Q:
    What should be inspected after removing the oil seal for the 2007 Chevrolet Equinox? Posted by Customer
    A:
    Inspect the crankshaft, crankshaft balancer, and engine front cover for any wear or damage, replacing components as necessary.
    Posted by ChevyPartsGiant Specialist
    See expert answers on similar Crankshaft Seal
    Q:
    What should you inspect after removing the oil seal for the 2000 Chevrolet Venture? Posted by Customer
    A:
    Inspect the crankshaft, crankshaft balancer, and engine front cover for wear or damage, replacing components as necessary.
    Posted by ChevyPartsGiant Specialist
    See expert answers on similar Crankshaft Seal
    Q:
    What should be aligned with the dowel pin in the crankshaft for the 2004 Chevrolet Venture? Posted by Customer
    A:
    The dowel pin of the J 34686 should be aligned with the dowel pin in the crankshaft.
    Posted by ChevyPartsGiant Specialist
    See expert answers on similar Crankshaft Seal
    Q:
    What are the final steps after installing the crankshaft rear oil seal for the 2001 Chevrolet Venture? Posted by Customer
    A:
    Reinstall the engine flywheel and the transaxle.
    Posted by ChevyPartsGiant Specialist
    See expert answers on similar Crankshaft Seal
    Q:
    What is the final step after installing the new oil seal for the 2006 Chevrolet Uplander? Posted by Customer
    A:
    Reinstall the crankshaft key into the keyway and the crankshaft balancer.
    Posted by ChevyPartsGiant Specialist
    See expert answers on similar Crankshaft Seal
    Q:
    What is the first step to replace the front crankshaft oil seal for the 2005 Chevrolet Uplander? Posted by Customer
    A:
    Remove the crankshaft balancer and the crankshaft key from the keyway, taking care not to damage the crankshaft.
    Posted by ChevyPartsGiant Specialist
    See expert answers on similar Crankshaft Seal
    Q:
    What is the next step after removing the flywheel for the 2008 Chevrolet Uplander? Posted by Customer
    A:
    Take out the crankshaft rear main oil seal following the Crankshaft Rear Oil Seal Removal procedure.
    Posted by ChevyPartsGiant Specialist
    See expert answers on similar Crankshaft Seal
    Q:
    What is the final step after installing the new oil seal for the 2005 Chevrolet Venture? Posted by Customer
    A:
    Reinstall the crankshaft balancer.
    Posted by ChevyPartsGiant Specialist
    See expert answers on similar Crankshaft Seal
    Q:
    What tool is used to install the crankshaft front oil seal for the 2008 Chevrolet Uplander? Posted by Customer
    A:
    Use the Cover Aligner and Seal Installer (J 35468) and a suitable tool.
    Posted by ChevyPartsGiant Specialist
    See expert answers on similar Crankshaft Seal
    If you have any questions about this product, please don't hesitate to ask us. We will be happy to help you!

OEM GM 12592195, Excellent Performance and Perfect Fitment

To ensure reliability, purchase GM part # 12592195 Rear Main Seal. It is sometimes referred to as GM Crankshaft Seal. Choosing OEM parts is the optimal decision for guaranteeing superior quality and perfect performance. These components undergo stringent quality checks and are carefully constructed to comply with GM's factory specifications, ensuring a smooth installation process.

ChevyPartsGiant.com is a leading supplier of genuine GM parts such as GM 12592195 Rear Main Seal. Our website boasts an extensive inventory of OEM GM parts, available at highly competitive prices in the market. Should you require any new genuine GM parts, rest assured we will deliver them swiftly and efficiently to your doorstep. Furthermore, all our parts come with the assurance of a manufacturer's warranty. For detailed Chevy parts information, click here.
Choose ChevyPartsGiant for discounted prices, exceptional service and fast delivery