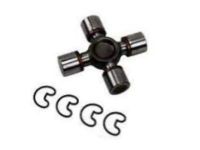
Make sure this part fits

GM 26064030
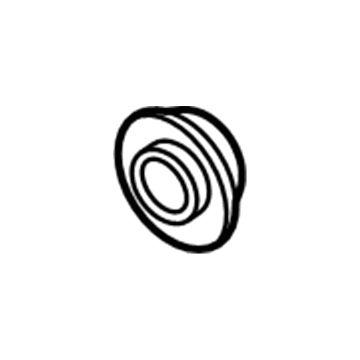
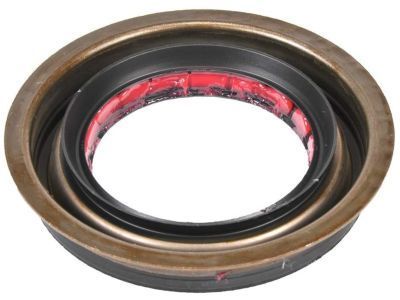
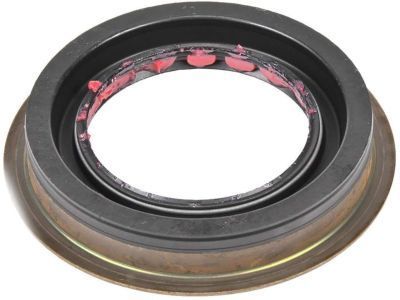
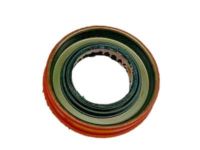
Pinion Seal

1998-2023 GM

Customer Questions & Expert Answers (12)
GM 26064030 Pinion Seal
  • Part Description
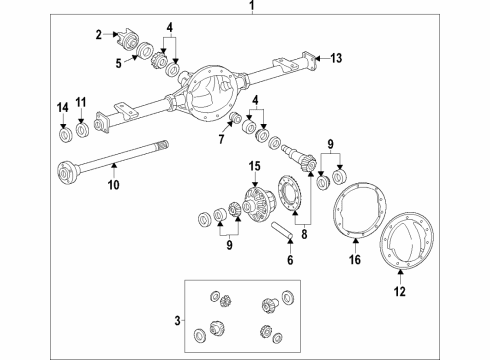
    Seal, Differential Drive Pinion Shaft Bearing; Differential Seal
  • Manufacturer
    General Motors
Make sure this part fits
$27.03 MSRP: $50.75
You Save: $23.72 (47%)
Ships in 1-2 Business Days
1
ADD TO CART
  • Related Parts
  • Product Specifications
  • Vehicle Fitment
  • Customer Questions & Expert Answers
  • Product Specifications

    BrandGenuine GM
    Manufacturer Part Number26064030
    Part DescriptionSeal, Differential Drive Pinion Shaft Bearing; Differential Seal
    Item Dimensions4.6 x 4.7 x 0.9 inches
    Item Weight0.50 Pounds
    ConditionNew
    Fitment TypeDirect Replacement
    ManufacturerGeneral Motors
    SKU26064030
    WarrantyThis genuine GM part is guaranteed by GM's factory warranty.
    Shipping & ReturnShipping Policy Return Policy
    Warning: California's Proposition 65
  • Vehicle Fitment

    Year Make Model Trim Engine
    2002-2006 Cadillac EscaladeBase8 Cyl 5.3 L GAS, 8 Cyl 6.0 L GAS
    2003-2006 Cadillac Escalade ESVBase8 Cyl 6.0 L GAS
    2002-2006 Cadillac Escalade EXTBase8 Cyl 6.0 L GAS
    2002-2006 Chevrolet Avalanche 1500Base, LS, LT, North Face, On Road Edition, WBH, Z66, Z718 Cyl 5.3 L FLEX, 8 Cyl 5.3 L GAS
    2002-2006 Chevrolet Avalanche 2500Base, LS, LT8 Cyl 8.1 L GAS
    2011-2014 Chevrolet Express 1500Base, LS, LT6 Cyl 4.3 L GAS, 8 Cyl 5.3 L FLEX
    2011-2017, 1998-2002 Chevrolet Express 2500Base, LS, LT4 Cyl 2.8 L DIESEL, 6 Cyl 4.3 L GAS, 8 Cyl 4.8 L FLEX, 8 Cyl 5.0 L GAS, 8 Cyl 5.7 L BI-FUEL, 8 Cyl 5.7 L CNG, 8 Cyl 5.7 L GAS, 8 Cyl 6.0 L CNG, 8 Cyl 6.0 L FLEX, 8 Cyl 6.0 L GAS, 8 Cyl 6.5 L DIESEL, 8 Cyl 6.6 L DIESEL
    2021-2023, 2011-2017, 1998-2002 Chevrolet Express 3500Base, LS, LT4 Cyl 2.8 L DIESEL, 6 Cyl 4.3 L FLEX, 6 Cyl 4.3 L GAS, 8 Cyl 4.8 L FLEX, 8 Cyl 5.7 L BI-FUEL, 8 Cyl 5.7 L CNG, 8 Cyl 5.7 L GAS, 8 Cyl 6.0 L CNG, 8 Cyl 6.0 L FLEX, 8 Cyl 6.0 L GAS, 8 Cyl 6.5 L DIESEL, 8 Cyl 6.6 L DIESEL, 8 Cyl 6.6 L GAS, 8 Cyl 7.4 L GAS, 8 Cyl 8.1 L GAS
    1999-2010 Chevrolet Silverado 1500Base, Hybrid, LS, LT, LTZ, SS, WT, XFE, Z71 Off-Road6 Cyl 4.3 L GAS, 8 Cyl 4.8 L FLEX, 8 Cyl 4.8 L GAS, 8 Cyl 5.3 L FLEX, 8 Cyl 5.3 L FULL HYBRID EV-GAS (FHEV), 8 Cyl 5.3 L GAS, 8 Cyl 6.0 L GAS, 8 Cyl 6.2 L FLEX
    2005-2006, 2001-2003 Chevrolet Silverado 1500 HDBase, LS, LT8 Cyl 6.0 L GAS
    View More
  • Customer Questions & Expert Answers

    Q:
    Can you help me check if this 26064030 is the right part for my car? Posted by ChevyPartsGiant Specialist
    A:
    Please Select Your Vehicle model to see if part number 26064030 is suitable before ordering.
    Posted by ChevyPartsGiant Specialist
    Q:
    How to replace the Differential Seal in the drive pinion housing on Cadillac Escalade ESV? Posted by Customer
    A:
    The following tools are required to change drive pinion housing or seal: pinion seal installer (J 44414), split-plate bearing puller (J 22912-01), pinion cone and side bearing installer (J 24433), pinion bearing installer (J 37624), universal driver handle 3/4 in -- 10 (J 8092), rear pinion bearing race installer (J 8608) and flange/pulley holding tool (J 8614-01). First drain axle lubricant after lifting the vehicle followed by taking out axle shafts then make a note of the rear propeller shaft position to the rear axle pinion yoke. The propeller shaft needs to be disconnected after wrapping the bearing caps with tape to avoid bearing roller loss. Record the measurement of pinion and ring gear rotational torque taken with an inch-pound torque wrench for later axle assembly. First remove the retainer bolts from the pinion gear bearing then remove the retainer followed by the pinion and shortly after remove the selective shim. Record the required pinion rotation torque that you measure before using the flange/pulley holding tool (J 8614-01) for pinion nut extraction. The pinion yoke and pinion oil seal should be unplugged from the flange/pulley holding tool (J 8614-01). Later take out the outer and inner pinion bearings using the split-plate bearing puller (J 22912-01) over a hydraulic press. Crank the pinion bearing installer (J 37624) with universal driver handle (J 8092) to put the inner pinion bearing cup in place before ringing up the outer pinion bearing cup with rear pinion bearing race installer (J 8608) and universal driver handle (J 8092). After inserting the inner pinion bearing onto its position using the pinion cone and side bearing installer (J 24433), users must add a new collapsible spacer followed by pinion bearing lubrication and the final pinion installation into the bearing retainer. Position the outer pinion bearing and fresh pinion oil seal into their proper places with the help of the pinion seal installer (J 44414). Sealant application occurs on the splines of the pinion yoke followed by its installation in alignment with pre-made removal marks onto the pinion shaft. Using flange/pulley holding tool (J 8614-01) maintain pinion end play readiness as you tighten the washer and newer pinion nut. Measure the rotating pinion torque which should be 0.40 - 0.57 nm (3 - 5 inch lbs.) more than the recorded removal torque. You should turn the pinion several times after achieving the specified torque to verify bearing seating before repeating the torque measurement for adjustments. Start by choosing the proper thickness of pinion gear bearing retainer shim, then apply sealant to both sealing surfaces followed by shim placement facing the unmachined area before adding sealant to the shim and finally tighten retainer bolts to 88 nm (65 ft. Lbs.). You must check the pinion and ring gear's rotating torque which should lie between 3.9 - 6.2 nm (30 - 55 inch lbs.) for new bearings or between 2.8-5.6 nm (25-50 inch lbs.) for used bearings during the testing process. A preload adjustment needs to be made on the pinion or differential side bearings when required. After realignment of reference marks completes the installation of propeller shaft while retaining clamps and bolts secure in place and axle shafts reattach before lubricating the axle and allowing the vehicle to descend.
    Posted by ChevyPartsGiant Specialist
    Q:
    How to replace the drive pinion housing or Differential Seal on Chevrolet Silverado 2500? Posted by Customer
    A:
    The required toolkit to perform drive pinion housing or seal replacement includes j 44414 pinion seal installer along with j 22912-01 bearing puller and j 24433 pinion cone and side bearing installer and j 37624 Pinion Bearing installer and j 8092 driver handle and j 8608 rear Pinion Bearing race installer and j 8614-01 flange/pulley holding tool. Start by elevating the vehicle and note the position of driveline parts versus propeller shaft connections and axles just before dismantling the components. Discard all lubricant from the axle before extracting its shafts. A reference mark established on the rear propeller shaft and rear axle pinion yoke should be followed by axle propeller shaft disconnection while bearing caps need to be wrapped with tape for bearing roller protection. Check the resistance of pinion and ring gear rotation by using an inch-pound torque wrench to perform torque measurement. Apply a reference mark on the pinion before removing its bearing retainer bolts and allowing removal of both original retainer pieces and the pinion itself. Record the rotational torque value of the pinion for reassembly after measuring it with the selective shim removed. Use tool j 8614-01 to first remove the pinion nut while retaining it then take away the washer. The j 8614-2 and j 8614-3 should be used with j 8614-01 to extract the pinion yoke. Proceed to remove the pinion oil seal after taking out the outer Pinion Bearing and the collapsible spacer and the pinion. The j 22912-01 should be used with a hydraulic press to remove the inner Pinion Bearing and to install it along with a hammer and brass drift that removes both outer and inner Pinion Bearing cups. The inner Pinion Bearing cup installation requires j 37624 with j 8092 and the outer Pinion Bearing cup installation demands usage of j 8608 alongside j 8092 . Follow installation of the inner Pinion Bearing using j 24433 by adding a new collapsible spacer while performing necessary Pinion Bearing lubrication procedures. Install the bearing retainer followed by the outer Pinion Bearing then install a new pinion oil seal through the use of tool j 44414. Seal the splines of the pinion yoke then place the yoke onto the pinion shaft while ensuring marked alignment from the initial removal process. Begin by tightening the new pinion nut using the j 8614-01 until the pinion end play reaches its limit while rotating the pinion for bearing seating. Use the j 8614-01 to measure the pinion's rotating torque then adjust it to reach a torque level which exceeds the removal measurement by 0.40-0.57 nm (3-5 inch lbs.). Check the bearing seating before selecting the proper shim thickness for the pinion gear bearing retainer. Apply sealant on the sealing surface and install the shim in the correct position after which reassemble the components. First layer sealant on the shim surface then install the pinion gear bearing retainer along with tightening its bolts to 88 nm (65 ft. Lbs.). Verify that the pinion and ring gear torque measurement maintains figures within the authorized norms. The preload of pinion or differential side bearings requires adjustment according to the required changes. After aligning reference marks on the propeller shaft users should reinstall it while securing clamps and bolts then replace axle shafts before filling the axle with lubricant and lowering the vehicle.
    Posted by ChevyPartsGiant Specialist
    Q:
    How to replace the Differential Seal in the drive pinion housing on Chevrolet Silverado 1500? Posted by Customer
    A:
    Observing component positions of the driveline relative to propeller shaft and axles is crucial before disassembling the drive pinion housing or seal. Detailed documentation must be made ensuring the components return to their original positions by following all noted specifications and torque values. Start vehicle elevation then support it while draining the axle lubricant from all chambers. The procedure begins by taking off the rear axle shafts together with the rear propeller shaft based on single-piece or two-piece construction. To extract the pinion you should first take out the drive pinion flange/yoke or oil seal and then employ a hydraulic press with proper tools for the operation. Calmly strike the collapsible spacer with a hammer and brass drift to pull out the outer and inner pinion bearing cups while maintaining uniform motion from side to side. To install the pinion bearing cups begin by using j 37624 (Pinion Bearing Installer) and j 8092 (Universal Driver Handle) on the inner cup and continue with the outer cup through usage of j 8608 (Pinion Bearing Cup Installer) accompanied by j 8092 (Universal Driver Handle). Sealant goes on the selective shim before installing the pinion gear bearing retainer with its bolts secured at 88 nm (65 lb ft). After reinstalling the drive pinion flange/yoke and oil seals and propeller shaft it is necessary to reinstall the rear axle shafts. To finish the procedure fill the axle with needed lubricant before taking away the support to drop the vehicle.
    Posted by ChevyPartsGiant Specialist
    Q:
    How to replace the Differential Seal in the drive pinion housing on GMC Yukon XL 2500? Posted by Customer
    A:
    The following tools are required to change drive pinion housing or seal: pinion seal installer (J 44414), split-plate bearing puller (J 22912-01), pinion cone and side bearing installer (J 24433), pinion bearing installer (J 37624), universal driver handle 3/4 in -- 10 (J 8092), rear pinion bearing race installer (J 8608) and flange/pulley holding tool (J 8614-01). First drain axle lubricant after lifting the vehicle followed by taking out axle shafts then make a note of the rear propeller shaft position to the rear axle pinion yoke. The propeller shaft needs to be disconnected after wrapping the bearing caps with tape to avoid bearing roller loss. Record the measurement of pinion and ring gear rotational torque taken with an inch-pound torque wrench for later axle assembly. First remove the retainer bolts from the pinion gear bearing then remove the retainer followed by the pinion and shortly after remove the selective shim. Record the required pinion rotation torque that you measure before using the flange/pulley holding tool (J 8614-01) for pinion nut extraction. The pinion yoke and pinion oil seal should be unplugged from the flange/pulley holding tool (J 8614-01). Later take out the outer and inner pinion bearings using the split-plate bearing puller (J 22912-01) over a hydraulic press. Crank the pinion bearing installer (J 37624) with universal driver handle (J 8092) to put the inner pinion bearing cup in place before ringing up the outer pinion bearing cup with rear pinion bearing race installer (J 8608) and universal driver handle (J 8092). After inserting the inner pinion bearing onto its position using the pinion cone and side bearing installer (J 24433), users must add a new collapsible spacer followed by pinion bearing lubrication and the final pinion installation into the bearing retainer. Position the outer pinion bearing and fresh pinion oil seal into their proper places with the help of the pinion seal installer (J 44414). Sealant application occurs on the splines of the pinion yoke followed by its installation in alignment with pre-made removal marks onto the pinion shaft. Using flange/pulley holding tool (J 8614-01) maintain pinion end play readiness as you tighten the washer and newer pinion nut. Measure the rotating pinion torque which should be 0.40 - 0.57 nm (3 - 5 inch lbs.) more than the recorded removal torque. You should turn the pinion several times after achieving the specified torque to verify bearing seating before repeating the torque measurement for adjustments. Start by choosing the proper thickness of pinion gear bearing retainer shim, then apply sealant to both sealing surfaces followed by shim placement facing the unmachined area before adding sealant to the shim and finally tighten retainer bolts to 88 nm (65 ft. Lbs.). You must check the pinion and ring gear's rotating torque which should lie between 3.9 - 6.2 nm (30 - 55 inch lbs.) for new bearings or between 2.8-5.6 nm (25-50 inch lbs.) for used bearings during the testing process. A preload adjustment needs to be made on the pinion or differential side bearings when required. After realignment of reference marks completes the installation of propeller shaft while retaining clamps and bolts secure in place and axle shafts reattach before lubricating the axle and allowing the vehicle to descend.
    Posted by ChevyPartsGiant Specialist
    Q:
    How to replace the drive pinion housing or Differential Seal on GMC Sierra 3500? Posted by Customer
    A:
    The required toolkit to perform drive pinion housing or seal replacement includes j 44414 pinion seal installer along with j 22912-01 bearing puller and j 24433 pinion cone and side bearing installer and j 37624 Pinion Bearing installer and j 8092 driver handle and j 8608 rear Pinion Bearing race installer and j 8614-01 flange/pulley holding tool. Start by elevating the vehicle and note the position of driveline parts versus propeller shaft connections and axles just before dismantling the components. Discard all lubricant from the axle before extracting its shafts. A reference mark established on the rear propeller shaft and rear axle pinion yoke should be followed by axle propeller shaft disconnection while bearing caps need to be wrapped with tape for bearing roller protection. Check the resistance of pinion and ring gear rotation by using an inch-pound torque wrench to perform torque measurement. Apply a reference mark on the pinion before removing its bearing retainer bolts and allowing removal of both original retainer pieces and the pinion itself. Record the rotational torque value of the pinion for reassembly after measuring it with the selective shim removed. Use tool j 8614-01 to first remove the pinion nut while retaining it then take away the washer. The j 8614-2 and j 8614-3 should be used with j 8614-01 to extract the pinion yoke. Proceed to remove the pinion oil seal after taking out the outer Pinion Bearing and the collapsible spacer and the pinion. The j 22912-01 should be used with a hydraulic press to remove the inner Pinion Bearing and to install it along with a hammer and brass drift that removes both outer and inner Pinion Bearing cups. The inner Pinion Bearing cup installation requires j 37624 with j 8092 and the outer Pinion Bearing cup installation demands usage of j 8608 alongside j 8092 . Follow installation of the inner Pinion Bearing using j 24433 by adding a new collapsible spacer while performing necessary Pinion Bearing lubrication procedures. Install the bearing retainer followed by the outer Pinion Bearing then install a new pinion oil seal through the use of tool j 44414. Seal the splines of the pinion yoke then place the yoke onto the pinion shaft while ensuring marked alignment from the initial removal process. Begin by tightening the new pinion nut using the j 8614-01 until the pinion end play reaches its limit while rotating the pinion for bearing seating. Use the j 8614-01 to measure the pinion's rotating torque then adjust it to reach a torque level which exceeds the removal measurement by 0.40-0.57 nm (3-5 inch lbs.). Check the bearing seating before selecting the proper shim thickness for the pinion gear bearing retainer. Apply sealant on the sealing surface and install the shim in the correct position after which reassemble the components. First layer sealant on the shim surface then install the pinion gear bearing retainer along with tightening its bolts to 88 nm (65 ft. Lbs.). Verify that the pinion and ring gear torque measurement maintains figures within the authorized norms. The preload of pinion or differential side bearings requires adjustment according to the required changes. After aligning reference marks on the propeller shaft users should reinstall it while securing clamps and bolts then replace axle shafts before filling the axle with lubricant and lowering the vehicle.
    Posted by ChevyPartsGiant Specialist
    Q:
    How is the pinion nut removed for the 2004 Chevrolet Silverado 3500? Posted by Customer
    A:
    Install the J 8614-01, hold the pinion nut, and then remove the washer.
    Posted by ChevyPartsGiant Specialist
    See expert answers on similar Differential Seal
    Q:
    What should be done after ensuring the bearings are seated for the 2008 Chevrolet Silverado 1500? Posted by Customer
    A:
    Determine the selective shim thickness for the pinion gear bearing retainer, apply sealant (GM P/N 1052942 or equivalent) to the sealing surface, and install the shim.
    Posted by ChevyPartsGiant Specialist
    See expert answers on similar Differential Seal
    Q:
    What should be applied to the surface of the selective shim during installation for the 2009 Chevrolet Silverado 1500? Posted by Customer
    A:
    Apply sealant.
    Posted by ChevyPartsGiant Specialist
    See expert answers on similar Differential Seal
    Q:
    What tools are needed to replace the drive pinion housing or seal for the 2004 Chevrolet Suburban 1500? Posted by Customer
    A:
    The necessary tools are: Pinion Seal Installer (J 44414), Split-Plate Bearing Puller (J 22912-01), Pinion Cone and Side Bearing Installer (J 24433), Pinion Bearing Installer (J 37624), Universal Driver Handle 3/4 in -- 10 (J 8092), Rear Pinion Bearing Race Installer (J 8608), and Flange/Pulley Holding Tool (J 8614-01).
    Posted by ChevyPartsGiant Specialist
    See expert answers on similar Differential Seal
    Q:
    How is the pinion nut tightened for the 2004 Cadillac Escalade EXT? Posted by Customer
    A:
    Install the washer and a new pinion nut, then tighten the nut while holding the Flange/Pulley Holding Tool (J 8614-01) until the pinion end play is just taken up.
    Posted by ChevyPartsGiant Specialist
    See expert answers on similar Differential Seal
    Q:
    What sealant should be applied to the sealing surface of the shim for the 2008 GMC Sierra 1500? Posted by Customer
    A:
    Apply sealant, GM P/N 1052942 (Canadian P/N 10953466) to the sealing surface.
    Posted by ChevyPartsGiant Specialist
    See expert answers on similar Differential Seal
    If you have any questions about this product, please don't hesitate to ask us. We will be happy to help you!

OEM GM 26064030, Excellent Performance and Perfect Fitment

To ensure reliability, purchase GM part # 26064030 Pinion Seal. It is sometimes referred to as GM Differential Seal. Choosing OEM parts is the optimal decision for guaranteeing superior quality and perfect performance. These components undergo stringent quality checks and are carefully constructed to comply with GM's factory specifications, ensuring a smooth installation process.

ChevyPartsGiant.com is a leading supplier of genuine GM parts such as GM 26064030 Pinion Seal. Our website boasts an extensive inventory of OEM GM parts, available at highly competitive prices in the market. Should you require any new genuine GM parts, rest assured we will deliver them swiftly and efficiently to your doorstep. Furthermore, all our parts come with the assurance of a manufacturer's warranty. For detailed Chevy parts information, click here.
Choose ChevyPartsGiant for discounted prices, exceptional service and fast delivery