Make sure this part fits

GM 26049394
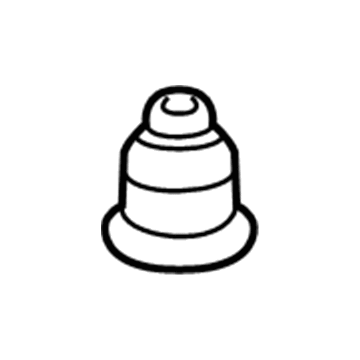
Dust Seal, Rear

1984-2005 GM

Customer Questions & Expert Answers (10)
GM 26049394 Dust Seal, Rear
  • Part Description
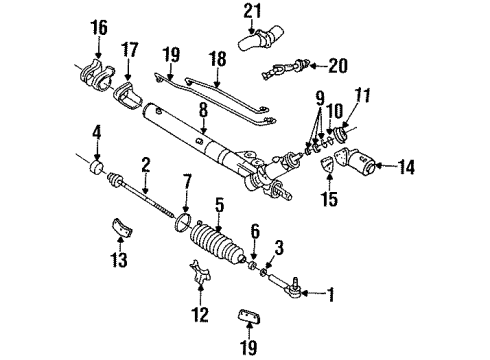
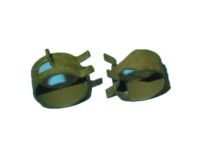
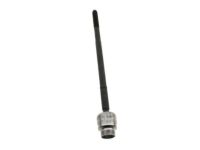
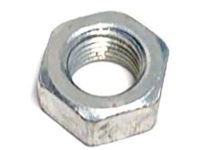
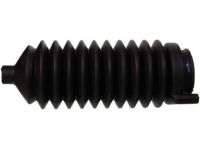
    Seal, Rear Axle; Power Steering Cylinder Boot Kit
  • Position
    Rear
  • Replaces
    07828084, 7828084
  • Manufacturer
    General Motors
  • Manufacturer's Notes
    This part is discontinued.
Make sure this part fits
  • Vehicle Fitment

    Year Make Model Trim Engine
    1984-1992 Buick CenturyCustom, Estate Wagon, Limited, Special, T-Type4 Cyl 2.5 L GAS, 6 Cyl 2.8 L GAS, 6 Cyl 3.0 L GAS, 6 Cyl 3.3 L GAS, 6 Cyl 3.8 L GAS, 6 Cyl 4.3 L DIESEL
    1992-1999 Buick LeSabreCustom, Limited6 Cyl 3.8 L GAS
    1997-1999 Buick Park AvenueBase, Ultra6 Cyl 3.8 L GAS
    1992-1996 Buick RegalCustom, Gran Sport, Limited, Olympic Gold Edition6 Cyl 3.1 L GAS, 6 Cyl 3.8 L GAS
    1995-1999 Buick RivieraBase6 Cyl 3.8 L GAS
    1992-1998, 1989 Buick SkylarkCustom, Gran Sport, Limited, Olympic Gold Edition4 Cyl 2.3 L GAS, 4 Cyl 2.4 L GAS, 4 Cyl 2.5 L GAS, 6 Cyl 3.1 L GAS, 6 Cyl 3.3 L GAS
    1993 Cadillac 60 SpecialBase8 Cyl 4.9 L GAS
    1993 Cadillac AllanteBase, Indianapolis 500 Pace Car, Value Leader8 Cyl 4.6 L GAS
    1985-1997 Cadillac DeVilleBase, Cabriolet, Concours, d'Elegance, Spring Edition, Touring6 Cyl 4.3 L DIESEL, 8 Cyl 4.1 L GAS, 8 Cyl 4.5 L GAS, 8 Cyl 4.6 L GAS, 8 Cyl 4.9 L GAS
    1992-1997 Cadillac EldoradoBase, ETC, Sport, Touring8 Cyl 4.6 L GAS, 8 Cyl 4.9 L GAS
    View More
    Warning: California's Proposition 65
  • Customer Questions & Expert Answers

    Q:
    Can you help me check if this 26049394 is the right part for my car? Posted by ChevyPartsGiant Specialist
    A:
    Please Select Your Vehicle model to see if part number 26049394 is suitable before ordering.
    Posted by ChevyPartsGiant Specialist
    Q:
    How to replace the right-hand axle wheel seal on the stub axle shaft of the Automatic Transaxle-4T40-E/4T45-E on Chevrolet Cavalier? Posted by Customer
    A:
    In order to replace the right-hand axle oil seal on the stub Axle Shaft of the automatic transaxle-4t40-e/4t45-e, first remove the drive axle assembly, making sure not to damage the seal bore or sleeve assembly in a bid to avoid fluid leaks. Next, remove and discard the snap ring on the stub Axle Shaft and pull the stub Axle Shaft out of the transaxle using the j6125-1b (Slide Hammer) and j38868 (Gear Installer Remover). Gently pull and turn the shaft until the snap ring on the output shaft at the differential are seated in the taper of the differential side gear and then remove the inner snap ring. Removal of the right-hand axle seal from the transaxle with the help of the j23129 (Axle Boot Remover) and j6125-1b (Slide Hammer) or a screwdriver is required. For installation, install the new seal by using the j41102 (Axle Seal Installer) to lubricate the seal lip with a light wipe of transmission oil. Slowly maneuver the stub Axle Shaft over the lip seal so the shaft spears do not scrape against the lip sealing surface to cause damage. Add the two new snap rings on the stub shaft; then tap the stub shaft into the transmission using a mallet. Thereafter re-install the drive axle assembly, lower your vehicle and finally check the oil levels as well the shaft and seal for any leaks.
    Posted by ChevyPartsGiant Specialist
    Q:
    How to replace the right front wheel drive shaft wheel seal on Chevrolet Lumina? Posted by Customer
    A:
    The first step to replace the right front wheel drive shaft oil seal requires lifting the vehicle securely. Start by taking off the right front tire together with wheel followed by removing the right engine splash shield. Detach the right stabilizer shaft brackets from the right lower Control Arm and separate the right Tie Rod End from the right Steering Knuckle together with the right lower Ball Joint from the right Control Arm. The right drive axle must be disconnected from the transaxle while being fastened to the right Steering Knuckle and strut. Use a screwdriver alongside a suitable tool to remove the old seal from its installation area but protect the channel where it resides. To install a new seal apply transaxle fluid to the lip before using the right side axle seal installer (J29130). Guiding the Axle Shaft through the lip seal while using the axle seal protector (J37292-B) ensures contact between splines and seal lip surface remains prevented. After connecting the drive axle to the transaxle users must detach the axle seal protector (J37292-B). You must first install the right lower Ball Joint to the right Steering Knuckle and then the right Tie Rod End and right stabilizer shaft bracket to the right lower Control Arm. After the repairs are done the technician should install the right engine splash shield then put back the right front tire followed by the wheel before lowering the vehicle to check fluid levels and inspect the work while monitoring for leaks.
    Posted by ChevyPartsGiant Specialist
    Q:
    How to replace the left front wheel drive shaft wheel seal on Chevrolet Lumina? Posted by Customer
    A:
    Start the procedure for left front wheel drive shaft oil seal replacement by adequately supporting the vehicle through proper vehicle lifting. Start replacement by removing both the left front tire and wheel and then the left engine splash shield. Detach the stabilizer shaft brackets from the left lower Control Arm before you remove both Tie Rod End from the left Steering Knuckle and the left lower Ball Joint from the left lower Control Arm. The left drive axle requires disconnection from the transaxle before securing it to the left Steering Knuckle and strut. A suitable tool such as a screwdriver should be used to remove seal (409) from its bore while protecting the bore's surface. Apply transaxle fluid on the seal lip before inserting a new seal (409) using the left side axle seal installer (J34115) along with the axle seal protector (J37292-B) inside it. While inserting the Axle Shaft ensure it passes by the lip seal without the splines touching the lip surface to avoid seal damage. After reattaching the drive axle connect to the transaxle operator should remove the axle seal protector (J37292-B) to start left lower Ball Joint installation onto the left Control Arm and then left Tie Rod End installation onto the left wheel knuckle followed by the left stabilizer shaft bracket installation onto the left Control Arm. Put back the left engine splash shield followed by installing the left front tire and wheel. Then lower the vehicle. Another requirement entails checking the fluid level to the specified amount while inspecting that the repair work was correctly finalized without leaks.
    Posted by ChevyPartsGiant Specialist
    Q:
    Is it important to replace the stub axle shaft sleeve and seal together for the 2002 Chevrolet Cavalier? Posted by Customer
    A:
    Yes, it is crucial to replace them together; do not replace them separately.
    Posted by ChevyPartsGiant Specialist
    See expert answers on similar Wheel Seal
    Q:
    What tool is used to install a new sleeve on the stub axle shaft for the 2004 Chevrolet Cavalier? Posted by Customer
    A:
    Use the Stub Shaft Sleeve Installer (J 41228).
    Posted by ChevyPartsGiant Specialist
    See expert answers on similar Wheel Seal
    Q:
    How should the new seal be installed for the 2003 Chevrolet Cavalier? Posted by Customer
    A:
    It should be seated flush to the outer bore area.
    Posted by ChevyPartsGiant Specialist
    See expert answers on similar Wheel Seal
    Q:
    What tool is used to install the new axle seal for the 2000 Chevrolet Cavalier? Posted by Customer
    A:
    Use the J 41102 Axle Seal Installer.
    Posted by ChevyPartsGiant Specialist
    See expert answers on similar Wheel Seal
    Q:
    What should be avoided when filling the transaxle for the 2001 Chevrolet Cavalier? Posted by Customer
    A:
    Avoid overfilling the transaxle to prevent foaming, loss of fluid, shift complaints, and potential damage.
    Posted by ChevyPartsGiant Specialist
    See expert answers on similar Wheel Seal
    Q:
    What should be removed after raising for the 2005 Chevrolet Cavalier? Posted by Customer
    A:
    Remove the drive axle assembly.
    Posted by ChevyPartsGiant Specialist
    See expert answers on similar Wheel Seal
    If you have any questions about this product, please don't hesitate to ask us. We will be happy to help you!

OEM GM Dust Seal, Rear 26049394 Designed for Proper Fit and Performance

Original OEM GM parts deliver superior quality and meet all performance standards needed for optimal automotive operation. The authentic part identified by 26049394 Dust Seal, Rear is available in the market under the name GM Wheel Seal. This genuine product has a full warranty coverage from the manufacturer available at all authorized GM dealers throughout the United States. This part 26049394 Dust Seal, Rear fits certain Chevrolet Camaro, Cavalier, Lumina models, as well as Cadillac Allante, DeVille, Eldorado. Additionally, it is compatible with Buick Regal, Riviera, Skylark and Pontiac Firebird, Grand Prix, Bonneville models.
The original GM component designated by manufacturer part number 26049394 maintains top performance when functioning as the Seal, Rear Axle; Power Steering Cylinder Boot Kit unit at its Rear. The component 26049394 is constructed from durable material and its dimensions span 2.4 x 2.4 x 1.4 inches while weighing 0.30 Pounds. The Direct Replacement component is ready in New condition to ensure full compatibility with your vehicle system. This component receives the designation of Inner Tie Rod Cover; Tie Rod Seal; Outer Boot; Dust Shield; Grease Seal; Dust Cap; Assembly Seal; Lock Nut Seal.. The part 26049394 has available replacement options 07828084, 7828084. GM manufacturer provides a warranty that ensures reliable operation of this product. The Shipping Policy and Return Policy pages outline complete details regarding shipping procedures and return processes.
If you want to save money in the long run on maintenance and repairs, you should choose OEM products because they're of the top level of durability. Are you on the quest of finding GM parts, our site is worth a visit. We stock an endless selection of high-quality GM components including things like ignition coils all the way through to fan shrouds and all at prices that can not be matched. You have nothing to worry about because all our OEM parts are covered with a manufacturer warranty, which guarantees superior quality and value.