ChevyParts
My Garage
My Account
Cart
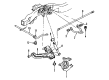
OEM Buick Rainier Shock Absorber
Suspension Shock Absorber- Select Vehicle by Model
- Select Vehicle by VIN
Select Vehicle by Model
orMake
Model
Year
Select Vehicle by VIN
For the most accurate results, select vehicle by your VIN (Vehicle Identification Number).
5 Shock Absorbers found


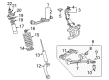
Buick Rainier Shock Absorber, Front Part Number: 15098725
$139.57 MSRP: $260.43You Save: $120.86 (47%)

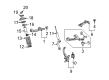
Buick Rainier Shock Absorber, Front Part Number: 15098727
$120.98 MSRP: $227.20You Save: $106.22 (47%)Ships in 1-2 Business Days
Buick Rainier Shock Absorber, Front Driver Side Part Number: 15098726
$79.86 MSRP: $236.33You Save: $156.47 (67%)


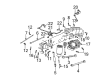
Buick Rainier Shock Absorber Part Number: 25820699

Buick Rainier Shock Absorber Part Number: 88965472
Buick Rainier Shock Absorber
Want to cut long-term maintenance and repair costs? Choose OEM Shock Absorber. Those parts deliver top durability you can trust. On our site, you'll find a huge catalog of genuine Buick Rainier parts. Prices are unbeatable, so you can keep more in your pocket. Every OEM Buick Rainier Shock Absorber includes a manufacturer's warranty. You can also get an easy return policy that keeps buying risk free. Fast delivery, get your car on the road quickly. It's simple to search, compare, and order. Stop guessing about quality or fit. Order today and save with parts that last.
Buick Rainier Shock Absorber Parts Questions & Experts Answers
- Q: How should one safely drain oil from gas charged shock absorbers on Buick Rainier?A:Gas-charged shock absorbers include high-pressure gas within their tubes therefore you should never remove the snap ring to prevent severe personal injuries caused by gas expulsion. Safety glasses should be worn during shock absorber drilling and center punching to avoid tube puncture that could result in personal injury. Use a centerpunch to make the first indentation 10 mm (0.4 inch) from the bottom of the tube. Place the shock absorber inside the vise while it faces horizontally with its rod stretched completely to its longest length. Fit a 5 mm (3/16 inch) drill bit into the centerpunch hole to let gas or gas/oil mixture exhaust before collecting escaping oil using shop towels. A second hole at the centerpunch location in the tube's center should be drill using a 5 mm (3/16 inch) drill bit which will also release oil. Similar to the first step, shop towels should be used to catch the escaping oil. Using the drain pan with holes facing down position the shock absorber horizontally and move rod through tube in and out movements to evacuate all oil from the absorber.

Related Buick Rainier Parts
 Buick Rainier Air Suspension Compressor
 Buick Rainier Ball Joint
 Buick Rainier Coil Spring Insulator
 Buick Rainier Coil Springs
 Buick Rainier Control Arm
 Buick Rainier Control Arm Bracket
 Buick Rainier Ride Height Sensor
 Buick Rainier Shock and Strut Boot
 Buick Rainier Steering Knuckle
 Buick Rainier Suspension Strut Rod
 Buick Rainier Sway Bar Bushing
 Buick Rainier Sway Bar Link