ChevyParts
My Garage
My Account
Cart
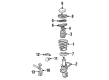
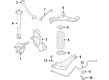
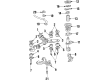
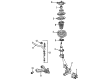
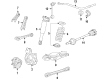
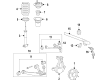
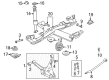
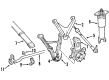
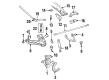
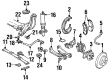
OEM Cadillac Sway Bar Bushing
Stabilizer Sway Bar Bushing- Select Vehicle by Model
- Select Vehicle by VIN
Select Vehicle by Model
orMake
Model
Year
Select Vehicle by VIN
For the most accurate results, select vehicle by your VIN (Vehicle Identification Number).
79 Sway Bar Bushings found


Cadillac Stabilizer Bar Bushing Part Number: 20907869
$4.93 MSRP: $8.81You Save: $3.88 (45%)Ships in 1-3 Business DaysProduct Specifications- Other Name: Insulator, Stabilizer Shaft; Sway Bar Bushing; Bushings; Insulator, Suspension
- Position: Rear


Cadillac Stabilizer Bar Bushing, Rear Part Number: 15873716
$9.16 MSRP: $16.34You Save: $7.18 (44%)Ships in 1-3 Business DaysProduct Specifications- Other Name: Insulator-Rear Stabilizer Shaft; Sway Bar Bushing; Bushings; Insulator, Stabilizer Shaft
- Position: Rear


Cadillac Bushings Part Number: 10198370
$2.02 MSRP: $3.60You Save: $1.58 (44%)Ships in 1-3 Business DaysProduct Specifications- Other Name: Insulator, Stabilizer Shaft; Sway Bar Bushing
- Position: Front


Cadillac Stabilizer Bar Bushing Part Number: 20761163
$4.93 MSRP: $8.79You Save: $3.86 (44%)Product Specifications- Other Name: Insulator, Stabilizer Shaft; Sway Bar Bushing; Bushings
- Position: Rear


Cadillac Stabilizer Bar Bushing, Blue, Front Part Number: 3545376
$6.75 MSRP: $9.09You Save: $2.34 (26%)Ships in 1-2 Business DaysProduct Specifications- Other Name: Insulator-Front Stabilizer Shaft *Blue; Sway Bar Bushing; Bushings; Insulator, Stabilizer Shaft
- Position: Front

Cadillac Stabilizer Bar Bushing Part Number: 25741039
$38.77 MSRP: $69.24You Save: $30.47 (45%)Ships in 1-2 Business DaysProduct Specifications- Other Name: Insulator, Stabilizer Shaft; Sway Bar Bushing; Bushings
- Position: Rear

Cadillac Stabilizer Bar Bushing Part Number: 14086831
$8.78 MSRP: $13.00You Save: $4.22 (33%)Ships in 1-2 Business DaysProduct Specifications- Other Name: Insulator, Stabilizer Shaft; Suspension Stabilizer Bar Bushing Kit; Sway Bar Link.; Link Kit; Link; Bushing; Bushings
- Position: Front
Cadillac Stabilizer Bar Bushing Part Number: 20907868
$4.93 MSRP: $8.80You Save: $3.87 (44%)Ships in 1-3 Business DaysProduct Specifications- Other Name: Insulator, Stabilizer Shaft; Sway Bar Bushing; Bushings
- Position: Rear

Cadillac Stabilizer Bar Bushing Part Number: 15852293
$4.48 MSRP: $8.01You Save: $3.53 (45%)Ships in 1-3 Business DaysProduct Specifications- Other Name: Insulator, Stabilizer Shaft; Suspension Stabilizer Bar Bushing Kit; Stabilizer Bushing Kit; Sway Bar Bushing; Bushings
- Position: Front
- Replaces: 10356434, 25895203
Cadillac Stabilizer Bar Bushing, Rear Part Number: 15945996
$23.46 MSRP: $41.91You Save: $18.45 (45%)Product Specifications- Other Name: Insulator-Rear Stabilizer Shaft; Sway Bar Bushing; Bushings; Insulator, Stabilizer Shaft
- Position: Rear


Cadillac Stabilizer Bar Bushing, Rear Part Number: 15880709
$8.56 MSRP: $15.28You Save: $6.72 (44%)Ships in 1-3 Business DaysProduct Specifications- Other Name: Insulator-Rear Stabilizer Shaft; Sway Bar Bushing; Bushings; Insulator, Stabilizer Shaft
- Position: Rear
Cadillac Stabilizer Bar Bushing Part Number: 20761162
$4.93 MSRP: $8.79You Save: $3.86 (44%)Ships in 1-3 Business DaysProduct Specifications- Other Name: Insulator, Stabilizer Shaft; Sway Bar Bushing; Bushings
- Position: Rear

Cadillac Stabilizer Bar Bushing Part Number: 84739934
$8.50 MSRP: $15.18You Save: $6.68 (45%)Ships in 1-3 Business DaysProduct Specifications- Other Name: Insulator, Stabilizer Shaft; Sway Bar Bushing; Bushings
- Position: Front
Cadillac Stabilizer Bar Bushing, Rear Part Number: 22860854
$6.76 MSRP: $12.07You Save: $5.31 (44%)Ships in 1-3 Business DaysProduct Specifications- Other Name: Insulator-Rear Stabilizer Shaft; Sway Bar Bushing; Bushings; Insulator, Stabilizer Shaft
- Position: Rear
Cadillac Stabilizer Bar Bushing, Rear Part Number: 23122143
$4.83 MSRP: $8.61You Save: $3.78 (44%)Ships in 1-3 Business DaysProduct Specifications- Other Name: Insulator-Rear Stabilizer Shaft; Sway Bar Bushing; Sway Bar Link; Link; Bushings; Insulator, Stabilizer Shaft
- Position: Rear


Cadillac Lower Control Arm Bushing Part Number: 6270752
$1.18 MSRP: $1.86You Save: $0.68 (37%)Product Specifications- Other Name: Insulator-Stabilizer Shaft Link; Control Arm Bushing; Axle Pivot Bushing; Stabilizer Link Bushing; Strut Mount Bushing; Stabilizer Link Kit; Insulator; Shock Absorber/Strut; Steering Anti-Shock.


Cadillac Stabilizer Bar Bushing, Rear Part Number: 25771205
$138.20 MSRP: $214.26You Save: $76.06 (36%)Product Specifications- Other Name: Insulator-Rear Stabilizer Shaft; Sway Bar Bushing; Bushings; Insulator, Stabilizer Shaft
- Position: Rear


Cadillac Stabilizer Bar Bushing Part Number: 10317560
Product Specifications- Other Name: Insulator, Stabilizer Shaft; Sway Bar Bushing; Bushings
- Position: Rear


Cadillac Stabilizer Bar Bushing Part Number: 15704513
Product Specifications- Other Name: Insulator, Stabilizer Shaft; Suspension Stabilizer Bar Bushing Kit; Stabilizer Bushing Kit; Sway Bar Bushing; Bushings
- Position: Front

Cadillac Stabilizer Bar Bushing, Black Part Number: 1628813
Product Specifications- Other Name: Insulator *Black; Sway Bar Bushing; Link Bushing; Stabilizer Bar Inner Bushing; Mounting Bushing; Insulator.
| Page 1 of 4 |Next >
1-20 of 79 Results
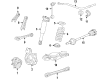
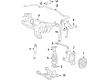
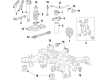
Cadillac Sway Bar Bushing
Choose OEM Sway Bar Bushing, you're making the optimal decision for superior quality and perfect performance. You can feel confident because each component goes through stringent quality checks. Every part is carefully built to comply with Cadillac's factory specifications. You'll enjoy a smooth, worry-free installation that fits just right. At ChevyPartsGiant.com, you'll find it easy to get top-quality OEM Cadillac Sway Bar Bushing. You can shop at highly competitive prices and protect your budget. All our genuine Cadillac parts include a dependable manufacturer's warranty. You'll also appreciate our straightforward return policy and swift delivery services for extra convenience.
Cadillac Sway Bar Bushing Parts and Q&A
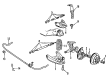
- Q: How to replace the front sway bar bushing on Cadillac CTS?A:The first step to change sway bar bushings requires vehicle elevation followed by support. Start by removing the sway bar mounting bolts along with the bracket from the shaft. After that disconnect the sway bar bushings from the sway bar. Install the sway bar bushings onto the sway bar with the slit at the rear end while also following the Fastener Notice in Service Precaution. Install the sway bar bracket followed by its mounting bolts while applying torque to 60 Nm (44 ft. lbs.). Finally, lower the vehicle.
- Q: How to replace the front sway bar bushing on Cadillac XLR?A:The following procedure to replace sway bar bushings starts by elevating the vehicle and proceeding with tire assembly removal. The next step requires front crossmember Sway Bar Bushing clamps to be removed followed by extraction of sway bar bushings from the sway bar. The installation procedure starts with putting sway bar bushings on the sway bar while adhering to the fastener notice in service precautions. Fasten the Sway Bar Bushing clamps by torquing clamp bolts to 58 nm (43 ft. Lbs.). After installation of the tire and wheel assemblies complete the procedure by lowering the vehicle.


Related Cadillac Parts
 Cadillac Control Arm Bushing
 Cadillac Alignment Bolt
 Cadillac Coil Springs
 Cadillac Control Arm Bolt
 Cadillac Control Arm Bracket
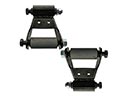 Cadillac Leaf Spring Shackle
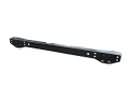 Cadillac Rear Crossmember
 Cadillac Shock and Strut Boot
 Cadillac Sway Bar Link
 Cadillac Torsion Bar
 Cadillac Trailing Arm
 Cadillac Wheel Seal