ChevyParts
My Garage
My Account
Cart
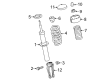
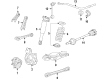
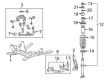
OEM Cadillac Coil Springs
Strut Spring- Select Vehicle by Model
- Select Vehicle by VIN
Select Vehicle by Model
orMake
Model
Year
Select Vehicle by VIN
For the most accurate results, select vehicle by your VIN (Vehicle Identification Number).
344 Coil Springs found

Cadillac Coil Spring, Rear Part Number: 84479872
$49.03 MSRP: $87.56You Save: $38.53 (44%)Ships in 1-3 Business DaysProduct Specifications- Other Name: Spring, Rear Spring; Coil Springs
- Position: Rear

Cadillac Coil Spring, Front Part Number: 22832839
$72.18 MSRP: $128.89You Save: $56.71 (44%)Ships in 1-3 Business DaysProduct Specifications- Other Name: Spring, Front Coil; Coil Springs; Spring; Spring, Front Chassis
- Position: Front
Cadillac Coil Spring, Front Part Number: 23225151
$58.37 MSRP: $104.23You Save: $45.86 (44%)Ships in 1-3 Business DaysProduct Specifications- Other Name: Spring, Front Chassis; Coil Springs; Spring
- Position: Front


Cadillac Spring, Front Part Number: 22938420
$79.95 MSRP: $142.76You Save: $62.81 (44%)Ships in 1-3 Business DaysProduct Specifications- Other Name: Spring, Front Chassis; Coil Springs
- Position: Front

Cadillac Coil Spring, Rear Part Number: 23153925
$36.72 MSRP: $65.58You Save: $28.86 (45%)Ships in 1-3 Business DaysProduct Specifications- Other Name: Spring, Rear Spring; Coil Springs; Spring
- Position: Rear
- Replaces: 20889385
Cadillac Coil Spring, Rear Part Number: 23153923
$33.07 MSRP: $59.06You Save: $25.99 (45%)Ships in 1-3 Business DaysProduct Specifications- Other Name: Spring, Rear Spring; Coil Springs; Spring
- Position: Rear
- Replaces: 20889379

Cadillac Coil Spring, Front Part Number: 22863247
$55.42 MSRP: $98.97You Save: $43.55 (44%)Ships in 1-3 Business DaysProduct Specifications- Other Name: Spring, Front Chassis; Coil Springs; Spring
- Position: Front

Cadillac Coil Spring, Front Part Number: 84511953
$54.14 MSRP: $96.69You Save: $42.55 (45%)Ships in 1-3 Business DaysProduct Specifications- Other Name: Spring, Front Chassis; Coil Springs; Spring
- Position: Front
Cadillac Coil Spring, Front Part Number: 22863248
$57.38 MSRP: $102.46You Save: $45.08 (44%)Ships in 1-3 Business DaysProduct Specifications- Other Name: Spring, Front Chassis; Coil Springs; Spring
- Position: Front
Cadillac Coil Spring, Front Part Number: 84231478
$44.11 MSRP: $78.76You Save: $34.65 (44%)Ships in 1-3 Business DaysProduct Specifications- Other Name: Spring, Front Chassis; Coil Springs; Spring
- Position: Front
- Replaces: 84022531
Cadillac Coil Spring, Front Part Number: 84231472
$49.13 MSRP: $87.75You Save: $38.62 (45%)Ships in 1-3 Business DaysProduct Specifications- Other Name: Spring, Front Chassis; Coil Springs; Spring
- Position: Front
- Replaces: 23290842
Cadillac Spring, Front Part Number: 22943021
$78.10 MSRP: $139.45You Save: $61.35 (44%)Ships in 1-3 Business DaysProduct Specifications- Other Name: Spring, Front Chassis; Coil Springs
- Position: Front

Cadillac Coil Spring, Rear Part Number: 23498315
$40.08 MSRP: $71.58You Save: $31.50 (45%)Ships in 1-3 Business DaysProduct Specifications- Other Name: Spring, Rear Spring; Coil Springs; Spring
- Position: Rear
- Replaces: 20767142, 23153917
Cadillac Coil Spring, Front Part Number: 84231471
$44.02 MSRP: $90.81You Save: $46.79 (52%)Ships in 1-2 Business DaysProduct Specifications- Other Name: Spring, Front Chassis; Coil Springs; Spring
- Position: Front
- Replaces: 23290841
Cadillac Coil Spring, Front Part Number: 84231473
$51.11 MSRP: $91.27You Save: $40.16 (44%)Ships in 1-3 Business DaysProduct Specifications- Other Name: Spring, Front Chassis; Coil Springs; Spring
- Position: Front
- Replaces: 23290843
Cadillac Coil Spring, Front Part Number: 84231476
$50.60 MSRP: $90.36You Save: $39.76 (44%)Ships in 1-3 Business DaysProduct Specifications- Other Name: Spring, Front Chassis; Coil Springs; Spring
- Position: Front
- Replaces: 84022529

Cadillac Coil Spring, Rear Part Number: 23341853
$36.01 MSRP: $67.64You Save: $31.63 (47%)Ships in 1-3 Business DaysProduct Specifications- Other Name: Spring, Rear Spring; Coil Springs; Spring
- Position: Rear
Cadillac Coil Spring, Front Part Number: 22784566
$61.45 MSRP: $109.73You Save: $48.28 (44%)Ships in 1-3 Business DaysProduct Specifications- Other Name: Spring, Front Coil; Coil Springs; Spring; Spring, Front Chassis
- Position: Front

Cadillac Coil Spring, Front Part Number: 25957802
$68.44 MSRP: $122.22You Save: $53.78 (44%)Product Specifications- Other Name: Spring, Front Chassis; Coil Springs; Spring
- Position: Front

Cadillac Coil Spring, Front Part Number: 23124824
$78.10 MSRP: $139.45You Save: $61.35 (44%)Product Specifications- Other Name: Spring, Front Chassis; Coil Springs; Spring
- Position: Front
| Page 1 of 18 |Next >
1-20 of 344 Results
Cadillac Coil Springs
Choose OEM Coil Springs, you're making the optimal decision for superior quality and perfect performance. You can feel confident because each component goes through stringent quality checks. Every part is carefully built to comply with Cadillac's factory specifications. You'll enjoy a smooth, worry-free installation that fits just right. At ChevyPartsGiant.com, you'll find it easy to get top-quality OEM Cadillac Coil Springs. You can shop at highly competitive prices and protect your budget. All our genuine Cadillac parts include a dependable manufacturer's warranty. You'll also appreciate our straightforward return policy and swift delivery services for extra convenience.
Cadillac Coil Springs Parts and Q&A
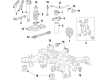
- Q: How to Replace Coil Springs and a Shock Absorber Safely on Cadillac CTS?A:Vehicle lifting with support is the first step before shock absorber and its components replacement. First remove the wheel along with the tire then extract the shock module from the vehicle. Place the shock module inside the spring compressor before marking the upper Control Arm assembly and insulator for reinstallation purposes while ensuring the shock absorber can fully move through the compressed spring coil. Use the spring compressor forcing screw to constrict the coil spring and remove the shock absorber upper retaining nut to disconnect its components from the shock module. By relaxing the compressor forcing screw you can remove the upper mounting plate and coil spring so you can extract the upper Control Arm Bracket assembly, insulator and coil spring from the spring compressor. Install the shock absorber by orienting both the upper Control Arm Bracket alignment pins toward a 90-degree angle from the shock absorber lower mounting holes. Place the coil spring along with the insulator and upper Control Arm Bracket assembly as well as the shock absorber on the spring compressor. Then compress the coil spring by twisting the spring compressor forcing screw. Keep all marks properly aligned during this process. Fasten the shock absorber retaining nut to 25 n.m (18 lb ft) torque level. After removing the shock module from the spring compressor allow its installation onto the vehicle. Reinstall the tire followed by the wheel while ending the vehicle lowering procedure.
- Q: How to Replace Coil Springs on Cadillac Escalade?A:Begin the coil spring replacement process by lifting and stabilizing your vehicle then supporting the rear axle. Start by disconnecting any real time damping (RTD) sensor when present before removing the stabilizer shaft link retaining nut from the frame structure and the lower shock absorber nut and bolt from the rear axle. Unload the springs by lowering the rear axle to its maximum level before taking out both the coil spring and upper insulator. Installation starts with adding the coil spring followed by the upper insulator before elevating the rear axle. Screw and bolt the lower shock absorber retaining components to the rear axle while torqueing them to 95 nm (70 ft. Lbs.). To install the stabilizer shaft link to the frame use the retaining nut for attachment and apply torque to 65 nm (48 ft. Lbs.). After reconnecting the rtd sensor and removing the rear axle support you should lower the vehicle into position.