ChevyParts
My Garage
My Account
Cart
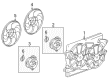
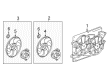
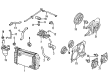
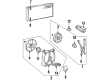
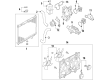
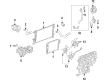
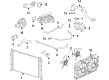
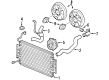
OEM Chevrolet Fan Motor
Cooling Fan Motor- Select Vehicle by Model
- Select Vehicle by VIN
Select Vehicle by Model
orMake
Model
Year
Select Vehicle by VIN
For the most accurate results, select vehicle by your VIN (Vehicle Identification Number).
99 Fan Motors found


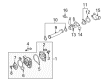
Chevrolet Fan Motor, Passenger Side Part Number: 22780242
$104.97 MSRP: $310.72You Save: $205.75 (67%)Ships in 1-2 Business DaysProduct Specifications- Other Name: Motor Assembly-Engine Cooling Fan; Motor; Motor, Engine Air Cooling(Electrical)
- Position: Passenger Side


Chevrolet Fan & Motor Part Number: 25952813
$185.57 MSRP: $381.35You Save: $195.78 (52%)Ships in 1-2 Business DaysProduct Specifications- Other Name: Motor Assembly-Engine Cooling Fan; Radiator Fan Assembly; Cooling Fan Assembly; Fan Blade; Fan Motor; Motor, Engine Air Cooling(Electrical)
- Replaces: 20879994


Chevrolet Fan Motor, Driver Side Part Number: 22136897
$89.16 MSRP: $183.22You Save: $94.06 (52%)Ships in 1-2 Business DaysProduct Specifications- Other Name: Motor Kit, Engine Air Cooling (Electrical); Motor; Motor Kit, Engine Air Cooling(Electrical)
- Position: Driver Side


Chevrolet Fan Motor, Driver Side Part Number: 22780241
$255.84 MSRP: $525.74You Save: $269.90 (52%)Ships in 1-2 Business DaysProduct Specifications- Other Name: Motor Assembly-Engine Cooling Fan; Motor; Motor, Engine Air Cooling(Electrical)
- Position: Driver Side


Chevrolet Fan Motor Part Number: 88890735
$102.65 MSRP: $191.54You Save: $88.89 (47%)Product Specifications- Other Name: Motor Kit, Engine Coolant Fan; Motor; Motor Kit, Engine Air Cooling(Electrical)
- Replaces: 12368631, 12368626, 12368622, 12367229, 22134444, 12368625, 22137037


Chevrolet Fan Motor, Driver Side Part Number: 20757665
$100.99 MSRP: $298.90You Save: $197.91 (67%)Ships in 1-2 Business DaysProduct Specifications- Other Name: Motor Kit, Engine Air Cooling (Electrical); Motor Kit, Engine Air Cooling(Electrical)
- Position: Driver Side

Chevrolet Fan & Motor, Passenger Side Part Number: 86778036
$141.75 MSRP: $254.25You Save: $112.50 (45%)Ships in 1-3 Business DaysProduct Specifications- Other Name: Motor Assembly-Engine Cooling Fan; Fan Motor; Motor, Engine Air Cooling(Electrical)
- Position: Passenger Side
- Replaced by: 85654567

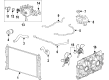
Chevrolet Fan & Motor Part Number: 86778039
$195.57 MSRP: $350.80You Save: $155.23 (45%)Ships in 1-3 Business DaysProduct Specifications- Other Name: Motor Assembly-Engine Cooling Fan; Fan Motor; Motor, Engine Air Cooling(Electrical)
- Replaces: 84848732

Chevrolet Fan & Motor Part Number: 84888882
$139.95 MSRP: $251.04You Save: $111.09 (45%)Ships in 1-2 Business DaysProduct Specifications- Other Name: Motor Kit, Engine Air Cooling (Electrical); Motor Kit, Engine Air Cooling(Electrical)

Chevrolet Fan Motor Part Number: 19316319
$269.19 MSRP: $482.86You Save: $213.67 (45%)Ships in 1-3 Business DaysProduct Specifications- Other Name: Motor, Engine Air Cooling (Electrical); Motor; Motor, Engine Air Cooling(Electrical)

Chevrolet Fan Motor, Driver Side Part Number: 20757663
$147.54 MSRP: $267.04You Save: $119.50 (45%)Ships in 1-2 Business DaysProduct Specifications- Other Name: Motor Kit, Engine Air Cooling (Electrical); Motor Kit, Engine Air Cooling(Electrical)
- Position: Driver Side

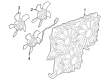
Chevrolet Fan & Motor, Passenger Side Part Number: 84543313
$171.72 MSRP: $310.80You Save: $139.08 (45%)Ships in 1-2 Business DaysProduct Specifications- Other Name: Motor Kit, Engine Air Cooling (Electrical); Radiator Fan Assembly; Fan Motor
- Position: Passenger Side
- Replaced by: 85600145

Chevrolet Fan & Motor, Passenger Side Part Number: 84888877
$127.11 MSRP: $228.00You Save: $100.89 (45%)Ships in 1-2 Business DaysProduct Specifications- Other Name: Motor Kit, Engine Air Cooling (Electrical); Motor Kit, Engine Air Cooling(Electrical)
- Position: Passenger Side

Chevrolet Fan & Motor, Passenger Side Part Number: 85600150
$205.88 MSRP: $369.30You Save: $163.42 (45%)Ships in 1-3 Business DaysProduct Specifications- Other Name: Motor Kit, Engine Air Cooling (Electrical); Fan Motor; Motor Kit, Engine Air Cooling(Electrical)
- Position: Passenger Side
- Replaces: 84120129


Chevrolet Fan Blade Part Number: 22134671
$67.27 MSRP: $121.76You Save: $54.49 (45%)Ships in 1-2 Business DaysProduct Specifications- Other Name: Motor Kit, Engine Air Cooling (Electrical); Radiator Fan Assembly; Fan Motor; Motor; Motor Kit, Engine Air Cooling(Electrical)
- Replaces: 22092352

Chevrolet Fan Motor Part Number: 88986474
$74.68 MSRP: $149.36You Save: $74.68 (50%)Ships in 1-2 Business DaysProduct Specifications- Other Name: Motor, Engine Air Cooling (Electrical); Motor, Engine Air Cooling(Electrical)
- Position: Driver Side
- Replaces: 12362566

Chevrolet Fan Motor, Passenger Side Part Number: 25949002
$161.19 MSRP: $302.70You Save: $141.51 (47%)Ships in 1-2 Business DaysProduct Specifications- Other Name: Motor Kit, Engine Air Cooling (Electrical); Motor Kit, Engine Air Cooling(Electrical)
- Position: Passenger Side

Chevrolet Fan Motor, Passenger Side Part Number: 15875029
$134.57 MSRP: $276.54You Save: $141.97 (52%)Ships in 1-2 Business DaysProduct Specifications- Other Name: Motor Kit-Engine Coolant Fan; Motor; Motor Kit, Engine Air Cooling(Electrical)
- Position: Passenger Side

Chevrolet Fan Motor Part Number: 89024961
$64.60 MSRP: $272.06You Save: $207.46 (77%)Ships in 1-2 Business DaysProduct Specifications- Other Name: Motor Kit, Engine Air Cooling (Electrical); Motor Kit, Engine Air Cooling(Electrical)
- Replaces: 89022506

Chevrolet Fan & Motor, Driver Side Part Number: 84888876
$246.98 MSRP: $443.02You Save: $196.04 (45%)Product Specifications- Other Name: Motor Kit, Engine Air Cooling (Electrical); Motor Kit, Engine Air Cooling(Electrical)
- Position: Driver Side
- Replaced by: 85746501
| Page 1 of 5 |Next >
1-20 of 99 Results
Chevrolet Fan Motor
Want to cut long-term maintenance and repair costs? Choose OEM Fan Motor. Those parts deliver top durability you can trust. On our site, you'll find a huge catalog of genuine Chevrolet parts. Prices are unbeatable, so you can keep more in your pocket. Every OEM Chevrolet Fan Motor includes a manufacturer's warranty. You can also get an easy return policy that keeps buying risk free. Fast delivery, get your car on the road quickly. It's simple to search, compare, and order. Stop guessing about quality or fit. Order today and save with parts that last.
Chevrolet Fan Motor Parts Questions & Experts Answers
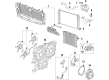
- Q: How to replace the engine coolant fan motor on Chevrolet Equinox?A:The first step for replacing the engine coolant Fan Motor includes disconnecting the negative Battery Cable for safety reasons to stop sparking then keeping hands and tools clear of the electric fan. Start by unmounting the Fan Shroud assembly from the vehicle and position the Fan Blade to prevent spinning. You should use ge-47827 socket (GE-47827) to reverse the Fan Motor drive plate motion against the Fan Blade arrow and then discard the blade. Set the Fan Motor along with its shroud on a wooden block before executing center punching procedures with a 6.35 mm (0.25 in) drill bit to remove the rivets then extract the Fan Motor from the shroud while cleaning away all debris. Install the new engine cooling Fan Motor onto the Fan Shroud by inserting bolts from its front side and securely tighten the cooling Fan Motor nuts to 6 n.m (53 lb in). Position the new Fan Blade hub on the Fan Motor drive plate when it has reached proper surface temperature of 49°c (120°F) maintained for at least 60 seconds. The ge-47827 socket (GE-47827) should be utilized to spin the Fan Motor drive plate toward the arrow on the Fan Blade until a connection is achieved before rotating the cooling Fan Blade to confirm proper positioning and reinstalling the Fan Shroud assembly on the vehicle.
- Q: How to replace the Electric Cooling Fan Motor on Chevrolet Malibu?A:The process of electric cooling Fan Motor replacement starts with obtaining j 38185 hose clamp pliers (J 38185) which serve as necessary equipment. Start by taking out the battery and battery tray followed by recovery of a/c system and draining of the cooling system. The technician must use the j 38185 to move upper Radiator Hose and clamps into position before extracting both hoses along with the upper transaxle cooler line. Apply another j 38185 hose clamp pliers device to move surge tank hoses and clamps before removing the coolant surge tank hose. Proceed by taking out both the condenser inlet fitting from the discharge hose and the cooling fan electrical connector. Ensure the vehicle is raised and eliminate the lower closeout panel from the chassis. The j 38185 tool should be used to reposition the lower Radiator Hose before removing the hose and transaxle cooler line and the condenser outlet line from the evaporator. Begin by removing the lower Radiator mounting panel and afterward remove the Radiator combined with fan and condenser assembly from the vehicle. Start by unattaching the Fan Shroud from the Radiator and proceed to remove the fan nut and fan from the Fan Motor until you reach the Fan Motor which requires its bolts removal to complete the removal process. Start installation by installing the Fan Motor while securing it with bolts at 6 nm (53 inch lbs.) before attaching the fan to the motor while tightening its nut to 6 nm (53 inch lbs.). Realign the Fan Shroud on the Radiator before you reassemble the Radiator components with fan and condenser next to the vehicle. The installation requires fastening the lower Radiator mounting panel with bolts at 10 nm (89 inch lbs.) while connecting the condenser outlet to the evaporator line using a bolt and tightening it to 25 nm (18 ft. Lbs.). To finish the installation securely place the lower Radiator Hose by using the j 38185 tool before installing the lower Radiator Hose while attaching the lower closeout panel. Lower the vehicle and link the electrical connection for the cooling fan and then add the lower transaxle oil cooler line before securing the fitting to 30 nm (22 ft. Lbs.). Position the discharge hose to the condenser inlet then tighten it to 25 nm (18 ft. Lbs.). Next install the coolant surge tank hose and the upper transaxle oil cooler line fitting by tightening to 30 nm (22 ft. Lbs.). You should implement the j 38185 tool to relocate the upper Radiator Hose and clamps before installing the hose and refilling the cooling system and recharging the a/c system and reattaching the battery tray with the battery.
- Q: How to replace the Electric Cooling Fan Motor on Chevrolet Camaro?A:The first step during electric cooling Fan Motor replacement requires unmounting the cooling fan. The second step involves uninstalling the cooling Fan Motor. You should always follow the fastener notice in service precautions for installation. Following installation of the cooling Fan Motor users should torque its bolts to 6 nm using an inch lbs. Torque setting. Finally, reinstall the cooling fan.


Related Chevrolet Parts
 Chevrolet Thermostat
 Chevrolet Fan Clutch
 Chevrolet Fan Shroud
 Chevrolet Radiator Hose
 Chevrolet Water Pump Pulley
 Chevrolet A/C Condenser Fan
 Chevrolet Coolant Pipe
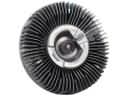 Chevrolet Cooling Fan Clutch
 Chevrolet Cooling Hose
 Chevrolet Drive Belt
 Chevrolet Oil Cooler Hose
 Chevrolet Transmission Oil Cooler Hose
Browse Chevrolet Fan Motor by Models
Nova Colorado C10 Tahoe Malibu Camaro Equinox Impala SS Avalanche Silverado 1500 Silverado 2500 HD Caprice Classic Suburban Blazer K10 Spark Cavalier Corvette C20 Beretta C1500 C2500 C30 C3500 Celebrity City Express Corsica G10 G20 G30 K1500 K20 K2500 K30 K3500 Lumina Metro Monte Carlo P30 Prizm Sprint Uplander Venture Lumina APV Silverado 3500 Suburban 1500 Avalanche 1500 Avalanche 2500 C1500 Suburban C2500 Suburban Captiva Sport Citation II Impala Limited K1500 Suburban K2500 Suburban R10 R20 R2500 R30 R3500 Silverado 1500 Classic Silverado 1500 HD Silverado 1500 HD Classic Silverado 1500 LD Silverado 1500 LTD Silverado 2500 HD Classic Silverado 3500 Classic Silverado 3500 HD Spectrum Suburban 2500 Suburban 3500 HD V10 V20 V30 V3500