ChevyParts
My Garage
My Account
Cart
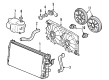
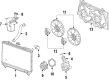
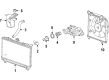
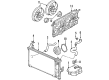
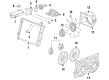
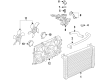
OEM Chevrolet Fan Shroud
Radiator Fan Shroud- Select Vehicle by Model
- Select Vehicle by VIN
Select Vehicle by Model
orMake
Model
Year
Select Vehicle by VIN
For the most accurate results, select vehicle by your VIN (Vehicle Identification Number).
258 Fan Shrouds found


Chevrolet Lower Shroud Part Number: 25835451
$86.68 MSRP: $135.76You Save: $49.08 (37%)Ships in 1-2 Business DaysProduct Specifications- Other Name: Shroud-Engine Coolant Fan Lower; Fan Shroud; Shroud, Radiator Fan Shroud
- Position: Lower
- Replaces: 15267486, 15067754, 15765441


Chevrolet Shroud Part Number: 15849632
$124.07 MSRP: $263.11You Save: $139.04 (53%)Ships in 1-2 Business DaysProduct Specifications- Other Name: Shroud Kit, Radiator Fan Shroud; Fan Shroud
- Replaces: 22731541


Chevrolet Upper Shroud Part Number: 15088330
$79.87 MSRP: $125.10You Save: $45.23 (37%)Ships in 1-2 Business DaysProduct Specifications- Other Name: Shroud, Radiator Fan Shroud; Fan Shroud
- Position: Upper
- Replaces: 15740070


Chevrolet Lower Shroud Part Number: 15736666
$79.87 MSRP: $125.10You Save: $45.23 (37%)Ships in 1-3 Business DaysProduct Specifications- Other Name: Shroud, Radiator Fan Shroud; Fan Shroud
- Position: Lower
- Replaces: 15708284, 15731696

Chevrolet Fan Shroud Part Number: 84943756
$40.98 MSRP: $61.00You Save: $20.02 (33%)Product Specifications- Other Name: Shroud, Radiator Fan Shroud; Upper Shroud
- Replaces: 84082827

Chevrolet Fan Shroud, Lower Part Number: 84082828
$45.85 MSRP: $68.22You Save: $22.37 (33%)Product Specifications- Other Name: Shroud-Engine Coolant Fan Lower; Lower Shroud; Shroud, Radiator Fan Shroud
- Position: Lower


Chevrolet Fan Shroud, Rear Part Number: 84362765
$83.35 MSRP: $118.14You Save: $34.79 (30%)Product Specifications- Other Name: Shroud-Engine Coolant Fan Rear; Rear Shroud; Shroud, Radiator Fan Shroud
- Position: Rear


Chevrolet Upper Shroud Part Number: 15088324
$136.50 MSRP: $214.79You Save: $78.29 (37%)Ships in 1-3 Business DaysProduct Specifications- Other Name: Shroud, Radiator Fan Shroud; Fan Shroud
- Position: Upper
- Replaces: 15020830

Chevrolet Lower Shroud Part Number: 15196054
$158.42 MSRP: $249.27You Save: $90.85 (37%)Ships in 1-2 Business DaysProduct Specifications- Other Name: Shroud-Engine Coolant Fan Lower; Fan Shroud; Shroud, Radiator Fan Shroud
- Position: Lower
- Replaces: 15076210, 15020831

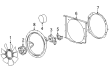
Chevrolet Fan Shroud Part Number: 19130587
$85.44 MSRP: $157.84You Save: $72.40 (46%)Ships in 1-2 Business DaysProduct Specifications- Other Name: Shroud Kit, Engine Electrical Coolant Fan; Dual Radiator and Condenser Fan Assembly; Shroud; Shroud Kit, Radiator Fan Shroud
- Replaces: 19130520

Chevrolet Fan Shroud Part Number: 92218321
$22.49 MSRP: $35.23You Save: $12.74 (37%)Ships in 1-3 Business DaysProduct Specifications- Other Name: Shroud, Radiator Fan Shroud; Dual Radiator and Condenser Fan Assembly; Cooling Fan Assembly

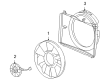
Chevrolet Cooling Fan Part Number: 22926357
$128.86 MSRP: $202.75You Save: $73.89 (37%)Ships in 1-3 Business DaysProduct Specifications- Other Name: Shroud, Radiator Fan Shroud; Radiator Fan Assembly; Fan Assembly

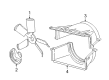
Chevrolet Fan Shroud Part Number: 15290117
$184.53 MSRP: $280.59You Save: $96.06 (35%)Ships in 1-3 Business DaysProduct Specifications- Other Name: Shroud Assembly-Engine Coolant Fan; Dual Radiator and Condenser Fan Assembly
- Replaces: 15112779

Chevrolet Fan Shroud Part Number: 15816789
$250.59 MSRP: $380.91You Save: $130.32 (35%)Ships in 1-3 Business DaysProduct Specifications- Other Name: Shroud Assembly-Engine Coolant Fan; Radiator Fan Assembly; Fan Assembly
- Replaces: 15290116, 15112778


Chevrolet Fan Shroud, Lower Part Number: 15267487
$4.59 MSRP: $7.19You Save: $2.60 (37%)Product Specifications- Other Name: Shroud-Engine Coolant Fan Lower; Lower Shroud; Shroud; Shroud, Radiator Fan Shroud
- Position: Lower
- Replaces: 15164394, 15067753, 15707563, 15765440


Chevrolet Fan Shroud Part Number: 15204231
$131.10 MSRP: $206.27You Save: $75.17 (37%)Product Specifications- Other Name: Shroud, Radiator Fan Shroud; Shroud
- Replaces: 15760073

Chevrolet Fan Shroud Part Number: 84311332
$65.02 MSRP: $96.75You Save: $31.73 (33%)Product Specifications- Other Name: Shroud, Radiator Fan Shroud
- Position: Upper
- Replaces: 23182723


Chevrolet Fan Shroud Part Number: 84888878
$69.79 MSRP: $124.63You Save: $54.84 (44%)Product Specifications- Other Name: Shroud, Engine Coolant Fan Rear; Shroud, Radiator Fan Shroud
- Replaced by: 85670000

Chevrolet Upper Shroud Part Number: 15005939
$16.31 MSRP: $25.54You Save: $9.23 (37%)Product Specifications- Other Name: Shroud, Radiator Fan Shroud; Fan Shroud
- Position: Upper

Chevrolet Fan Shroud Part Number: 23420530
$163.97 MSRP: $258.01You Save: $94.04 (37%)Product Specifications- Other Name: Shroud, Radiator Fan Shroud
| Page 1 of 13 |Next >
1-20 of 258 Results
Chevrolet Fan Shroud
Want to cut long-term maintenance and repair costs? Choose OEM Fan Shroud. Those parts deliver top durability you can trust. On our site, you'll find a huge catalog of genuine Chevrolet parts. Prices are unbeatable, so you can keep more in your pocket. Every OEM Chevrolet Fan Shroud includes a manufacturer's warranty. You can also get an easy return policy that keeps buying risk free. Fast delivery, get your car on the road quickly. It's simple to search, compare, and order. Stop guessing about quality or fit. Order today and save with parts that last.
Chevrolet Fan Shroud Parts Questions & Experts Answers
- Q: How to replace the fan shroud on Chevrolet Colorado?A:The Fan Shroud replacement starts with removing the Radiator Hose-outlet followed by differential vent hose retainer release and then the order of a/c suction hose retainer and a/c discharge hose retainer removal. You should move the slip ring in a counterclockwise direction beneath the Fan Shroud before removing the Fan Shroud . Position the Fan Shroud onto the vehicle before rotating the slip ring in its original position for installation. The procedure for install includes putting back the differential vent hose retainer followed by a/c suction hose retainer then a/c discharge hose retainer and finally the Radiator Hose-outlet.
- Q: How to replace the Fan Shroud in the Engine Coolant Lower Section on Chevrolet Tahoe?A:The replacement of the engine coolant fan lower shroud requires a starting point where you need to remove the Radiator. The first step involves removing two Radiator clips and also extracting the oil cooler hose clip from its position on the lower Fan Shroud before proceeding with removal of the shroud from the vehicle. Lower the Fan Shroud over the lower Radiator support until it reaches the center position before fastening the two Radiator clips. The oil cooler hose clip installation should go onto the lower Fan Shroud prior to Radiator reinstalling.
- Q: How to replace the fan shroud on Chevrolet S10?A:Start by taking out the bolts of the upper Fan Shroud while disconnecting the coolant recovery reservoir hose from the lower Fan Shroud. The installation process begins by removing the upper Fan Shroud followed by lifting the lower Fan Shroud until locating tabs break free from the Radiator then the unit may be extracted from the vehicle. Install the lower Fan Shroud by placing it against the Radiator then activate its locating tabs through Fan Shroud downward pressure. Attach the upper Fan Shroud while tightening its bolts to 10 nm (89 inch lbs.). The coolant recovery reservoir hose needs to be connected back to the lower Fan Shroud during the last step of installation.


Related Chevrolet Parts
 Chevrolet Water Pump
 Chevrolet Thermostat Housing
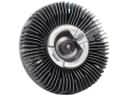 Chevrolet Fan Clutch
 Chevrolet Radiator Cap
 Chevrolet Radiator Hose
 Chevrolet Thermostat Gasket
 Chevrolet Water Pump Gasket
 Chevrolet A/C Condenser Fan
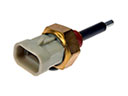 Chevrolet Coolant Level Sensor
 Chevrolet Coolant Pipe
 Chevrolet Cooling Hose
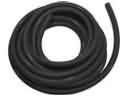 Chevrolet Transmission Oil Cooler Hose
Browse Chevrolet Fan Shroud by Models
S10 Colorado C10 Tahoe Cruze Malibu Camaro Equinox Impala SS Avalanche Silverado 1500 Silverado 2500 HD Caprice Classic Cobalt Suburban Blazer HHR Sonic Tracker Volt El Camino K10 Trax Trailblazer Astro Cavalier Corvette C20 Aveo Beretta C1500 C2500 C30 C3500 Celebrity Chevette Corsica Express 1500 Express 2500 Express 3500 G10 G20 G30 K1500 K20 K2500 K30 K3500 K5 Blazer Lumina Metro Monte Carlo P30 Prizm S10 Blazer Silverado 2500 Uplander Venture Lumina APV Silverado 3500 Suburban 1500 Trailblazer EXT Avalanche 1500 Avalanche 2500 Aveo5 C10 Suburban C1500 Suburban C20 Suburban C2500 Suburban Captiva Sport Citation II Cruze Limited Impala Limited K10 Suburban K1500 Suburban K20 Suburban K2500 Suburban Malibu Limited P20 R10 R10 Suburban R1500 Suburban R20 R20 Suburban R2500 R2500 Suburban R30 R3500 Silverado 1500 Classic Silverado 1500 HD Silverado 1500 HD Classic Silverado 1500 LD Silverado 1500 LTD Silverado 2500 HD Classic Silverado 3500 Classic Silverado 3500 HD Suburban 2500 Suburban 3500 HD V10 V10 Suburban V1500 Suburban V20 V20 Suburban V2500 Suburban V30 V3500