ChevyParts
My Garage
My Account
Cart
OEM GMC Canyon Shift Solenoid
Transmission Shift Solenoid- Select Vehicle by Model
- Select Vehicle by VIN
Select Vehicle by Model
orMake
Model
Year
Select Vehicle by VIN
For the most accurate results, select vehicle by your VIN (Vehicle Identification Number).
1 Shift Solenoid found


GMC Canyon Shift Actuator Part Number: 15775841
$62.09 MSRP: $105.72You Save: $43.63 (42%)Ships in 1-2 Business Days
GMC Canyon Shift Solenoid
Want to cut long-term maintenance and repair costs? Choose OEM Shift Solenoid. Those parts deliver top durability you can trust. On our site, you'll find a huge catalog of genuine GMC Canyon parts. Prices are unbeatable, so you can keep more in your pocket. Every OEM GMC Canyon Shift Solenoid includes a manufacturer's warranty. You can also get an easy return policy that keeps buying risk free. Fast delivery, get your car on the road quickly. It's simple to search, compare, and order. Stop guessing about quality or fit. Order today and save with parts that last.
GMC Canyon Shift Solenoid Parts Questions & Experts Answers
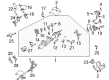
- Q: How to service and repair the control and shift solenoids in a transmission on GMC Canyon?A:The maintenance process for control and shift solenoids starts with removing the transmission oil pan along with its filter. The removal of the Valve Body is only necessary for pressure control solenoid maintenance that requires taking out the 1-2 accumulator. You must disconnect all internal wiring harness electrical connectors from electrical components 1 through 6. First disconnect the pressure control solenoid (377) while keeping track of its original position and then take off the solenoid retainer (378) followed by the solenoid retainer bolt (364A). Next, you should take off both the Shift Solenoid retainers along with the actual solenoids from the 1-2 and 2-3 positions. Set the electrical connector side of all solenoids to face against the non-machined (cast) side of the Valve Body to avoid potential transmission case binding during installation. Follow the 1-2 and 2-3 Shift Solenoid (377) and retainer installation by adding the actuator feed limit valve (374) and spring (375), bore plug (376) along with retainer (395) and pressure control solenoid (377) to the unit. Secure the retaining bolt at 11 nm (97 lb in). Reinstall the 1-2 accumulator after reconnecting all internal wiring harness electrical connectors that control electrical components (1-6). Place the transmission oil pan while also installing its filter before adding dexron(R) vi transmission fluid to the fluid level specification. A scan tool must be used to reset transmission adaptive pressure (TAP) values which will remove all learned values before Engine Control Module (ECM) or powertrain control module (PCM) or transmission control module (TCM) learning process begins because resetting tap values influence transmission performance.

Related GMC Canyon Parts
 GMC Canyon Steering Wheel
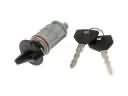 GMC Canyon Ignition Lock Cylinder
 GMC Canyon Power Steering Hose
 GMC Canyon Power Steering Reservoir
 GMC Canyon Rack And Pinion
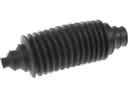 GMC Canyon Rack and Pinion Boot
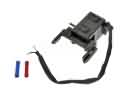 GMC Canyon Shift Interlock Solenoid
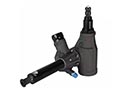 GMC Canyon Steering Gearbox
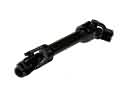 GMC Canyon Steering Shaft
 GMC Canyon Tie Rod
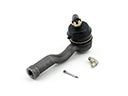 GMC Canyon Tie Rod End
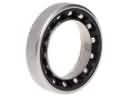 GMC Canyon Upper Steering Column Bearing