ChevyParts
My Garage
My Account
Cart
OEM GMC Savana 3500 Camshaft Position Sensor
Cam Position Sensor- Select Vehicle by Model
- Select Vehicle by VIN
Select Vehicle by Model
orMake
Model
Year
Select Vehicle by VIN
For the most accurate results, select vehicle by your VIN (Vehicle Identification Number).
7 Camshaft Position Sensors found


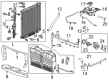
GMC Savana 3500 Camshaft Position Sensor Part Number: 12637869
$21.95 MSRP: $41.22You Save: $19.27 (47%)


GMC Savana 3500 Camshaft Position Sensor Part Number: 12591720
$54.42 MSRP: $101.54You Save: $47.12 (47%)


GMC Savana 3500 Camshaft Position Sensor Part Number: 97365038
$81.66 MSRP: $165.86You Save: $84.20 (51%)Ships in 1-2 Business Days


GMC Savana 3500 Camshaft Position Sensor Part Number: 19417445
$66.52 MSRP: $124.92You Save: $58.40 (47%)Ships in 1 Business Day


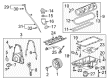
GMC Savana 3500 Engine Camshaft Position Sensor Part Number: 12623093
$18.72 MSRP: $35.16You Save: $16.44 (47%)Ships in 1-3 Business Days
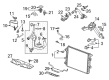
GMC Savana 3500 Camshaft Position Sensor Part Number: 12672642
$26.15 MSRP: $49.10You Save: $22.95 (47%)Ships in 1-2 Business Days
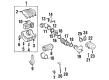
GMC Savana 3500 Camshaft Position Sensor Part Number: 19420911
$72.64 MSRP: $129.71You Save: $57.07 (44%)
GMC Savana 3500 Camshaft Position Sensor
Want to cut long-term maintenance and repair costs? Choose OEM Camshaft Position Sensor. Those parts deliver top durability you can trust. On our site, you'll find a huge catalog of genuine GMC Savana 3500 parts. Prices are unbeatable, so you can keep more in your pocket. Every OEM GMC Savana 3500 Camshaft Position Sensor includes a manufacturer's warranty. You can also get an easy return policy that keeps buying risk free. Fast delivery, get your car on the road quickly. It's simple to search, compare, and order. Stop guessing about quality or fit. Order today and save with parts that last.
GMC Savana 3500 Camshaft Position Sensor Parts and Q&A
- Q: How to replace the Camshaft Position Sensor on GMC Savana 3500?A:Cleaning the area surrounding the CMP sensor must be the first step before sensor replacement to avoid contaminating the engine compartment. Start by removing the engine cover before disconnecting the CMP sensor electrical connector. The replacement process starts with removing the CMP sensor bolt and extracting the CMP sensor. The installation process starts with placing the CMP sensor to its position before screwing in the CMP sensor bolt with a torque of 25 N.m (18 lb ft). Reconnect the electrical CMP sensor connector afterward you should replace the engine cover.
- Q: How to service the camshaft position sensor on GMC Savana 3500?A:The Camshaft Position Sensor service starts by turning off ignition then removing the engine cover. Begin service of the Camshaft Position Sensor by disconnecting Spark Plug Wires and ignition coil wire from Distributor hardware followed by disconnecting the camshaft position (CMP) sensor electrical connector at the Distributor location. Begin the procedure by unscrewing both Distributor Cap screws then removing the cap. After that detach the rotor screws before removing the rotor. Apply the square slot on the reluctor wheel to the cmp sensor then unscrew and remove both the cmp sensor screws and cmp sensor. Installation requires the replacement of Distributor Cap and cmp sensor screws with thread locking compound coated screws that are available as gm p/n 10475922 (pkg of 10 screws) for Distributor Cap and gm p/n 10475924 (pkg of 10 screws) for rotor. Slip the square slot of the reluctor wheel onto the cmp sensor before inserting the sensor through the slot on the reluctor wheel. Use new cmp sensor mounting screws that you will tighten to a torque value of 2.2 n.m (20 lb in). The locating tabs on the rotor need to remain intact for proper alignment because damage requires rotor substitution. Place the Distributor rotor onto the reluctor wheel before securing it with new rotor screws which should be tightened to 2.2 n.m (20 lb in). Close the Distributor Cap installation by fastening new Distributor Cap screws which need tightening at 2.4 n.m (21 lb in). The cmp sensor electrical connector should be connected after reinstalling the engine cover together with Spark Plug Wires and the ignition coil wire.


Related GMC Savana 3500 Parts
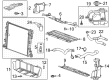
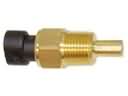 GMC Savana 3500 Coolant Temperature Sensor
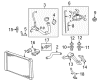
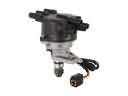 GMC Savana 3500 Distributor
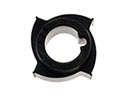 GMC Savana 3500 Distributor Reluctor
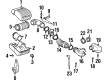
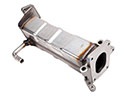 GMC Savana 3500 EGR Cooler
 GMC Savana 3500 Engine Control Module
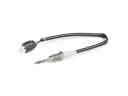 GMC Savana 3500 Exhaust Gas Temperature Sensor
 GMC Savana 3500 Ignition Coil
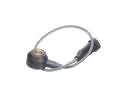 GMC Savana 3500 Knock Sensor
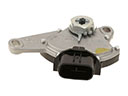 GMC Savana 3500 Neutral Safety Switch
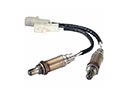 GMC Savana 3500 Oxygen Sensor
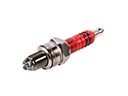 GMC Savana 3500 Spark Plug
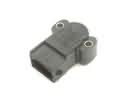 GMC Savana 3500 Throttle Position Sensor