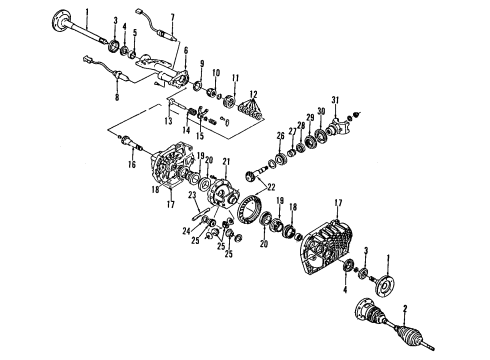
Make sure this part fits

GM 26060073
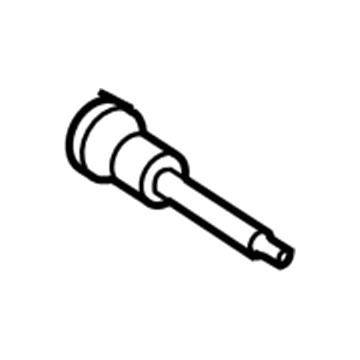
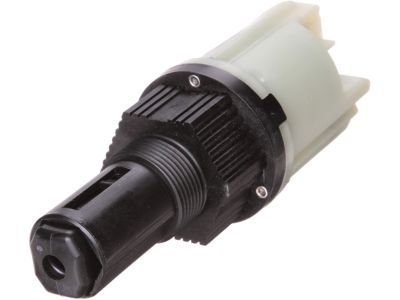
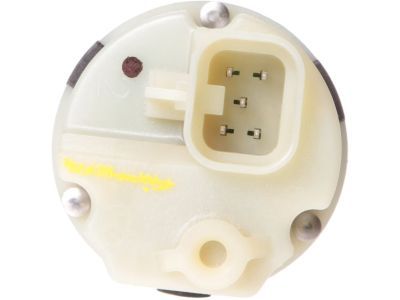
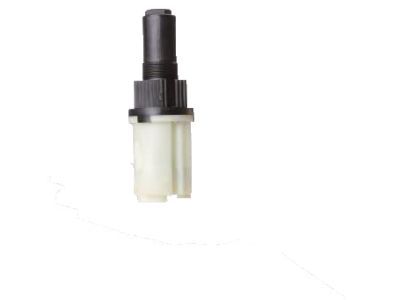
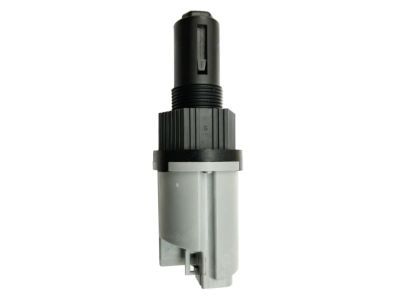
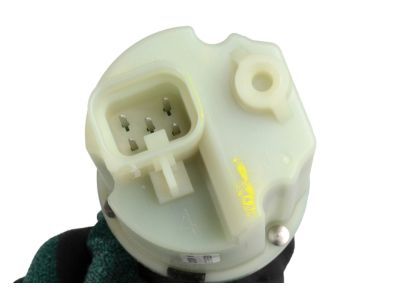
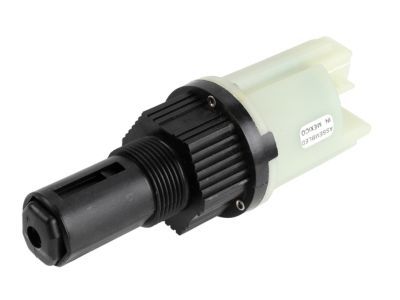
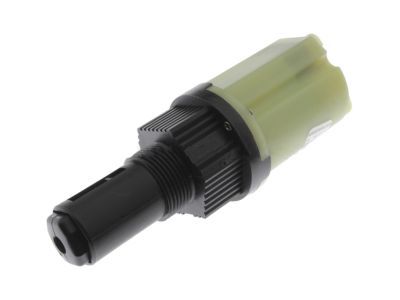
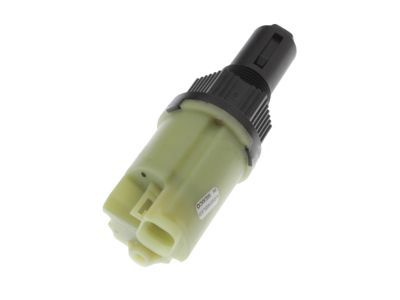
Switch Actuator, Front

1988-2019 GM

Customer Questions & Expert Answers (18)
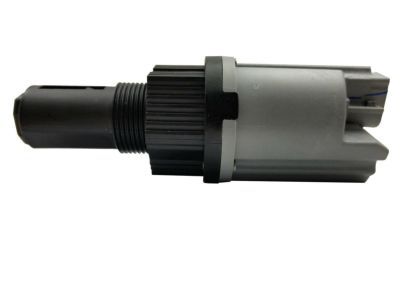
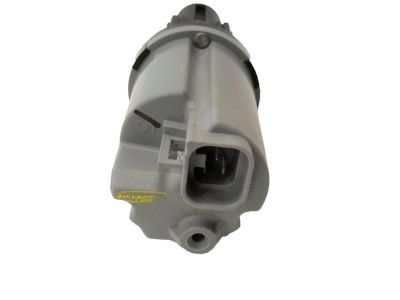
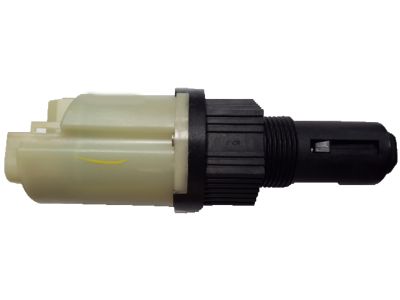
GM 26060073 Switch Actuator, Front
  • Part Description
    Actuator, Front Drive Axle; 4WD Actuator
  • Position
    Front
  • Manufacturer
    General Motors
Make sure this part fits
$149.30 MSRP: $254.16
You Save: $104.86 (42%)
Ships in 1-2 Business Days
1
ADD TO CART
  • Related Parts
  • Product Specifications
  • Vehicle Fitment
  • Customer Questions & Expert Answers
  • Product Specifications

    BrandGenuine GM
    Manufacturer Part Number26060073
    Part DescriptionActuator, Front Drive Axle; 4WD Actuator
    Other NamesSwitch; Actuator; Actuator, Front Drive Axle Shifter/Lock
    Item Dimensions8.5 x 3.3 x 3.2 inches
    Item Weight4.10 Pounds
    PositionFront
    ConditionNew
    Fitment TypeDirect Replacement
    ManufacturerGeneral Motors
    SKU26060073
    WarrantyThis genuine GM part is guaranteed by GM's factory warranty.
    Shipping & ReturnShipping Policy Return Policy
    Warning: California's Proposition 65
  • Vehicle Fitment

    Year Make Model Trim Engine
    2002-2014, 1999-2000 Cadillac EscaladeBase, Hybrid, Hybrid Platinum, Luxury, Platinum, Premium8 Cyl 5.3 L GAS, 8 Cyl 5.7 L GAS, 8 Cyl 6.0 L FULL HYBRID EV-FLEX (FHEV), 8 Cyl 6.0 L FULL HYBRID EV-GAS (FHEV), 8 Cyl 6.0 L GAS, 8 Cyl 6.2 L FLEX, 8 Cyl 6.2 L GAS
    2003-2014 Cadillac Escalade ESVBase, Luxury, Platinum, Premium8 Cyl 6.0 L GAS, 8 Cyl 6.2 L FLEX, 8 Cyl 6.2 L GAS
    2002-2013 Cadillac Escalade EXTBase, Luxury, Premium8 Cyl 6.0 L GAS, 8 Cyl 6.2 L FLEX, 8 Cyl 6.2 L GAS
    2007-2013 Chevrolet AvalancheBlack Diamond LS, Black Diamond LT, Black Diamond LTZ, LS, LT, LTZ8 Cyl 5.3 L FLEX, 8 Cyl 5.3 L GAS, 8 Cyl 6.0 L GAS
    2002-2006 Chevrolet Avalanche 1500Base, LS, LT, North Face, On Road Edition, WBH, Z66, Z718 Cyl 5.3 L FLEX, 8 Cyl 5.3 L GAS
    2002-2006 Chevrolet Avalanche 2500Base, LS, LT8 Cyl 8.1 L GAS
    1992-1994 Chevrolet BlazerBase, Cheyenne, Silverado, Silverado Sport8 Cyl 5.7 L GAS, 8 Cyl 6.5 L DIESEL
    1997-1999 Chevrolet C1500Base, Cheyenne, LS, Silverado, WT6 Cyl 4.3 L GAS, 8 Cyl 5.0 L GAS, 8 Cyl 5.7 L GAS, 8 Cyl 6.5 L DIESEL
    1997-1999 Chevrolet C1500 SuburbanBase, LS, LT8 Cyl 5.7 L GAS, 8 Cyl 6.5 L DIESEL
    1997-2000 Chevrolet C2500Base, Cheyenne, LS, Silverado, WT8 Cyl 5.0 L GAS, 8 Cyl 5.7 L CNG, 8 Cyl 5.7 L GAS, 8 Cyl 6.5 L DIESEL, 8 Cyl 7.4 L GAS
    View More
  • Customer Questions & Expert Answers

    Q:
    Can you help me check if this 26060073 is the right part for my car? Posted by ChevyPartsGiant Specialist
    A:
    Please Select Your Vehicle model to see if part number 26060073 is suitable before ordering.
    Posted by ChevyPartsGiant Specialist
    Q:
    How to replace the 4WD Actuator on the Transfer Case on Cadillac Escalade? Posted by Customer
    A:
    The first step for transfer case motor/encoder replacement consists of properly supporting and lifting the vehicle. Start by removing the transfer case shield and the front propeller shaft before disconnecting the motor/encoder electrical connectors and unbolting the assembly with its gasket. Before installing a new defective motor/encoder assembly ensure the transfer case remains in neutral position by manually shifting at the shift shaft with a crescent wrench for assistance. The new motor/encoder gasket installation should begin by making sure the motor/encoder unit lies flat against the transfer case before the mounting bolts get tightened. Course the motor/encoder assembly through the mounting bolts before tightening these fasteners sequentially to 20 nm (15 ft. Lbs.). Secure the motor/encoder electrical connector with retention clips into place after inserting the front propeller shaft and transfer case shield when lowering the vehicle.
    Posted by ChevyPartsGiant Specialist
    Q:
    How to replace the 4WD Actuator on the Transfer Case on Cadillac Escalade ESV? Posted by Customer
    A:
    Begin the process to replace the Transfer Case encoder motor by placing your vehicle in a secure position with the parking brake engaged. Begin with engine starts followed by selecting neutral (N) for the transmission and two-wheel high for the Transfer Case. Press both the two-wheel high and four-wheel low buttons simultaneously for 10 seconds until a neutral light appears indicating the Transfer Case has entered neutral mode. After turning off the engine through accessory mode you must put the transmission shift lever in p position then set the ignition blend to lock position. Start by disconnecting any Transfer Case shield and then proceed to remove the front propeller shaft. Begin by disconnecting the Transfer Case switch electrical connector and the encoder motor electrical connector and then uninstall the encoder motor bolts and motor. First remove the actuator insulator gasket and also extract the locating pins from the encoder motor if you replace it. Begin installation by positioning the Transfer Case into neutral then utilize the actuator lever shaft to manually shift if necessary followed by installing the locating pins to the new encoder motor. Position the new actuator insulator gasket to the Transfer Case before mounting the encoder motor using the proper sequence and applying 20 n.m (15 lb ft) torque to its bolts. Ensure that the encoder motor sits flat and correctly indexed to the Transfer Case. Reattach the electrical connector to the encoder motor while reconnecting the Transfer Case switch electrical connector before reinstalling the front propeller shaft together with the Transfer Case shield if installed. For shift changes into neutral position begin by implementing the parking brake followed by applying normal brakes and selecting neutral position from the transmission after setting run mode without engine start. Following you select a shift position (Two-Wheel High, Four-Wheel High, AUTO 4WD, or Four-Wheel Low) the neutral light shuts off as the Transfer Case moves outside neutral position. Finally, release the parking brake.
    Posted by ChevyPartsGiant Specialist
    Q:
    How to replace the 4WD Actuator on the Transfer Case on Cadillac Escalade EXT? Posted by Customer
    A:
    Begin the process to replace the Transfer Case encoder motor by placing your vehicle in a secure position with the parking brake engaged. Begin with engine starts followed by selecting neutral (N) for the transmission and two-wheel high for the Transfer Case. Press both the two-wheel high and four-wheel low buttons simultaneously for 10 seconds until a neutral light appears indicating the Transfer Case has entered neutral mode. After turning off the engine through accessory mode you must put the transmission shift lever in p position then set the ignition blend to lock position. Start by disconnecting any Transfer Case shield and then proceed to remove the front propeller shaft. Begin by disconnecting the Transfer Case switch electrical connector and the encoder motor electrical connector and then uninstall the encoder motor bolts and motor. First remove the actuator insulator gasket and also extract the locating pins from the encoder motor if you replace it. Begin installation by positioning the Transfer Case into neutral then utilize the actuator lever shaft to manually shift if necessary followed by installing the locating pins to the new encoder motor. Position the new actuator insulator gasket to the Transfer Case before mounting the encoder motor using the proper sequence and applying 20 n.m (15 lb ft) torque to its bolts. Ensure that the encoder motor sits flat and correctly indexed to the Transfer Case. Reattach the electrical connector to the encoder motor while reconnecting the Transfer Case switch electrical connector before reinstalling the front propeller shaft together with the Transfer Case shield if installed. For shift changes into neutral position begin by implementing the parking brake followed by applying normal brakes and selecting neutral position from the transmission after setting run mode without engine start. Following you select a shift position (Two-Wheel High, Four-Wheel High, AUTO 4WD, or Four-Wheel Low) the neutral light shuts off as the Transfer Case moves outside neutral position. Finally, release the parking brake.
    Posted by ChevyPartsGiant Specialist
    Q:
    How to replace the 4WD Actuator on the Transfer Case on Chevrolet Avalanche 2500? Posted by Customer
    A:
    The first step for transfer case motor/encoder replacement consists of properly supporting and lifting the vehicle. Start by removing the transfer case shield and the front propeller shaft before disconnecting the motor/encoder electrical connectors and unbolting the assembly with its gasket. Before installing a new defective motor/encoder assembly ensure the transfer case remains in neutral position by manually shifting at the shift shaft with a crescent wrench for assistance. The new motor/encoder gasket installation should begin by making sure the motor/encoder unit lies flat against the transfer case before the mounting bolts get tightened. Course the motor/encoder assembly through the mounting bolts before tightening these fasteners sequentially to 20 nm (15 ft. Lbs.). Secure the motor/encoder electrical connector with retention clips into place after inserting the front propeller shaft and transfer case shield when lowering the vehicle.
    Posted by ChevyPartsGiant Specialist
    Q:
    How to replace the 4WD Actuator Encoder Motor on Chevrolet Colorado? Posted by Customer
    A:
    Begin replacement of the Transfer Case Encoder Motor by lifting and supporting the vehicle properly. Disconnect the electrical connector and the vent hose before removing the encoder motor. You must remove encoder motor mounting bolts to extract the encoder motor from its slot together with its O-ring seal which must be discarded. Install the new encoder motor after you make sure the transfer case actuator shaft rests in neutral but avoid using the encoder motor for this maneuver. Apply a thin layer of clean transfer case fluid to the new O-ring before inserting it into the transfer case while making sure the encoder motor maintains a flat position against the seal. Mount the encoder motor into place adjacent to the actuator shaft while installing the mounting bolts together with the heated oxygen sensor bracket using 22 Nm (16 lb ft) torque. Complete the process by attaching the vent hose along with the electrical connector to the encoder motor and then lower the vehicle.
    Posted by ChevyPartsGiant Specialist
    Q:
    How to replace the 4WD Actuator on the Transfer Case on Chevrolet Colorado? Posted by Customer
    A:
    The first step to replace the Transfer Case Encoder Motor requires vehicle lifting followed by proper support during maintenance. Disconnect both the electrical connector and the vent hose from the encoder motor. The encoder motor mounting bolts must be removed completely while extracting both the encoder motor and O-ring seal from the transfer case. Dispose of the O-ring seal. The new encoder motor installation should begin only after positioning the transfer case actuator shaft into its neutral position without the encoder motor's involvement. Last, lubricate the new O-ring seal with transfer case fluid then push it into position in the transfer case so the encoder motor sits flat against its surface. Before installation position the encoder motor directly against the actuator shaft using the heated oxygen sensor bracket and encoder motor mounting bolts tightened at 22 N.m (16 lb ft). Reconnect the electrical connector of the encoder motor and return the vent hose to its position on the motor before you lower the vehicle.
    Posted by ChevyPartsGiant Specialist
    Q:
    How to replace the 4WD Actuator Encoder Motor on Chevrolet Silverado 2500? Posted by Customer
    A:
    Starting the replacement of transfer case encoder motor involves first removing the transfer case shield and then disconnecting the front propeller shaft. Disconnect the power connector of the encoder motor while removing the screws holding the encoder motor. Then extract the encoder motor from its position. Start by taking off the actuator insulator gasket and remove any locating pins from the original encoder motor if you plan to replace it. Before installing the new encoder motor manually shift the transfer case into neutral at the shift shaft by using a crescent wrench. Synce the new encoder motor into position use the locating pins before adding a fresh actuator insulator gasket to the transfer case. Install the encoder motor and tighten the encoder motor bolts to 20 nm (15 ft. Lbs.) in the specified sequence. Connect the electric encoder motor connector before reinstalling the front propeller shaft along with the transfer case shield if installed.
    Posted by ChevyPartsGiant Specialist
    Q:
    How to replace the 4WD Actuator on the Transfer Case on Chevrolet Tahoe? Posted by Customer
    A:
    The first step for transfer case motor/encoder replacement consists of properly supporting and lifting the vehicle. Start by removing the transfer case shield and the front propeller shaft before disconnecting the motor/encoder electrical connectors and unbolting the assembly with its gasket. Before installing a new defective motor/encoder assembly ensure the transfer case remains in neutral position by manually shifting at the shift shaft with a crescent wrench for assistance. The new motor/encoder gasket installation should begin by making sure the motor/encoder unit lies flat against the transfer case before the mounting bolts get tightened. Course the motor/encoder assembly through the mounting bolts before tightening these fasteners sequentially to 20 nm (15 ft. Lbs.). Secure the motor/encoder electrical connector with retention clips into place after inserting the front propeller shaft and transfer case shield when lowering the vehicle.
    Posted by ChevyPartsGiant Specialist
    Q:
    How to service and repair the 4WD Actuator on Chevrolet Suburban 1500? Posted by Customer
    A:
    Service and repair of the Transfer Case Actuator begins with shield removal from the transfer case. The first step requires removal of transfer case wiring harness connectors from motor/encoder connections. Dismantling the motor/encoder gasket from the transfer case requires three bolts to be undone while preserving the rubber gasket to reuse. Start by installing the motor/encoder assembly and rubber gasket onto the transfer case and tightener the securing bolts to 37 Nm (27 ft. lbs.). The motor/encoder must be aligned perfectly with the transfer case shift shaft while the motor/encoder mating surface detent needs to match the transfer case mating surface detent. To finish the process reconnect the wiring harness connectors to the motor/encoder while reinstalling the transfer case shield.
    Posted by ChevyPartsGiant Specialist
    Q:
    How to replace the 4WD Actuator on the Transfer Case on Chevrolet Silverado 1500? Posted by Customer
    A:
    The first step for replacing a transfer case encoder motor involves removing the transfer case shield and the front propeller shaft. Start by disconnecting both the transfer case switch electrical connector and encoder motor electrical connector before removing the encoder motor bolts to take out the encoder motor and finally the actuator insulator gasket. Defective encoder motors require manual shifting of the shift shaft to the neutral position at the transfer case using a crescent wrench for proper alignment. Set the new encoder motor into its correct position against the transfer case surface before tightening the bolts. Reposition the locating pins on the new encoder motor before adding the insulator gasket to the transfer case for new encoder motor installation. Tighten the encoder motor bolts in the specified sequence to 20 nm (15 ft. Lbs.)secure the electrical connection wires to the encoder motor and transfer case switch. Reinstall the front propeller shaft along with the transfer case shield as the final step of the procedure.
    Posted by ChevyPartsGiant Specialist
    Q:
    How to replace the 4WD Actuator on the Transfer Case on Chevrolet Suburban 2500? Posted by Customer
    A:
    The first step for transfer case motor/encoder replacement consists of properly supporting and lifting the vehicle. Start by removing the transfer case shield and the front propeller shaft before disconnecting the motor/encoder electrical connectors and unbolting the assembly with its gasket. Before installing a new defective motor/encoder assembly ensure the transfer case remains in neutral position by manually shifting at the shift shaft with a crescent wrench for assistance. The new motor/encoder gasket installation should begin by making sure the motor/encoder unit lies flat against the transfer case before the mounting bolts get tightened. Course the motor/encoder assembly through the mounting bolts before tightening these fasteners sequentially to 20 nm (15 ft. Lbs.). Secure the motor/encoder electrical connector with retention clips into place after inserting the front propeller shaft and transfer case shield when lowering the vehicle.
    Posted by ChevyPartsGiant Specialist
    Q:
    How to replace the 4WD Actuator on the Transfer Case on Chevrolet Silverado 3500? Posted by Customer
    A:
    The first step for replacing a transfer case encoder motor involves removing the transfer case shield and the front propeller shaft. Start by disconnecting both the transfer case switch electrical connector and encoder motor electrical connector before removing the encoder motor bolts to take out the encoder motor and finally the actuator insulator gasket. Defective encoder motors require manual shifting of the shift shaft to the neutral position at the transfer case using a crescent wrench for proper alignment. Set the new encoder motor into its correct position against the transfer case surface before tightening the bolts. Reposition the locating pins on the new encoder motor before adding the insulator gasket to the transfer case for new encoder motor installation. Tighten the encoder motor bolts in the specified sequence to 20 nm (15 ft. Lbs.)secure the electrical connection wires to the encoder motor and transfer case switch. Reinstall the front propeller shaft along with the transfer case shield as the final step of the procedure.
    Posted by ChevyPartsGiant Specialist
    Q:
    How to replace the 4WD Actuator Encoder Motor on GMC Canyon? Posted by Customer
    A:
    The vehicle needs to be properly raised before starting the replacement of the Transfer Case Encoder Motor. The encoder motor requires disconnecting both its electrical connector and vent hose. Remove the encoder motor mounting bolts and pull out the encoder motor while simultaneously taking out the O-ring seal from the transfer case. Discard the old O-ring seal. When installing the new encoder motor avoid rotating the transfer case actuator shaft to neutral position by hand since the encoder motor will not be used. Use clean transfer case fluid to lubricate the new O-ring seal before placing it into the transfer case where the encoder motor rests flat against it. The encoder motor should be positioned toward the actuator shaft position while encoder motor mounting bolts and heated oxygen sensor bracket get installed with 22 Nm (16 lb ft) of torque. After both reconnection steps are complete, the vehicle can be lowered to the ground.
    Posted by ChevyPartsGiant Specialist
    Q:
    How to replace the 4WD Actuator on the Transfer Case on GMC Canyon? Posted by Customer
    A:
    Vehicle elevation and support are necessary before starting a Transfer Case Encoder Motor replacement operation. Lift the mechanical connection between the electrical wires and ventilation tube inside the encoder motor. The encoder motor requires removal after unbolting its mount and extracting the motor along with the O-ring seal while discarding the O-ring seal. The actuator shaft needs to be set to neutral during the replacement steps but the encoder motor should not provide power for this movement. Apply some clean transfer case fluid to the new O-ring seal then place it in the transfer case while aligning the encoder motor to sit flat on the transfer case surface. The encoder motor should receive correct positioning relative to the actuator shaft then secure the encoder motor mounting bolts and heated oxygen sensor bracket with correct torque settings at 22 N.m (16 lb ft). Lower the vehicle by reconnecting both the encoder motor's electrical connector and vent hose.
    Posted by ChevyPartsGiant Specialist
    Q:
    How to replace the 4WD Actuator on the Transfer Case on GMC Sierra 1500? Posted by Customer
    A:
    The first step for replacing a transfer case encoder motor involves removing the transfer case shield and the front propeller shaft. Start by disconnecting both the transfer case switch electrical connector and encoder motor electrical connector before removing the encoder motor bolts to take out the encoder motor and finally the actuator insulator gasket. Defective encoder motors require manual shifting of the shift shaft to the neutral position at the transfer case using a crescent wrench for proper alignment. Set the new encoder motor into its correct position against the transfer case surface before tightening the bolts. Reposition the locating pins on the new encoder motor before adding the insulator gasket to the transfer case for new encoder motor installation. Tighten the encoder motor bolts in the specified sequence to 20 nm (15 ft. Lbs.)secure the electrical connection wires to the encoder motor and transfer case switch. Reinstall the front propeller shaft along with the transfer case shield as the final step of the procedure.
    Posted by ChevyPartsGiant Specialist
    Q:
    How to replace the 4WD Actuator on the Transfer Case on GMC Sierra 3500? Posted by Customer
    A:
    The first step for replacing a transfer case encoder motor involves removing the transfer case shield and the front propeller shaft. Start by disconnecting both the transfer case switch electrical connector and encoder motor electrical connector before removing the encoder motor bolts to take out the encoder motor and finally the actuator insulator gasket. Defective encoder motors require manual shifting of the shift shaft to the neutral position at the transfer case using a crescent wrench for proper alignment. Set the new encoder motor into its correct position against the transfer case surface before tightening the bolts. Reposition the locating pins on the new encoder motor before adding the insulator gasket to the transfer case for new encoder motor installation. Tighten the encoder motor bolts in the specified sequence to 20 nm (15 ft. Lbs.)secure the electrical connection wires to the encoder motor and transfer case switch. Reinstall the front propeller shaft along with the transfer case shield as the final step of the procedure.
    Posted by ChevyPartsGiant Specialist
    Q:
    What should be done with the O-ring seal when removing the encoder motor for the 2005 Chevrolet Colorado? Posted by Customer
    A:
    Discard the O-ring seal.
    Posted by ChevyPartsGiant Specialist
    See expert answers on similar 4WD Actuator
    If you have any questions about this product, please don't hesitate to ask us. We will be happy to help you!

OEM GM 26060073, Excellent Performance and Perfect Fitment

To ensure reliability, purchase GM part # 26060073 Switch Actuator, Front. It is sometimes referred to as GM 4WD Actuator. Choosing OEM parts is the optimal decision for guaranteeing superior quality and perfect performance. These components undergo stringent quality checks and are carefully constructed to comply with GM's factory specifications, ensuring a smooth installation process.

ChevyPartsGiant.com is a leading supplier of genuine GM parts such as GM 26060073 Switch Actuator, Front. Our website boasts an extensive inventory of OEM GM parts, available at highly competitive prices in the market. Should you require any new genuine GM parts, rest assured we will deliver them swiftly and efficiently to your doorstep. Furthermore, all our parts come with the assurance of a manufacturer's warranty. For detailed Chevy parts information, click here.
Choose ChevyPartsGiant for discounted prices, exceptional service and fast delivery