Make sure this part fits

GM 26059671
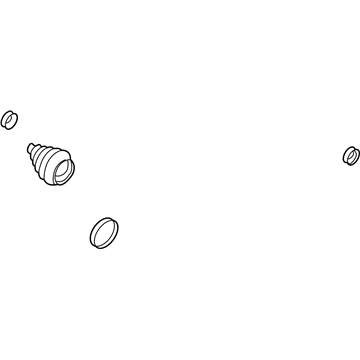
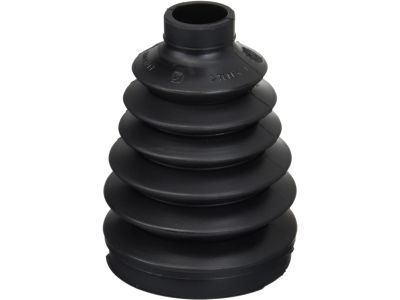
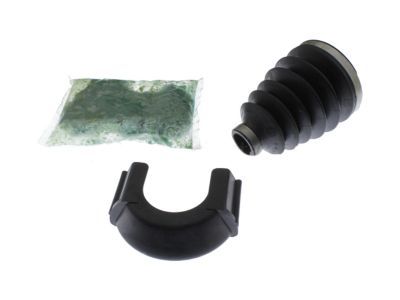
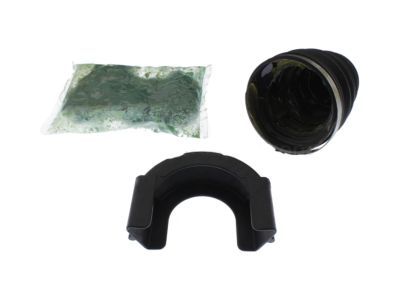
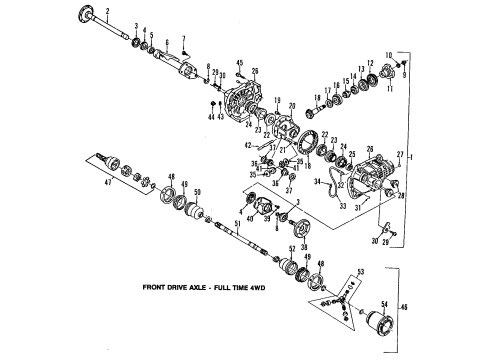
Boot Kit, Front

1997-2009 GM

Customer Questions & Expert Answers (8)
GM 26059671 Boot Kit, Front
  • Part Description
    Boot Kit, Front Axle; CV Boot
  • Position
    Front
  • Manufacturer
    General Motors
Make sure this part fits
$36.90 MSRP: $57.80
You Save: $20.90 (37%)
Ships in 1-2 Business Days
1
ADD TO CART
  • Related Parts
  • Product Specifications
  • Vehicle Fitment
  • Customer Questions & Expert Answers
  • Product Specifications

    BrandGenuine GM
    Manufacturer Part Number26059671
    Part DescriptionBoot Kit, Front Axle; CV Boot
    Other NamesOuter Boot
    Item Dimensions8.0 x 7.0 x 6.8 inches
    Item Weight1.70 Pounds
    PositionFront
    ConditionNew
    Fitment TypeDirect Replacement
    Require Quantity2
    ManufacturerGeneral Motors
    SKU26059671
    WarrantyThis genuine GM part is guaranteed by GM's factory warranty.
    Shipping & ReturnShipping Policy Return Policy
    Warning: California's Proposition 65
  • Vehicle Fitment

    Year Make Model Trim Engine
    2004-2007 Buick RainierCXL, CXL Plus6 Cyl 4.2 L GAS, 8 Cyl 5.3 L GAS
    1997-2005 Chevrolet BlazerBase, LS, LT, Trailblazer, Xtreme, ZR26 Cyl 4.3 L GAS
    1997-2004 Chevrolet S10Base, LS, SS, Xtreme, ZR2, ZR54 Cyl 2.2 L FLEX, 4 Cyl 2.2 L GAS, 6 Cyl 4.3 L GAS
    2002-2009 Chevrolet TrailblazerBase, LS, LT, LTZ, North Face, SS6 Cyl 4.2 L GAS, 8 Cyl 5.3 L GAS, 8 Cyl 6.0 L GAS
    2002-2006 Chevrolet Trailblazer EXTLS, LT, North Face6 Cyl 4.2 L GAS, 8 Cyl 5.3 L GAS
    2002-2009 GMC EnvoyDenali, SLE, SLT6 Cyl 4.2 L GAS, 8 Cyl 5.3 L GAS
    2002-2006 GMC Envoy XLDenali, SLE, SLT6 Cyl 4.2 L GAS, 8 Cyl 5.3 L GAS
    2004-2005 GMC Envoy XUVSLE, SLT6 Cyl 4.2 L GAS, 8 Cyl 5.3 L GAS
    1997-2001 GMC JimmyDiamond Edition, Envoy, SL, SLE, SLS, SLT6 Cyl 4.3 L GAS
    1997-2004 GMC SonomaSL, SLE, SLS4 Cyl 2.2 L FLEX, 4 Cyl 2.2 L GAS, 6 Cyl 4.3 L GAS
    View More
  • Customer Questions & Expert Answers

    Q:
    Can you help me check if this 26059671 is the right part for my car? Posted by ChevyPartsGiant Specialist
    A:
    Please Select Your Vehicle model to see if part number 26059671 is suitable before ordering.
    Posted by ChevyPartsGiant Specialist
    Q:
    What tools are needed to service and repair the CV Boot and CV Joint for the wheel drive shaft outer joint replacement on Chevrolet S10? Posted by Customer
    A:
    Tools for reference to service and repair the Axle Shaft assembly, namely wheel drive shaft outer joint and boot replacement include: tool, clip seal (J 35910), tool, swage clamp (J 41048), and pliers, snap ring (J 8059). Start by clamping the halfshaft into a vise with the jaws covered by protective guards. These will be cut using a hand grinder without causing damage to the outer race through the swage rings. Compress the seal from the halfshaft and wipe all grease from the cv joint face. Find the halfshaft retaining snap ring at the inner race and pull the snap ring ears apart using j 8059. Pull the cv joint from the half shaft and get rid of the old seal. Use a brass drift to tilt the cage and take out all balls, then pivot the cage and inner race to discharge them. Degrease all cv joints parts and inspect for wear or damage and replace any of the defective parts. For assembly, inspect all parts also apply light coat of grease on their inner and outer race grooves. Ensure that plans the inner race are lined with the windows, and place them into the cage and then introducing the cage and inner race into the outer race. Tilt the cage with a brass drift and reinstall all balls. Pack the cv joint seal and assembly with the pre-measured grease that came with the kit and put the new small swage clamp on the cv joint seal and the big retaining clamp on the seal. Push the cv joint seal into the groove of the halfshaft bar and utilize j41048 to align and clamp the swage on. Tighten the bolts by hand to snug then alternate between the two bolts going 180 degrees on each of the two bolts until they are both bottomed. Loosen the bolts and disassemble the dies, check for deformity in the swage clamp and reinsert if needed. Make sure that before you place the retaining snap ring into the inner race, the retaining ring side of the cv joint inner race is position in the direction of the halfshaft bar. Slide the cv joint onto the half shaft bar, confirm engagement and locate the cv joint derby on the outer race - this should be put in your position. Lastly, apply the large retaining clamp to the housing by torque sequencing with j 35910, a breaker bar and a torque wrench, applying torque to 176nm (130 Ft. Lbs.) and checking the gap dimension on the clamp ear.
    Posted by ChevyPartsGiant Specialist
    Q:
    What tools are needed to service and repair the CV Boot and CV Joint for the wheel drive shaft outer joint on Chevrolet Trailblazer? Posted by Customer
    A:
    The following tools are necessary for wheel drive shaft outer joint and boot replacement on the Axle Shaft assembly: the following repair tools are necessary: j35910 (Seal Clamp Tool), j41048 (Swage Clamp Tool), and j8059 (Snap Ring Pliers). J35910 (Seal Clamp Tool), j41048 (Swage Clamp Tool), and j8059 (Snap Ring Pliers). Set the halfshaft into a vise that has protective covers guarding its jaws. Remove the swage rings with a hand grinder without hurting the outer race. After compression of the halfshaft seal press away from the cv joint outer race completely remove all grease from the cv joint face. Use tool j8059 to spread the snap ring ears in the inner race before extracting the retaining snap ring. You should extract the cv joint through its halfshaft while disposing of the worn seal. Start by using a brass drift to move the cage while performing ball removal before rotating each piece 90 degrees relative to the outer race lands for extraction. All cv joint parts require degreasing before an inspection checks for damage and wear that determines whether replacement parts are needed. Begin by lightly applying grease to the race grooves of each part. Next, insert the inner race into its cage where it must match up perfectly with the outer race. Finally, use a brass drift to install all balls in their proper positions before packing the joint with grease. Begin the installation process with a brass drift tool that tilts the cage to reposition all balls inside. Afterward, apply pre-measured kit grease to pack the new cv joint seal and assembly. First mount the cv joint seal with its new small swage clamp and then install the large retaining clamp before inserting the seal into the halfshaft bar's joint seal groove. Fasten the swage clamp with j41048 while aligning the bolts by alternating them until their fit is tight. Afterward check for any pinch points. Position the retaining snap ring inside the cv joint inner race with its retaining ring side facing the halfshaft bar. Apply the cv joint over the halfshaft bar and authenticate its position so place the cv joint seal externally on the outer race while using j35910 alongside a breaker bar and torque wrench to create 176 nm (130 ft. Lbs.) of torque. A final step involves examination of the clamp ear's gap dimension.
    Posted by ChevyPartsGiant Specialist
    Q:
    How to replace the outer CV Boot and CV Joint on the wheel drive shaft on GMC Envoy? Posted by Customer
    A:
    To replace the wheel drive shaft outer joint and boot, you will need the following tools: snap ring pliers (J 8059), drive axle seal clamp pliers (J 35910), drive axle swage ring clamp tool (J 41048). Start by firmly fastening the piece of halfshaft in a vise equipped with protective covers over the vise jaws. Hand grinder disappears gently and limits the downside scales without any distortion of the outer race. Press the seal off the halfshaft from the cv joint outer race, and clean all grease off of the cv joint face. Find the halfshaft retaining snap ring in the inner race using the snap ring pliers (J 8059) to shape its ears apart before pulling the cv joint off the halfshaft. Throw away the old seal and then take a brass drift to tilt the cage getting rid of the balls as you do so. Once all parts are properly degreased and inspected for damage, grease lightly the race grooves on the inner and outer. Shove the inside race into the cage and line up properly, then inside the outer race and into the cage; inside. Use the brass drift to tilt the cage to set all balls, packing the cv joint seal and assembly with the pre-measured grease to be found in the kit. Screw the new small swage clamp onto the cv joint seal and slide on to the large retaining clamp up on the seal. Utilize the drive axle swge ring clamp tool (J41048) to align and tighten the swage clamp by tightening the bolts alternately until it is snug. Make sure the retaining ring side of the cv joint inner race is the halfshaft bar and have the retaining snap ring in the inner race. Slide cv joint onto the halfshaft bar and confirm engagement; position the cv joint seal on the outer race and fasten using the drive axle seal clamp pliers (J 35910), a breaker bar and a torque wrench torqued to 176 n.m (130 lb ft) while measuring the gap dimension on the clamp ear.
    Posted by ChevyPartsGiant Specialist
    Q:
    How to replace the outer CV Boot and CV Joint on the wheel drive shaft on GMC Jimmy? Posted by Customer
    A:
    The following tools must be obtained to replace wheel drive shaft outer joint and boot: you need snap ring pliers (J8059), seal clamp tool (J35910) and swage clamp tool (J41048) with a breaker bar and torque wrench for this job. Snap ring pliers (J8059), seal clamp tool (J35910), swage clamp tool (J41048), a breaker bar , and a torque wrench . Secure the halfshaft inside the vise under protective covers while you remove outer cv joint boot clamp protectors using side cutters to separate the boot clamps from each other. Grind the swage ring while protecting the outer race before using a tool to push the boot toward the retainer and scrape all grease off the cv joint face. Install the snap ring pliers (J8059) to loosely position the halfshaft retaining snap ring before removing the cv joint from the halfshaft. Start by dropping the worn boot before using a brass drift to guide the cage movement until all balls fall out. You can now extract the cage and inner race from the joint. All components of the cv joint should undergo degreasing before a damage check is performed to replace any required parts. Put a thin layer of grease on inner and outer race grooves before sliding the inner race into its cage and making the races match correctly. Apply the brass drift to insert the cage at an angle before reinserting all balls and proceed to fill the joint boot with the ready-measured grease. Secure the new small swage clamp onto the cv joint boot before putting the boot in place on the halfshaft bar. Use the swage clamp tool (J41048) to clamp the boot. Begin by tightening the bolts manually when they are snug to maintain correct placement for the boot and swage clamp housing assembly after which use a torque wrench to fasten the large retaining clamp at 176 nm (130 ft. Lbs.). Inspect the clamp ear gap dimension before adding boot clamp protectors if vehicle components require them.
    Posted by ChevyPartsGiant Specialist
    Q:
    What is the next step after preparing the components for the 2009 Chevrolet Trailblazer? Posted by Customer
    A:
    Compress the tripot boot onto the halfshaft bar away from the spider assembly, then use J 8059 to spread the spacer rings (1, 3) and remove the spider assembly, spacer rings (1, 3), and tripot boot, discarding the latter two.
    Posted by ChevyPartsGiant Specialist
    See expert answers on similar CV Boot
    Q:
    How do you compress the tripot boot onto the halfshaft bar for the 2000 GMC Jimmy? Posted by Customer
    A:
    Use Snap Ring Pliers (J8059) to spread the spacer rings for spider assembly removal.
    Posted by ChevyPartsGiant Specialist
    See expert answers on similar CV Boot
    Q:
    How do you verify engagement of the CV joint for the 2009 GMC Envoy? Posted by Customer
    A:
    Slide the CV joint onto the halfshaft bar, verifying engagement by pulling on it.
    Posted by ChevyPartsGiant Specialist
    See expert answers on similar CV Boot
    If you have any questions about this product, please don't hesitate to ask us. We will be happy to help you!

OEM GM 26059671, Excellent Performance and Perfect Fitment

To ensure reliability, purchase GM part # 26059671 Boot Kit, Front. It is sometimes referred to as GM CV Boot. Choosing OEM parts is the optimal decision for guaranteeing superior quality and perfect performance. These components undergo stringent quality checks and are carefully constructed to comply with GM's factory specifications, ensuring a smooth installation process.

ChevyPartsGiant.com is a leading supplier of genuine GM parts such as GM 26059671 Boot Kit, Front. Our website boasts an extensive inventory of OEM GM parts, available at highly competitive prices in the market. Should you require any new genuine GM parts, rest assured we will deliver them swiftly and efficiently to your doorstep. Furthermore, all our parts come with the assurance of a manufacturer's warranty. For detailed Chevy parts information, click here.
Choose ChevyPartsGiant for discounted prices, exceptional service and fast delivery