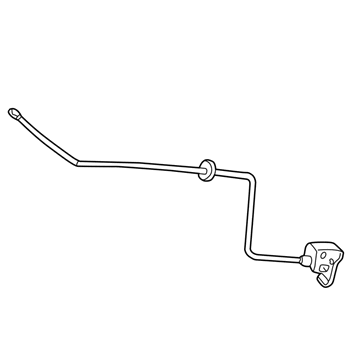
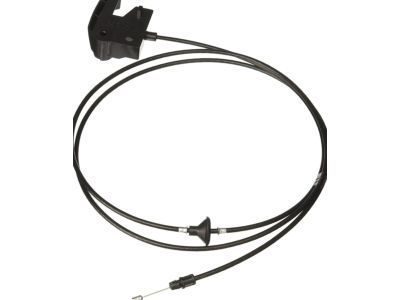
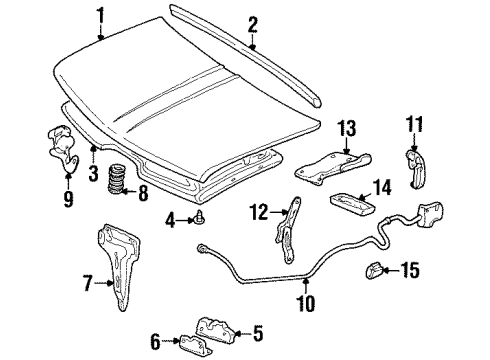
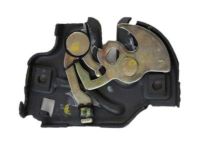
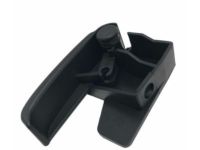
Make sure this part fits

GM 15142953
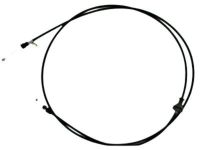
Release Cable

1999-2007 GM

Customer Questions & Expert Answers (20)
GM 15142953 Release Cable
  • Part Description
    Cable, Hood Latch; Hood Release Cable
  • Replaces
    15769724, 15706152
  • Manufacturer
    General Motors
Make sure this part fits
$71.09 MSRP: $105.80
You Save: $34.71 (33%)
Ships in 1-3 Business Days
1
ADD TO CART
  • Related Parts
  • Product Specifications
  • Vehicle Fitment
  • Customer Questions & Expert Answers
  • Product Specifications

    BrandGenuine GM
    Manufacturer Part Number15142953
    Part DescriptionCable, Hood Latch; Hood Release Cable
    Item Dimensions3.7 x 11.9 x 11.0 inches
    Item Weight0.60 Pounds
    ConditionNew
    Fitment TypeDirect Replacement
    Replaces15769724, 15706152
    ManufacturerGeneral Motors
    SKU15142953
    WarrantyThis genuine GM part is guaranteed by GM's factory warranty.
    Shipping & ReturnShipping Policy Return Policy
    Warning: California's Proposition 65
  • Vehicle Fitment

    Year Make Model Trim Engine
    2002-2006 Cadillac EscaladeBase8 Cyl 5.3 L GAS, 8 Cyl 6.0 L GAS
    2003-2006 Cadillac Escalade ESVBase8 Cyl 6.0 L GAS
    2002-2006 Cadillac Escalade EXTBase8 Cyl 6.0 L GAS
    2002-2006 Chevrolet Avalanche 1500Base, LS, LT, North Face, On Road Edition, WBH, Z66, Z718 Cyl 5.3 L FLEX, 8 Cyl 5.3 L GAS
    2002-2006 Chevrolet Avalanche 2500Base, LS, LT8 Cyl 8.1 L GAS
    1999-2007 Chevrolet Silverado 1500Base, Hybrid, LS, LT, LTZ, SS, WT, Z71 Off-Road6 Cyl 4.3 L GAS, 8 Cyl 4.8 L GAS, 8 Cyl 5.3 L FLEX, 8 Cyl 5.3 L FULL HYBRID EV-GAS (FHEV), 8 Cyl 5.3 L GAS, 8 Cyl 6.0 L GAS
    2007 Chevrolet Silverado 1500 ClassicHybrid, LS, LT, SS, WT6 Cyl 4.3 L GAS, 8 Cyl 4.8 L GAS, 8 Cyl 5.3 L FLEX, 8 Cyl 5.3 L FULL HYBRID EV-GAS (FHEV), 8 Cyl 5.3 L GAS, 8 Cyl 6.0 L GAS
    2005-2006, 2001-2003 Chevrolet Silverado 1500 HDBase, LS, LT8 Cyl 6.0 L GAS
    2007 Chevrolet Silverado 1500 HD ClassicLT8 Cyl 6.0 L GAS
    1999-2004 Chevrolet Silverado 2500Base, LS, LT, WT8 Cyl 5.3 L GAS, 8 Cyl 6.0 L BI-FUEL, 8 Cyl 6.0 L CNG, 8 Cyl 6.0 L GAS
    View More
  • Customer Questions & Expert Answers

    Q:
    Is this 15142953 designed for my car? Posted by ChevyPartsGiant Specialist
    A:
    Please Select Your Vehicle model to see if part number 15142953 is suitable before ordering.
    Posted by ChevyPartsGiant Specialist
    Q:
    How to Replace a Hood Cable for Release Cable on Chevrolet Avalanche 1500? Posted by Customer
    A:
    Start by releasing the hood through left-side latch tab pressing with a rod for broken cables. Raise the hood and then remove the left hinge pillar trim panel. Start by removing the electrical center cover through nut removal at its center then unclipping both side retaining components. The Hood Cable becomes accessible once you lift out the electrical center after removing its retaining clips from both sides. The instrument panel's (I/P) cable handle needs removal to free the end of the cable from its handle. Squeeze the tabs with needle nose pliers to detach the cable end from the Hood Latch assembly before you can lift the cable out of the lock. With partial park brake pedal assembly removal you can access the Hood Cable. Pull the cable toward the handle through the cowl hole and disconnect the radiator air baffle and deflector. First detach the cable end from the Hood Latch assembly by using needle nose pliers to squeeze two tabs that release the end from the handle mechanism. Once the end is removed, lift the cable from its lock. During installation feed the cable through the cowl hole toward the front of the vehicle while making sure the grommet remains properly seated. Seam the cable end to the latch assembly while securing the cable to retainer clips before connecting the cable end to the cable handle. Before final installation reinstall the radiator air baffle along with the deflector component then attach the cable handle under the i/p and tighten the cable handle nut to 11 n.m (97 lb in). Set the electrical center into the retaining grooves before placing retaining clips on both assembly sides. Once complete secure both electrical center retaining clips then fasten the center retaining nut to 2.5 n.m (22 lb in) and reinstall the left hinge pillar trim panel before closing the hood.
    Posted by ChevyPartsGiant Specialist
    Q:
    How to replace the Release Hood Cable on Cadillac Escalade? Posted by Customer
    A:
    To replace the Hood Cable, it's first important to release the hood, if a cable is broken by pressing the latch tab on the left side of lock assembly using a rod. Open the hood and remove the left hinge pillar trim panel. Next, pull off the cable handle of the handle located beneath the instrument panel (IP), and separate the cable end from the handle by pressing the tabs with needle nose pliers and then separating the cable from the lock. Pull the cable toward the cable handle through the hole in the cowl until you disengage the retainer clips, and disconnect the end of the cable by using the needle nose pliers to press the tabs and pry the cable from the lock on the Hood Latch assembly. For installing, pull the cable through the cowl, make sure a grommet is in the place, then connect the end of the cable to the latch assembly and tie it to the retainer clips. Next, connect the cable end to the cable handle, making sure that you tighten the cable handle nut to 11 n.m797 b in (97 lb in), and connect the cable handle under the ip. Finally, reconnect the left hinge pillar trim panel and shut the hood.
    Posted by ChevyPartsGiant Specialist
    Q:
    How to Replace a Hood Cable for Release Cable on Cadillac Escalade ESV? Posted by Customer
    A:
    Start by releasing the hood through left-side latch tab pressing with a rod for broken cables. Raise the hood and then remove the left hinge pillar trim panel. Start by removing the electrical center cover through nut removal at its center then unclipping both side retaining components. The Hood Cable becomes accessible once you lift out the electrical center after removing its retaining clips from both sides. The instrument panel's (I/P) cable handle needs removal to free the end of the cable from its handle. Squeeze the tabs with needle nose pliers to detach the cable end from the Hood Latch assembly before you can lift the cable out of the lock. With partial park brake pedal assembly removal you can access the Hood Cable. Pull the cable toward the handle through the cowl hole and disconnect the radiator air baffle and deflector. First detach the cable end from the Hood Latch assembly by using needle nose pliers to squeeze two tabs that release the end from the handle mechanism. Once the end is removed, lift the cable from its lock. During installation feed the cable through the cowl hole toward the front of the vehicle while making sure the grommet remains properly seated. Seam the cable end to the latch assembly while securing the cable to retainer clips before connecting the cable end to the cable handle. Before final installation reinstall the radiator air baffle along with the deflector component then attach the cable handle under the i/p and tighten the cable handle nut to 11 n.m (97 lb in). Set the electrical center into the retaining grooves before placing retaining clips on both assembly sides. Once complete secure both electrical center retaining clips then fasten the center retaining nut to 2.5 n.m (22 lb in) and reinstall the left hinge pillar trim panel before closing the hood.
    Posted by ChevyPartsGiant Specialist
    Q:
    How to Replace a Hood Cable for Release Cable on Cadillac Escalade EXT? Posted by Customer
    A:
    Start by releasing the hood through left-side latch tab pressing with a rod for broken cables. Raise the hood and then remove the left hinge pillar trim panel. Start by removing the electrical center cover through nut removal at its center then unclipping both side retaining components. The Hood Cable becomes accessible once you lift out the electrical center after removing its retaining clips from both sides. The instrument panel's (I/P) cable handle needs removal to free the end of the cable from its handle. Squeeze the tabs with needle nose pliers to detach the cable end from the Hood Latch assembly before you can lift the cable out of the lock. With partial park brake pedal assembly removal you can access the Hood Cable. Pull the cable toward the handle through the cowl hole and disconnect the radiator air baffle and deflector. First detach the cable end from the Hood Latch assembly by using needle nose pliers to squeeze two tabs that release the end from the handle mechanism. Once the end is removed, lift the cable from its lock. During installation feed the cable through the cowl hole toward the front of the vehicle while making sure the grommet remains properly seated. Seam the cable end to the latch assembly while securing the cable to retainer clips before connecting the cable end to the cable handle. Before final installation reinstall the radiator air baffle along with the deflector component then attach the cable handle under the i/p and tighten the cable handle nut to 11 n.m (97 lb in). Set the electrical center into the retaining grooves before placing retaining clips on both assembly sides. Once complete secure both electrical center retaining clips then fasten the center retaining nut to 2.5 n.m (22 lb in) and reinstall the left hinge pillar trim panel before closing the hood.
    Posted by ChevyPartsGiant Specialist
    Q:
    How to Replace a Hood Cable for Release Cable on Chevrolet Avalanche 2500? Posted by Customer
    A:
    Start by releasing the hood through left-side latch tab pressing with a rod for broken cables. Raise the hood and then remove the left hinge pillar trim panel. Start by removing the electrical center cover through nut removal at its center then unclipping both side retaining components. The Hood Cable becomes accessible once you lift out the electrical center after removing its retaining clips from both sides. The instrument panel's (I/P) cable handle needs removal to free the end of the cable from its handle. Squeeze the tabs with needle nose pliers to detach the cable end from the Hood Latch assembly before you can lift the cable out of the lock. With partial park brake pedal assembly removal you can access the Hood Cable. Pull the cable toward the handle through the cowl hole and disconnect the radiator air baffle and deflector. First detach the cable end from the Hood Latch assembly by using needle nose pliers to squeeze two tabs that release the end from the handle mechanism. Once the end is removed, lift the cable from its lock. During installation feed the cable through the cowl hole toward the front of the vehicle while making sure the grommet remains properly seated. Seam the cable end to the latch assembly while securing the cable to retainer clips before connecting the cable end to the cable handle. Before final installation reinstall the radiator air baffle along with the deflector component then attach the cable handle under the i/p and tighten the cable handle nut to 11 n.m (97 lb in). Set the electrical center into the retaining grooves before placing retaining clips on both assembly sides. Once complete secure both electrical center retaining clips then fasten the center retaining nut to 2.5 n.m (22 lb in) and reinstall the left hinge pillar trim panel before closing the hood.
    Posted by ChevyPartsGiant Specialist
    Q:
    How to replace the Release Hood Cable on Chevrolet Silverado 2500? Posted by Customer
    A:
    Begin Hood Cable replacement by using a rod to operate the latch tab on the lock assembly's left side for hood liberation before continuing. Start by raising the hood then take out the driver-side trim panel that covers the hinges. To access the electrical center you need to first loosen the center retaining nut and then free both retaining clips. You can locate the hood release cable by removing retaining clips from both sides followed by lifting the electrical center out of its retaining grooves. First detach the cable end from the handle by removing the cable handle found under the instrument panel. Press the tabs with needle nose pliers before extracting the end of the cable from the Hood Latch assembly while gently pulling the cable free from its lock. The park brake pedal assembly needs partial removal for access to the Hood Cable while pulling it toward the cable handle through the cowl hole. Additionally, remove the radiator air baffle and deflector. Remove the cable from the retainer clips using needle nose pliers to disconnect the cable end from the Hood Latch assembly while also pressing the tabs to free the handle before lifting the cable out. Put the cable toward the front of the vehicle through the cowl hole while making sure the grommet seats correctly. First secure the cable end to the latch assembly before mounting the cable into its retainer clips and completing the cable attachment to the handle. After installing the radiator air baffle and deflector you must attach the cable handle below the i/p before tightening the cable handle nut to 11 n.m (97 lb in). Reinstall the park brake pedal assembly while setting the electrical center into its retaining grooves. Apply retaining clips to both sides of the assembly. Secure the electrical center cover while tightening both retaining clips and the center retaining nut to 2.5 n.m (22 lb in). Next, reinstall the left hinge pillar trim panel and close the hood.
    Posted by ChevyPartsGiant Specialist
    Q:
    How to replace the Release Hood Cable on Chevrolet Silverado 1500? Posted by Customer
    A:
    Begin Hood Cable replacement by using a rod to operate the latch tab on the lock assembly's left side for hood liberation before continuing. Start by raising the hood then take out the driver-side trim panel that covers the hinges. To access the electrical center you need to first loosen the center retaining nut and then free both retaining clips. You can locate the hood release cable by removing retaining clips from both sides followed by lifting the electrical center out of its retaining grooves. First detach the cable end from the handle by removing the cable handle found under the instrument panel. Press the tabs with needle nose pliers before extracting the end of the cable from the Hood Latch assembly while gently pulling the cable free from its lock. The park brake pedal assembly needs partial removal for access to the Hood Cable while pulling it toward the cable handle through the cowl hole. Additionally, remove the radiator air baffle and deflector. Remove the cable from the retainer clips using needle nose pliers to disconnect the cable end from the Hood Latch assembly while also pressing the tabs to free the handle before lifting the cable out. Put the cable toward the front of the vehicle through the cowl hole while making sure the grommet seats correctly. First secure the cable end to the latch assembly before mounting the cable into its retainer clips and completing the cable attachment to the handle. After installing the radiator air baffle and deflector you must attach the cable handle below the i/p before tightening the cable handle nut to 11 n.m (97 lb in). Reinstall the park brake pedal assembly while setting the electrical center into its retaining grooves. Apply retaining clips to both sides of the assembly. Secure the electrical center cover while tightening both retaining clips and the center retaining nut to 2.5 n.m (22 lb in). Next, reinstall the left hinge pillar trim panel and close the hood.
    Posted by ChevyPartsGiant Specialist
    Q:
    How to replace the Hood Cable on Chevrolet Silverado 3500 Classic? Posted by Customer
    A:
    The first step for replacing the Hood Cable includes using a rod to activate the latch tab on the lock assembly's left side when the cable is broken. Start by lifting the hood while removing the left hinge pillar trim panel. First detach the retaining nut in the center and release the retaining clips that run to both sides of the electrical center cover. You can reach the hood release cable when you remove the electrical center by unscrewing the retaining clips and lifting it from its retaining grooves. Extract the cable handle from under the instrument panel (I/P) then disconnect the cable end from this handle. Squeeze the Hood Latch assembly tabs with needle nose pliers to remove the cable end before lifting the cable from the lock. The cable requires access through the cowl's hole by pulling the cable towards the handle while removing both the radiator air baffle and deflector. Use needle nose pliers on the tabs to extract the cable end from the Hood Latch assembly handle before you lift the cable free from the lock. When you install the cable you need to pass it forward through the cowl hole before positioning the grommet correctly. Start by connecting the latch assembly to the cable end and by installing the end through the retainer clips. Finally install the cable end through the handle. Install the radiator air baffle together with deflector per fastener notice direction. Secure the cable handle beneath the i/p and tighten the cable handle nut to 11 n.m (97 lb in). The park brake pedal assembly goes back into place while the electrical center fits into its retaining grooves followed by retaining clip installation on both sides. To finish the installation attach the electrical center cover by tightening the center retaining nut to 2.5 n.m (22 lb in) while you also secure the retaining clips and reinstall the left hinge pillar trim panel and close the hood.
    Posted by ChevyPartsGiant Specialist
    Q:
    How to replace the Release Hood Cable on Chevrolet Suburban 2500? Posted by Customer
    A:
    To replace the Hood Cable, it's first important to release the hood, if a cable is broken by pressing the latch tab on the left side of lock assembly using a rod. Open the hood and remove the left hinge pillar trim panel. Next, pull off the cable handle of the handle located beneath the instrument panel (IP), and separate the cable end from the handle by pressing the tabs with needle nose pliers and then separating the cable from the lock. Pull the cable toward the cable handle through the hole in the cowl until you disengage the retainer clips, and disconnect the end of the cable by using the needle nose pliers to press the tabs and pry the cable from the lock on the Hood Latch assembly. For installing, pull the cable through the cowl, make sure a grommet is in the place, then connect the end of the cable to the latch assembly and tie it to the retainer clips. Next, connect the cable end to the cable handle, making sure that you tighten the cable handle nut to 11 n.m797 b in (97 lb in), and connect the cable handle under the ip. Finally, reconnect the left hinge pillar trim panel and shut the hood.
    Posted by ChevyPartsGiant Specialist
    Q:
    How to replace the Release Hood Cable on Chevrolet Silverado 3500? Posted by Customer
    A:
    Begin Hood Cable replacement by using a rod to operate the latch tab on the lock assembly's left side for hood liberation before continuing. Start by raising the hood then take out the driver-side trim panel that covers the hinges. To access the electrical center you need to first loosen the center retaining nut and then free both retaining clips. You can locate the hood release cable by removing retaining clips from both sides followed by lifting the electrical center out of its retaining grooves. First detach the cable end from the handle by removing the cable handle found under the instrument panel. Press the tabs with needle nose pliers before extracting the end of the cable from the Hood Latch assembly while gently pulling the cable free from its lock. The park brake pedal assembly needs partial removal for access to the Hood Cable while pulling it toward the cable handle through the cowl hole. Additionally, remove the radiator air baffle and deflector. Remove the cable from the retainer clips using needle nose pliers to disconnect the cable end from the Hood Latch assembly while also pressing the tabs to free the handle before lifting the cable out. Put the cable toward the front of the vehicle through the cowl hole while making sure the grommet seats correctly. First secure the cable end to the latch assembly before mounting the cable into its retainer clips and completing the cable attachment to the handle. After installing the radiator air baffle and deflector you must attach the cable handle below the i/p before tightening the cable handle nut to 11 n.m (97 lb in). Reinstall the park brake pedal assembly while setting the electrical center into its retaining grooves. Apply retaining clips to both sides of the assembly. Secure the electrical center cover while tightening both retaining clips and the center retaining nut to 2.5 n.m (22 lb in). Next, reinstall the left hinge pillar trim panel and close the hood.
    Posted by ChevyPartsGiant Specialist
    Q:
    How to replace the Hood Cable on Chevrolet Silverado 1500 Classic? Posted by Customer
    A:
    The first step for replacing the Hood Cable includes using a rod to activate the latch tab on the lock assembly's left side when the cable is broken. Start by lifting the hood while removing the left hinge pillar trim panel. First detach the retaining nut in the center and release the retaining clips that run to both sides of the electrical center cover. You can reach the hood release cable when you remove the electrical center by unscrewing the retaining clips and lifting it from its retaining grooves. Extract the cable handle from under the instrument panel (I/P) then disconnect the cable end from this handle. Squeeze the Hood Latch assembly tabs with needle nose pliers to remove the cable end before lifting the cable from the lock. The cable requires access through the cowl's hole by pulling the cable towards the handle while removing both the radiator air baffle and deflector. Use needle nose pliers on the tabs to extract the cable end from the Hood Latch assembly handle before you lift the cable free from the lock. When you install the cable you need to pass it forward through the cowl hole before positioning the grommet correctly. Start by connecting the latch assembly to the cable end and by installing the end through the retainer clips. Finally install the cable end through the handle. Install the radiator air baffle together with deflector per fastener notice direction. Secure the cable handle beneath the i/p and tighten the cable handle nut to 11 n.m (97 lb in). The park brake pedal assembly goes back into place while the electrical center fits into its retaining grooves followed by retaining clip installation on both sides. To finish the installation attach the electrical center cover by tightening the center retaining nut to 2.5 n.m (22 lb in) while you also secure the retaining clips and reinstall the left hinge pillar trim panel and close the hood.
    Posted by ChevyPartsGiant Specialist
    Q:
    How to Replace a Hood Cable for Release Cable on Chevrolet Tahoe? Posted by Customer
    A:
    Start by releasing the hood through left-side latch tab pressing with a rod for broken cables. Raise the hood and then remove the left hinge pillar trim panel. Start by removing the electrical center cover through nut removal at its center then unclipping both side retaining components. The Hood Cable becomes accessible once you lift out the electrical center after removing its retaining clips from both sides. The instrument panel's (I/P) cable handle needs removal to free the end of the cable from its handle. Squeeze the tabs with needle nose pliers to detach the cable end from the Hood Latch assembly before you can lift the cable out of the lock. With partial park brake pedal assembly removal you can access the Hood Cable. Pull the cable toward the handle through the cowl hole and disconnect the radiator air baffle and deflector. First detach the cable end from the Hood Latch assembly by using needle nose pliers to squeeze two tabs that release the end from the handle mechanism. Once the end is removed, lift the cable from its lock. During installation feed the cable through the cowl hole toward the front of the vehicle while making sure the grommet remains properly seated. Seam the cable end to the latch assembly while securing the cable to retainer clips before connecting the cable end to the cable handle. Before final installation reinstall the radiator air baffle along with the deflector component then attach the cable handle under the i/p and tighten the cable handle nut to 11 n.m (97 lb in). Set the electrical center into the retaining grooves before placing retaining clips on both assembly sides. Once complete secure both electrical center retaining clips then fasten the center retaining nut to 2.5 n.m (22 lb in) and reinstall the left hinge pillar trim panel before closing the hood.
    Posted by ChevyPartsGiant Specialist
    Q:
    How to replace the Hood Cable for the Primary Latch Release on Chevrolet Suburban 1500? Posted by Customer
    A:
    The replacement of the hood primary latch cable requires that you lift the hood before you remove the left hinge pillar trim panel. You should start by removing the cable handle beneath the instrument panel (IP) and use needle nose pliers to disconnect the cable end from the handle while pressing its tabs before lifting the cable from the lock. Rotate the Hood Latch assembly cable toward the cable handle through the cowl hole by disconnecting it from the retainer clips using needle nose pliers to lift its tabs from the lock. The cable installation requires users to thread the new cable towards the front of the vehicle through the cowl hole while verifying that the grommet stays properly positioned. Connect the cable end to the latch assembly while fixing the cable into the retainer clips before attaching the cable end to the cable handle. Fasten the cable handle beneath the ip using tools to tighten the cable handle nut at 11 n.m (97 lb in). Installation of the left hinge pillar trim panel should be followed by closing the hood.
    Posted by ChevyPartsGiant Specialist
    Q:
    How to replace the Hood Cable on GMC Sierra 1500 Classic? Posted by Customer
    A:
    The first step for replacing the Hood Cable includes using a rod to activate the latch tab on the lock assembly's left side when the cable is broken. Start by lifting the hood while removing the left hinge pillar trim panel. First detach the retaining nut in the center and release the retaining clips that run to both sides of the electrical center cover. You can reach the hood release cable when you remove the electrical center by unscrewing the retaining clips and lifting it from its retaining grooves. Extract the cable handle from under the instrument panel (I/P) then disconnect the cable end from this handle. Squeeze the Hood Latch assembly tabs with needle nose pliers to remove the cable end before lifting the cable from the lock. The cable requires access through the cowl's hole by pulling the cable towards the handle while removing both the radiator air baffle and deflector. Use needle nose pliers on the tabs to extract the cable end from the Hood Latch assembly handle before you lift the cable free from the lock. When you install the cable you need to pass it forward through the cowl hole before positioning the grommet correctly. Start by connecting the latch assembly to the cable end and by installing the end through the retainer clips. Finally install the cable end through the handle. Install the radiator air baffle together with deflector per fastener notice direction. Secure the cable handle beneath the i/p and tighten the cable handle nut to 11 n.m (97 lb in). The park brake pedal assembly goes back into place while the electrical center fits into its retaining grooves followed by retaining clip installation on both sides. To finish the installation attach the electrical center cover by tightening the center retaining nut to 2.5 n.m (22 lb in) while you also secure the retaining clips and reinstall the left hinge pillar trim panel and close the hood.
    Posted by ChevyPartsGiant Specialist
    Q:
    How to Replace a Hood Cable for Release Cable on GMC Yukon? Posted by Customer
    A:
    Start by releasing the hood through left-side latch tab pressing with a rod for broken cables. Raise the hood and then remove the left hinge pillar trim panel. Start by removing the electrical center cover through nut removal at its center then unclipping both side retaining components. The Hood Cable becomes accessible once you lift out the electrical center after removing its retaining clips from both sides. The instrument panel's (I/P) cable handle needs removal to free the end of the cable from its handle. Squeeze the tabs with needle nose pliers to detach the cable end from the Hood Latch assembly before you can lift the cable out of the lock. With partial park brake pedal assembly removal you can access the Hood Cable. Pull the cable toward the handle through the cowl hole and disconnect the radiator air baffle and deflector. First detach the cable end from the Hood Latch assembly by using needle nose pliers to squeeze two tabs that release the end from the handle mechanism. Once the end is removed, lift the cable from its lock. During installation feed the cable through the cowl hole toward the front of the vehicle while making sure the grommet remains properly seated. Seam the cable end to the latch assembly while securing the cable to retainer clips before connecting the cable end to the cable handle. Before final installation reinstall the radiator air baffle along with the deflector component then attach the cable handle under the i/p and tighten the cable handle nut to 11 n.m (97 lb in). Set the electrical center into the retaining grooves before placing retaining clips on both assembly sides. Once complete secure both electrical center retaining clips then fasten the center retaining nut to 2.5 n.m (22 lb in) and reinstall the left hinge pillar trim panel before closing the hood.
    Posted by ChevyPartsGiant Specialist
    Q:
    How to Replace a Hood Cable for Release Cable on GMC Yukon XL 2500? Posted by Customer
    A:
    Start by releasing the hood through left-side latch tab pressing with a rod for broken cables. Raise the hood and then remove the left hinge pillar trim panel. Start by removing the electrical center cover through nut removal at its center then unclipping both side retaining components. The Hood Cable becomes accessible once you lift out the electrical center after removing its retaining clips from both sides. The instrument panel's (I/P) cable handle needs removal to free the end of the cable from its handle. Squeeze the tabs with needle nose pliers to detach the cable end from the Hood Latch assembly before you can lift the cable out of the lock. With partial park brake pedal assembly removal you can access the Hood Cable. Pull the cable toward the handle through the cowl hole and disconnect the radiator air baffle and deflector. First detach the cable end from the Hood Latch assembly by using needle nose pliers to squeeze two tabs that release the end from the handle mechanism. Once the end is removed, lift the cable from its lock. During installation feed the cable through the cowl hole toward the front of the vehicle while making sure the grommet remains properly seated. Seam the cable end to the latch assembly while securing the cable to retainer clips before connecting the cable end to the cable handle. Before final installation reinstall the radiator air baffle along with the deflector component then attach the cable handle under the i/p and tighten the cable handle nut to 11 n.m (97 lb in). Set the electrical center into the retaining grooves before placing retaining clips on both assembly sides. Once complete secure both electrical center retaining clips then fasten the center retaining nut to 2.5 n.m (22 lb in) and reinstall the left hinge pillar trim panel before closing the hood.
    Posted by ChevyPartsGiant Specialist
    Q:
    How to replace the Hood Cable for the Primary Latch Release on GMC Yukon XL 1500? Posted by Customer
    A:
    Firstly, if the Hood Latch release cable is broken, it shall be released by pressing the latch tab on the left side of the lock assembly using a rod. Raise the hood and pull out the left hinge pillar trim panel. Next, take off the electrical center cover by removing the center retaining nut and releasing the retaining clips on both sides. Lift out that electrical center by removing the retaining clips on either side from the retaining grooves. This will allow you to gain access to the Hood Latch release cable. Remove the cable handle underneath the instrument panel (I/P) and remove the cable end from the handle. With the help of the needle nose pliers, squeeze the tabs and remove the cable end from the Hood Latch assembly and then draw the cable off the lock. Partially drive the park brake pedal assembly to provide a connection to the Hood Latch release cable, pull the cable into the handle of the cable that is connected to the hole in the cowl, and remove the radiator air baffle and deflector. Unplug the cable from the retainer clips and pull the cable from the Hood Latch assembly by squeezing the tabs of the cable end off the handle then pull the cable from the lock. For installation, introduce and pull the cable through the hole in the cowl to the front of the vehicle, making sure that the grommet is seated. Secure the cable end into the latch assembly and cable to retainer clips and secure the cable end to the cable handle. Reinstalling the radiator air baffle and deflector, attach the cable handle underneath the i/p, tightening the cable handle nut to 11 n.m (97 lb in). Assemble the park brake pedal assembly and install it back into the retaining grooves and secure both retaining clips. Finally, mount the electrical center cover by connecting it using retaining brackets on both sides, put on the center retaining nut, and tighten to 2.5 n.m (22 lb in), install left hinge pillar trim panel and close hood.
    Posted by ChevyPartsGiant Specialist
    Q:
    How to replace the Release Hood Cable on GMC Sierra 1500? Posted by Customer
    A:
    Begin Hood Cable replacement by using a rod to operate the latch tab on the lock assembly's left side for hood liberation before continuing. Start by raising the hood then take out the driver-side trim panel that covers the hinges. To access the electrical center you need to first loosen the center retaining nut and then free both retaining clips. You can locate the hood release cable by removing retaining clips from both sides followed by lifting the electrical center out of its retaining grooves. First detach the cable end from the handle by removing the cable handle found under the instrument panel. Press the tabs with needle nose pliers before extracting the end of the cable from the Hood Latch assembly while gently pulling the cable free from its lock. The park brake pedal assembly needs partial removal for access to the Hood Cable while pulling it toward the cable handle through the cowl hole. Additionally, remove the radiator air baffle and deflector. Remove the cable from the retainer clips using needle nose pliers to disconnect the cable end from the Hood Latch assembly while also pressing the tabs to free the handle before lifting the cable out. Put the cable toward the front of the vehicle through the cowl hole while making sure the grommet seats correctly. First secure the cable end to the latch assembly before mounting the cable into its retainer clips and completing the cable attachment to the handle. After installing the radiator air baffle and deflector you must attach the cable handle below the i/p before tightening the cable handle nut to 11 n.m (97 lb in). Reinstall the park brake pedal assembly while setting the electrical center into its retaining grooves. Apply retaining clips to both sides of the assembly. Secure the electrical center cover while tightening both retaining clips and the center retaining nut to 2.5 n.m (22 lb in). Next, reinstall the left hinge pillar trim panel and close the hood.
    Posted by ChevyPartsGiant Specialist
    Q:
    How to replace the Release Hood Cable on GMC Sierra 3500? Posted by Customer
    A:
    Begin Hood Cable replacement by using a rod to operate the latch tab on the lock assembly's left side for hood liberation before continuing. Start by raising the hood then take out the driver-side trim panel that covers the hinges. To access the electrical center you need to first loosen the center retaining nut and then free both retaining clips. You can locate the hood release cable by removing retaining clips from both sides followed by lifting the electrical center out of its retaining grooves. First detach the cable end from the handle by removing the cable handle found under the instrument panel. Press the tabs with needle nose pliers before extracting the end of the cable from the Hood Latch assembly while gently pulling the cable free from its lock. The park brake pedal assembly needs partial removal for access to the Hood Cable while pulling it toward the cable handle through the cowl hole. Additionally, remove the radiator air baffle and deflector. Remove the cable from the retainer clips using needle nose pliers to disconnect the cable end from the Hood Latch assembly while also pressing the tabs to free the handle before lifting the cable out. Put the cable toward the front of the vehicle through the cowl hole while making sure the grommet seats correctly. First secure the cable end to the latch assembly before mounting the cable into its retainer clips and completing the cable attachment to the handle. After installing the radiator air baffle and deflector you must attach the cable handle below the i/p before tightening the cable handle nut to 11 n.m (97 lb in). Reinstall the park brake pedal assembly while setting the electrical center into its retaining grooves. Apply retaining clips to both sides of the assembly. Secure the electrical center cover while tightening both retaining clips and the center retaining nut to 2.5 n.m (22 lb in). Next, reinstall the left hinge pillar trim panel and close the hood.
    Posted by ChevyPartsGiant Specialist
    If you have any questions about this product, please don't hesitate to ask us. We will be happy to help you!

OEM GM 15142953, Excellent Performance and Perfect Fitment

To ensure reliability, purchase GM part # 15142953 Release Cable. It is sometimes referred to as GM Hood Cable. Choosing OEM parts is the optimal decision for guaranteeing superior quality and perfect performance. These components undergo stringent quality checks and are carefully constructed to comply with GM's factory specifications, ensuring a smooth installation process.

ChevyPartsGiant.com is a leading supplier of genuine GM parts such as GM 15142953 Release Cable. Our website boasts an extensive inventory of OEM GM parts, available at highly competitive prices in the market. Should you require any new genuine GM parts, rest assured we will deliver them swiftly and efficiently to your doorstep. Furthermore, all our parts come with the assurance of a manufacturer's warranty. For detailed Chevy parts information, click here.
Choose ChevyPartsGiant for discounted prices, exceptional service and fast delivery