Make sure this part fits

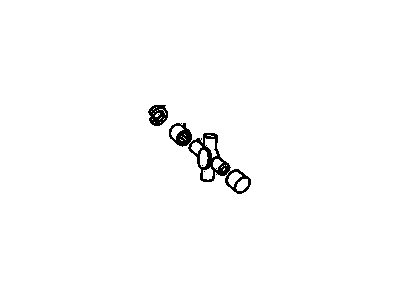
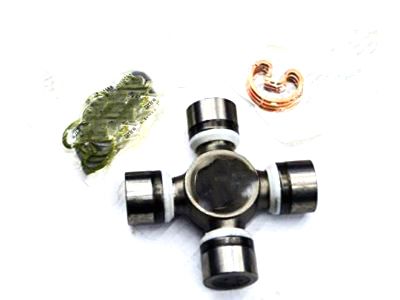
GM 89040243
Universal Joints

1999-2012 GM

Customer Questions & Expert Answers (12)
GM 89040243 Universal Joints
  • Part Description
    Joint Kit, Propeller Shaft Front Universal; U Joint
  • Position
    Front
  • Replaces
    12543573, 12473124, 12476135
  • Manufacturer
    General Motors
Make sure this part fits
$75.05 MSRP: $183.13
You Save: $108.08 (60%)
Ships in 1-2 Business Days
1
ADD TO CART
  • Related Parts
  • Product Specifications
  • Vehicle Fitment
  • Customer Questions & Expert Answers
  • Product Specifications

    BrandGenuine GM
    Manufacturer Part Number89040243
    Part DescriptionJoint Kit, Propeller Shaft Front Universal; U Joint
    Other NamesJoint Kit, Propeller Shaft Universal Joint
    Item Dimensions4.2 x 4.1 x 1.6 inches
    Item Weight1.80 Pounds
    PositionFront
    ConditionNew
    Fitment TypeDirect Replacement
    Replaces12543573, 12473124, 12476135
    ManufacturerGeneral Motors
    SKU89040243
    WarrantyThis genuine GM part is guaranteed by GM's factory warranty.
    Shipping & ReturnShipping Policy Return Policy
    Warning: California's Proposition 65
  • Vehicle Fitment

    Year Make Model Trim Engine
    2002-2006 Chevrolet Avalanche 1500Base, LS, LT, On Road Edition, WBH, Z668 Cyl 5.3 L FLEX, 8 Cyl 5.3 L GAS
    2002-2006 Chevrolet Avalanche 2500Base, LT8 Cyl 8.1 L GAS
    2004-2012 Chevrolet ColoradoBase, LS, LT, Sport, Sport LS, WT, Z71, Z71 LS, Z85, Z85 LS4 Cyl 2.8 L GAS, 4 Cyl 2.9 L GAS, 5 Cyl 3.5 L GAS, 5 Cyl 3.7 L GAS, 8 Cyl 5.3 L GAS
    1999-2008 Chevrolet Silverado 1500Base, Hybrid, LS, LT, LTZ, SS, WT6 Cyl 4.3 L GAS, 8 Cyl 4.8 L GAS, 8 Cyl 5.3 L FLEX, 8 Cyl 5.3 L FULL HYBRID EV-GAS (FHEV), 8 Cyl 5.3 L GAS, 8 Cyl 6.0 L GAS
    2007 Chevrolet Silverado 1500 ClassicHybrid, LS, LT, SS, WT6 Cyl 4.3 L GAS, 8 Cyl 4.8 L GAS, 8 Cyl 5.3 L FLEX, 8 Cyl 5.3 L FULL HYBRID EV-GAS (FHEV), 8 Cyl 5.3 L GAS, 8 Cyl 6.0 L GAS
    2005-2006, 2001-2003 Chevrolet Silverado 1500 HDBase, LS, LT8 Cyl 6.0 L GAS
    2007-2008 Chevrolet Silverado 2500 HDLT, LTZ, WT8 Cyl 6.0 L GAS, 8 Cyl 6.6 L DIESEL
    2007-2008 Chevrolet Silverado 3500 HDLT, LTZ, WT8 Cyl 6.0 L GAS, 8 Cyl 6.6 L DIESEL
    2002-2006 Chevrolet Suburban 1500Base, LS, LT, LTZ, Z718 Cyl 5.3 L FLEX, 8 Cyl 5.3 L GAS, 8 Cyl 6.0 L GAS
    2004-2012 GMC CanyonSL, SLE, SLT, WT, Z71 Fleet, Z71 SL, Z71 SLE, Z85 SL, Z85 SLE4 Cyl 2.8 L GAS, 4 Cyl 2.9 L GAS, 5 Cyl 3.5 L GAS, 5 Cyl 3.7 L GAS, 8 Cyl 5.3 L GAS
    View More
  • Customer Questions & Expert Answers

    Q:
    Is 89040243 compatible with my car? Posted by ChevyPartsGiant Specialist
    A:
    Please Select Your Vehicle model to see if part number 89040243 is suitable before ordering.
    Posted by ChevyPartsGiant Specialist
    Q:
    How to replace the universal joint with a nylon injected ring on Chevrolet Avalanche 1500? Posted by Customer
    A:
    To switch to a nylon injected ring for the Universal Joint collect these parts first: u-joint bearing separator (J9522-3) and u-joint bearing spacer remover (J9522-5). Place the propeller shaft horizontally under light pressure without clamping the tubing inside the vise because it may harm the components. Draw markings to confirm the right attitude of the propeller shaft. Set the Universal Joint on top of the 30 mm (11 1/8 inch) socket so that only the lower yoke ear contacts the socket. Press the lower bearing cup out of the yoke ear through the u-joint bearing separator tool j9522-3 which shears the plastic retaining ring on the bearing cup. Push the u-joint bearing spacer remover (J9522-5) beyond the seal to extract the bearing cup when manual force fails to free it. Mark the Slip Yoke position before removing its opposite bearing cup using the propeller shaft rotation. Uninstall the cross and leftover joint elements to check for debris or damage around the retaining ring grooves and bearing cup bores. Take out remaining plastic pieces from the groove spaces to get optimal positioning of the new bearing cups. To assemble the items place one bearing cup partially into one side of the yoke before you place the yoke ear down then interact the cross with caution to permit the trunnion to move without difficulty. Stick the bearing cup to its yoke ear mark without touching the other side. Do this with both bearing cups as you line up their trunnions perfectly. Check how well the needle bearings line up to find the source of the binding. Push down firmly until the bearing retainer slot shows through before fitting the retainer and pressing both pieces into their correct positions. Use a dead blow hammer as needed while pushing the retainer into position. Also apply chassis grease to the snap ring to lower installation challenges.
    Posted by ChevyPartsGiant Specialist
    Q:
    How to replace the universal joint with an external snap ring on Chevrolet Colorado? Posted by Customer
    A:
    Start by placing the propeller shaft on a press table flat on top then keep the hollow tubing from vise clamps since vise pressure can break it. Note the specific positioning of the transmission and rear axle on the propeller shaft before installation. Push pliers onto the snap ring ends then pinch to disassemble; gently tap the cup when the ring remains stuck. Use a 30 mm hex head socket or 27 mm socket to support the lower yoke ear and push out its bearing cup with j 9522-3. After the seal and bearing cup fail to separate together use j 9522-5 tool to reach and push them apart. Turn the prop shaft and press out the opposite bearing cup as you note its position to the tube for future setup. Take out all components from the yoke including the cross to replace both universal joints and bearing cups of the Slip Yoke. Check the groove areas of retaining rings and bearing cup spaces for dirt and defects before cleaning them when needed. To build the yoke assembly insert one bearing cup into the joint part until its flat section meets the yoke hole and the ear points downward. Put the cross inside the yoke with the trunnion moving easily in the bearing cup before pushing the bearing cup tightly against the yoke ear. Place the opposite bearing cup partially in place after lining up its trunnions straight to both parts before pushing the piece in while verifying easy movement. Examine the needle bearings when they cannot slide freely. Press until the bearing retainer seating groove appears before putting in both retainers and completing the pushing process. Use a small dead blow hammer to push on the retainer when fitting becomes hard. Applying a tiny amount of chassis grease to the snap ring makes it easier to put it into position correctly.
    Posted by ChevyPartsGiant Specialist
    Q:
    How to Properly Service a Universal Joint with an External Snap Ring on Chevrolet Colorado? Posted by Customer
    A:
    Mount the propeller shaft on a press table to change the Universal Joint without the risk of harm. Set up the propeller shaft horizontally at the beginning. Indicate on the propeller shaft the positions where transmission and rear axle connections will be made. When the snap rings resist being removed use pliers, and then lightly hit the cup's end with a hammer to ease pressure. Press the lower bearing cup out of the yoke ear by placing j 9522-3 on the open horizontal bearing cups. Support this side of the yoke its 30 mm hex socket fixture or 27 mm socket. Use j 9522-5 between the seal and bearing cup to complete removal when the cup remains stuck. Turn the propeller shaft to push the opposite bearing cup toward the Slip Yoke while keeping note of its alignment with the tube for assembly. Take off the cross and all Universal Joint components from the yoke. Also remove bearing cups from the Slip Yoke if replacing its front Universal Joint unit. Check the sealing ring slots and bearing cup bores for residue and signs of damage then remove it through cleaning methods. Put one bearing cup into the yoke first by placing the yoke ear down and the cup into one side of the assembly. Set the cross into the yoke and push bearing cup down to rest on its associated trunnion space. Works the bearing cup half way into the yoke ear while aligning the trunnions to straight entrance for both bearing cups. Use the opposite bearing cup to test trunnion movement; check the needle bearings if trunnions become stuck when pushed. Push the bearing cup straight into position while watching until the bearing cup retainer notch becomes visible. Afterward, insert the bearing retainer into the groove and push until it clicks into place on both retainer sides. A stroke from a dead blow hammer followed by smeared grease on the snap ring can assist with retaining unit installation.
    Posted by ChevyPartsGiant Specialist
    Q:
    How to Properly Service a Universal Joint with an External Snap Ring on GMC Canyon? Posted by Customer
    A:
    To fix the universal joint start by preparing these tools U-Joint Bearing Separator model J 9522-3 and U-Joint Bearing Spacer Remover tool J 9522-5. Keep the propeller shaft in a horizontal position while supporting it and never fit the tubing in a vise because it damages the shaft. Label the shaft ends before taking out the snap rings with pliers. Lightly tapping on the cup will help the ring exit when it does not come out freely. Set the lower yoke support onto either a 30 mm (1-1/8 in) hex socket head or a 27 mm (1-1/16 in) socket tool. Then use the U-Joint Bearing Separator (J 9522-3) device to push the lower bearing cup out from the horizontal opening. Install the U-Joint Bearing Spacer Remover tool (J 9522-5) when the standard process to remove the bearing cup does not work. Use the propeller shaft rotation to push out the other bearing cup and temporarily note its position for correct reassembly. Look through the bores of the bearing cups and retaining ring grooves for debris then assess each area for irregularities in the surface. Insert one bearing cup into the yoke side then fit the cross over it before pushing the cup until it meets the surface of the yoke. Apply the second bearing cup to its proper location and press it into position while making sure the trunnions line up. After seeing a clear slot in the retainer groove you must press both bearing retainers into place before using a dead blow hammer when needed to fully seat the retainers. The snap ring installation is smoother with a coating of chassis grease for the operation.
    Posted by ChevyPartsGiant Specialist
    Q:
    How to replace the universal joint with an external snap ring on GMC Canyon? Posted by Customer
    A:
    When replacing the universal joint you need to use tools J 9522-3 (U-Joint Bearing Separator) and J 9522-5 (U-Joint Bearing Spacer Remover). Position the propeller shaft horizontally on a standby device to stop any possible harm to the tubing. Make aligning markings on the propeller shaft to guide installation. Press pliers gently on the snap rings to unfasten them and tap the end of the cup gently to lower pressure if needed. Position the lower yoke ear onto a hex socket or socket with 1-1/16 inch head and put J9522-3 over open horizontal bearing cups to push the bearing cup out of the yoke cast. Push J 9522-5 between the seal and bearing cup if the cup does not fully move to remove it. Twist the shaft to force the opposite bearing cup out without damaging it. Note its position to the tube then take off the slip yoke and other universal joint parts. Check if the grooves of the retaining rings and bores for the bearing cups remain clean during this process. First put a bearing cup into one yoke side and then attach the cross. Push the bearing cup until it reaches the yoke ear. You should push the opposite bearing cup through until it locks in position. Verify that the trunnions line up properly before verifying easy movement across all angles. Press down firmly to show the retainer groove on both yoke ears and then put together the bearing retainers while striking with a dead blow hammer if needed to fully seat the parts. You can apply chassis grease to the snap ring for better installation performance.
    Posted by ChevyPartsGiant Specialist
    Q:
    How to replace the universal joint with an external snap ring on GMC Sierra 1500 Classic? Posted by Customer
    A:
    You need two tools for swapping out the universal joint snap ring - specifically the J 9522-3 U-Joint Bearing Separator and J 9522-5 U-Joint Bearing Spacer Remover. Set the propeller shaft horizontally across a press before beginning while taking care to prevent tubing damage by using vise clamps. Apply temporary marks to the propeller shaft's extremities for correct post-installation alignment. Remove snap rings through plier pinching while end cup light tapping helps reduce the pressure. Oil J 9522-3 with the lower yoke ear opened by securing it into either a 30 mm (1-1/8 inch) hex head socket or a 27 mm (1-1/16 inch) socket. Then use J 9522-3 to push the lower bearing cup out of the yoke ear. To complete the removal of an uncooperative bearing cup lift the cross downward and slip J 9522-5 between the seal and cup to proceed with pressing it out. Use propeller shaft rotation to push out the bearing cup at the opposite end while recording the slip yoke's position to the tube. After removing the cross and universal joint components, check the bearing cup bores and retaining ring grooves for any imperfections or unclean areas. First position half of a bearing cup inside one yoke side before assembling the cross allowing the trunnion to fit without resistance. Use bearing tools to drive the bearing cup until it contacts the yoke ear before repeating this process on the other side and verifying correct trunnion alignment. Check the needle bearings when you experience binding during installation procedures. After the retainer groove for the bearing cup becomes visible you must build the bearing retainer assembly before pressing both retainers to snap into position. The dead blow hammer can help spring the yoke surface slightly before you install the retainers. To facilitate seating you should use chassis grease on the snap rings.
    Posted by ChevyPartsGiant Specialist
    Q:
    How to replace the universal joint with a nylon injected ring on GMC Sierra 1500? Posted by Customer
    A:
    You need two tools to change the Universal Joint - start with j 9522-3 u joint bearing separator and j 9522-5 u joint bearing spacer remover. Place the propeller shaft horizontally on a press setup and take care not to put the tubing inside a vise to protect it from injury. Set a mark on the shaft ends before placing the Universal Joint so its lower yoke head fits into a 30 mm socket. To access the lower bearing cup in the yoke ear you need the u joint bearing separator (J 9522-3) to cut the plastic retaining ring before pressing the bearing cup out. Change to the replacement tool j 9522-5 to push the bearing cup completely away from its position. Adjust the propeller shaft rotation to remove the other bearing cup for future reassembly and record its position. Look for dirt or marks in the retaining ring slots and bearing cup wall before cleaning them thoroughly. Place one side of the yoke partially with the bearing cup and put the cross in position to freely fit the trunnion. Insert one bearing cup until it snaps into the yoke ear position on each side while keeping the trunnion alignment straight. Examine the needle bearings immediately after assembly because binding problems with them indicate misalignment. Push the tool until the groove on top of the bearing retainer appears while maintaining proper alignment before installing the bearing retainer and pressing both retainers for perfect fit. When needed use a dead blow hammer for the retainer while chassis grease helps installation.
    Posted by ChevyPartsGiant Specialist
    Q:
    How can you assist in seating the bearing retainer for the 2006 Chevrolet Avalanche 2500? Posted by Customer
    A:
    Use a dead blow hammer if necessary.
    Posted by ChevyPartsGiant Specialist
    See expert answers on similar Universal Joint
    Q:
    What is the next step after supporting the lower ear of the yoke for the 2006 Chevrolet Colorado? Posted by Customer
    A:
    Use the U-Joint Bearing Separator (J 9522-3) to press the lower bearing cup out of the yoke ear.
    Posted by ChevyPartsGiant Specialist
    See expert answers on similar Universal Joint
    Q:
    What is the next step after supporting the lower ear of the yoke for the 2007 Chevrolet Silverado 1500 Classic? Posted by Customer
    A:
    Place J 9522-3 on the open horizontal bearing cups to press the lower bearing cup out of the yoke ear.
    Posted by ChevyPartsGiant Specialist
    See expert answers on similar Universal Joint
    Q:
    What tool is used to support the lower ear of the yoke for the 2008 GMC Sierra 1500? Posted by Customer
    A:
    A 30 mm (1 1/8 in) socket.
    Posted by ChevyPartsGiant Specialist
    See expert answers on similar Universal Joint
    If you have any questions about this product, please don't hesitate to ask us. We will be happy to help you!

OEM GM 89040243, Excellent Performance and Perfect Fitment

To ensure reliability, purchase GM part # 89040243 Universal Joints. It is sometimes referred to as GM Universal Joint. Choosing OEM parts is the optimal decision for guaranteeing superior quality and perfect performance. These components undergo stringent quality checks and are carefully constructed to comply with GM's factory specifications, ensuring a smooth installation process.

ChevyPartsGiant.com is a leading supplier of genuine GM parts such as GM 89040243 Universal Joints. Our website boasts an extensive inventory of OEM GM parts, available at highly competitive prices in the market. Should you require any new genuine GM parts, rest assured we will deliver them swiftly and efficiently to your doorstep. Furthermore, all our parts come with the assurance of a manufacturer's warranty. For detailed Chevy parts information, click here.
Choose ChevyPartsGiant for discounted prices, exceptional service and fast delivery