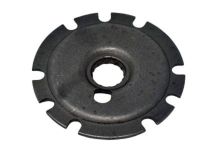
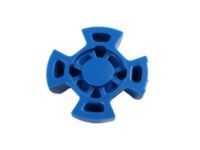
Make sure this part fits

GM 26100837
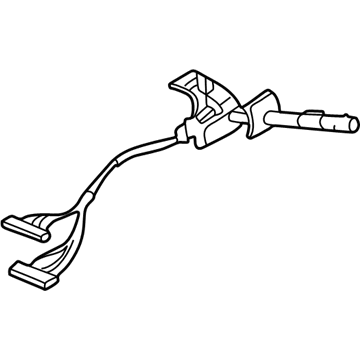
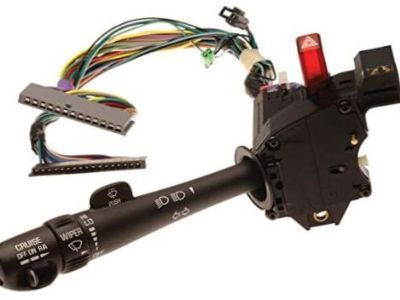
Turn Signal Switch

1998-2005 GM

Customer Questions & Expert Answers (11)
GM 26100837 Turn Signal Switch
  • Part Description
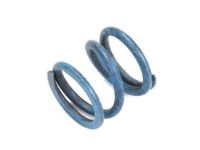
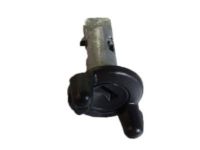
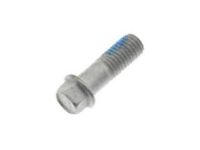
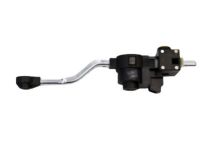
    Switch Assembly, Turn Signal & Headlamp Dimmer, Windshield Wiper & Washer Switch; Multi Purpose Combination Switch
  • Replaces
    26062270, 26083635, 26090641, 26096832
  • Manufacturer
    General Motors
Make sure this part fits
$150.66 MSRP: $243.66
You Save: $93.00 (39%)
1
ADD TO CART
  • Vehicle Fitment

    Year Make Model Trim Engine
    1999-2005 Chevrolet BlazerBase, LS, LT, Trailblazer, Xtreme, ZR26 Cyl 4.3 L GAS
    1998-2004 Chevrolet S10Base, LS, SS, Xtreme, ZR2, ZR54 Cyl 2.2 L FLEX, 4 Cyl 2.2 L GAS, 6 Cyl 4.3 L GAS
    1999-2001 GMC JimmyDiamond Edition, Envoy, SL, SLE, SLS, SLT6 Cyl 4.3 L GAS
    1998-2004 GMC SonomaSL, SLE, SLS4 Cyl 2.2 L FLEX, 4 Cyl 2.2 L GAS, 6 Cyl 4.3 L GAS
    1999-2004 Oldsmobile BravadaBase6 Cyl 4.2 L GAS, 6 Cyl 4.3 L GAS
    Warning: California's Proposition 65
  • Customer Questions & Expert Answers

    Q:
    Can you help me check if this 26100837 is the right part for my car? Posted by ChevyPartsGiant Specialist
    A:
    Please Select Your Vehicle model to see if part number 26100837 is suitable before ordering.
    Posted by ChevyPartsGiant Specialist
    Q:
    How to replace the Turn Signal Switch on Chevrolet Blazer? Posted by Customer
    A:
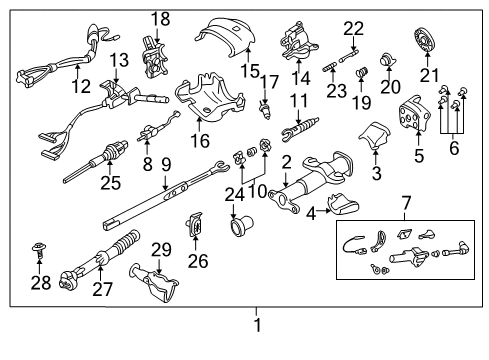
    To replace the turn signal switch; first deactivate the Restraints system, then follow the steps for removal of the upper and lower trim covers. Check the reinstallation of the abrasion sleeve for the steering column wire harness assembly, with attention to the connector's location to be installed afterwards. Take out the wire harness assembly from the wire harness strap and remove the turn signal and multifunction switch assembly connector with the SIR system coil connector. Slide the two connectors of a turn signal and multifunction switch assembly from the bulkhead connector. Then, two pan head tapping screws and should be removed from the turn signal and multifunction switch assembly and the assembly is removed from the steering column till head assembly then. For installation put the turn signal and multifunction switch assembly onto the steering column tilt head assembly with the electrical contact resting on the turn signal cancel cam assembly. Fasten it with the two pan head tapping screws and , tighten the upper one to 3 Nm (27 inch lbs.) and the lateral one to 7 Nm (62 inch lbs.). Slide the two connectors into the bulkhead connector and snap the turn signal and multifunction switch assembly connector to the SIR coil connector. Replace the abrasion sleeve onto the steering column wire harness assembly, making sure the ignition lock cylinder case wires and connector are properly aligned. Finally, connect the wire harness assembly into the wire harness strap, and re-fit the upper and lower trim covers, and activate the Restraints system.
    Posted by ChevyPartsGiant Specialist
    Q:
    How to replace the rear Wiper Switch on Chevrolet Blazer? Posted by Customer
    A:
    When switching out the rear wiper/washer component first disconnect negative battery power following standard battery work procedures. First split the switch handle away from the instrument panel using a flat-bladed tool then detach electronic connections when necessary. After installation reconnect the switch to its panel location then put on the battery negative cable.
    Posted by ChevyPartsGiant Specialist
    Q:
    How to replace the Headlight Switch on Chevrolet Blazer? Posted by Customer
    A:
    Start the replacement by setting both the headlamp switch to off position and the Ignition Switch into lock position. Start by removing the instrument panel accessory trim plate followed by disconnecting the electrical connectors. The headlamp switch panel can be removed by disassociating it from the instrument panel accessory trim plate using all screws and extracting the panel. Position the headlamp switch panel onto the instrument panel accessory trim plate before fixing it with screws which should be tightened to 1 n.m (9 lb in). Put back the electrical connectors and replace the instrument panel accessory trim plate.
    Posted by ChevyPartsGiant Specialist
    Q:
    How to replace the dimmer switch on Chevrolet S10? Posted by Customer
    A:
    In order to replace the Dimmer Switch first make sure that the headlamp switch is off - make sure Ignition Switch is in the lock position. Take off the instrument panel accessory trim plate and disconnect its electrical connector. Next, remove the screws that hold the headlamp switch panel into the instrument panel accessory trim plate and remove the headlamp switch panel. To install, return the headlamp switch panel back on the instrument panel accessory trim plate, with the arrangement to the fastener notice in service precautions. Mount the screws that hold the headlamp switch panel onto the instrument cluster bezel, which affixes with a securing of 1 n.m (9 lb in). Restart the electrical connector and finally replace the instrument test instrument panel accessory trim plate back.
    Posted by ChevyPartsGiant Specialist
    Q:
    How to service the Headlight Switch on Chevrolet S10? Posted by Customer
    A:
    The first step before servicing the headlamp switch requires turning it off while placing the Ignition Switch into the lock position. Next remove the instrument panel accessory trim plate before disconnecting the electrical connectors. You must remove the screws which keep the headlamp switch panel in place on the instrument panel accessory trim plate before extracting the panel. The headlamp switch panel installation requires attaching it to the instrument panel accessory trim plate but turn attention to the "follow fastener notice in service precautions" instruction. You should install screws to attach the headlamp switch panel onto the instrument cluster bezel while tightening them to 1 n.m (9 lb in). Attached the electrical connectors after placing back the instrument panel accessory trim plate.
    Posted by ChevyPartsGiant Specialist
    Q:
    How to replace the Wiper Switch on Chevrolet S10? Posted by Customer
    A:
    First disconnect the negative cable of the battery to make the operation safe. Before commencing use a flat-bladed tool to remove the switch from the instrument panel while disconnecting any necessary electrical connectors. Following installation you should first reconnect the electrical connectors then restore the switch to its panel position and last reestablish the negative Battery Cable connection.
    Posted by ChevyPartsGiant Specialist
    Q:
    How to replace the dimmer switch on GMC Jimmy? Posted by Customer
    A:
    In order to replace the Dimmer Switch first make sure that the headlamp switch is off - make sure Ignition Switch is in the lock position. Take off the instrument panel accessory trim plate and disconnect its electrical connector. Next, remove the screws that hold the headlamp switch panel into the instrument panel accessory trim plate and remove the headlamp switch panel. To install, return the headlamp switch panel back on the instrument panel accessory trim plate, with the arrangement to the fastener notice in service precautions. Mount the screws that hold the headlamp switch panel onto the instrument cluster bezel, which affixes with a securing of 1 n.m (9 lb in). Restart the electrical connector and finally replace the instrument test instrument panel accessory trim plate back.
    Posted by ChevyPartsGiant Specialist
    Q:
    How to replace the Headlight Switch on GMC Jimmy? Posted by Customer
    A:
    The first step to replace the headlamp switch requires users to turn off the headlamp switch and position the Ignition Switch in lock mode. Begin by removing the instrument panel accessory trim plate followed by the disconnect of electrical connectors. You should begin by removing the screws which maintain the headlamp switch panel attached to the instrument panel accessory trim plate before extracting the headlamp switch panel. Installation requires the headlamp switch panel to be placed onto the instrument panel accessory trim plate while observing the service precautions for fastener usage. Use 1 n.m (9 lb in) torque to install the screws which attach the headlamp switch panel to the instrument cluster bezel while reinstalling it into the instrument panel accessory trim plate. The instrument panel accessory trim plate should be replaced after reconnecting electrical connectors.
    Posted by ChevyPartsGiant Specialist
    Q:
    How to Service and Repair a Wiper Switch on GMC Jimmy? Posted by Customer
    A:
    Before anything else, disconnect the negative Battery Cable to work on the windshield washer switch. Gently remove the switch from the instrument panel and detach the electrical cables attached to it. During installation, put the electrical connectors back in place, fit the switch into the instrument panel and reattach the negative Battery Cable.
    Posted by ChevyPartsGiant Specialist
    Q:
    How to replace the Headlight Switch on GMC Sonoma? Posted by Customer
    A:
    The first step to replace the headlamp switch requires users to turn off the headlamp switch and position the Ignition Switch in lock mode. Begin by removing the instrument panel accessory trim plate followed by the disconnect of electrical connectors. You should begin by removing the screws which maintain the headlamp switch panel attached to the instrument panel accessory trim plate before extracting the headlamp switch panel. Installation requires the headlamp switch panel to be placed onto the instrument panel accessory trim plate while observing the service precautions for fastener usage. Use 1 n.m (9 lb in) torque to install the screws which attach the headlamp switch panel to the instrument cluster bezel while reinstalling it into the instrument panel accessory trim plate. The instrument panel accessory trim plate should be replaced after reconnecting electrical connectors.
    Posted by ChevyPartsGiant Specialist
    If you have any questions about this product, please don't hesitate to ask us. We will be happy to help you!

OEM GM Turn Signal Switch 26100837 Designed for Proper Fit and Performance

Original OEM GM parts deliver superior quality and meet all performance standards needed for optimal automotive operation. The authentic part identified by 26100837 Turn Signal Switch is available in the market under the name GM Dimmer Switch, Headlight Switch, Turn Signal Switch, Wiper Switch. This genuine product has a full warranty coverage from the manufacturer available at all authorized GM dealers throughout the United States. This part 26100837 Turn Signal Switch fits certain Chevrolet S10, Blazer models, as well as GMC Sonoma, Jimmy. Additionally, it is compatible with Oldsmobile Bravada models.
The original GM component designated by manufacturer part number 26100837 maintains top performance when functioning as the Switch Assembly, Turn Signal & Headlamp Dimmer, Windshield Wiper & Washer Switch; Multi Purpose Combination Switch unit. The component 26100837 is constructed from durable material and its dimensions span 10.7 x 5.8 x 5.3 inches while weighing 1.70 Pounds. The Direct Replacement component is ready in New condition to ensure full compatibility with your vehicle system. This component receives the designation of Front Wiper Switch; Switch, Windshield Wiper & Washer Control; Switch, Turn Signal Lamp; Switch, Headlamp Dimmer. The part 26100837 has available replacement options 26062270, 26083635, 26090641, 26096832. GM manufacturer provides a warranty that ensures reliable operation of this product. The Shipping Policy and Return Policy pages outline complete details regarding shipping procedures and return processes.
If you want to save money in the long run on maintenance and repairs, you should choose OEM products because they're of the top level of durability. Are you on the quest of finding GM parts, our site is worth a visit. We stock an endless selection of high-quality GM components including things like ignition coils all the way through to fan shrouds and all at prices that can not be matched. You have nothing to worry about because all our OEM parts are covered with a manufacturer warranty, which guarantees superior quality and value.