Make sure this part fits

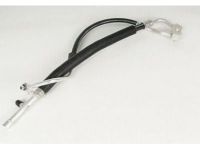
GM 22759527
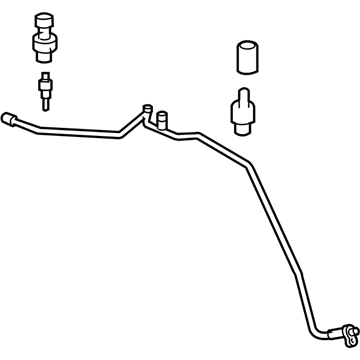
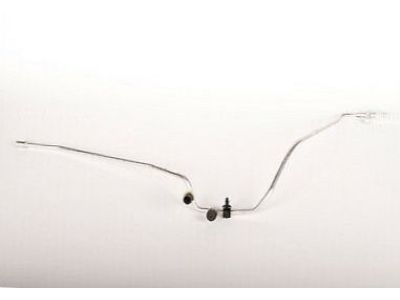
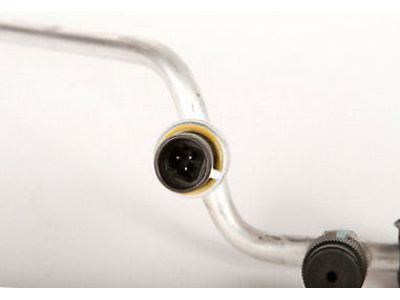
A/C Tube, Front

2004-2013 GM

Customer Questions & Expert Answers (11)
GM 22759527 A/C Tube, Front
  • Part Description
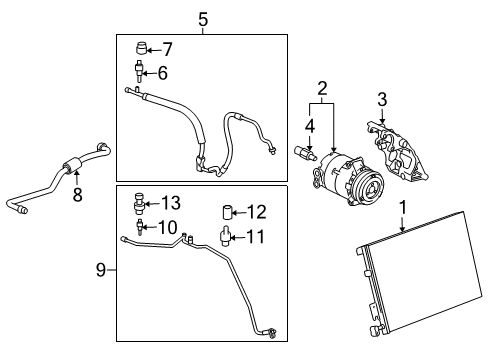
    Tube Assembly-A/C Evaporator Thermal Expansion Valve Front; A/C Refrigerant Liquid Hose; A/C Hose
  • Position
    Front
  • Replaces
    10385363, 10442893
  • Manufacturer
    General Motors
Make sure this part fits
$113.07 MSRP: $232.36
You Save: $119.29 (52%)
Ships in 1-2 Business Days
1
ADD TO CART
  • Related Parts
  • Product Specifications
  • Vehicle Fitment
  • Customer Questions & Expert Answers
  • Product Specifications

    BrandGenuine GM
    Manufacturer Part Number22759527
    Part DescriptionTube Assembly-A/C Evaporator Thermal Expansion Valve Front; A/C Refrigerant Liquid Hose; A/C Hose
    Other NamesTube, A/C Refrigerant (All Metal)
    Item Dimensions42.1 x 21.2 x 9.0 inches
    Item Weight0.70 Pounds
    PositionFront
    ConditionNew
    Fitment TypeDirect Replacement
    Replaces10385363, 10442893
    ManufacturerGeneral Motors
    SKU22759527
    WarrantyThis genuine GM part is guaranteed by GM's factory warranty.
    Shipping & ReturnShipping Policy Return Policy
    Warning: California's Proposition 65
  • Vehicle Fitment

    Year Make Model Trim Engine
    2004-2009 Cadillac XLRBase, Platinum, V8 Cyl 4.4 L GAS, 8 Cyl 4.6 L GAS
    2005-2013 Chevrolet Corvette427, 427 Limited Edition Z06, Base, Grand Sport, Z06, Z06 Carbon, ZR18 Cyl 6.0 L GAS, 8 Cyl 6.2 L GAS, 8 Cyl 7.0 L GAS
  • Customer Questions & Expert Answers

    Q:
    Can you help me check if this 22759527 is the right part for my car? Posted by ChevyPartsGiant Specialist
    A:
    Please Select Your Vehicle model to see if part number 22759527 is suitable before ordering.
    Posted by ChevyPartsGiant Specialist
    Q:
    How to replace the Front A/C Hose on Cadillac XLR? Posted by Customer
    A:
    The first step to replace the air conditioning evaporator front tube requires recovering refrigerant from the a/c system and battery removal. First remove the a/c tube connector which is at the evaporator rear line assembly then unplug the refrigerant pressure sensor electrical connector and front evaporator inlet line from its body retaining clip. Support the vehicle before removing the front evaporator inlet line to A/C Condenser lower bolt while using immediate caps or tapes on the open a/c components to avoid contamination. The front evaporator line inlet connecting to the A/C Condenser requires separation followed by sealing washer dismissal and A/C Condenser sealing with caps or tape. Lower the vehicle while disconnecting the front evaporator inlet line from the evaporator rear line assembly for removal of o-rings then capping or taping the evaporator rear line assembly. The front evaporator inlet line must be removed from the vehicle only after unplugging the surge tank outlet hose and inlet heater hose from their mounting points located on the underhood junction box retainer clip. You must first attach the front evaporator inlet line to the vehicle before you join the surge tank outlet hose and inlet heater hose with the underhood junction box retainer clip. Disassemble the tape or cap from the evaporator rear line assembly then implement fresh o-rings before linking the front evaporator inlet line to the rear evaporator line assembly. After elevating the vehicle again, users should remove the cover from the A/C Condenser before inserting a new sealing washer to the front evaporator inlet line and attaching this line to the A/C Condenser. Tighten the front evaporator inlet line to A/C Condenser lower bolt until it reaches 16 n.m (12 lb ft). Lower the vehicle and join the front evaporator inletellowing by the clip. Add the refrigerant pressure sensor electricity wire and the a/c tube wiring at the evaporator rear line assembly. The service procedure ends by installing the battery followed by evacuating and recharging the a/c system while using the halogen leak detector (J 39400-A) to inspect the component fittings.
    Posted by ChevyPartsGiant Specialist
    Q:
    How to Change the A/C Hose in a Cadillac XLR? Posted by Customer
    A:
    The first step to install a new air conditioning evaporator front tube is to extract refrigerant from the a/c system. Discharge the battery power after detaching the a/c tube connector at the evaporator rear line assembly. The distributer of the front evaporator inlet line needs disconnection from the body retaining clip as well as from the refrigerant pressure sensor electrical connector . Raise and support the vehicle before removing the front evaporator inlet line to A/C Condenser lower bolt but ensure to cap or tape open a/c components to avoid contamination. Use hacksaw pliers to disconnect front evaporator line inlet from A/C Condenser then remove washing seal then tape up or apply a cap on the open A/C Condenser. Lower the vehicle while you disconnect the front evaporator inlet line from the evaporator rear line assembly and discard the o-rings by capping or taping the evaporator rear line assembly. The front evaporator inlet line removal requires you to disconnect surge tank outlet hose and inlet heater hose from the underhood junction box retainer clip. To set up the front evaporator inlet line users must first attach it to the vehicle then connect surge tank outlet hose and inlet heater hose at the underhood junction box retainer clip. Apply new o-rings on the rear evaporator line assembly and then remove the front evaporator rear-line assembly cap or tape. Raise the vehicle after joining the evaporator rear line assembly to the front evaporator inlet line and then remove the cap or tape from the A/C Condenser. The front evaporator inlet line requires a new sealing washer before connection to the A/C Condenser which must be tightened to 16 nm (12 lb ft). Lower the vehicle position and connect the front evaporator inlet line to the body retaining clip and at the same time install the refrigerant pressure sensor electrical connector . Before rehanging the battery the a/c tube connector installation will take place at the evaporator rear line assembly followed by an evacuation-charging process and leak test of component fittings using j 39400-a.
    Posted by ChevyPartsGiant Specialist
    Q:
    How do you disconnect the A/C compressor hose assembly from the condenser for the 2007 Cadillac XLR? Posted by Customer
    A:
    Remove the A/C compressor hose assembly bolt from the A/C condenser fitting and disconnect the hose assembly from the fitting, discarding the sealing washer.
    Posted by ChevyPartsGiant Specialist
    See expert answers on similar A/C Hose
    Q:
    What components need to be removed before accessing the evaporator rear tube for the 2008 Cadillac XLR? Posted by Customer
    A:
    Remove the battery and then the intake manifold.
    Posted by ChevyPartsGiant Specialist
    See expert answers on similar A/C Hose
    Q:
    What should be done with the seal washers during installation for the 2009 Cadillac XLR? Posted by Customer
    A:
    Install new seal washers to the evaporator rear line assembly.
    Posted by ChevyPartsGiant Specialist
    See expert answers on similar A/C Hose
    Q:
    What should be done after raising and supporting the 2008 Chevrolet Corvette? Posted by Customer
    A:
    Remove the front evaporator inlet line to A/C condenser lower bolt and cap or tape the open A/C components to prevent contamination.
    Posted by ChevyPartsGiant Specialist
    See expert answers on similar A/C Hose
    Q:
    How should the hose assembly be secured to the A/C compressor for the 2005 Chevrolet Corvette? Posted by Customer
    A:
    Connect the hose assembly to the A/C compressor and secure it with the retaining bolt, tightening it to 20 N.m (15 lb ft).
    Posted by ChevyPartsGiant Specialist
    See expert answers on similar A/C Hose
    Q:
    What components need to be removed before accessing the rear evaporator tube for the 2006 Chevrolet Corvette? Posted by Customer
    A:
    Remove the battery and intake manifold.
    Posted by ChevyPartsGiant Specialist
    See expert answers on similar A/C Hose
    Q:
    What is the first step to replace the Air Conditioning Evaporator Rear Tube for the 2010 Chevrolet Corvette? Posted by Customer
    A:
    First, recover the refrigerant from the A/C system.
    Posted by ChevyPartsGiant Specialist
    See expert answers on similar A/C Hose
    Q:
    What should be done after installing the new evaporator rear line assembly for the 2007 Chevrolet Corvette? Posted by Customer
    A:
    Connect it to the retainer bracket stud and the TXV, install the TXV block fitting nut and tighten it to 20 N.m (15 lb ft), then install the heater pipe bracket retaining nut and tighten it to 10 N.m (7 lb ft).
    Posted by ChevyPartsGiant Specialist
    See expert answers on similar A/C Hose
    If you have any questions about this product, please don't hesitate to ask us. We will be happy to help you!

OEM GM 22759527, Excellent Performance and Perfect Fitment

To ensure reliability, purchase GM part # 22759527 A/C Tube, Front. It is sometimes referred to as GM A/C Hose. Choosing OEM parts is the optimal decision for guaranteeing superior quality and perfect performance. These components undergo stringent quality checks and are carefully constructed to comply with GM's factory specifications, ensuring a smooth installation process.

ChevyPartsGiant.com is a leading supplier of genuine GM parts such as GM 22759527 A/C Tube, Front. Our website boasts an extensive inventory of OEM GM parts, available at highly competitive prices in the market. Should you require any new genuine GM parts, rest assured we will deliver them swiftly and efficiently to your doorstep. Furthermore, all our parts come with the assurance of a manufacturer's warranty. For detailed Chevy parts information, click here.
Choose ChevyPartsGiant for discounted prices, exceptional service and fast delivery