ChevyParts
My Garage
My Account
Cart
OEM Buick Park Avenue Oxygen Sensor
Oxygen O2 Sensor- Select Vehicle by Model
- Select Vehicle by VIN
Select Vehicle by Model
orMake
Model
Year
Select Vehicle by VIN
For the most accurate results, select vehicle by your VIN (Vehicle Identification Number).
7 Oxygen Sensors found


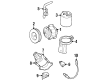
Buick Park Avenue Oxygen Sensor Part Number: 19178938
$63.56 MSRP: $129.10You Save: $65.54 (51%)Ships in 1-2 Business Days


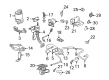
Buick Park Avenue Oxygen Sensor Part Number: 19209814
$59.22 MSRP: $120.28You Save: $61.06 (51%)Ships in 1-2 Business Days


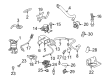
Buick Park Avenue Oxygen Sensor Part Number: 19209807
$87.79 MSRP: $178.30You Save: $90.51 (51%)Ships in 1-2 Business Days


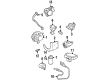
Buick Park Avenue Oxygen Sensor Part Number: 19178958
$65.65 MSRP: $133.34You Save: $67.69 (51%)Ships in 1-2 Business Days


Buick Park Avenue Oxygen Sensor Part Number: 19178930
$66.41 MSRP: $134.88You Save: $68.47 (51%)Ships in 1-2 Business Days

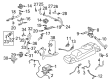
Buick Park Avenue Oxygen Sensor Part Number: 19178924
$71.63 MSRP: $145.48You Save: $73.85 (51%)Ships in 1-2 Business Days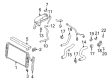
Buick Park Avenue Oxygen Sensor Part Number: 19211437
$19.00 MSRP: $33.92You Save: $14.92 (44%)
Buick Park Avenue Oxygen Sensor
Want to cut long-term maintenance and repair costs? Choose OEM Oxygen Sensor. Those parts deliver top durability you can trust. On our site, you'll find a huge catalog of genuine Buick Park Avenue parts. Prices are unbeatable, so you can keep more in your pocket. Every OEM Buick Park Avenue Oxygen Sensor includes a manufacturer's warranty. You can also get an easy return policy that keeps buying risk free. Fast delivery, get your car on the road quickly. It's simple to search, compare, and order. Stop guessing about quality or fit. Order today and save with parts that last.
Buick Oxygen Sensor is an important part that explains dependability and effectiveness of the Buick Park Avenue series. This sensor carefully tracks the GFC in the engine exhaust, produces important voltage which is needed by the computer that controls the engine concerning with the richness or the leanness of the mixture. Due to providing the accurate changes to the fuel injector pulse width, the Buick Park Avenue Oxygen Sensor improves efficiency and safety, increasing the engine output with suitable levels of emissions. Ordinarily, Buick Park Avenue cars have at least two oxygen sensors, one stationed before and the other after the catalytic converter so that the levels of the exhaust gases can be effectively measured. The one thing that stands out with the Buick Park Avenue Oxygen Sensor is its endurance, which functions efficiently even in high temperatures; however, the performance reduces as it gradually gets contaminated over time. Due to the compatibility feature, this sensor is suitable when it comes to maintaining the Buick Park Avenue of different models since it fits in the car. Some of the features of the Buick Park Avenue Oxygen Sensor include the fact that it embraces newer senses such as the air/fuel ration sensors which give a wider range of grip of the air/fuel mixtures. In total, the Buick Park Avenue Oxygen Sensor can be commended as a necessary innovation in the automotive market, playing a crucial part in improving the cars' efficiency and safety while being environmentally friendly as well, thus maintaining the Buick Park Avenue as a well-known luxury car with proper performance.
Buick Park Avenue Oxygen Sensor Parts Questions & Experts Answers
- Q: What tools are required to replace the Heated Oxygen Sensor (HO2S) and what are the steps involved in the process on Buick Park Avenue?A:The necessary tools for heated Oxygen Sensor (HO2S) replacement include an Oxygen Sensor wrench (J 39194). Oxygen Sensor wrench (J 39194). The ho2s along with the Oxygen Sensor retains their connector-pigtail permanently so do not detach them to prevent sensor dysfunction. The handling of ho2s and o2s must preserve their in-line electrical connector along with louvered end by keeping them clean from contamination and grease using no cleaning fluids. Start the inspection process with engine off while supporting the vehicle at its height. Start removal by taking off both the splash shield and ho2s electrical connector retaining tab that secures the connector. The ho2s electrical connector loses its Oxygen Sensor connector while being unlinked for servicing. Before attempting Oxygen Sensor removal operators need to wait until engine temperature drops below 48°c (120°F) because higher temperatures lead to installation challenges. The Oxygen Sensor wrench (J 39194) should be used to separate the Oxygen Sensor from its position inside the Exhaust Pipe. Reused sensor threads should receive special anti-seize compound treatment before installation by using p/n 5613695 or equivalent if necessary. The exhaust installation of the Oxygen Sensor requires a torque of 41 n.m (30 lb ft) for proper tightening. Position the ho2s connector to the ho2s electrical connector and return the retaining tab to its position on the ho2s electrical connector. Complete installation by adding the front splash shield then lowering the vehicle.

Related Buick Park Avenue Parts
 Buick Park Avenue Crankshaft Position Sensor
 Buick Park Avenue Camshaft Position Sensor
 Buick Park Avenue Engine Control Module
 Buick Park Avenue Igniter
 Buick Park Avenue Ignition Control Module
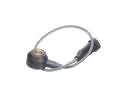 Buick Park Avenue Knock Sensor
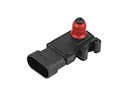 Buick Park Avenue MAP Sensor
 Buick Park Avenue Mass Air Flow Sensor
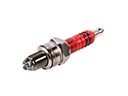 Buick Park Avenue Spark Plug
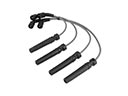 Buick Park Avenue Spark Plug Wires
 Buick Park Avenue Vapor Pressure Sensor
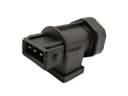 Buick Park Avenue Vehicle Speed Sensor