ChevyParts
My Garage
My Account
Cart
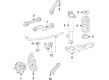
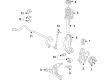
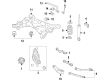
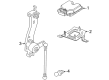
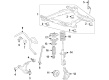
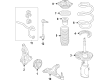
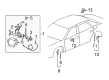
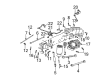
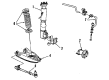
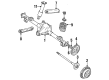
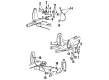
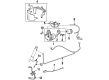
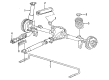
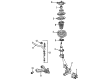
OEM Buick Ride Height Sensor
Suspension Level Hight Sensor- Select Vehicle by Model
- Select Vehicle by VIN
Select Vehicle by Model
orMake
Model
Year
Select Vehicle by VIN
For the most accurate results, select vehicle by your VIN (Vehicle Identification Number).
29 Ride Height Sensors found

Buick Height Sensor, Rear Part Number: 84171606
$38.01 MSRP: $67.87You Save: $29.86 (44%)Ships in 1-3 Business DaysProduct Specifications- Other Name: Sensor Assembly-Rear Suspension Auto Forward Lighting Leveling
- Position: Rear
- Replaced by: 84391114

Buick Front Sensor Part Number: 23161431
$83.68 MSRP: $131.09You Save: $47.41 (37%)Ships in 1-3 Business DaysProduct Specifications- Other Name: Sensor, Air Suspension Leveling Or Level Control; Sensor
- Position: Front
- Replaced by: 84368165

Buick Level Sensor, Rear Driver Side Part Number: 84391114
$38.01 MSRP: $67.87You Save: $29.86 (44%)Ships in 1-3 Business DaysProduct Specifications- Other Name: Sensor Assembly-Rear Suspension Auto Forward Lighting Leveling; Ride Height Sensor; Height Sensor; Sensor, Air Suspension Leveling Or Level Control
- Position: Rear Driver Side
- Replaces: 84171606

Buick Level Sensor, Passenger Side Part Number: 84460152
$62.85 MSRP: $112.25You Save: $49.40 (45%)Ships in 1-3 Business DaysProduct Specifications- Other Name: Sensor, Air Suspension Leveling Or Level Control; Ride Height Sensor
- Position: Passenger Side

Buick Height Sensor, Passenger Side Part Number: 84365777
$41.93 MSRP: $82.07You Save: $40.14 (49%)Ships in 1-2 Business DaysProduct Specifications- Other Name: Sensor, Air Suspension Leveling Or Level Control; Ride Height Sensor; Front Sensor
- Position: Passenger Side
- Replaces: 23404137

Buick Level Sensor, Passenger Side Part Number: 84400588
$43.43 MSRP: $77.55You Save: $34.12 (44%)Product Specifications- Other Name: Sensor, Air Suspension Leveling Or Level Control; Ride Height Sensor; Height Sensor
- Position: Passenger Side
- Replaces: 23377923, 84084760


Buick Control Sensor Part Number: 25980091
Product Specifications- Other Name: Sensor Assembly-Auto Level Control; Front Sensor; Sensor, Air Suspension Leveling Or Level Control


Buick Level Sensor, Rear Driver Side Part Number: 25999463
Product Specifications- Other Name: Sensor Assembly-Rear Air Spring Level; Ride Height Sensor; Rear Sensor; Sensor, Air Suspension Leveling Or Level Control
- Position: Rear Driver Side
- Replaces: 15070506, 25999461, 15125534

Buick Level Sensor, Rear Passenger Side Part Number: 25999464
Product Specifications- Other Name: Sensor Assembly-Rear Air Spring Level; Ride Height Sensor; Rear Sensor; Sensor, Air Suspension Leveling Or Level Control
- Position: Rear Passenger Side
- Replaces: 15070507, 25999462, 15125535


Buick Rear Sensor, Passenger Side Part Number: 25767364
Product Specifications- Other Name: Sensor Assembly-Electronic Suspension Rear Position; Suspension Ride Height Sensor; Ride Height Sensor; Sensor, Air Suspension Leveling Or Level Control
- Position: Rear Passenger Side
Buick Rear Sensor, Driver Side Part Number: 15241855
Product Specifications- Other Name: Sensor Assembly-Electronic Suspension Rear Position; Ride Height Sensor; Sensor, Air Suspension Leveling Or Level Control
- Position: Rear Driver Side
Buick Level Sensor Part Number: 22100400
Product Specifications- Other Name: Sensor & Arm Package; Height Sensor; Sensor, Air Suspension Leveling Or Level Control

Buick Level Sensor Part Number: 22076333
Product Specifications- Other Name: Sensor, Air Suspension Leveling Or Level Control; Ride Height Sensor; Height Sensor

Buick Height Sensor Part Number: 22076335
Product Specifications- Other Name: Sensor, Air Suspension Leveling Or Level Control; Ride Height Sensor; Sensor
Buick Rear Sensor, Passenger Side Part Number: 15241856
Product Specifications- Other Name: Sensor Assembly-Electronic Suspension Rear Position; Ride Height Sensor; Sensor, Air Suspension Leveling Or Level Control
- Position: Rear Passenger Side

Buick Height Sensor Part Number: 22149496
Product Specifications- Other Name: Sensor, Air Suspension Leveling Or Level Control; Ride Height Sensor; Sensor
Buick Position Sensor Part Number: 22153656
Product Specifications- Other Name: Sensor, Air Suspension Leveling Or Level Control; Ride Height Sensor; Height Sensor; Control Sensor; Sensor

Buick Level Sensor Part Number: 22091486
Product Specifications- Other Name: Sensor, Air Suspension Leveling Or Level Control; Ride Height Sensor; Height Sensor; Sensor
Buick Rear Sensor, Driver Side Part Number: 25767365
Product Specifications- Other Name: Sensor Assembly-Electronic Suspension Rear Position; Suspension Ride Height Sensor; Ride Height Sensor; Sensor, Air Suspension Leveling Or Level Control
- Position: Rear Driver Side
Buick Front Sensor, Passenger Side Part Number: 25767359
$195.39 MSRP: $350.49You Save: $155.10 (45%)Product Specifications- Other Name: Sensor Assembly-Electronic Suspension Front Position; Suspension Ride Height Sensor; Ride Height Sensor; Sensor, Air Suspension Leveling Or Level Control
- Position: Front Passenger Side
| Page 1 of 2 |Next >
1-20 of 29 Results
Buick Ride Height Sensor
Want to cut long-term maintenance and repair costs? Choose OEM Ride Height Sensor. Those parts deliver top durability you can trust. On our site, you'll find a huge catalog of genuine Buick parts. Prices are unbeatable, so you can keep more in your pocket. Every OEM Buick Ride Height Sensor includes a manufacturer's warranty. You can also get an easy return policy that keeps buying risk free. Fast delivery, get your car on the road quickly. It's simple to search, compare, and order. Stop guessing about quality or fit. Order today and save with parts that last.
Buick Ride Height Sensor Parts Questions & Experts Answers
- Q: How to properly service and replace the Ride Height Sensor on Buick LeSabre?A:You must first raise the vehicle and take off the wheel when you decide to replace the Automatic Level Control Sensor. First disconnect the sensor connector from the height sensor while also detaching the sensor link from the ball stud and then loosen the mounting nut. Lower the Automatic Level Control Sensor by detaching the anti-rotation tab before pulling it down from the vehicle. First install the sensor by placing its mounting stud head into the key hole before pushing the sensor upward until the lower hole receives the anti-rotation tab. Follow the procedure by applying 9 Nm of torque (80 inch lbs) to the sensor mounting nut before attaching both the sensor link to the ball stud and height sensor connector. Place the wheel onto the vehicle before lowering it to completion.
- Q: How to replace the Rear Ride Height Sensor on Buick Lucerne?A:The first step to replace the Electronic Suspension Rear Position Sensor consists of lifting the vehicle while taking off the wheel. The height sensor electrical connector and sensor link from the ball stud need to be disconnected before the sensor mounting nut can be loosened. You can disengage the anti-rotation tab before pulling the sensor downwards to take it off from the vehicle. The installation process involves putting the stud head into the keyhole then pushing the sensor upward until it locks into the lower hole by the anti-rotation tab. Proceed by connecting the sensor link into position on the ball stud and tightening the sensor mounting nut to 9 Nm (80 lb in). Afterward connect the height sensor electrical connector. To finish the procedure replace the wheel then lower the vehicle.
- Q: How to replace the Ride Height Sensor on Buick Terraza?A:You must remove the ELC/TRAILER fuse before starting replacement of the Ride Height Sensor. Fitting the height sensor requires performing an active diagnostic system assessment. Raise and support the vehicle. Detach the ride height sensor electrical connector and remove its link from the ball stud located on the sensor arm. Begin by removing the ride height sensor bracket bolts from the vehicle. Finish the removal with the sensor. Install the ride height sensor on the vehicle by fixing the height sensor bracket bolts before tightening them to 85 Nm (63 ft. lbs.). Secure the ride height sensor link onto the ball stud of the sensor arm before connecting the ride height sensor electrical connector. After carrying out a diagnostic system check, you must lower the vehicle while re-installing the ELC/TRAILER fuse.


Related Buick Parts
 Buick Axle Beam Mount
 Buick Axle Support Bushings
 Buick Ball Joint
 Buick Coil Springs
 Buick Crossmember Bushing
 Buick Shock Absorber
 Buick Shock And Strut Mount
 Buick Strut Bearing
 Buick Suspension Strut Rod
 Buick Sway Bar Bushing
 Buick Sway Bar Link
 Buick Trailing Arm Bushing