ChevyParts
My Garage
My Account
Cart
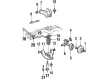
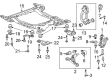
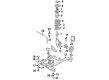
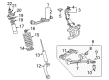
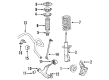
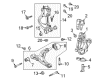
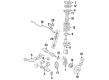
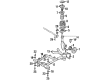
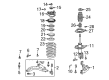
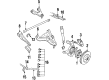
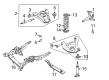
OEM Buick Ball Joint
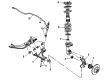
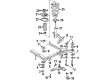
Control Arm Joint- Select Vehicle by Model
- Select Vehicle by VIN
Select Vehicle by Model
orMake
Model
Year
Select Vehicle by VIN
For the most accurate results, select vehicle by your VIN (Vehicle Identification Number).
22 Ball Joints found


Buick Ball Joint, Front Upper Part Number: 88911387
$34.06 MSRP: $60.81You Save: $26.75 (44%)Ships in 1-3 Business DaysProduct Specifications- Other Name: Joint Kit, Front Upper Control Arm Ball; Suspension Ball Joint; Upper Ball Joint; Stud Kit, Steering Knuckle Control Arm; Ball Joint Kit
- Position: Front Upper
- Replaced by: 19460397


Buick Ball Joints, Front Lower Part Number: 23275106
$114.49 MSRP: $194.91You Save: $80.42 (42%)Ships in 1-2 Business DaysProduct Specifications- Other Name: Joint, Front Wheel Lower Control Arm; Ball Joint; Lower Ball Joint; Knuckle Bushing
- Position: Front Lower
- Replaces: 20998092


Buick Ball Joint, Front Lower Part Number: 17989117
$45.54 MSRP: $71.33You Save: $25.79 (37%)Ships in 1-3 Business DaysProduct Specifications- Other Name: Stud Kit, Front Lower Control Arm Ball; Suspension Ball Joint; Lower Ball Joint; Stud Kit, Front Wheel Lower Control Arm
- Position: Front Lower


Buick Ball Joint, Front Lower Part Number: 19207521
$125.14 MSRP: $206.14You Save: $81.00 (40%)Ships in 1-2 Business DaysProduct Specifications- Other Name: Stud Kit, Front Lower Control Arm Ball; Suspension Ball Joint; Lower Ball Joint; Stud Kit, Steering Knuckle Lower Control Arm Pivot; Stud Kit, Front Wheel Lower Control Arm
- Position: Front Lower


Buick Lower Ball Joint, Front Part Number: 19133670
$57.43 MSRP: $140.12You Save: $82.69 (60%)Ships in 1-2 Business DaysProduct Specifications- Other Name: Stud Kit, Front Lower Control Arm Ball; Suspension Ball Joint; Ball Joint; Stud, Steering Knuckle Lower Control Arm Pivot
- Position: Front Lower
- Replaces: 22157319


Buick Ball Joints, Upper Part Number: 13258056
$42.32 MSRP: $72.06You Save: $29.74 (42%)Ships in 1-3 Business DaysProduct Specifications- Other Name: Joint, Upper Control Arm Shaft; Lower Ball Joint; Upper Ball Joint; Upper Ball Joints
- Position: Upper


Buick Ball Joint, Front Lower Part Number: 15863690
$70.41 MSRP: $115.99You Save: $45.58 (40%)Ships in 1-2 Business DaysProduct Specifications- Other Name: Stud Kit-Front Lower Control Arm Ball; Suspension Ball Joint; Lower Ball Joint; Stud Kit, Steering Knuckle Lower Control Arm Pivot; Stud Kit, Front Wheel Lower Control Arm
- Position: Front Lower


Buick Lower Ball Joint Part Number: 13230777
$99.86 MSRP: $169.97You Save: $70.11 (42%)Ships in 1-2 Business DaysProduct Specifications- Other Name: Bushing, Steering Knuckle King Pinion; Joint, Front Wheel Lower Control Arm

Buick Ball Joint, Front Lower Part Number: 22156472
$40.37 MSRP: $77.00You Save: $36.63 (48%)Ships in 1-2 Business DaysProduct Specifications- Other Name: Stud Assembly, Front Lower Control Arm Ball; Ball Joints; Lower Ball Joint
- Position: Front Lower

Buick Ball Joint, Front Lower Part Number: 17988890
$45.54 MSRP: $71.33You Save: $25.79 (37%)Ships in 1-3 Business DaysProduct Specifications- Other Name: Ball Joint Kit, Front Wheel Lower Control Arm; Suspension Ball Joint; Lower Ball Joint
- Position: Front Lower

Buick Upper Ball Joint, Front Part Number: 19133638
$85.35 MSRP: $146.59You Save: $61.24 (42%)Ships in 1-2 Business DaysProduct Specifications- Other Name: Stud Kit, Front Upper Control Arm Ball; Suspension Ball Joint; Ball Joint; Upper Ball Joints; Stud, Steering Knuckle Upper Control Arm
- Position: Front Upper
- Replaces: 22157320

Buick Ball Joint Part Number: 88965333
$51.99 MSRP: $82.54You Save: $30.55 (38%)Ships in 1-2 Business DaysProduct Specifications- Other Name: Stud Kit, Front Lower Control Arm Ball; Suspension Ball Joint; Lower Ball Joint; Stud Kit, Steering Knuckle Lower Control Arm Pivot; Stud Kit, Front Wheel Lower Control Arm
- Position: Front Lower
- Replaces: 88955451, 22157089

Buick Lower Link Part Number: 42726528
$45.84 MSRP: $71.79You Save: $25.95 (37%)Ships in 1-3 Business DaysProduct Specifications- Other Name: Joint Assembly-Center Pivot Ball; Integral Link; Ball Joint; Joint; Joint, Rear Axle Control Arm

Buick Lower Ball Joint Part Number: 95916024
$74.11 MSRP: $122.10You Save: $47.99 (40%)Ships in 1-2 Business DaysProduct Specifications- Other Name: Stud Kit-Front Lower Control Arm Ball; Suspension Ball Joint; Ball Joint; Stud Kit, Front Wheel Lower Control Arm
- Position: Front Lower

Buick Ball Joint, Front Lower Part Number: 19416895
$20.58 MSRP: $50.23You Save: $29.65 (60%)Product Specifications- Other Name: Stud Kit, Front Lower Control Arm Ball; Ball Joints; Lower Ball Joint Kit for Steering Knuckle and Front Wheel Control Arm.
- Position: Front Lower
- Replaces: 09767281, 9767281, 19122185

Buick Ball Joint Part Number: 9763761
$32.04 MSRP: $64.31You Save: $32.27 (51%)Product Specifications- Other Name: Ball Joint, Upper Control Arm; Upper Ball Joints; Ball Joint, Steering Knuckle Upper Control Arm; Ball Joint, Upper Control Arm Shaft
- Position: Upper

Buick Lower Ball Joint Part Number: 88965475
Product Specifications- Other Name: Stud Kit, Front Lower Control Arm Ball; Suspension Ball Joint; Ball Joint; Stud Kit, Steering Knuckle Lower Control Arm Pivot; Front Wheel Lower Control Arm; Rear Axle Control Arm.
- Position: Front Lower
- Replaces: 09766421, 9766421
Buick Ball Joints Part Number: 9767781
Product Specifications- Other Name: Lower Ball Joint; Suspension Ball Joint; Ball Joint
- Position: Lower

Buick Ball Joint Part Number: 9764247
Product Specifications- Other Name: Ball Joint, Lower Control Arm; Suspension Ball Joint; Ball Joint, Steering Knuckle Lower Control Arm Pivot; Ball Joint, Front Wheel Lower Control Arm
- Position: Lower

Buick Ball Joint, Front Lower Part Number: 17983482
Product Specifications- Other Name: Stud Kit, Front Lower Control Arm Ball; Suspension Ball Joint; Lower Ball Joint; Stud Kit, Front Wheel Lower Control Arm
- Position: Front Lower
| Page 1 of 2 |Next >
1-20 of 22 Results
Buick Ball Joint
Choose OEM Ball Joint, you're making the optimal decision for superior quality and perfect performance. You can feel confident because each component goes through stringent quality checks. Every part is carefully built to comply with Buick's factory specifications. You'll enjoy a smooth, worry-free installation that fits just right. At ChevyPartsGiant.com, you'll find it easy to get top-quality OEM Buick Ball Joint. You can shop at highly competitive prices and protect your budget. All our genuine Buick parts include a dependable manufacturer's warranty. You'll also appreciate our straightforward return policy and swift delivery services for extra convenience.
Buick Ball Joint Parts and Q&A
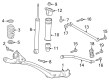
- Q: How to replace the lower control arm ball joint on Buick Enclave?A:When changing the Ball Joint of the lower Control Arm you must first remove the complete assembly. Secure the lower Control Arm inside a vise for further work. Start the drill using a center punch before drilling or grinding off the rivet's head. You should use a punch with hammer to detach the lower Control Arm rivets prior to separating them from the assembly. Proceed by removing the Ball Joint from your lower Control Arm assembly. During installation keep holding the bolt while tightening the nut to achieve the correct torque value when setting the Ball Joint onto the lower Control Arm. After positioning the Ball Joint mounting hardware secure its nuts and bolts until they reach 68 nm (50 lb ft) scale. When you finish working with the vise remove the complete lower Control Arm assembly then reinstall the entire lower Control Arm unit. All vehicle front end alignments must be checked during this stage of the project.
- Q: How to replace the lower ball joint on Buick Regal?A:Start by removing the lower Control Arm and securing it in the vice before starting the job. Use a tool to cut the ball stud rivets and then hit them out with a drift punch and hammer to dismantle the ball stud from the lower Control Arm. Place the ball stud on the Control Arm then insert the bolts starting with the new ball studs which point downward away from the stud. Secure the new ball stud nuts afterward. The fastener functions as a prevailing torque type but you can reuse it when both parts are rust-free and clean plus the fastener generates 2 n.m (18 lb in) of torque before fixing in place. New fasteners need replacement when these conditions are not met. Insert the lower Control Arm while tightening new ball stud nuts to 68 n.m (50 lb ft) settings.


Related Buick Parts
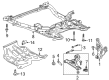
 Buick Control Arm
 Buick Axle Support Bushings
 Buick Bed Mounting Hardware
 Buick Control Arm Bolt
 Buick Control Arm Bracket
 Buick Crossmember Bushing
 Buick Lateral Link
 Buick Shock Absorber
 Buick Shock and Strut Boot
 Buick Sway Bar Link
 Buick Trailing Arm
 Buick Wheel Cover