ChevyParts
My Garage
My Account
Cart
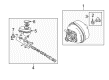
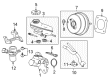
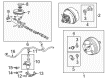
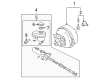
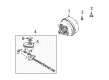
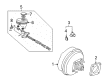
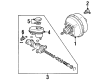
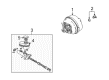
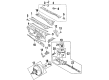
OEM Cadillac Brake Booster
Brake Power Booster- Select Vehicle by Model
- Select Vehicle by VIN
Select Vehicle by Model
orMake
Model
Year
Select Vehicle by VIN
For the most accurate results, select vehicle by your VIN (Vehicle Identification Number).
68 Brake Boosters found


Cadillac Brake Booster Part Number: 20840619
$109.64 MSRP: $192.37You Save: $82.73 (44%)Ships in 1-2 Business DaysProduct Specifications- Other Name: Booster, Hydraulic Power Brake Booster
- Replaces: 20840617, 20800051, 25847719, 20800049


Cadillac Master Cylinder Part Number: 84678193
$198.66 MSRP: $356.33You Save: $157.67 (45%)Ships in 1-3 Business DaysProduct Specifications- Other Name: Booster Kit-Power Brake (Vacuum); Booster Assembly; Booster Kit, Vacuum Power Brake
- Replaces: 84073046, 84559498

Cadillac Master Cylinder Part Number: 84073045
$100.19 MSRP: $181.34You Save: $81.15 (45%)Ships in 1-3 Business DaysProduct Specifications- Other Name: Cylinder Kit, Brake Master Cylinder; Brake Master Cylinder; Brake Booster
- Replaced by: 84678201


Cadillac Master Cylinder Part Number: 85543518
$1227.26 MSRP: $2394.64You Save: $1167.38 (49%)Ships in 1-3 Business DaysProduct Specifications- Other Name: Cylinder, Brake Master Cylinder; Master Cylinder Assembly
- Replaces: 84926393, 85124747

Cadillac Brake Booster Part Number: 84614709
$104.85 MSRP: $205.28You Save: $100.43 (49%)Ships in 1-2 Business DaysProduct Specifications- Other Name: Booster, Hydraulic Power Brake Booster; Booster Assembly
- Replaces: 84456300, 23415092


Cadillac Brake Booster Part Number: 20840618
$132.12 MSRP: $236.99You Save: $104.87 (45%)Product Specifications- Other Name: Booster, Hydraulic Power Brake Booster; Booster Assembly


Cadillac Brake Booster Part Number: 88967236
Product Specifications- Other Name: Booster, Power Brake; Booster Assembly; Booster, Hydraulic Power Brake Booster


Cadillac Brake Booster Part Number: 19371352
Product Specifications- Other Name: Booster, Hydraulic Power Brake Booster
- Replaces: 15150633, 15710166, 15757258, 15192200, 15003100

Cadillac Brake Booster Part Number: 20840616
$171.79 MSRP: $308.14You Save: $136.35 (45%)Product Specifications- Other Name: Booster, Hydraulic Power Brake Booster; Booster Assembly
- Replaces: 20800047, 25847716

Cadillac Brake Booster Part Number: 15237321
Product Specifications- Other Name: Booster, Hydraulic Power Brake Booster

Cadillac Brake Booster Part Number: 20800045
Product Specifications- Other Name: Booster, Hydraulic Power Brake Booster; Booster Assembly
- Replaces: 20762405


Cadillac Brake Booster Part Number: 19432808
$312.98 MSRP: $561.39You Save: $248.41 (45%)Product Specifications- Other Name: Booster, Hydraulic Power Brake Booster; Booster Assembly; Booster, Vacuum Power Brake
- Replaces: 15276502, 19417224, 84164389, 15947019, 15856781

Cadillac Brake Booster Part Number: 84172388
Product Specifications- Other Name: Booster, Hydraulic Power Brake Booster; Power Booster
- Replaces: 25845639
Cadillac Brake Booster Part Number: 15237762
Product Specifications- Other Name: Booster, Hydraulic Power Brake Booster; Power Booster
- Replaces: 18047897
Cadillac Brake Booster Part Number: 20800046
Product Specifications- Other Name: Booster, Hydraulic Power Brake Booster; Booster Assembly
- Replaces: 25847715, 19303634
Cadillac Brake Booster Part Number: 88967254
Product Specifications- Other Name: Booster, Hydraulic Power Brake Booster; Booster Assembly

Cadillac Brake Booster Part Number: 9054184
Product Specifications- Other Name: Booster, Power Brake; Booster Assembly; Booster, Hydraulic Power Brake Booster
- Replaces: 15267511

Cadillac Brake Booster Part Number: 18044442
Product Specifications- Other Name: Booster, Hydraulic Power Brake Booster

Cadillac Brake Booster Part Number: 88967237
Product Specifications- Other Name: Booster, Power Brake; Booster Assembly
- Replaces: 18048695

Cadillac Brake Booster Part Number: 18029922
Product Specifications- Other Name: Booster, Hydraulic Power Brake Booster
| Page 1 of 4 |Next >
1-20 of 68 Results
Cadillac Brake Booster
Want to cut long-term maintenance and repair costs? Choose OEM Brake Booster. Those parts deliver top durability you can trust. On our site, you'll find a huge catalog of genuine Cadillac parts. Prices are unbeatable, so you can keep more in your pocket. Every OEM Cadillac Brake Booster includes a manufacturer's warranty. You can also get an easy return policy that keeps buying risk free. Fast delivery, get your car on the road quickly. It's simple to search, compare, and order. Stop guessing about quality or fit. Order today and save with parts that last.
Cadillac Brake Booster Parts Questions & Experts Answers
- Q: How to Ensure Proper Installation of the Brake Booster on Cadillac CTS?A:The first step in vacuum Brake Booster replacement is to put together j 22805-b (Brake Booster Holder). First remove the left insulator cover and then take out the vacuum Brake Booster Pushrod retaining clip along with the Pushrod from the Brake Pedal setup. Set the master cylinder aside safely by taking it off its connection to the booster without disconnecting brake pipes if needed. Once you access the vacuum Brake Booster you can open its locking tab by taking off the air inlet grille panel. Drain coolant from the surge tank inlet hose but leave it attached before removing its tank bolts. Turn the coolant surge tank bolts loose and move it aside before reconnecting the inlet tube to avoid coolant leakage. You must attach the j 22805-b device through the master cylinder retaining nuts to the vacuum Brake Booster check valve. Deactivate the locking tab on the cowl using a flat-blade tool then remove the booster with a ratchet on j 22805-b while turning it counterclockwise. You need to raise the vacuum Brake Booster from its cowl mounting flange and support it before pushing the foam filter forward to get to the retaining clip. Raise the taller edge of the retaining clip upwards to take out the vacuum Brake Booster Pushrod from the unit. Install the booster without damaging its internal parts and the ledge locking system. Push the vacuum Brake Booster onto the Pushrod and keep pushing until the retaining clip engages its position. Rotate the booster clockwise to connect it before using the j 22805-b on the ratchet without a flat blade. Press the booster into place until the locking feature reaches total activation. Reconnect the vacuum hose and check valve assembly after you take off the j 22805-b and put back the coolant surge tank. Place the vacuum Brake Booster Pushrod into its slot and rotate it counterclockwise to install the retaining clip on top. Next, put on the air inlet grille panel as well as integrate the master cylinder, cross vehicle brace (if needed), and left closeout/insulator panel.
- Q: How to replace the hydraulic brake booster on Cadillac Escalade?A:The first step to replace the hydraulic Brake Booster requires application of the park brake along with blocking the wheels. You should disconnect the inlet hose along with the steering gear while separating the return hoses from the booster assembly but keep all pipes attached to the master cylinder. The mechanic should detach the master cylinder to hydraulic booster nuts before placing the master cylinder in the engine compartment. First disconnect the stop lamp switch and afterward remove the 4 booster to bulkhead nuts before extracting the booster assembly with its gasket. The steps for installing the new gasket include its placement ahead of installing the booster assembly. Place the 4 booster to bulkhead nuts and torque them to 33 nm (24 lb ft). After installing the stop lamp switch proceed to install the master cylinder onto the Brake Booster while securing its nuts to 33 nm (24 lb ft). The procedure ends by adding the return hose together with the steering gear and inlet hoses before bleeding the hydraulic booster system and freeing the park brake and opening the wheels.
- Q: How to replace the vacuum brake booster on Cadillac XLR?A:Before you replace the vacuum Brake Booster you need to disconnect the negative terminal of the battery then take off the coolant surge tank. Unplug the brake fluid sensor electrical connector and take out the master cylinder mounting nuts while placing the master cylinder aside without detaching brake lines. First disconnect the Brake Booster Vacuum Hose at its connection to the booster check valve. Pull off the instrument panel lower trim panel to access the booster. Take out the pushrod from the brake pedal and then remove the mounting nuts from the Brake Booster studs along with washer and retainer. This step needs the booster to be pushed out from its push-on nut location on the cowl. To take the booster off the cowl you need to rock it back and forth until the mounting studs slide out of the push-on nuts. Then pull the booster directly up and take it plus the seal from the front of the cowl. Check if any issues exist on the booster seal or its attaching surfaces and replace the seal if required. Install both the Brake Booster and its seal in front of the dash before putting the booster studs through and tighten the bolts to 27 nm (19 ft. Lbs.). Attach the Brake Booster pushrod plus addition parts to the brake pedal assembly following retention device rotation to complete its locking function. Put back the instrument panel lower trim before attaching the vacuum hose to the Brake Booster check valve. Install the master cylinder on the Brake Booster while tightening mounting nuts to 29 nm (21 ft. Lbs.). Return the electrical connector to its proper place on the Brake Fluid Level Sensor and restore the coolant surge tank into position. Also reconnect the battery negative cable. Finally, program the transmitters.


Related Cadillac Parts
 Cadillac ABS Control Module
 Cadillac Brake Backing Plate
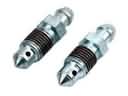 Cadillac Brake Bleeder Screw
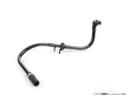 Cadillac Brake Booster Vacuum Hose
 Cadillac Brake Caliper Bracket
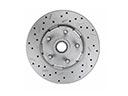 Cadillac Brake Disc
 Cadillac Brake Drum
 Cadillac Brake Fluid Level Sensor
 Cadillac Brake Line
 Cadillac Brake Pad
 Cadillac Brake Proportioning Valve
 Cadillac Wheel Speed Sensor