ChevyParts
My Garage
My Account
Cart
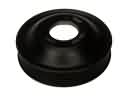
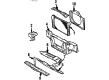
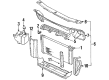
OEM Cadillac Coolant Reservoir
Coolant Tank Reservoir- Select Vehicle by Model
- Select Vehicle by VIN
Select Vehicle by Model
orMake
Model
Year
Select Vehicle by VIN
For the most accurate results, select vehicle by your VIN (Vehicle Identification Number).
47 Coolant Reservoirs found


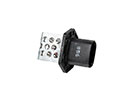
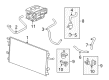
Cadillac Reservoir Tank Part Number: 22885796
$17.28 MSRP: $25.72You Save: $8.44 (33%)Product Specifications- Other Name: Container, Heater Coolant Tank; Coolant Reservoir; Reservoir; Tank, Engine Coolant Recovery


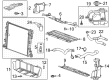
Cadillac Recovery Tank Part Number: 19353731
$87.12 MSRP: $113.30You Save: $26.18 (24%)Product Specifications- Other Name: Tank, Engine Coolant Recovery; Coolant Reservoir
- Replaces: 15085724, 15049676, 15203949, 15808716, 15778387, 15046661, 15074857, 15012547


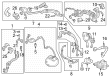
Cadillac Reservoir Tank Part Number: 19129961
$113.75 MSRP: $168.52You Save: $54.77 (33%)Ships in 1-2 Business DaysProduct Specifications- Other Name: Tank, Radiator Surge; Coolant Reservoir; Recovery Tank; Tank, Engine Coolant Recovery
- Replaces: 03540041, 3540041


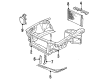
Cadillac Filter Part Number: 25880375
$72.54 MSRP: $94.36You Save: $21.82 (24%)Product Specifications- Other Name: Tank, Engine Coolant By-Pass; Tank, Engine Coolant By - Pass

Cadillac Expansion Tank Part Number: 23378398
$26.94 MSRP: $40.08You Save: $13.14 (33%)Ships in 1-3 Business DaysProduct Specifications- Other Name: Container, Heater Coolant Tank; Coolant Reservoir; Reservoir Tank; Tank, Engine Coolant Recovery

Cadillac Reservoir Tank Part Number: 13538764
$26.32 MSRP: $39.16You Save: $12.84 (33%)Ships in 1-3 Business DaysProduct Specifications- Other Name: Container, Heater Coolant Tank; Surge Tank


Cadillac Recovery Tank Part Number: 25529265
Product Specifications- Other Name: Reservoir, Engine Coolant Recovery; Coolant Reservoir


Cadillac Recovery Tank Part Number: 25636828
Product Specifications- Other Name: Reservoir, Coolant Recovery; Coolant Reservoir; Reservoir, Engine Coolant Recovery


Cadillac Reservoir Tank Part Number: 15882261
Product Specifications- Other Name: Container, Heater Coolant Tank; Coolant Reservoir; Reservoir; Tank, Engine Coolant Recovery


Cadillac Recovery Tank Part Number: 15650373
Product Specifications- Other Name: Reservoir, Coolant Recovery; Engine Coolant Reservoir; Coolant Reservoir; Reservoir; Reservoir, Engine Coolant Recovery


Cadillac Reservoir Tank Part Number: 20902126
Product Specifications- Other Name: Tank, Engine Coolant Recovery; Coolant Reservoir; Reservoir


Cadillac Recovery Tank Part Number: 15808715
$73.37 MSRP: $109.19You Save: $35.82 (33%)Product Specifications- Other Name: Tank, Radiator Surge; Coolant Reservoir; Reservoir; Tank, Engine Coolant Recovery
- Replaces: 15110395, 15778386


Cadillac Reservoir Tank Part Number: 19260088
Product Specifications- Other Name: Tank, Engine Coolant Recovery; Coolant Reservoir; Reservoir
- Replaces: 10346350, 25922057


Cadillac Reservoir Tank Part Number: 25774005
Product Specifications- Other Name: Container, Heater Coolant Tank; Coolant Reservoir; Recovery Tank; Tank, Engine Coolant Recovery
- Replaces: 25748905, 25741919, 25654619

Cadillac Reservoir Part Number: 90500223
Product Specifications- Other Name: Tank, Radiator Surge; Coolant Reservoir; Tank, Engine Coolant Recovery

Cadillac Reservoir Tank Part Number: 25769371
Product Specifications- Other Name: Tank, Radiator Surge; Coolant Reservoir; Reservoir; Tank, Engine Coolant Recovery
- Replaces: 25757864, 25687420


Cadillac Reservoir Tank Part Number: 25635588
$114.35 MSRP: $170.94You Save: $56.59 (34%)Product Specifications- Other Name: Tank, Radiator Surge; Coolant Reservoir; Tank, Engine Coolant Recovery

Cadillac Recovery Tank Part Number: 25528889
Product Specifications- Other Name: Reservoir, Engine Coolant Recovery; Coolant Reservoir

Cadillac Recovery Tank Part Number: 22505434
Product Specifications- Other Name: Reservoir, Engine Coolant Recovery; Coolant Reservoir; Reservoir

Cadillac Recovery Tank Part Number: 25523627
Product Specifications- Other Name: Reservoir, Engine Coolant Recovery; Coolant Reservoir
| Page 1 of 3 |Next >
1-20 of 47 Results
Cadillac Coolant Reservoir
Want to cut long-term maintenance and repair costs? Choose OEM Coolant Reservoir. Those parts deliver top durability you can trust. On our site, you'll find a huge catalog of genuine Cadillac parts. Prices are unbeatable, so you can keep more in your pocket. Every OEM Cadillac Coolant Reservoir includes a manufacturer's warranty. You can also get an easy return policy that keeps buying risk free. Fast delivery, get your car on the road quickly. It's simple to search, compare, and order. Stop guessing about quality or fit. Order today and save with parts that last.
Cadillac Coolant Reservoir Parts Questions & Experts Answers
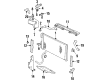
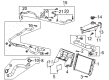
- Q: How to service and replace the Coolant Reservoir (LHD M 35) on Cadillac CTS?A:Service procedures on the Coolant Reservoir (LHD M 35) start with coolant draining. First disconnect the Coolant Reservoir inlet hose and then remove its upper bolt. First clear the necessary area by unscrewing clutch master cylinder reservoir bolts then move the reservoir to a safe location. Remove the master cylinder nuts so you can move the cylinder away from the vacuum Brake Booster without breaking the brake lines. Loosen and slide the clamp on the Coolant Reservoir outlet hose using hose clamp pliers (J38185) before disconnecting the outlet hose. To access the Coolant Reservoir you must first remove the lower tank bolt and the air inlet grille bolt which enables lifting the panel out of the way for Coolant Reservoir removal. The following procedure involves removing both the Coolant Reservoir along with disconnecting its low coolant sensor electrical connector. During the mounting process, position the Coolant Reservoir behind the air inlet grille screen while connecting the low coolant sensor electrical connector. Set the air inlet grille into its final position before fastening the Coolant Reservoir nut to a torque of 9 nm (80 inch lbs.). Secure the Coolant Reservoir outlet hose with hose clamp pliers (J38185) before relocating the hose clamp. Connect the Coolant Reservoir inlet hose then install its lower bolt with 9 nm (80 inch lbs.) of torque. Screw and tighten the Coolant Reservoir bolt to 9 nm (80 inch lbs.). Fasten the clutch master cylinder reservoir bolts where they require a torque of 50 nm (37 ft. Lbs.). Secure the master cylinder to the vacuum Brake Booster then torque its nuts to 25 nm (18 ft. Lbs.). Finally, fill the cooling system.
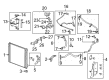
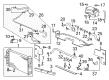
- Q: How to replace the coolant reservoir on Cadillac XLR?A:To replace the coolant reservoir, first drain the cooling system using the Cooling System Draining and Filling (GE 47716). Next, disconnect the reservoir inlet hose from the reservoir using the Hose Clamp Pliers (J 38185) and remove tension on the reservoir inlet hose clamp. Afterwards, use Hose Clamp Pliers (J 38185) to further loosen the pinch on the reservoir outlet hose clamp and remove the reservoir outlet hose from the reservoir. Take off the protective cap from the reservoir upper stud; the reservoir upper nut, followed by the reservoir side nut; and loosen the reservoir side nut. The coolant level sensor, as well as the reservoir, should be disconnected by the electrical connection and removed. For installation: lubricate the I.D. hoses with clean coolant before the installation of the reservoir. Apply the upper reservoir nut and much up all nuts to 8 N.m (71 lb in). Replace protective cap on upper stud of reservoir, connect the coolant level sensor electrical connector, connect the reservoir outlet hose to the reservoir and install tension onto the reservoir outlet hose clamp. Finally tie in the reservoir inlet hose to the reservoir and apply tension to the reservoir inlet hose clamp and fill the cooling system with the help of Cooling System Draining and Filling (GE 47716).
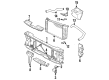
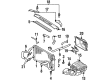
- Q: How to service and repair the coolant reservoir, specifically for the surge tank replacement on left-hand drive on Cadillac SRX?A:In order to service and repair the Coolant Reservoir more particularly for the Coolant Reservoir replacement, left-hand drive vehicle, start by draining the coolant. Remove the master cylinder fluid level sensor electrical connector and put it aside. Use the hose clamp pliers (J 38185) to move the Coolant Reservoir outlet hose clamp and then remove the Coolant Reservoir outlet hose. Again, it is recommended to use the hose clamp pliers (J 38185) to disengage and reposition the Coolant Reservoir inlet hose clamp prior to disconnecting the Coolant Reservoir inlet hose. Take off the bolt and nut of the Coolant Reservoir, disconnecting the low coolant sensor electric connector in order to remove the Coolant Reservoir. For installation, put the Coolant Reservoir in its place and plug the low coolant sensor electrical connector. Install the Coolant Reservoir nut and tighten it 9 n.m (80 lb in), the Coolant Reservoir bolt, which should be tightened to 9 n.m (80 lb in). The inside diameters of the hoses need to be lubricated with clean coolant before connecting the Coolant Reservoir inlet hose and fixing it with the hose clamp pliers (J 38185). Connect the Coolant Reservoir outlet hose and secure it with the hose clamp pliers (J 38185) as well. Lastly, reconnect the master cylinder fluid level sensor electrical connection and top off the cooling system.