ChevyParts
My Garage
My Account
Cart
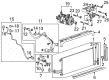
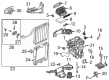
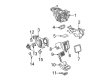
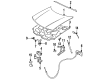
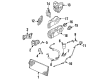
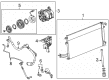
OEM Cadillac Evaporator
A/C Evaporator Core- Select Vehicle by Model
- Select Vehicle by VIN
Select Vehicle by Model
orMake
Model
Year
Select Vehicle by VIN
For the most accurate results, select vehicle by your VIN (Vehicle Identification Number).
54 Evaporators found

Cadillac Evaporator Core Part Number: 84104354
$141.34 MSRP: $290.45You Save: $149.11 (52%)Ships in 1-2 Business DaysProduct Specifications- Other Name: Evaporator Assembly-A/C; A/C Evaporator Core Repair Kit; A/C Evaporator
- Replaced by: 84340800

Cadillac Evaporator Core Part Number: 85558394
$81.11 MSRP: $144.84You Save: $63.73 (44%)Ships in 1-2 Business DaysProduct Specifications- Other Name: Evaporator Kit-A/C; Evaporator Kit, A/C Evaporator
- Replaces: 84763267

Cadillac Evaporator Case Part Number: 23506069
$50.01 MSRP: $89.30You Save: $39.29 (44%)Ships in 1-3 Business DaysProduct Specifications- Other Name: Case, Air Conditioner Evaporator Core Housing; A/C Evaporator; Case Assembly
- Replaced by: 87824143

Cadillac Evaporator Core Part Number: 87846570
$98.58 MSRP: $176.05You Save: $77.47 (44%)Ships in 1-2 Business DaysProduct Specifications- Other Name: Evaporator Assembly-A/C; Evaporator, A/C Evaporator
- Replaced by: 85054168

Cadillac Evaporator Core Part Number: 84445411
$129.39 MSRP: $265.89You Save: $136.50 (52%)Ships in 1-2 Business DaysProduct Specifications- Other Name: Evaporator Kit-A/C; A/C Evaporator Core Repair Kit; A/C Evaporator; Evaporator Kit, A/C Evaporator
- Replaces: 23277681, 23224323, 84130427

Cadillac Evaporator Core Part Number: 52473589
$178.68 MSRP: $330.58You Save: $151.90 (46%)Product Specifications- Other Name: Evaporator Assembly, A/C; A/C Evaporator Core Repair Kit; A/C Evaporator; Evaporator, A/C Evaporator

Cadillac Evaporator Core Part Number: 84835413
$79.07 MSRP: $162.50You Save: $83.43 (52%)Product Specifications- Other Name: Evaporator Kit-A/C; A/C Evaporator Core Repair Kit; A/C Evaporator; Evaporator Kit, A/C Evaporator

Cadillac Heater Core Part Number: 84206592
$89.49 MSRP: $183.91You Save: $94.42 (52%)Ships in 1-2 Business DaysProduct Specifications- Other Name: Core Kit-Heater; Evaporator Core
- Replaced by: 84760093

Cadillac Evaporator Core Part Number: 84641125
$127.77 MSRP: $229.17You Save: $101.40 (45%)Product Specifications- Other Name: Evaporator Kit-A/C; A/C Evaporator Core Repair Kit; A/C Evaporator; Evaporator Kit, A/C Evaporator
- Replaces: 84055903, 84252913, 84225315
Cadillac Evaporator Core Part Number: 84055903
$122.04 MSRP: $229.17You Save: $107.13 (47%)Ships in 1-2 Business DaysProduct Specifications- Other Name: Evaporator Assembly-A/C (W/Seal); A/C Evaporator Core Repair Kit; A/C Evaporator
- Replaced by: 84641125


Cadillac Evaporator Core Part Number: 52454628
$66.75 MSRP: $182.92You Save: $116.17 (64%)Ships in 1-2 Business DaysProduct Specifications- Other Name: Evaporator, Air Conditioner Evaporator; A/C Evaporator Core Repair Kit; A/C Evaporator; Evaporator, A/C Evaporator


Cadillac Evaporator Core Part Number: 19129798
Product Specifications- Other Name: Evaporator, Air Conditioner Evaporator; A/C Evaporator Core Repair Kit; A/C Evaporator Core; A/C Evaporator; Evaporator, A/C Evaporator; Evaporator
- Replaces: 88957405


Cadillac Evaporator Core Part Number: 52464036
$219.54 MSRP: $393.80You Save: $174.26 (45%)Product Specifications- Other Name: Evaporator, A/C; A/C Evaporator Core Repair Kit; A/C Evaporator Core; A/C Evaporator; Evaporator; Evaporator, A/C Evaporator


Cadillac Evaporator Core Part Number: 89024954
Product Specifications- Other Name: Evaporator Kit, Air Conditioner Evaporator; A/C Evaporator Core Repair Kit; A/C Evaporator Core; A/C Evaporator; Evaporator Kit, A/C Evaporator; Evaporator
- Replaces: 25740389


Cadillac Evaporator Core Part Number: 89019057
Product Specifications- Other Name: Evaporator, Air Conditioner Evaporator; A/C Evaporator Core Repair Kit; A/C Evaporator Core; A/C Evaporator; Evaporator, A/C Evaporator; Evaporator
- Replaces: 52401671, 52486401
Cadillac Evaporator Core Part Number: 52456012
Product Specifications- Other Name: Evaporator, Air Conditioner Evaporator; A/C Evaporator Core Repair Kit; A/C Evaporator; Evaporator, A/C Evaporator
Cadillac Evaporator Core Part Number: 3095723
Product Specifications- Other Name: Core, Evaporator; A/C Evaporator Core Repair Kit; A/C Evaporator; Core, A/C Evaporator
Cadillac Evaporator Core Part Number: 23152572
Product Specifications- Other Name: Evaporator, Air Conditioner Evaporator; A/C Evaporator Core Repair Kit; A/C Evaporator

Cadillac Evaporator Core Part Number: 3058130
Product Specifications- Other Name: Evaporator, A/C (W/Case); A/C Evaporator Core Repair Kit; A/C Evaporator; Evaporator, A/C Evaporator; Core, A/C Evaporator

Cadillac Evaporator Core Part Number: 52457218
Product Specifications- Other Name: Evaporator, A/C (W/Case); A/C Evaporator Core Repair Kit; A/C Evaporator; Evaporator, A/C Evaporator; Core, A/C Evaporator
| Page 1 of 3 |Next >
1-20 of 54 Results
Cadillac Evaporator
Choose OEM Evaporator, you're making the optimal decision for superior quality and perfect performance. You can feel confident because each component goes through stringent quality checks. Every part is carefully built to comply with Cadillac's factory specifications. You'll enjoy a smooth, worry-free installation that fits just right. At ChevyPartsGiant.com, you'll find it easy to get top-quality OEM Cadillac Evaporator. You can shop at highly competitive prices and protect your budget. All our genuine Cadillac parts include a dependable manufacturer's warranty. You'll also appreciate our straightforward return policy and swift delivery services for extra convenience.
Cadillac Evaporator Parts and Q&A
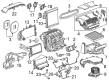
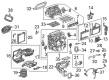
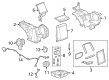
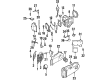
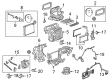
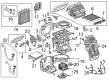
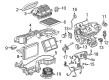
- Q: How to replace the air conditioning evaporator core on Cadillac CTS?A:Starting the air conditioning Evaporator core replacement requires initial removal of the hvac module assembly. You should first remove the insulation from the thermal expansion valve (TXV) and then unscrew and remove both the hvac line clamp and its clamp screw. The procedure includes removing txv to Evaporator bolts as well as the txv line bracket before pulling the txv straight out from the Evaporator core. The process begins with unscrewing all case-retaining components while disconnecting the thermistor electrical connection and splitting the hvac module apart. After removing the thermistor from the Evaporator core you should remove the Evaporator core itself. The installation process should begin with applying refrigerant oil while also installing new Evaporator core seals before placing the Evaporator core in its correct position. Install the thermistor at its original position before putting the hvac module back together while using the proper screws to secure the case and tightening them to 1 nm torque strength (8 lb in). The installation process begins with adding the case-clips which simultaneously allows you to connect the thermistor electrical connector. Apply refrigerant oil to the a/c lines before inserting them into the txv before carefully placing the txv onto the Evaporator core until correct placement occurs. Align and install the txv line bracket followed by attaching the txv to Evaporator bolts while tightening them to 3.5 nm (31 lb in). Attach the hvac line clamp followed by its screw and tighten to 1 nm (8 lb in). Afterward, position the insulation to cover the lines and txv. Finally, reinstall the hvac module.
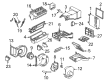
- Q: How to replace the air conditioning evaporator core on Cadillac Escalade?A:The first step to replace the air conditioning Evaporator core consists of hvac module removal. When using the provided heat stakes separate them from the hvac module by using a screwdriver along with a hammer. Detach all wires from the Blower Motor and both sensors in addition to the Blower Motor control module and carefully remove extra wires from their retaining systems. You should disassemble the hvac module assembly by removing its screws if they are present. You should remove the Evaporator cowl gasket from the Evaporator before separating the upper hvac module assembly from the lower hvac module assembly . The Evaporator core must be removed from the upper component parts hierarchy of the hvac module assembly. Placing new refrigerant oil into the Evaporator core becomes necessary before installing it. The installation process starts with fitting the Evaporator core inside the hvac module before reattaching the upper hvac module assembly to the lower hvac module assembly followed by Evaporator cowl gasket fitting on the Evaporator. Secure the hvac module assembly with screws which should be tightened to 2 nm (18 lb in). Install the hvac module assembly after completing all procedures.


Related Cadillac Parts
 Cadillac Cabin Air Filter
 Cadillac Blend Door Actuator
 Cadillac Blower Motor
 Cadillac Blower Motor Resistor
 Cadillac A/C Accumulator
 Cadillac A/C Compressor
 Cadillac A/C Condenser
 Cadillac A/C Expansion Valve
 Cadillac A/C Idler Pulley
 Cadillac A/C Service Cap
 Cadillac A/C System Valve Core
 Cadillac Air Temperature Sensor