ChevyParts
My Garage
My Account
Cart
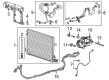
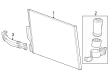
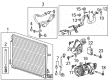
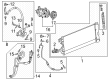
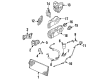
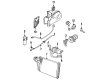
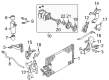
OEM Cadillac A/C Condenser
Air Conditioning Condenser- Select Vehicle by Model
- Select Vehicle by VIN
Select Vehicle by Model
orMake
Model
Year
Select Vehicle by VIN
For the most accurate results, select vehicle by your VIN (Vehicle Identification Number).
54 A/C Condensers found


Cadillac Condenser Part Number: 52471072
$129.90 MSRP: $194.17You Save: $64.27 (34%)Ships in 1-3 Business DaysProduct Specifications- Other Name: Condenser, A/C; A/C Condenser; Condenser, A/C Condenser

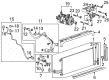
Cadillac Condenser Part Number: 84908876
$174.21 MSRP: $260.40You Save: $86.19 (34%)Ships in 1-3 Business DaysProduct Specifications- Other Name: Condenser Assembly-A/C
- Replaced by: 86540124

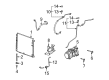
Cadillac Condenser Part Number: 22990683
$180.91 MSRP: $270.42You Save: $89.51 (34%)Product Specifications- Other Name: Condenser Assembly-A/C; A/C Condenser; Condenser, A/C Condenser

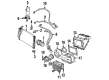
Cadillac Condenser Part Number: 84908875
$174.16 MSRP: $260.33You Save: $86.17 (34%)Ships in 1-2 Business DaysProduct Specifications- Other Name: Condenser Assembly-A/C
- Replaced by: 86540123

Cadillac Condenser Part Number: 84638451
$274.01 MSRP: $409.59You Save: $135.58 (34%)Ships in 1-3 Business DaysProduct Specifications- Other Name: Condenser Assembly-A/C; A/C Condenser; Condenser, A/C Condenser
- Replaces: 84406068

Cadillac Condenser Part Number: 84671660
$140.91 MSRP: $271.10You Save: $130.19 (49%)Ships in 1-3 Business DaysProduct Specifications- Other Name: Condenser Assembly-A/C; Condenser, A/C Condenser

Cadillac Condenser Part Number: 84551760
$164.13 MSRP: $245.34You Save: $81.21 (34%)Ships in 1-3 Business DaysProduct Specifications- Other Name: Condenser Assembly-A/C; A/C Condenser; Condenser, A/C Condenser

Cadillac Condenser Part Number: 25876662
$242.13 MSRP: $361.92You Save: $119.79 (34%)Ships in 1-2 Business DaysProduct Specifications- Other Name: Condenser Assembly-A/C; A/C Condenser; Condenser, A/C Condenser

Cadillac Condenser Part Number: 23409063
$177.68 MSRP: $265.60You Save: $87.92 (34%)Ships in 1-3 Business DaysProduct Specifications- Other Name: Condenser Assembly-A/C; A/C Condenser
- Replaced by: 85822145

Cadillac Condenser Part Number: 3095844
$140.98 MSRP: $263.06You Save: $122.08 (47%)Product Specifications- Other Name: Condenser Assembly; A/C Condenser
- Replaced by: 52482102


Cadillac Condenser Part Number: 52485722
Product Specifications- Other Name: Condenser, A/C; A/C Condenser; Condenser, A/C Condenser
- Replaces: 03050450, 03037438, 03037439, 3037438, 3037439, 3050450


Cadillac Condenser Part Number: 52482102
Product Specifications- Other Name: Condenser Assembly, A/C; A/C Condenser; Condenser, A/C Condenser
- Replaces: 03095844, 3095844, 52456332

Cadillac Condenser Assembly Part Number: 84802253
$168.44 MSRP: $251.78You Save: $83.34 (34%)Product Specifications- Other Name: Condenser Assembly-A/C; A/C Condenser; Condenser; Condenser, A/C Condenser
- Replaced by: 85145960

Cadillac Condenser Part Number: 88957420
$183.04 MSRP: $273.60You Save: $90.56 (34%)Product Specifications- Other Name: Condenser, A/C; A/C Condenser; Condenser A/C; Condenser, A/C Condenser
- Replaces: 19130355


Cadillac Condenser Part Number: 3090686
Product Specifications- Other Name: Condenser Assembly, A/C; A/C Condenser; Condenser, A/C Condenser

Cadillac Condenser Part Number: 3095898
Product Specifications- Other Name: Condenser Assembly, A/C; A/C Condenser; Condenser Assembly, A/C Condenser; Condenser, A/C Condenser

Cadillac Condenser Part Number: 3092740
Product Specifications- Other Name: Condenser Assembly, A/C; A/C Condenser; Condenser, A/C Condenser
Cadillac Condenser Part Number: 3040531
Product Specifications- Other Name: Condenser Assembly, A/C; A/C Condenser; Condenser, A/C Condenser
Cadillac Condenser Part Number: 52450541
Product Specifications- Other Name: A/C Condenser; Condenser, A/C Condenser

Cadillac Condenser Part Number: 52402209
Product Specifications- Other Name: Condenser Assembly, A/C; A/C Condenser; Condenser, A/C Condenser
- Replaces: 52471230, 52458718, 52494466
| Page 1 of 3 |Next >
1-20 of 54 Results
Cadillac A/C Condenser Parts Questions & Experts Answers
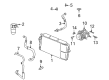
- Q: How to Replace an A/C Condenser in an HVAC System (MAE) on Cadillac CTS?A: First, to replace the condenser, employ the halogen leak detector (J 39400) to recover the refrigerant. First of all, remove the radiator support brackets, upper condenser bolts, and air deflector. Remove the hose from the Power Steering Cooler, remove the discharge hose bolt and remove the discharge hose, dispose of the o-ring seal. Then, unfasten the condenser tube bolt and take away the condenser tube,disposing of the o-ring seal once more. Go on to dismantle lower condenser mounting bolts and remove the condenser. For installation, just add refrigerant oil according to refrigerant system capacities and installation of the new condenser. Install the lower mounting bolts to the condenser. Tighten them to 3.9 n.m (35 lb in). Lubricate the o-ring using refrigerant oil and attach the condenser tube to the condenser using the tubing bolt, screwed down to 5.4 n.m (48 lb in). Reconnect power steering lines to hoses, lubricate o-ring again and connect discharge hose to the condenser and discharge hose bolt tightened to a value of 5.4 n.m (48 lb in). Make sure there are no dents in the side seals and it is situated correctly around the pipes and install the air deflector and upper condenser mounting bolts and torque it to 3.9 n.m (35 lb in). Finally, install the upper radiator supports, evacuate and charge the a/c system and perform a leak test on all fittings of the repaired or reinstalled parts with the halogen leak detector (J 39400-A).
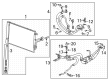
- Q: How to replace the A/C Condenser in a heavy-duty cooling system on Cadillac SRX?A: To replace the condenser for heavy duty cooling system, start by recovering the refrigerant. Next, take off the Power Steering Cooler mounting bolts and lift and support the vehicle. Go ahead and take off the front air deflector retainers and front air deflector, and lower air baffle push pin retainers. Shear the condenser upper bracket bolts as well as the condenser lower mounting bolts and the discharge line bolt, then unbolt discharge line from the condenser and discard the o-ring. Loosen the condenser tube bolt and remove the condenser tube from the condenser and discard the o-rings too. Shove the Power Steering Cooler to one side of the car so that the condenser can be detached, then remove the condenser. In case of installing a new condenser, add the marked amount of pag oil to it. Install the new condenser, and place the Power Steering Cooler back in place. Install a new o-ring to the condenser tube, attach it to the condenser, and fix it with the condenser tube bolt, tightening the bolt to 9 n.m(80 lb.in). Then install a new o-ring to the discharge line, connect it with the condenser, and make it tight with the discharge line bolt tightened to 9 n.m (80 lb in). Apply the condenser lower mounting bolts with tighten them up to 5.4 n.m (48 lb in) and then do the same thing with the condenser upper bracket bolts tighten them to 5.4 n.m (48 lb in). Refit the lower air baffle push pin retainers, the front air deflector and the front air deflector retainers. Lower the vehicle down and install the Power Steering Cooler mounting bolts. Lastly, evacuate and recharge the a/c system and conduct a leak test on the fittings of the component with the halogen leak detector (J 39400-A).
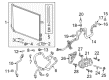
- Q: How to replace the A/C Condenser in a system on Cadillac XLR?A: Begin by using a halogen leak detector j 39400-a to check for leaks on the component fittings. Start your work by extracting refrigerant from the a/c system. The upper radiator support needs to be taken off next. Start by removing the fitting bolt to disconnect the a/c compressor hose assembly from the A/C Condenser fitting before immediately sealing the open a/c components with caps or tape to prevent contamination. Next raise the vehicle and proceed to take off the front evaporator inlet line bolt from the A/C Condenser before disconnecting the line so discard the seal washer and use caps or tape to seal the line. Use an air hammer to remove one lh and one rh radiator baffle upper retainer pin then push the baffle forward for more clearance. Lower the condenser along the radiator to free its tabs from the slots before taking it out of the vehicle. To install a new condenser add pag oil as specified then lower the unit into the vehicle for secure tab insertion into radiator slots before reinstallation. Connect the front evaporator inlet line to the A/C Condenser by installing a new washer and tighten the bolt to 16 n.m (12 lb ft). Connect the hose assembly to the A/C Condenser using a new seal washer followed by tight bolt installation at 16 n.m (12 lb ft). To complete this procedure you should reinstall the upper radiator support and then evacuate and recharge the a/c system following your test with the halogen leak detector (J 39400-A).


Related Cadillac Parts
 Cadillac Cabin Air Filter
 Cadillac Blower Motor
 Cadillac Heater Core
 Cadillac A/C Accumulator
 Cadillac A/C Compressor Cut-Out Switches
 Cadillac A/C Expansion Valve
 Cadillac A/C Idler Pulley
 Cadillac A/C Orifice Tube
 Cadillac A/C System Valve Core
 Cadillac Ambient Temperature Sensor
 Cadillac Blower Control Switches
 Cadillac HVAC Control Module