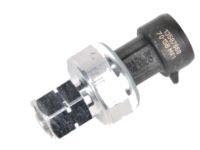
Make sure this part fits

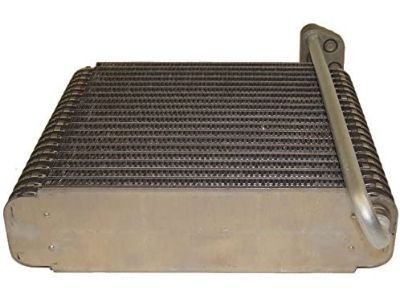
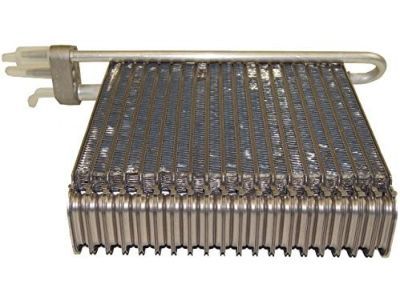
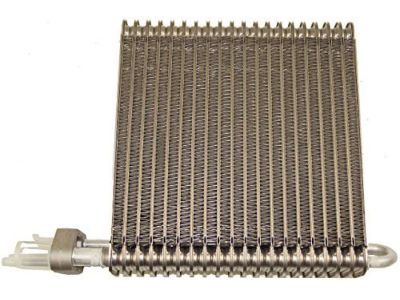
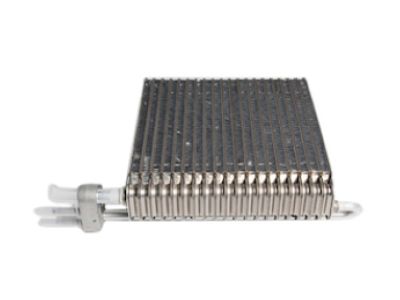
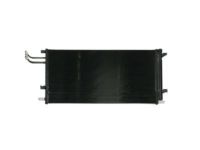
GM 89019027
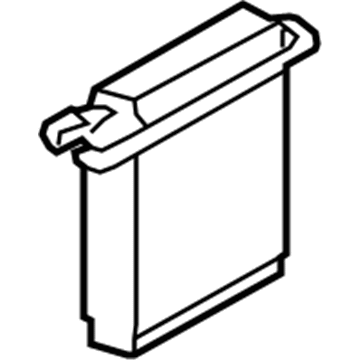
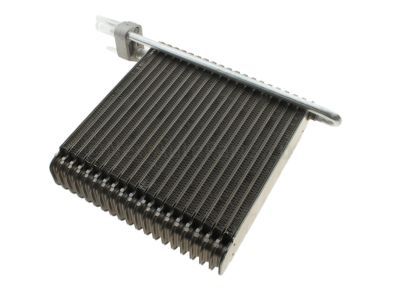
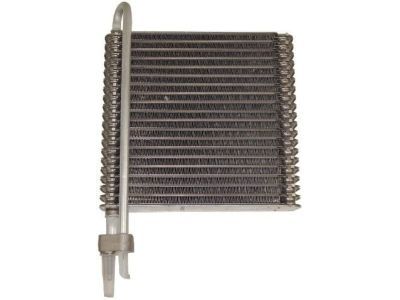
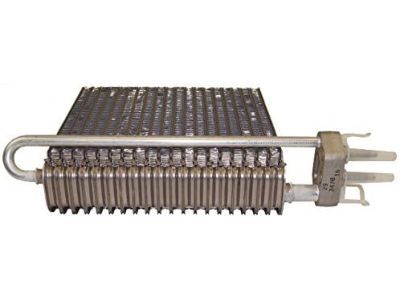
Evaporator Core

2003-2014 GM

Customer Questions & Expert Answers (26)
GM 89019027 Evaporator Core
  • Part Description
    Evaporator Assembly, A/C; A/C Evaporator Core Repair Kit; A/C Evaporator Core; A/C Evaporator
  • Replaces
    89018296
  • Manufacturer
    General Motors
Make sure this part fits
$209.04 MSRP: $429.58
You Save: $220.54 (52%)
Ships in 1-2 Business Days
1
ADD TO CART
  • Related Parts
  • Product Specifications
  • Vehicle Fitment
  • Customer Questions & Expert Answers
  • Product Specifications

    BrandGenuine GM
    Manufacturer Part Number89019027
    Part DescriptionEvaporator Assembly, A/C; A/C Evaporator Core Repair Kit; A/C Evaporator Core; A/C Evaporator
    Other NamesEvaporator, A/C Evaporator; Evaporator
    Item Dimensions21.2 x 18.4 x 10.9 inches
    Item Weight7.90 Pounds
    ConditionNew
    Fitment TypeDirect Replacement
    Replaces89018296
    ManufacturerGeneral Motors
    SKU89019027
    WarrantyThis genuine GM part is guaranteed by GM's factory warranty.
    Shipping & ReturnShipping Policy Return Policy
    Warning: California's Proposition 65
  • Vehicle Fitment

    Year Make Model Trim Engine
    2003-2014 Cadillac EscaladeBase, Hybrid, Hybrid Platinum, Luxury, Platinum, Premium8 Cyl 5.3 L GAS, 8 Cyl 6.0 L FULL HYBRID EV-FLEX (FHEV), 8 Cyl 6.0 L FULL HYBRID EV-GAS (FHEV), 8 Cyl 6.0 L GAS, 8 Cyl 6.2 L FLEX, 8 Cyl 6.2 L GAS
    2003-2014 Cadillac Escalade ESVBase, Luxury, Platinum, Premium8 Cyl 6.0 L GAS, 8 Cyl 6.2 L FLEX, 8 Cyl 6.2 L GAS
    2003-2013 Cadillac Escalade EXTBase, Luxury, Premium8 Cyl 6.0 L GAS, 8 Cyl 6.2 L FLEX, 8 Cyl 6.2 L GAS
    2007-2013 Chevrolet AvalancheBlack Diamond LS, Black Diamond LT, Black Diamond LTZ, LS, LT, LTZ8 Cyl 5.3 L FLEX, 8 Cyl 5.3 L GAS, 8 Cyl 6.0 L GAS
    2003-2006 Chevrolet Avalanche 1500Base, LS, LT, North Face, On Road Edition, WBH, Z66, Z718 Cyl 5.3 L FLEX, 8 Cyl 5.3 L GAS
    2003-2006 Chevrolet Avalanche 2500Base, LS, LT8 Cyl 8.1 L GAS
    2003-2013 Chevrolet Silverado 1500Base, Hybrid, LS, LT, LTZ, SS, WT, XFE, Z71 Off-Road6 Cyl 4.3 L GAS, 8 Cyl 4.8 L FLEX, 8 Cyl 4.8 L GAS, 8 Cyl 5.3 L FLEX, 8 Cyl 5.3 L FULL HYBRID EV-GAS (FHEV), 8 Cyl 5.3 L GAS, 8 Cyl 6.0 L FULL HYBRID EV-FLEX (FHEV), 8 Cyl 6.0 L FULL HYBRID EV-GAS (FHEV), 8 Cyl 6.0 L GAS, 8 Cyl 6.2 L FLEX
    2007 Chevrolet Silverado 1500 ClassicHybrid, LS, LT, SS, WT6 Cyl 4.3 L GAS, 8 Cyl 4.8 L GAS, 8 Cyl 5.3 L FLEX, 8 Cyl 5.3 L FULL HYBRID EV-GAS (FHEV), 8 Cyl 5.3 L GAS, 8 Cyl 6.0 L GAS
    2005-2006, 2003 Chevrolet Silverado 1500 HDBase, LS, LT8 Cyl 6.0 L GAS
    2007 Chevrolet Silverado 1500 HD ClassicLT8 Cyl 6.0 L GAS
    View More
  • Customer Questions & Expert Answers

    Q:
    Is 89019027 compatible with my car? Posted by ChevyPartsGiant Specialist
    A:
    Please Select Your Vehicle model to see if part number 89019027 is suitable before ordering.
    Posted by ChevyPartsGiant Specialist
    Q:
    How to Replace an Evaporator Core in a Visteon System on Cadillac Escalade EXT? Posted by Customer
    A:
    Replacing the Evaporator core (Visteon) demands removal of the hvac module and detachment of the electrical connector from the recirculation actuator. Begin by removing the Evaporator cover screw set then eliminate the cover from the hvac module assembly. First you should remove the Evaporator cowl gasket which is attached to the Evaporator before pulling the Evaporator core out of the hvac module assembly. The installation process requires adding petroleum base oil to the Evaporator core but only when you are also replacing the condenser. The hvac module assembly accepts the Evaporator core while installation of the Evaporator cowl gasket goes on the Evaporator before installing the Evaporator cover onto the hvac module assembly. The correct fasteners need to be installed where they belong because replacement fasteners should match exactly with the specified part number for proper use. Fasteners together with their joint surfaces should always remain free of paints and lubricants and corrosion inhibitors because such substances alter torque and clamping force measurements. When following tightening procedures it is necessary to use the correct sequence and specifications to avoid damaging components. Complete the installation by fastening screws to the Evaporator cover while tightening them to 2 nm (18 lb in) torque then connect the electrical connector to the recirculation actuator before reinstalling the hvac module.
    Posted by ChevyPartsGiant Specialist
    Q:
    How to replace the evaporator core in the auxiliary HVAC module on Cadillac Escalade? Posted by Customer
    A:
    The halogen leak detector (J 39400-A) must be used first to confirm leak-free conditions before changing the Evaporator core inside the auxiliary hvac module. The service/initiation starts by extracting the auxiliary hvac module followed by sequential removal of the air temperature actuator then the Heater Core cover and finally the Heater Core from the auxiliary hvac module. Start by taking away the lower module cover from the auxiliary hvac module before you obtain the Evaporator core from the lower module cover. To install the Evaporator core you must put it into the lower module cover before attaching the cover to the auxiliary hvac module. Reinstall the Heater Core while next installing the Heater Core cover until completion with the air temperature actuator being reinstalled onto the auxiliary hvac module and then proceed with securing everything back into the vehicle.
    Posted by ChevyPartsGiant Specialist
    Q:
    How to replace the evaporator core on Cadillac Escalade? Posted by Customer
    A:
    The replacement of the Evaporator core begins with hvac module removal. The screwdriver combined with a hammer can eliminate the heat stakes from the hvac module when installed. Unplug every wire connection from the Blower Motor control module with sensors before eliminating the wiring from retainers. First unfasten any screws present on the hvac module assembly if your vehicle has this feature. The Evaporator cowl gasket must be removed from the Evaporator before separating the upper hvac module assembly from the lower hvac module assembly. Take out the Evaporator core from its position in the upper hvac module assembly. Before integrating the new Evaporator core into the hvac module assembly, the system requires refrigerant oil addition. After attaching the upper hvac module assembly to the lower hvac module assembly you must install the Evaporator cowl gasket onto the Evaporator. Install the screws to the hvac module assembly with 2 n.m (18 lb in) torque settings then mount the hvac module assembly.
    Posted by ChevyPartsGiant Specialist
    Q:
    How to Replace an Evaporator Core in a Delphi System on Chevrolet Avalanche 1500? Posted by Customer
    A:
    The first step to replace the Evaporator core (Delphi) requires hvac module removal. A screwdriver with hammer allows you to disassemble heat stakes inside of the hvac module and extract all screws from the hvac module assembly. The next step involves taking off the Evaporator cowl gasket from the Evaporator before dividing the upper hvac module assembly from the lower hvac module assembly. Extract the Evaporator core out from the upper hvac module assembly. Before installing the new Evaporator core it requires a proper amount of refrigerant oil added to it. Install the Evaporator core within the hvac module assembly before fixing the upper hvac module assembly to the lower hvac module assembly . The replacement process requires installation of the Evaporator cowl gasket onto the Evaporator while using appropriate fasteners at their proper locations with the requirement of matching original part numbers. The use of paint, lubricants and corrosion inhibitors on fasteners together with their joint surfaces should be avoided because they alter torque values and clamping force. The proper tightening sequence combined with specifications will help prevent damage to the system. Complete the hvac module assembly with screws while tightening them to 2 nm (18 lb in) before reinstalling the assembly part.
    Posted by ChevyPartsGiant Specialist
    Q:
    How to replace the evaporator core (Visteon) on Chevrolet Silverado 2500? Posted by Customer
    A:
    The replacement of the Evaporator core (Visteon) requires detachment of the hvac module and removal of the electrical connector from the recirculation actuator. The following procedure requires the Evaporator cover screws to be unscrewed before the cover can be detached from the hvac module assembly. The Evaporator cowl gasket needs to be detached from the Evaporator before you pull out the Evaporator core from the hvac module assembly . It is mandatory to inject refrigerant oil during new Evaporator core replacement when you substitute the condenser overcompanies. Fit the Evaporator core into the hvac module assembly while placing the Evaporator cowl gasket onto the Evaporator until positioning the Evaporator cover on the hvac module assembly . The proper usage of fasteners must occur at their intended positions while maintaining match-up of all components to their corresponding part numbers. Fasteners along with their joint surfaces should never have paints or lubricants or corrosion inhibitors applied because these substances impact torque and clamping force. The correct fastener sequence and values should be used to stop equipment damage from occurring. The procedure ends by installing Evaporator cover screws with a torque of 2 nm(18 lb in) before reattaching the electrical connector to the recirculation actuator and returning the hvac module assembly into place.
    Posted by ChevyPartsGiant Specialist
    Q:
    How to replace the evaporator core (Delphi) in the HVAC module on Chevrolet Silverado 3500? Posted by Customer
    A:
    The replacement process of the Evaporator core (Delphi) starts with hvac module removal. Equipped vehicles need screwdriver and hammer assistance to withdraw heat stakes from hvac modules prior to screw removal of hvac module assemblies. Begin by removing the Evaporator cowl gasket off the Evaporator before splitting up the upper hvac module assembly from the lower hvac module assembly. Take out the Evaporator core which is situated inside the upper hvac module assembly. To install the new Evaporator core you must add refrigerant oil to it. Place the Evaporator core into the hvac module assembly before reassembling the upper hvac module assembly to the lower hvac module assembly. Affix the Evaporator cowl gasket to its place on the Evaporator while paying attention to fastener placement rules since new fasteners require identical part numbers matching the actual vehicle demands. Using paints lubricants or corrosion inhibitors on fasteners and their joint surfaces leads to damage of fasteners through effects on both torque and clamping force. You should follow the proper tightening sequence along with required specifications to prevent damage to the system. After installing the hvac module assembly place screws onto it while tightening each screw to 2 nm (18 lb in) torque specifications before reattaching the module assembly.
    Posted by ChevyPartsGiant Specialist
    Q:
    How to replace the evaporator core (Visteon) on Chevrolet Silverado 1500 Classic? Posted by Customer
    A:
    The replacement process of the visteon Evaporator core begins with the removal of hvac module components as well as disconnecting the electrical connector from the recirculation actuator. You must begin replacing the Evaporator cover by detaching its screws then removing the hvac module assembly cover. User must first remove the Evaporator cowl gasket from the Evaporator after which they can extract the Evaporator core from the hvac module assembly. During new Evaporator core installation you should apply refrigerant oil if you replace the condenser. First attach the Evaporator core into the hvac module assembly before placing the Evaporator cowl gasket on the Evaporator. Place the Evaporator cover on the hvac module assembly with securing screws doing tightness of 2 n.m(18 lb in). The hvac recirculation actuator electrical connector should be connected again followed by reinstalling the complete hvac module assembly.
    Posted by ChevyPartsGiant Specialist
    Q:
    How to replace the auxiliary evaporator core on Chevrolet Tahoe? Posted by Customer
    A:
    Initial replacement of the auxiliary Evaporator core necessitates verification for leaks by using the halogen leak detector (J 39400-A). The first task is to take out the auxiliary hvac module from the vehicle adding air temperature actuator and heating core cover from the auxiliary hvac module. Users must remove the Heater Core together with the lower module cover from the auxiliary hvac module before extracting the Evaporator core from the lower module cover. To install the Evaporator core system start by fitting it into the lower module cover and securing the cover back to the auxiliary hvac module. Follow this step by putting back the Heater Core and Heater Core cover to the auxiliary hvac module then install the air temperature actuator. To finish the installation sequence replace the auxiliary hvac module assembly into its vehicle position.
    Posted by ChevyPartsGiant Specialist
    Q:
    How to replace the evaporator core (Delphi) on Chevrolet Silverado 3500 Classic? Posted by Customer
    A:
    A replacement of the delphi Evaporator core should begin with the removal of the hvac module. The hvac module requires screwdriver and hammer to extract heat stakes and lose its attachment screws. The Evaporator cowl gasket should be removed from the Evaporator while the upper hvac module assembly needs to be divided from the lower hvac module assembly . Transfer the Evaporator core out from its position in the upper hvac module assembly . During the installation of the new Evaporator core it needs to receive an addition of refrigerant oil. Install the Evaporator core inside the hvac module assembly after which join the upper hvac module assembly back to the lower hvac module assembly. Next install the Evaporator cowl gasket to the Evaporator before inserting screws into the hvac module assembly and tightening these screws to 2 n.m (18 lb in). The hvac module assembly needs to be replaced during the last step of the installation process.
    Posted by ChevyPartsGiant Specialist
    Q:
    How to replace the evaporator core on GMC Sierra 1500? Posted by Customer
    A:
    The process for replacing an evaporator core starts with heater/vent module removal through screw extraction and module separation. The removal of the evaporator core begins by extracting it from its position inside the heater/vent module. Put refrigerant oil in the new evaporator core during its installation process. Fit the new evaporator core inside the heater/vent module followed by rebuilding the module structure and tighten its screws to 1.6 N.m (14 lb in). The reinstallation of the heater/vent module requires A/C system evacuation and recharging followed by testing its fittings using J 39400-A.
    Posted by ChevyPartsGiant Specialist
    Q:
    How to replace the evaporator core on GMC Sierra 3500? Posted by Customer
    A:
    Removing the heater/vent module begins with unfastening its screws before separating the module halves. Remove the evaporator core from the heater/vent module before proceeding. When you install the new evaporator core add refrigerant oil into it. The first step is to put the evaporator core back into the heater/vent module after which you must reassemble the module halves following the Fastener Notice in Service Precautions. Achieve secure sealing of the module when you tighten the screws to 1.6 N.m (14 lb in). To conclude the repair process install the heater/vent module and perform an evacuation and recharging process of the A/C system while conducting a leak test on component fittings using the J 39400-A.
    Posted by ChevyPartsGiant Specialist
    Q:
    How to replace the air conditioning evaporator core on GMC Yukon? Posted by Customer
    A:
    The replacement of the air conditioning Evaporator core begins with hvac module removal. Heat stakes may be removed from the hvac module using a screwdriver followed by a hammer. Disengage all wires on the Blower Motor as well as the Blower Motor control module and sensors before extracting the wires from their retainers. Detach all screws that fasten the hvac module assembly. During the replacement of the Evaporator cowl gasket users should detach the element from the Evaporator before splitting the upper hvac module assembly from the lower hvac module assembly. Evacuate the Evaporator core before it comes out from the upper hvac module assembly. Feeding the new Evaporator core with refrigerant oil at setup time is necessary. The Evaporator core installation occurs on the hvac module assembly before reuniting the upper hvac assembly to the lower component levels. The Evaporator cowl gasket gets mounted to the Evaporator before installing the screws into the hvac module assembly at 2 nm (18 lb in). The hvac module assembly needs to be reinstalled at the end of the process.
    Posted by ChevyPartsGiant Specialist
    Q:
    How to replace the auxiliary evaporator core on GMC Yukon XL 2500? Posted by Customer
    A:
    The replacement process for an auxiliary Evaporator core begins with leak detection through use of the halogen leak detector (J 39400-A). Initiate the process by removing the auxiliary hvac module from the vehicle after which remove the air temperature actuator . The next step requires removal of the stud positioned beneath the rear hvac module between Heater Core inlet and outlet pipes. Remove both the Heater Core pipe gasket from the module case before taking out the Heater Core pipe retainer. Now establish access by disassembling both the hvac module lower cover screws followed by the lower cover itself. Detach the Heater Core clamp before pulling out the Heater Core from the auxiliary hvac module. Extract the gasket between the auxiliary hvac module and the air distributor duct because it may need reinstallation. You must detach the front case fasteners which enable you to separate it from the back half before pulling out the Evaporator core from this back section. The technician should examine gaskets and seals for damage before making replacements when needed. You should insert the Evaporator core inside the case while also applying the Evaporator core seal. Join the case pieces while placing the gasket correctly on the air distributor duct along with aligning the temperature door for proper assembly. Return the Heater Core into the auxiliary hvac module before installing the Heater Core clamp. Secure the auxiliary hvac module lower cover with screws by tightening them to 1.6 n.m at 14 lb in. Position the Heater Core pipe retainer and gasket followed by reinstalling the stud between the Heater Core inlet and outlet which exists beneath the auxiliary hvac module surface. Complete the installation by putting back the air temperature actuator alongside the auxiliary hvac module.
    Posted by ChevyPartsGiant Specialist
    Q:
    How to replace the evaporator core (Delphi) on GMC Sierra 1500 Classic? Posted by Customer
    A:
    A replacement of the delphi Evaporator core should begin with the removal of the hvac module. The hvac module requires screwdriver and hammer to extract heat stakes and lose its attachment screws. The Evaporator cowl gasket should be removed from the Evaporator while the upper hvac module assembly needs to be divided from the lower hvac module assembly . Transfer the Evaporator core out from its position in the upper hvac module assembly . During the installation of the new Evaporator core it needs to receive an addition of refrigerant oil. Install the Evaporator core inside the hvac module assembly after which join the upper hvac module assembly back to the lower hvac module assembly. Next install the Evaporator cowl gasket to the Evaporator before inserting screws into the hvac module assembly and tightening these screws to 2 n.m (18 lb in). The hvac module assembly needs to be replaced during the last step of the installation process.
    Posted by ChevyPartsGiant Specialist
    Q:
    How to replace the air conditioning evaporator core on GMC Sierra 3500 Classic? Posted by Customer
    A:
    The first step to replace the air conditioning Evaporator core involves unmounting the hvac module. The hvac module's heat stakes can be extracted by using both screwdriver and hammer if your vehicle has these components. Severe any electrical links between the Blower Motor and all associated sensors along with the Blower Motor control module after disconnecting the wires from their retainers. Remove the hvac module assembly screws initially if such features exist and remove the Evaporator cowl gasket from the Evaporator. You should first detach the upper hvac module assembly from the lower hvac module assembly before removing the Evaporator core from the upper hvac module assembly . Refrigerant oil should be applied to the new Evaporator core before its installation. After putting the Evaporator core into the hvac module assembly you will reconnect the upper assembly to the lower assembly before installing the Evaporator cowl gasket. Install the screws on the hvac module assembly before you tighten them to 2 n.m (18 lb in). The next step requires installation of the hvac module assembly.
    Posted by ChevyPartsGiant Specialist
    Q:
    What needs to be installed to the evaporator after reattaching the HVAC module assemblies for the 2003 Cadillac Escalade? Posted by Customer
    A:
    Install the evaporator cowl gasket.
    Posted by ChevyPartsGiant Specialist
    See expert answers on similar Evaporator
    Q:
    What is the final step in the process for the 2008 Cadillac Escalade ESV? Posted by Customer
    A:
    Finally, install the HVAC module assembly.
    Posted by ChevyPartsGiant Specialist
    See expert answers on similar Evaporator
    Q:
    What is the first step to replace the evaporator core (Visteon) for the 2003 Chevrolet Avalanche 1500? Posted by Customer
    A:
    First, remove the HVAC module.
    Posted by ChevyPartsGiant Specialist
    See expert answers on similar Evaporator
    Q:
    What should be added to the evaporator core if the condenser is being replaced for the 2004 Chevrolet Tahoe? Posted by Customer
    A:
    Add refrigerant oil to the evaporator core.
    Posted by ChevyPartsGiant Specialist
    See expert answers on similar Evaporator
    Q:
    What is the installation procedure for the new evaporator core for the 2003 Chevrolet Suburban 1500? Posted by Customer
    A:
    Place the evaporator core into the case and install the evaporator core seal.
    Posted by ChevyPartsGiant Specialist
    See expert answers on similar Evaporator
    Q:
    What should be added to the new evaporator core during installation for the 2009 Chevrolet Silverado 1500? Posted by Customer
    A:
    Add refrigerant oil to the new evaporator core.
    Posted by ChevyPartsGiant Specialist
    See expert answers on similar Evaporator
    Q:
    How do you install the new evaporator core for the 2006 Chevrolet Tahoe? Posted by Customer
    A:
    Place the evaporator core back into the HVAC module assembly, ensuring to add refrigerant oil to the evaporator core if the condenser is being replaced.
    Posted by ChevyPartsGiant Specialist
    See expert answers on similar Evaporator
    Q:
    What should be done after reattaching the upper and lower HVAC module assemblies for the 2006 GMC Yukon? Posted by Customer
    A:
    Install the evaporator cowl gasket to the evaporator.
    Posted by ChevyPartsGiant Specialist
    See expert answers on similar Evaporator
    Q:
    What is the first step to replace the air conditioning evaporator core without HP2 for the 2010 GMC Sierra 1500? Posted by Customer
    A:
    Begin by removing the HVAC module.
    Posted by ChevyPartsGiant Specialist
    See expert answers on similar Evaporator
    Q:
    What should be done with the evaporator core for the 2009 GMC Yukon? Posted by Customer
    A:
    Remove the evaporator core from the upper HVAC module assembly.
    Posted by ChevyPartsGiant Specialist
    See expert answers on similar Evaporator
    If you have any questions about this product, please don't hesitate to ask us. We will be happy to help you!

OEM GM 89019027, Excellent Performance and Perfect Fitment

To ensure reliability, purchase GM part # 89019027 Evaporator Core. It is sometimes referred to as GM Evaporator. Choosing OEM parts is the optimal decision for guaranteeing superior quality and perfect performance. These components undergo stringent quality checks and are carefully constructed to comply with GM's factory specifications, ensuring a smooth installation process.

ChevyPartsGiant.com is a leading supplier of genuine GM parts such as GM 89019027 Evaporator Core. Our website boasts an extensive inventory of OEM GM parts, available at highly competitive prices in the market. Should you require any new genuine GM parts, rest assured we will deliver them swiftly and efficiently to your doorstep. Furthermore, all our parts come with the assurance of a manufacturer's warranty. For detailed Chevy parts information, click here.
Choose ChevyPartsGiant for discounted prices, exceptional service and fast delivery