ChevyParts
My Garage
My Account
Cart
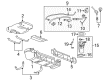
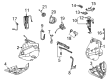
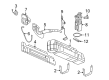
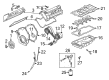
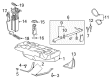
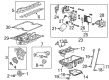
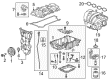
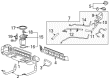
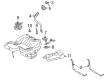
OEM Cadillac Fuel Level Sensor
Gas Gauge Sensor- Select Vehicle by Model
- Select Vehicle by VIN
Select Vehicle by Model
orMake
Model
Year
Select Vehicle by VIN
For the most accurate results, select vehicle by your VIN (Vehicle Identification Number).
89 Fuel Level Sensors found


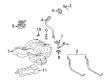
Cadillac Fuel Gauge Sending Unit Part Number: 88965441
$154.80 MSRP: $318.12You Save: $163.32 (52%)Ships in 1-2 Business DaysProduct Specifications- Other Name: Sensor Kit, Fuel Tank Meter/Pump; Fuel Level Sensor; Fuel Sending Unit; Level Sensor


Cadillac Fuel Gauge Sending Unit, Driver Side Part Number: 19420829
$87.45 MSRP: $156.15You Save: $68.70 (44%)Ships in 1-2 Business DaysProduct Specifications- Other Name: Sensor Kit, Fuel Tank Meter/Pump; Fuel Level Sensor; Fuel Sending Unit; Level Sensor
- Position: Driver Side
- Replaces: 19149686, 19207710


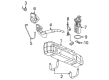
Cadillac Fuel Gauge Sending Unit Part Number: 88965379
$178.32 MSRP: $366.44You Save: $188.12 (52%)Ships in 1-2 Business DaysProduct Specifications- Other Name: Sensor Kit, Fuel Tank Meter/Pump; Fuel Level Sensor; Fuel Sending Unit; Level Sensor
- Replaces: 25349028

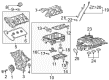
Cadillac Fuel Gauge Sending Unit Part Number: 25322887
$62.75 MSRP: $112.05You Save: $49.30 (44%)Ships in 1-3 Business DaysProduct Specifications- Other Name: Sensor Kit, Fuel Tank Meter/Pump; Fuel Level Sensor; Fuel Sending Unit; Level Sensor
- Replaces: 25315905

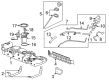
Cadillac Fuel Gauge Sending Unit Part Number: 84726779
$35.53 MSRP: $73.02You Save: $37.49 (52%)Ships in 1-2 Business DaysProduct Specifications- Other Name: Sensor Kit-Fuel Level; Fuel Level Sensor; Fuel Sending Unit; Level Sensor; Sensor Kit, Fuel Tank Meter/Pump
- Replaced by: 85088488
- Replaces: 23282531


Cadillac Fuel Gauge Sending Unit Part Number: 84816098
$30.64 MSRP: $54.72You Save: $24.08 (45%)Product Specifications- Other Name: Sensor Kit-Fuel Level; Fuel Level Sensor; Fuel Sending Unit; Level Sensor; Sensor Kit, Fuel Tank Meter/Pump

Cadillac Fuel Gauge Sending Unit Part Number: 84634060
$28.91 MSRP: $51.62You Save: $22.71 (44%)Ships in 1-3 Business DaysProduct Specifications- Other Name: Sensor Kit-Fuel Level; Fuel Level Sensor; Fuel Sending Unit; Level Sensor; Sensor Kit, Fuel Tank Meter/Pump
- Replaced by: 85697751
Cadillac Fuel Gauge Sending Unit Part Number: 86825362
$38.55 MSRP: $68.84You Save: $30.29 (44%)Ships in 1-2 Business DaysProduct Specifications- Other Name: Sensor Kit-Fuel Level; Level Sensor; Sensor Kit, Fuel Tank Meter/Pump

Cadillac Fuel Gauge Sending Unit Part Number: 13595836
$56.99 MSRP: $101.76You Save: $44.77 (44%)Ships in 1-2 Business DaysProduct Specifications- Other Name: Sensor Kit, Fuel Tank Meter/Pump; Fuel Level Sensor; Fuel Sending Unit; Level Sensor
- Replaces: 13584321

Cadillac Fuel Gauge Sending Unit Part Number: 25756354
$201.27 MSRP: $361.04You Save: $159.77 (45%)Ships in 1-3 Business DaysProduct Specifications- Other Name: Sender, Fuel; Fuel Level Sensor; Fuel Sending Unit; Sending Unit
- Replaces: 25721001

Cadillac Fuel Gauge Sending Unit Part Number: 19121640
$120.03 MSRP: $215.31You Save: $95.28 (45%)Ships in 1-2 Business DaysProduct Specifications- Other Name: Sensor Kit, Fuel Tank Meter/Pump; Fuel Level Sensor; Fuel Sending Unit; Level Sensor
- Replaces: 25335561, 89060638, 25316675

Cadillac Fuel Gauge Sending Unit Part Number: 84498295
$46.18 MSRP: $82.46You Save: $36.28 (44%)Ships in 1-3 Business DaysProduct Specifications- Other Name: Sensor Kit-Fuel Level; Fuel Level Sensor; Fuel Sending Unit; Sensor Kit, Fuel Tank Meter/Pump

Cadillac Fuel Gauge Sending Unit Part Number: 13590029
$64.02 MSRP: $114.33You Save: $50.31 (44%)Ships in 1-3 Business DaysProduct Specifications- Other Name: Sensor Kit-Fuel Level; Fuel Level Sensor; Fuel Sending Unit; Level Sensor; Sensor Kit, Fuel Tank Meter/Pump
Cadillac Fuel Gauge Sending Unit Part Number: 84816100
$37.43 MSRP: $66.84You Save: $29.41 (44%)Ships in 1-3 Business DaysProduct Specifications- Other Name: Sensor Kit-Fuel Level; Fuel Level Sensor; Fuel Sending Unit; Level Sensor; Sensor Kit, Fuel Tank Meter/Pump
- Replaced by: 85744655

Cadillac Fuel Gauge Sending Unit Part Number: 19257104
$121.93 MSRP: $250.56You Save: $128.63 (52%)Ships in 1-2 Business DaysProduct Specifications- Other Name: Sensor Kit, Fuel Tank Meter/Pump; Fuel Level Sensor; Fuel Sending Unit; Level Sensor
- Replaces: 19179870

Cadillac Fuel Gauge Sending Unit Part Number: 25335942
$95.20 MSRP: $170.00You Save: $74.80 (44%)Ships in 1-2 Business DaysProduct Specifications- Other Name: Sensor Kit, Fuel Tank Meter/Pump; Fuel Level Sensor; Fuel Sending Unit; Level Sensor
- Replaces: 25322890, 25335940

Cadillac Fuel Gauge Sending Unit, Passenger Side Part Number: 13578380
$102.54 MSRP: $183.10You Save: $80.56 (44%)Ships in 1-2 Business DaysProduct Specifications- Other Name: Sensor Kit-Fuel Level; Fuel Level Sensor; Fuel Sending Unit; Level Sensor; Sensor Kit, Fuel Tank Meter/Pump
- Position: Passenger Side
- Replaces: 13505211, 19208947

Cadillac Fuel Gauge Sending Unit Part Number: 13514081
$23.28 MSRP: $41.59You Save: $18.31 (45%)Ships in 1-3 Business DaysProduct Specifications- Other Name: Sensor Kit-Fuel Level; Fuel Level Sensor; Fuel Sending Unit; Level Sensor; Sensor Kit, Fuel Tank Meter/Pump

Cadillac Fuel Gauge Sending Unit Part Number: 19207954
$88.26 MSRP: $157.58You Save: $69.32 (44%)Ships in 1-2 Business DaysProduct Specifications- Other Name: Sensor Kit, Fuel Tank Meter/Pump; Fuel Level Sensor; Fuel Sending Unit; Level Sensor
- Replaces: 19168705, 19180802


Cadillac Fuel Gauge Sending Unit Part Number: 19151153
$99.88 MSRP: $178.36You Save: $78.48 (44%)Product Specifications- Other Name: Sensor Kit, Fuel Tank Meter/Pump; Fuel Level Sensor; Fuel Sending Unit; Level Sensor
| Page 1 of 5 |Next >
1-20 of 89 Results
Cadillac Fuel Level Sensor
Want to cut long-term maintenance and repair costs? Choose OEM Fuel Level Sensor. Those parts deliver top durability you can trust. On our site, you'll find a huge catalog of genuine Cadillac parts. Prices are unbeatable, so you can keep more in your pocket. Every OEM Cadillac Fuel Level Sensor includes a manufacturer's warranty. You can also get an easy return policy that keeps buying risk free. Fast delivery, get your car on the road quickly. It's simple to search, compare, and order. Stop guessing about quality or fit. Order today and save with parts that last.
Cadillac Fuel Level Sensor Parts Questions & Experts Answers
- Q: How to replace the Fuel Level Sensor on the right side on Cadillac XLR?A:The first step to replace the right side Fuel Level Sensor involves removing the Fuel Tank module from the Fuel Tank and extracting the Fuel Tank module o-ring at the tank opening. Before taking out the level sensor wires from the Fuel Tank module users need to push down on the locking tab so they can disconnect the Fuel Level Sensor while making a mental note of its wire location relative to the inner connector. Install the Fuel Level Sensor by connecting its wires to the internal connector in the proper position before inserting the sensor into the Fuel Tank module until the lock clicks and makes sure the wires rest in the slot beneath it. You should install a new Fuel Tank module o-ring into the Fuel Tank opening before securely reattaching the Fuel Tank module to the Fuel Tank. See the digital multimeter to check the Fuel Tank module resistance values when you flip the tank upside down. The empty value must show 40 ohms and the full value must be 250 ohms. Finish the installation by joining the Fuel Tank pressure sensor cable and the fuel pump module cable and the evaporative emission line to the fuel pump module before attaching the right Fuel Tank.
- Q: How to replace the Primary Fuel Level Sensor on Cadillac CTS?A:You must remove the primary fuel tank module before you start the replacement process of the primary fuel level sensor. Macro-connect the fuel level sensor electrical connector to disengage it from the module. The removal of the fuel level sensor from the module requires users to pull the locking tab in an opposite direction from the sensor then slide the sensor out of the module. To install the sensor position its tabs exactly on the module assembly slots before fully inserting it into place with the tabs secured and then attach the fuel level sensor electrical connector to the module. You must install the primary fuel tank module at the end of your work.
- Q: How to Replace a Fuel Level Sensor on Cadillac Escalade?A:Begin the fuel level sensor replacement by setting the sending unit on a sterile work surface. Gently disconnect the fuel level sensor electrical connector that is attached to the module connector then remove the retaining clip from the sensor. The technician must carefully release both fuel sender reservoir retaining tabs which are positioned on either side without harming the locking mechanisms because this could result in the failure of the sender. The module should be extracted from the reservoir after removing its wires from the tabs. You should use your fingers to press these retaining tabs toward one another so the fuel level sensor can be pulled off the reservoir. After installing the fuel level sensor onto the reservoir you must enable retaining tab activation before connecting the module to the reservoir. Insert the wires of the fuel level sensor between the reservoir retaining tabs before snapping both sending unit reservoir retaining tabs securely against the reservoir sides. Install the retaining clip of the fuel level sensor while connecting its electrical connector to the module connector before installing the sending unit.


Related Cadillac Parts
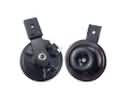 Cadillac Horn
 Cadillac Mass Air Flow Sensor
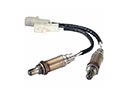 Cadillac Oxygen Sensor
 Cadillac Fuel Pump Relay
 Cadillac Brake Light Switch
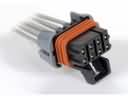 Cadillac Chassis Wiring Harness Connector
 Cadillac Fuel Tank Sending Unit
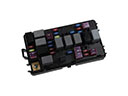 Cadillac Fuse
 Cadillac Headlight Relay
 Cadillac Instrument Panel Harness Connector
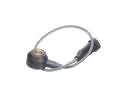 Cadillac Knock Sensor
 Cadillac Relay