ChevyParts
My Garage
My Account
Cart
OEM Cadillac Brake Light Switch
Brake Lamp Switch- Select Vehicle by Model
- Select Vehicle by VIN
Select Vehicle by Model
orMake
Model
Year
Select Vehicle by VIN
For the most accurate results, select vehicle by your VIN (Vehicle Identification Number).
35 Brake Light Switches found


Cadillac Stoplamp Switch Part Number: 15861245
$54.20 MSRP: $111.40You Save: $57.20 (52%)Ships in 1-2 Business DaysProduct Specifications- Other Name: Switch Assembly-Stop Lamp; Brake Light Switch; Switch, Stop Lamp Switch


Cadillac Stoplamp Switch Part Number: 13579088
$13.17 MSRP: $24.74You Save: $11.57 (47%)Ships in 1-2 Business DaysProduct Specifications- Other Name: Sensor Assembly-Brake Pedal Position; Brake Light Switch; Sensor, Stop Lamp Switch; Sensor, Brake
- Replaced by: 13566315
- Replaces: 22774281


Cadillac Release Valve Part Number: 10170430
$9.56 MSRP: $17.08You Save: $7.52 (45%)Ships in 1-3 Business DaysProduct Specifications- Other Name: Switch, Cruise Control; Brake Light Switch; Release Switch; Stoplamp Switch; Switch; Switch, Transmission Converter; Switch, Stop Lamp Switch
- Replaces: 10180531, 25551819


Cadillac Release Switch Part Number: 19330547
$18.52 MSRP: $34.78You Save: $16.26 (47%)Ships in 1-2 Business DaysProduct Specifications- Other Name: Switch, Cruise Control; Brake Light Switch; Stoplamp Switch; Switch; Switch, Stop Lamp Switch; Switch, Engine Brake
- Replaces: 25523463


Cadillac Stoplamp Switch Part Number: 93801734
$30.68 MSRP: $57.62You Save: $26.94 (47%)Ships in 1-2 Business DaysProduct Specifications- Other Name: Switch, Stop Lamp; Brake Light Switch; Switch, Stop Lamp Switch
- Replaces: 12450076, 15732489


Cadillac Brake Switch Part Number: 25668878
$13.34 MSRP: $20.75You Save: $7.41 (36%)Ships in 1-2 Business DaysProduct Specifications- Other Name: Switch, Stop Lamp Switch; Brake Light Switch; Release Switch; Stoplamp Switch; Switch; Switch, Transmission Safety Start/Warning; Switch, Cruise Control


Cadillac Stoplamp Switch Part Number: 15128874
$34.51 MSRP: $64.40You Save: $29.89 (47%)Product Specifications- Other Name: Switch, Stop Lamp; Brake Light Switch; Switch, Stop Lamp Switch
- Replaces: 15163032, 15038393, 25771554, 15161650, 15158767

Cadillac Stoplamp Switch Part Number: 25814705
$11.77 MSRP: $21.30You Save: $9.53 (45%)Ships in 1-2 Business DaysProduct Specifications- Other Name: Sensor Kit, Brake; Brake Light Switch
Cadillac Stoplamp Switch Part Number: 20929906
$14.45 MSRP: $22.63You Save: $8.18 (37%)Ships in 1-3 Business DaysProduct Specifications- Other Name: Sensor Kit, Brake; Brake Light Switch

Cadillac Parking Brake Switch, Jet Black Part Number: 85569148
$31.47 MSRP: $46.84You Save: $15.37 (33%)Ships in 1-3 Business DaysProduct Specifications- Other Name: Switch Assembly-Parking Brake Control *Jet Black; Switch; Switch, Parking Brake Indicator
- Replaced by: 86558795
- Replaces: 84701517


Cadillac Release Switch Part Number: 25705395
Product Specifications- Other Name: Switch, Stop Lamp Switch; Brake Light Switch; Stoplamp Switch


Cadillac Stoplamp Switch Part Number: 15128592
$55.29 MSRP: $98.74You Save: $43.45 (44%)Product Specifications- Other Name: Switch Assembly-Stop Lamp; Brake Light Switch; Switch, Stop Lamp Switch
- Replaces: 15197022, 15064159


Cadillac Stoplamp Switch Part Number: 25524848
Product Specifications- Other Name: Switch Assembly, Stop Lamp; Brake Light Switch; Switch, Stop Lamp Switch


Cadillac Stoplamp Switch Part Number: 25529861
Product Specifications- Other Name: Switch, Stop Lamp Switch; Brake Light Switch

Cadillac Stoplamp Switch Part Number: 3522540
Product Specifications- Other Name: Switch Assembly; Brake Light Switch; Switch, Stop Lamp Switch
Cadillac Stoplamp Switch Part Number: 1636940
Product Specifications- Other Name: Switch; Brake Light Switch; Switch, Stop Lamp Switch

Cadillac Stoplamp Switch Part Number: 12450005
Product Specifications- Other Name: Switch, Stop Lamp Switch; Brake Light Switch; Switch

Cadillac Stoplamp Switch Part Number: 25524844
Product Specifications- Other Name: Switch, Stop Lamp Switch; Brake Light Switch


Cadillac Stoplamp Switch Part Number: 25529860
Product Specifications- Other Name: Switch, Stop Lamp Switch; Brake Light Switch

Cadillac Stoplamp Switch Part Number: 1261219
Product Specifications- Other Name: Switch Assembly - Stop Lamp; Brake Light Switch; Switch, Electrical Switches; Switch, Stop Lamp Switch
| Page 1 of 2 |Next >
1-20 of 35 Results
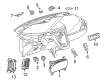
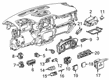
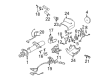
Cadillac Brake Light Switch
Want to cut long-term maintenance and repair costs? Choose OEM Brake Light Switch. Those parts deliver top durability you can trust. On our site, you'll find a huge catalog of genuine Cadillac parts. Prices are unbeatable, so you can keep more in your pocket. Every OEM Cadillac Brake Light Switch includes a manufacturer's warranty. You can also get an easy return policy that keeps buying risk free. Fast delivery, get your car on the road quickly. It's simple to search, compare, and order. Stop guessing about quality or fit. Order today and save with parts that last.
Cadillac Brake Light Switch Parts Questions & Experts Answers
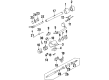
- Q: How to replace the Brake Light Switch (Cruise Control) on Cadillac DeVille?A:The replacement process for brake release switch (Cruise Control) starts with insulator panel removal from the driver side along with disconnecting the upper switch electrical connector. The upper brake release switch can be extracted by turning it counterclockwise. You must keep the Brake Pedal fully up or at rest while installing brake release switch (Cruise Control) to protect the brake system from damage and avoid incorrect switch adjustment. You should attach the upper brake release switch electrical connector before installing the switch into the upper retainer where the connector faces the 6 o'clock position. The brake release switch assembly and the stoplamp switch assembly should not undergo adjustment until the brake booster pushrod connects to the Brake Pedal assembly to avoid cruise control system problems. Complete the procedure by adjusting the brake release switch followed by reinstallation of the driver side insulator panel.
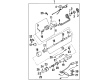
- Q: How to Replace the Brake Light Switch and Torque Converter Clutch/Cruise Control Release Switch on Cadillac CTS?A:The first step for exchanging the Torque Converter Clutch/Cruise Control Release Switch requires a left closeout/insulator panel removal. The first step requires you to pull the upper switch from its retainer to unmount the Torque Converter Clutch/Cruise Release Switch and detach the electrical connector. To install the Torque Converter Clutch/Cruise Release Switch you must connect its electrical connector then insert the switch into the upper retainer. Complete the Torque Converter Clutch/Cruise Release Switch installation by readjusting it followed by reinstallation of the left closeout/insulator panel.
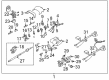
- Q: How to replace the Brake Light Switch on Cadillac XLR?A:Beginning Brake Pedal Position Sensor replacement requires you to take off the instrument panel covering material. Switch off the connector position assurance without fully removing it and detach the power connection. Disconnect and remove the sensor brake pedal position along with the peg screw. Install a brand-new sensor into the system and insert the sensor fork onto the pin. Turn the sensor to make sure the sensor locator lines up with the extension bracket's hole. Reinstall the NEW brake pedal position sensor screw and secure it by turning to 2 Nm torque. Place the electrical connector into its proper port and fasten the CPA at the same time. Re-establish your work by setting the sensor and putting back its insulator at the end.


Related Cadillac Parts
 Cadillac Antenna
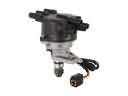 Cadillac Distributor
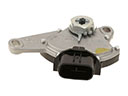 Cadillac Neutral Safety Switch
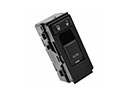 Cadillac Door Lock Switch
 Cadillac Fuel Pump Relay
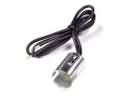 Cadillac Dome Light Connector
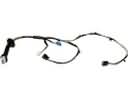 Cadillac Door Harness Connector
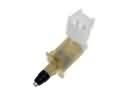 Cadillac Door Jamb Switch
 Cadillac Headlight Switch
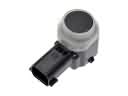 Cadillac Parking Assist Distance Sensor
 Cadillac Seat Switch
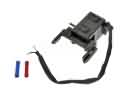 Cadillac Shift Interlock Solenoid