ChevyParts
My Garage
My Account
Cart
OEM Chevrolet Corvette A/C Switch
Air Conditioning Switch- Select Vehicle by Model
- Select Vehicle by VIN
Select Vehicle by Model
orMake
Model
Year
Select Vehicle by VIN
For the most accurate results, select vehicle by your VIN (Vehicle Identification Number).
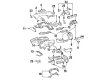
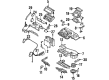
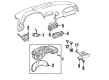
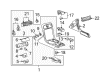
52 A/C Switches found

Chevrolet Corvette Control Switch Part Number: 86539708
$230.28 MSRP: $413.07You Save: $182.79 (45%)Ships in 1-2 Business DaysChevrolet Corvette Control Switch Part Number: 86539709
$198.93 MSRP: $356.83You Save: $157.90 (45%)Ships in 1-2 Business DaysChevrolet Corvette Control Switch Part Number: 84918276
$272.83 MSRP: $489.40You Save: $216.57 (45%)Ships in 1-3 Business Days
Chevrolet Corvette Dash Control Unit Part Number: 84972229
$214.09 MSRP: $384.02You Save: $169.93 (45%)Ships in 1-3 Business DaysChevrolet Corvette Dash Control Unit Part Number: 84916708
$257.69 MSRP: $462.22You Save: $204.53 (45%)Ships in 1-3 Business Days
Chevrolet Corvette Dash Control Unit Part Number: 84598299
$109.78 MSRP: $196.04You Save: $86.26 (44%)Ships in 1-3 Business DaysChevrolet Corvette Control Switch Part Number: 85531736
$237.41 MSRP: $425.84You Save: $188.43 (45%)Ships in 1-3 Business DaysChevrolet Corvette Dash Control Unit, Rear Part Number: 84344626
$215.59 MSRP: $320.75You Save: $105.16 (33%)

Chevrolet Corvette Heater Control Part Number: 19329964


Chevrolet Corvette Dash Control Unit Part Number: 16170891
Chevrolet Corvette Dash Control Unit Part Number: 16162120


Chevrolet Corvette Blower Motor Switch Part Number: 16022463

Chevrolet Corvette Blower Motor Switch Part Number: 19131601
Chevrolet Corvette Temperature Control Switch Part Number: 16203804

Chevrolet Corvette Heater Control Knob Part Number: 19129950

Chevrolet Corvette Blower Motor Switch Part Number: 16064921

Chevrolet Corvette Dash Control Unit Part Number: 16040101

Chevrolet Corvette Dash Control Unit Part Number: 16068761
Chevrolet Corvette Dash Control Unit Part Number: 16040111

Chevrolet Corvette Dash Control Unit Part Number: 1228095
| Page 1 of 3 |Next >
1-20 of 52 Results
Chevrolet Corvette A/C Switch
Want to cut long-term maintenance and repair costs? Choose OEM A/C Switch. Those parts deliver top durability you can trust. On our site, you'll find a huge catalog of genuine Chevrolet Corvette parts. Prices are unbeatable, so you can keep more in your pocket. Every OEM Chevrolet Corvette A/C Switch includes a manufacturer's warranty. You can also get an easy return policy that keeps buying risk free. Fast delivery, get your car on the road quickly. It's simple to search, compare, and order. Stop guessing about quality or fit. Order today and save with parts that last.
Chevrolet Corvette A/C Switch Parts and Q&A
- Q: How to service the A/C Switch on Chevrolet Corvette?A:Start hvac system servicing by taking out the front floor kick-up panel and the i/p electrical center's cover. Next, take out the hvac con (HVAC controls) minifuse(R) #27 from the i/p electrical center and remove the i/p accessory trim plate. The support bracket from the i/p center allows access to electrical connectors and vacuum harness connectors when the hvac control head is unscrewed and its control assembly is pulled outward. The vehicle requires the control assembly connectors to undergo removal before extracting the control assembly from its place. During installation first connect vacuum harness connectors to hvac control assembly then electrical connectors followed by reinstalling the control head into i/p center support bracket and ensure fastener notice in service precautions is followed. Secure the hvac control assembly to the panel with retaining screws that require a torque value of 1.9 n.m (17 lb in). Finally, reinstall the i/p accessory trim panel, the hvac con (HVAC controls) minifuse(R) #27 to the i/p electrical center, the cover to the i/p electrical center, and the front floor kick-up panel.
- Q: How to Remove and Install the A/C Switch in an Automatic HVAC System on Chevrolet Corvette?A:In servicing and repairing the hvac system using automatic controls, start by removing i/p accessory trim sheet, then conduct the HVAC Control Module retaining screws. Remove the HVAC Control Module carefully from the i/p center support bracket and disconnect the electrical connector that should be connected to the HVAC Control Module before removing the vehicle. In installation, slot the HVAC Control Module into the vehicle and join the electrical connector. Mount the HVAC Control Module to the i/p center support bracket making sure to render the retaining screws to 1.9 n.m (17 lb in), and ultimately replace the i/p accessory trim plate.


Related Chevrolet Corvette Parts
 Chevrolet Corvette A/C Accumulator
 Chevrolet Corvette A/C Compressor
 Chevrolet Corvette A/C Condenser
 Chevrolet Corvette A/C Expansion Valve
 Chevrolet Corvette A/C Hose
 Chevrolet Corvette Ambient Temperature Sensor
 Chevrolet Corvette Blend Door Actuator
 Chevrolet Corvette Blower Control Switches
 Chevrolet Corvette Blower Motor
 Chevrolet Corvette Cabin Air Filter
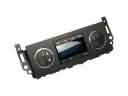 Chevrolet Corvette HVAC Control Module
 Chevrolet Corvette Heater Core