ChevyParts
My Garage
My Account
Cart
OEM GMC Distributor
Ignition Distributor- Select Vehicle by Model
- Select Vehicle by VIN
Select Vehicle by Model
orMake
Model
Year
Select Vehicle by VIN
For the most accurate results, select vehicle by your VIN (Vehicle Identification Number).
10 Distributors found

GMC Distributor Part Number: 1103521
$109.22 MSRP: $156.28You Save: $47.06 (31%)
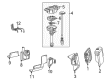
GMC Distributor Assembly Part Number: 19179576
$304.49 MSRP: $554.62You Save: $250.13 (46%)Ships in 1-2 Business DaysProduct Specifications- Other Name: Distributor Assembly, (Remanufacture); Distributor
- Replaces: 01104059, 01104052, 1104052, 1104059
GMC Distributor Assembly Part Number: 94672691
$383.36 MSRP: $775.86You Save: $392.50 (51%)Ships in 1-2 Business DaysProduct Specifications- Other Name: Starter; Distributor; Distributor, Ignition
- Replaces: 01104058, 01104051, 01104079, 1104058, 93441558, 1104079, 1103977, 1104051, 12570425


GMC Distributor Assembly Part Number: 12598210
Product Specifications- Other Name: Distributor; Distributor, Ignition
- Replaces: 01104057, 01104078, 01104050, 1104050, 1104078, 1104057, 93441559
GMC Distributor Part Number: 1103620


GMC Distributor Part Number: 1103570
Product Specifications- Other Name: Distributor, Ignition
GMC Distributor Part Number: 1103546
Product Specifications- Other Name: Dist
GMC Distributor Part Number: 1103520
Product Specifications- Other Name: Dist
GMC Distributor Part Number: 1103482
GMC Distributor Part Number: 1103480
GMC Distributor
Want to cut long-term maintenance and repair costs? Choose OEM Distributor. Those parts deliver top durability you can trust. On our site, you'll find a huge catalog of genuine GMC parts. Prices are unbeatable, so you can keep more in your pocket. Every OEM GMC Distributor includes a manufacturer's warranty. You can also get an easy return policy that keeps buying risk free. Fast delivery, get your car on the road quickly. It's simple to search, compare, and order. Stop guessing about quality or fit. Order today and save with parts that last.
GMC Distributor Parts Questions & Experts Answers
- Q: How to replace the distributor on GMC Sierra 1500?A:The Distributor replacement process begins with air cleaner outlet resonator removal and removal of electrical connectors for the camshaft position (CMP) sensor and fuel pump/oil pressure sensor. Start by taking off the Ignition Coil wire from its coil and the Distributor Cap. Proceed to detach Spark Plug Wires from the Distributor Cap through a 1/2 turn boot twist followed by wire boot pull. Remove the Distributor Cap after you discard its screws. Apply a grease pencil to note both the rotor position versus Distributor housing alignment and the Distributor housing intakes manifold relation. Extract the Distributor by removing the hold down bolt while tracking that the rotor rotates counterclockwise by 42 degrees. The base of the Distributor needs a second mark for easier rotor alignment when reinstalling the vehicle. Two marks should be placed on new Distributor housing similar to where the original markings were. Place the Distributor into position while making sure the hole in the Distributor hold-down clamp matches with the Intake Manifold hole. Then line up the Distributor with the second mark before installation. Watch the Distributor rotor rotate clockwise 42 degrees when installed before it reaches the mark on the base. During final position, the rotor should align precisely with the Distributor mark. Misalignment requires you to uninstall the Distributor before reinstallation. Follow these installation steps: tighten the Distributor hold down bolt to 25 n.m (18 lb ft) but install the Distributor Cap with new screws set to 2.4 n.m (21 lb in) and then connect the cmp sensor and fuel pump/oil pressure sensor. Mount the Ignition Coil wire by directing its nipple between 35 and 60 degrees behind engine centerline perpendicular orientation. A malfunction indicator lamp (MIL) along with dtc p1345 indicates improper Distributor installation. To execute installation procedure 2 you must turn cylinder number 1 until it reaches top dead center compression stroke alignment with engine front cover tabs and crankshaft balancer marks. Set the Distributor's white paint mark on its bottom stem to match the pre-drilled hole found on the bottom of the gear. Mark down Distributor parts during assembly to maintain proper reinstallation. Insert a long screwdriver to the oil pump drive shaft and use it to guide the Distributor into the engine space until the spark plug towers match the engine centerline perpendicular to it. When correctly installed the rotor segment must position itself with reference to the Distributor base pointer. Repetitions of this procedure should be performed to correct alignment problems. Begin by securing the Distributor hold down bolt at 25 n.m (18 lb ft) torque while installing the new Distributor Cap screws to 2.4 n.m (21 lb in) torque. Reconnect the cmp sensor and fuel pump/oil pressure sensor before finalizing your installation with correct Ignition Coil wire placement. Follow installation procedure 2 once again if the mil remains activated. Replace the air cleaner outlet resonator unless the mil remains illuminated.
- Q: How to replace the distributor on GMC Sonoma?A:Initiate Distributor replacement by turning off ignition then extracting the air cleaner assembly. Start by pulling the Distributor Cap's boot 1/2 turn while twisting it away from its base in order to disconnect the Spark Plug Wires. First remove the Distributor's electrical connector from its base and use a screwdriver to remove and discard the two screws holding the Distributor Cap to its housing. Note the rotor's position using a grease pencil on both the Distributor housing and Intake Manifold before removing the Distributor Cap. Before proceeding with Distributor removal, loosen the holding bolt on the mounting clamp and extract the Distributor component after observing the rotor's counter-clockwise rotation of approximately 42 degrees. The second Distributor mark should be added at its base to assist with rotor alignment when reinstallation happens. Installation procedure 1 requires new Distributor housing users to replicate original marks and position rotor against the second mark before guiding the Distributor into its engine slot and aligning the hold-down base hole with the Intake Manifold mounting hole. Install the Distributor while the rotor rotates clockwise 42 degrees then check for correct rotor segment alignment with the Distributor base mark when its properly seated. The Distributor requires removal and reinstall because its misaligned position. The installation process requires tightening the Distributor clamp bolt to 25 n.m (18 lb ft) followed by mounting the Distributor Cap with two new screws at 2.4 n.m (21 lb in) torque. Reconnect the electrical connector then connect the Spark Plug Wires and ignition coil wire maintaining correct wire boot orientation. After installation the Distributor is incorrectly installed when the malfunction indicator lamp (MIL) activates with dtc p1345. When performing installation procedure 2, turn the crankshaft balancer clockwise until engine front cover tabs match Distributor alignment marks while the number 1 Piston rests at compression stroke top dead center. A white paint mark on the Distributor's stem must align with an indent hole to set the correct rotor segment for either v6 or v8 engines. Insert a long screwdriver to position the oil pump drive shaft directly against the Distributor's drive tab. Then guide the Distributor into the engine block while ensuring both spark plug towers remain perpendicular to the centerline. Check that the rotor segment points to the Distributor base pointer. Repeat the maneuver if necessary. If misaligned, repeat the procedure. After installing the Distributor clamp bolt to 25 n.m (18 lb ft) torque, use two new screws to join the Distributor Cap with 2.4 n.m (21 lb in) tightening. Then reconnect electrical connections and position Spark Plug Wires and ignition coil wire while maintaining proper wire boot alignment. You must retrace all steps of installation procedure 2 whenever the mil indicator stays on.
- Q: How to replace the distributor on GMC Savana 2500?A:Begin Distributor replacement by shutting off the ignition followed by engine cover removal and sequentially disconnecting the air cleaner assembly and the air intake resonator assembly. Twist the wire boot of each spark plug wire 1/2 turn before you pull only the boot to disconnect them from the Distributor Cap. Use a screwdriver to take out the 2 screws holding the Distributor Cap in place against its housing then extract the electrical connector from the Distributor base. Toss these pieces away. Apply a grease pencil to mark two reference points on the Distributor housing and intake manifold then mark down the rotor position against the Distributor housing before removing the Distributor Cap. At Distributor removal you should observe the rotor moving counter-clockwise by about 42 degrees and should apply another alignment mark to the Distributor base while reassembly approaches. Unscrew the mounting clamp hold-down bolt before removing the Distributor. The new Distributor assembly requires two matching Distributor housing marks at positions analogous to those on the original component. To install the Distributor guide it into position while aligning the rotor segment with the second mark followed by placing and securing the Distributor base hole above the intake manifold mounting slot. Monitor the rotor's clockwise movement to reach 42 degrees while installing the Distributor. After placing the Distributor in position check that the rotor segment points towards the Distributor base mark. When the Distributor position does not align properly with the mark use the Distributor installation procedure again. Register Distributor mounting clamp bolt to 25 nm (18 lb ft) before installing the Distributor Cap and securing it with new screws tightened to 2.4 n.m (21 lb in). Reconnect the electrical connector then position the Spark Plug Wires and ignition coil wire with proper orientation before installation. The detector lamp warns you that you installed the Distributor incorrectly when p1345 dtc gets triggered. Installation procedure 2 requires top dead center (TDC) positioning of the number 1 cylinder compression stroke while matching the crankshaft balancer marks to front cover tabs. Guide the white paint mark from the Distributor's bottom stem through the pre-drilled indent situated in the gear. The Distributor must receive proper markings because improper reassembly methods could either block engine startup or lead to motor damage. The installation requires correctly positioned gears which lead you to guide the Distributor through the engine opening maintaining the flat housing section facing forward. When the rotor segment reaches complete insertion its position must match the Distributor base pointer. If not, repeat the procedure. Tighten the Distributor mounting clamp bolt to 25 n.m (18 lb ft) and then install the Distributor Cap while securing new screws at 2.4 n.m (21 lb in) torque. After reconnecting the electrical connector, place the Spark Plug Wires and ignition coil wire properly. An illuminated malfunction indicator lamp, together with the detection of dtc p1345, requires you to perform installation procedure 2 again. Finally, install the engine cover.

Related GMC Parts
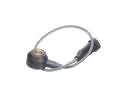 GMC Knock Sensor
 GMC Brake Light Switch
 GMC Engine Control Module
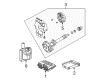
 GMC Fuse Box
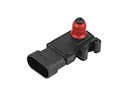 GMC MAP Sensor
 GMC Oxygen Sensor
 GMC Battery Fuse
 GMC Distributor Reluctor
 GMC EGR Cooler
 GMC Exhaust Gas Temperature Sensor
 GMC Headlight Relay
 GMC Intake Manifold Temperature Sensor