Popular OEM Chevrolet Avalanche 2500 Parts
- Body & Hardware Parts View More >
- Steering Parts View More >
- Electrical Parts View More >
- Air & Fuel Delivery Parts View More >
- Charging & Starting Parts View More >
- Engine Parts View More >
- Belts & Cooling Parts View More >
- Suspension Parts View More >
- Driveline & Axles Parts View More >
- Emission Control & Exhaust Parts View More >
- Transmission Parts View More >
- Brakes Parts View More >
Why Buy Genuine Chevrolet Avalanche 2500 Parts From ChevyPartsGiant.com
Looking for real Chevrolet Avalanche 2500 parts? ChevyPartsGiant.com may be a better choice to find genuine parts at wallet-friendly prices. We sell only OEM Chevrolet Avalanche 2500 parts, ensuring perfect fit, reliability, and long-term performance. With our website, you can easily get access to the same parts found at local Chevrolet stores. All components are produced by Chevrolet and are exclusively fitted on Chevrolet Avalanche 2500 automobiles. By shopping at our store, you can enjoy the quality of the Chevrolet factory without the high prices of brick-and-mortar facilities. We achieve this because we are an online store operating at lower costs, which we pass on to you. We also have a user-friendly platform where you can find and order genuine Chevrolet Avalanche 2500 parts swiftly. We are here to make your process of restoring a Chevrolet Avalanche 2500 or dealing with simple repairs quick and inexpensive. We also make it easy to obtain Chevrolet Avalanche 2500 parts at competitive shipping prices and a team of knowledgeable staff ready to take your order. Choose ChevyPartsGiant.com to save time and money, as well as keep your Chevrolet Avalanche 2500 in the good condition.
The Chevrolet Avalanche 2500 positions itself in the Chevrolet lineup through its combination of pickup capabilities with SUV comfort as a 3/4-ton truck. Aesthetically flexible Chevy Avalanche 2500 presents an 8.1L V8 Vortec engine paired with a 4-speed 4L85-E automatic transmission to deliver 340 horsepower. The vehicle utilizes the RWD configuration but offers optional 4WD capability through the system and includes overdrive for better fuel economy during highway travel. The extended wheelbase ensures smooth movements while the plastic construction along with the integrated bed keeps the vehicle durable as a whole. Passengers of the Chevrolet Avalanche 2500 could utilize its 'Convert-a-Cab' functionality to drop the midgate to lengthen the bed area while boosting storage options through flexible cab-to-bed arrangements. The Chevrolet Avalanche 2500 stands out through its combination of chrome framing with gold strip elements on the front. A Z71 Off-Road package provides modified suspension along with off-road components to enhance performance when handling rough outdoor conditions. The Chevrolet Avalanche 2500 owner requires manufacturer-provided OEM parts to receive vital structural protection alongside exact specifications compliance of every component. Investing in original components for the Chevrolet Avalanche 2500 lengthens its lifetime while providing increased dependability thus making it an ideal utility vehicle for work and recreation.
Chevrolet Avalanche 2500 often shows issues in HVAC controls, ignition components, and fuel delivery systems. Within the HVAC system, a failed AC mode door actuator misroutes air or locks to one temperature. The Chevrolet Avalanche 2500 should be scanned for HVAC codes, then recalibrated and replaced as required. Ignition relates to service intervals, worn spark plugs at 100,000 miles trigger misfires, hesitation, and weak starts. On the Chevrolet Avalanche 2500, replace plugs and wires together, verify gap, and clear stored misfire codes. Fuel delivery sits in the drivetrain support group, a failing fuel pump causes crank no start or stalls. Confirm pressure at the rail, check power and ground, confirm command from the control module. If pressure falls below specification, the Avalanche 2500 needs pump replacement and a new strainer. Group these by location for clarity, HVAC belongs to cabin electronics, ignition to engine, fuel to delivery. Functionally, the Chevrolet Avalanche 2500 shows climate control faults, ignition wear, and fuel supply failure risks. Address HVAC first during hot or cold complaints, then evaluate ignition and fuel under starting concerns. These steps restore consistent cabin comfort, steady spark energy, and reliable power delivery on the Avalanche 2500.
Chevrolet Avalanche 2500 Parts Questions & Answers
- Q: How to replace the intake manifold on Chevrolet Avalanche 2500?A:In order to change the Intake Manifold, the first task to undertake involve loosening the Throttle Body and air cleaner clamps, followed by the removal of the air cleaner outlet duct. Unfasten and take off the Intake Manifold sight shield from the stud and bracket, also where necessary take off the sight shield bracket nuts and the bracket. Drain fuel system pressure, then remove the feed and return pipes, and remove the clips from the engine harness from the studs on the front of the dash and the wheel house splash shield. Remove the pressure cycling switch , surge tank switch , and the mass airflow (MAF) sensor . Reposition the engine harness branch to the top of the engine and unplug the connector position assurance (CPA) retainer from ignition coil harness; disconnect the manifold absolute pressure (MAP) sensor, ignition coil harness, and engine coach temperature (ECT) sensor. Unbolt the engine harness bolts and studs, as well as disconnect the generator , injector harness , ignition coil harness , electronic throttle control (ETC) , and purge valve solenoid . The engine harness should be moved to the driver's side, the bypass valve vacuum hose should be removed from the Intake Manifold, the evaporative emission (EVAP) tube should be unhooked from the purge solenoid uncoupled anddisconnect it from the vent pipe at the rear of the engine and then remove from the evap tube. If you need to replace the Intake Manifold, loosen the Fuel Rail studs and the Fuel Rail, making sure you do not get pry under the gasket face. Unbolt and remove the intake bolts as well as the Intake Manifold itself, and throw the Intake Manifold side gaskets and end seals as those are non reusable. Take out the splash shield, also reusable, and if you replace the Intake Manifold, clean and check it. For installation, if you are replacing Intake Manifold, mount it, install the splash shield, which should snap into place between the cylinders heads, install the new Intake Manifold end seals, and side gaskets with the appropriate gasket tabs. Mount the Intake Manifold and apply thread lock (GM P/N 12345382 or Canadian P/N 10953489) to the Intake Manifold bolts and tighten in the defined sequence in four passes to the stipulated torque values. Oil the engine oil the Fuel Injector O-Ring seals and mount them onto the spray tip of each injector. If you need to replace the Intake Manifold, install the Fuel Rail and tighten the Fuel Rail studs to 12 nm (106 inch lbs.). Reconnect the evap tube to the vent pipe and clip it to the Fuel Rail while connecting it to the purge solenoid. Mount the bypass valve vacuum hose back at the inlet to the intake, put the engine harness over the engine compartment, and connect the generator, injector harness, ignition coil harness, etc as well as purge valve solenoid. Mounting of the cpa retainer onto the ignition coil harness, securing of the engine harness with a 16 nm/12 ft. Lbs. Bolt on the harness and 10 nm/89 inch lbs. Bolts on the studs and MAP Sensor, ignition coil harness, and ect sensor before installing the cpa retainer once again. Place the engine harness branch over the engine top, attach the pressure cycling switch , surge tank switch , and maf sensor, attach the engine harness clip to the wheel house splash shield and clip the studs to the front of dash. Lastly, link the fuel feed and return pipes, install the sight shield bracket and nuts tightening them to 5 nm (44 inch lbs.), put on the sight shield to the bracket, and affix the sight shield on the stud, put on the air cleaner outlet duct and tighten up the clamp at the Throttle Body and the air cleaner to 4 nm (35 inch lbs.).
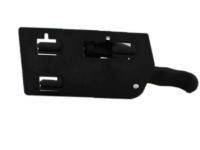
- Q: How to replace the front interior door handle on Chevrolet Avalanche 2500?A:Beginning the front door interior handle replacement requires elimination of trim panel followed by removing mounting bolts from within the inside door handle. You need to push forward the inside door handle and then cut the control rod loose from the inside door handle as a step before taking out the door handle assembly. Mount the control rod to the inside door handle before sliding the handle into its position according to the fastener guidelines in the Service Precautions. The final step includes installing retaining bolts onto the inside door handle while tightening them to 9 N.m (80 lb in) before you replace the trim panel.
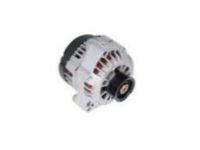
- Q: How to replace an alternator on Chevrolet Avalanche 2500?A:In order to replace the generator, one should initially remove the negative Battery Cable and the generator electrical connector. Now slide the boot down to show the terminal stud and remove the cable nut from the terminal and pull off the generator cable. Secondly, take off the Drive Belt, the generator bolts, and the generator. When installing, the generator should be anchored in its position and secured with the generator bolts, tighten to 50 n.m (37 lb ft). Install the Drive Belt and connect the generator cable to the generator by first putting in the cable and then the cable nut for the generator that should be tightened 9 n.m (80 lb in). Lastly, slide over the boot the terminal stud, check the generator electrical connector, and reconnect the negative Battery Cable.
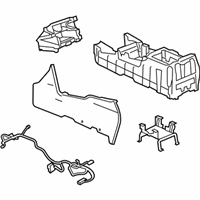
- Q: How to replace the Center Console with the console mounting bracket on Chevrolet Avalanche 2500?A:Begin the process of console replacement with console mounting bracket installation by first removing both front seats. The vehicle requires a bose(R) amplifier so the radio amp Fuse must be removed from the hood electrical center. As the next step remove both the upper console bezel together with the cup holder. Begin console removal by unscrewing the screws which mount the console to the i/p followed by disconnecting wire connectors so you can extract the console assembly from the vehicle. Extract the rear seat audio control device from the console whenever possible. Start your installation process by attaching any removed rear seat audio controls back to the console. Reattach the console to the vehicle before connecting all wire connectors. Proceed with console installation by sliding into position to secure the retaining screws according to the fastener notice in service precautions. Attach the console using 2 screws, applying 4 n.m (35 lb in) of torque to each screw. Reinstall the cup holder after placing the upper console bezel back into position and then restore the radio amp Fuse only if it had been removed from the system prior to both front seats reinstallation.


