
Popular OEM Chevrolet HHR Parts
- Body & Hardware Parts View More >
- Steering Parts View More >
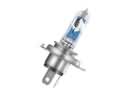
- Electrical Parts View More >
- Air & Fuel Delivery Parts View More >
- Engine Parts View More >
- Belts & Cooling Parts View More >
- Suspension Parts View More >
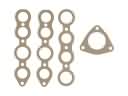
- Emission Control & Exhaust Parts View More >
- Transmission Parts View More >
- Brakes Parts View More >
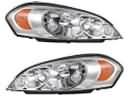
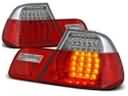
- Headlights & Lighting Parts View More >
- A/C & Heating Parts View More >


Why Buy Genuine Chevrolet HHR Parts From ChevyPartsGiant.com
Looking for real Chevrolet HHR parts? ChevyPartsGiant.com may be a better choice to find genuine parts at wallet-friendly prices. We sell only OEM Chevrolet HHR parts, ensuring perfect fit, reliability, and long-term performance. With our website, you can easily get access to the same parts found at local Chevrolet stores. All components are produced by Chevrolet and are exclusively fitted on Chevrolet HHR automobiles. By shopping at our store, you can enjoy the quality of the Chevrolet factory without the high prices of brick-and-mortar facilities. We achieve this because we are an online store operating at lower costs, which we pass on to you. We also have a user-friendly platform where you can find and order genuine Chevrolet HHR parts swiftly. We are here to make your process of restoring a Chevrolet HHR or dealing with simple repairs quick and inexpensive. We also make it easy to obtain Chevrolet HHR parts at competitive shipping prices and a team of knowledgeable staff ready to take your order. Choose ChevyPartsGiant.com to save time and money, as well as keep your Chevrolet HHR in the good condition.
The Chevrolet HHR entered the market as a 2006 model during 2005. The designer Bryan Nesbitt created the HHR (Heritage High Roof) with its 1940s Chevrolet Suburban inspired retro styling, according to his design. This crossover's powertrain section offers customers the choice between standard 2.2-liter and 2.4-liter inline-4 engines that produce 155 horsepower and 150 lb-ft of torque and 172 horsepower and 167 lb-ft of torque respectively. The Chevrolet HHR exists with front-wheel-drive driving design and customers can choose between manual transmission and automatic transmission. Two new transmission options add to driving performance: the F35 (MU3) manual with five-speeds and the F23 manual with five-speeds. Both engines offer estimated highway and city mileage by the EPA at 22 mpg city and 30 mpg highway. The Chevrolet HHR has extensive interior space because it measures 447.5 cm in length and 175.5 cm in width and 158.8 cm in height. Crash tests have awarded the Chevrolet HHR top ratings because it includes antilock brakes together with stability and traction control as well as side curtain airbags. The long-term proper function of Chevrolet HHR vehicles can be achieved by utilizing factory-certified OEM parts that fulfill manufacturer design requirements and quality benchmarks.
Shows Chevrolet HHR problems classified into steering assist, ignition power, and fuel delivery to make it easy to diagnose. In steering, the HHR has the ability to start steering heavily with a warning message. Irregular assist can usually be attributed to a faulty EPS module or grounds. Replace the column motor current, do a column motor current inspection, wiring inspection, and EPS module replacement, and validate alignment. To ignite, the Chevrolet HHR can stall upon impact and with a heavy key ring. Detents that are worn allow the ignition switch to rotate out of the run situation. Reinstall the new ignition switch, test the feel of the lock cylinder, and make sure the column connectors are secure. During fuel delivery, the Chevrolet HHR can develop a fuel smell and be hard to start. Cracks at the pump top plate can provide seepage at the tank and evap lines. Replace fuel pump, renew seals and quick connects, and evacuate and check evap integrity under pressure. These groups practically aid in steering effort, electrical continuity, as well as reliable power on the HHR. To prevent usability, address the steering faults first in the Chevrolet HHR, and then the ignition, and then the fueling. Complete the final touch up with a road test, ensure readiness and trims, and ensure there are no leaks on the HHR.
Chevrolet HHR Parts Questions & Answers
- Q: How to replace a catalytic converter on Chevrolet HHR?A:First, remove the Muffler, remove then the post catalyst heated Oxygen Sensor (HO2S), and Catalytic Converter nuts later on, remove the Catalytic Converter from the Exhaust Manifold. Remove the Catalytic Converter to Exhaust Manifold gasket. Make sure to put in a new gasket on the Exhaust Manifold studs prior to mounting the Catalytic Converter to the Exhaust Manifold. If a Catalytic Converter nut was removed earlier, reinstall them using a 46 nm (34 ft. Lbs.) torque, etc, and reinstall post cat ho2s then Muffler. Be careful not to bend the exhaust flex decoupler ten by angle of more than 3 degrees in any direction because this might lead to its compromise.
- Q: How to replace the exhaust camshaft and lash adjusters on Chevrolet HHR?A:The first task for exhaust camshaft and lifter replacement involves taking out the camshaft cover and upper Timing Chain Guide. You must install sprocket holding tool (J 43655) while you remove both intake and exhaust camshaft sprocket bolts which will be discarded. Note down the original positions of bearing caps before sliding the camshaft sprockets forward. The transmission of camshaft spring tension should stop by loosening each bearing cap bolt one rotation at a time before removing all caps along with the exhaust camshaft and camshaft roller followers and hydraulic element lash adjusters. The valve tips require lubrication during installation followed by placement of the hydraulic element lash adjusters and camshaft roller followers while verifying alignment notches on the camshaft sprocket. The exhaust camshaft and bearing caps should be installed before torquing the bearing cap bolts with incremental three-turn rotations until full seat is achieved at 10 n.m (89 lb in). Following placement of camshaft sprockets to camshafts use hands to tighten new sprocket bolts until you remove the sprocket holding tool (J 43655). Press the camshaft sprocket bolts to 85 n.m (63 lb ft) while adding another 30 degrees and complete the procedure by installing the upper Timing Chain Guide with 10 n.m (89 lb in) torque before finally installing the camshaft cover.
- Q: How to replace the water pump on Chevrolet HHR?A:Before starting the Water Pump replacement process collect the Water Pump holding tool (J 43651) as well as other essential tools. First take off the Thermostat Housing then remove the Water Pump access plate from the front cover and the right-hand fender liner. Release the Water Pump coolant through its Drain Plug at the pump bottom base. Install the Water Pump holding tool j 43651 onto the Water Pump sprocket for safe working conditions while replacing the pump parts. Secure the tool to the front cover assembly by reinstalling the access cover bolts. Loosen the three bolts between the Water Pump sprocket and pump before disengaging the front and rear engine block bolts. Extract the Water Pump from the system in the end. Throw away the damaged Water Pump o-ring seal. Set a fresh Water Pump o-ring seal first before creating the guide pin from an m6 m x 6 mm stud to assist positioning with the Water Pump holding tool. Press the new Water Pump against the engine block and partially tighten its bolts by hand. Put in two inner Water Pump sprocket bolts partially and take out the guide pin before adding the last bolt. Use a torque wrench to first set all Water Pump bolts at 25 nm and then add a final 10 nm tension to the Water Pump sprocket bolts. Put back the Water Pump holding tool j 43651 and reset the Water Pump access plate before fixing the right-hand fender and Thermostat Housing in place.
- Q: How to Perform an Alternator Replacement on Chevrolet HHR?A:First disconnect the negative terminal and then remove the ventilation module and Drive Belt respectively. The technician should lower the vehicle and remove the generator terminal nut while also removing the engine harness terminal from the generator. After removing the generator upper bolts you should raise and support the vehicle. First remove the generator lower bolt and disconnect the electrical connector only after cutting and repositioning the coolant heater cords if your vehicle has this component. The installation begins with generator positioning then executing generator electrical connector connection. Secure the coolant heater cord by using new tie straps when possible. Lower your vehicle then insert the generator upper bolts until they become snug before securing all generator bolts to 22 n.m (16 lb ft). Screw the engine harness terminal to the generator before tightening the generator terminal nut to 20 n.m (15 lb ft). When complete you must install the Drive Belt together with the air cleaner assembly before reattaching the negative Battery Cable.


