Make sure this part fits

GM 19330060
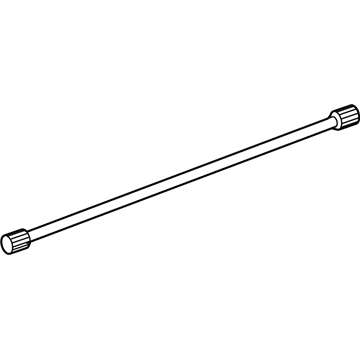
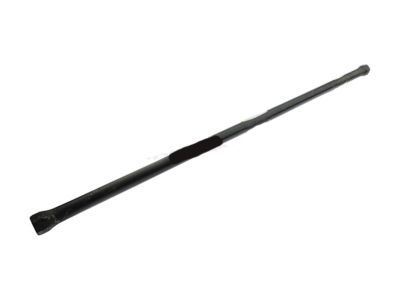
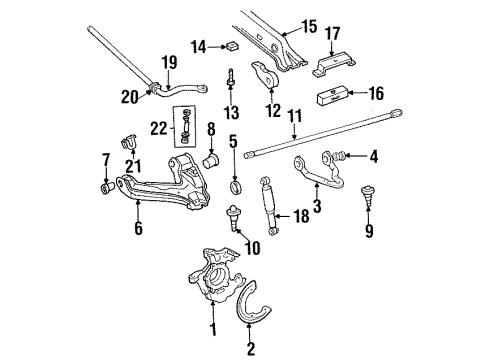
Torsion Bar, Front Driver Side

1988-2019 GM

Customer Questions & Expert Answers (18)
GM 19330060 Torsion Bar, Front Driver Side
  • Part Description
    Bar, Front Torsion; Ball Joint
  • Position
    Front Driver Side
  • Replaces
    15528965
  • Manufacturer
    General Motors
Make sure this part fits
$286.89 MSRP: $451.40
You Save: $164.51 (37%)
1
ADD TO CART
  • Related Parts
  • Product Specifications
  • Vehicle Fitment
  • Customer Questions & Expert Answers
  • Product Specifications

    BrandGenuine GM
    Manufacturer Part Number19330060
    Part DescriptionBar, Front Torsion; Ball Joint
    Other NamesLower Ball Joint; Bar, Front Chassis
    Item Dimensions54.5 x 2.1 x 2.1 inches
    Item Weight32.70 Pounds
    PositionFront Driver Side
    ConditionNew
    Fitment TypeDirect Replacement
    Replaces15528965
    ManufacturerGeneral Motors
    SKU19330060
    WarrantyThis genuine GM part is guaranteed by GM's factory warranty.
    Shipping & ReturnShipping Policy Return Policy
    Warning: California's Proposition 65
  • Vehicle Fitment

    Year Make Model Trim Engine
    1999-2000 Cadillac EscaladeBase8 Cyl 5.7 L GAS
    1992-1994 Chevrolet BlazerBase, Cheyenne, Silverado, Silverado Sport8 Cyl 5.7 L GAS, 8 Cyl 6.5 L DIESEL
    1988-1999 Chevrolet C1500454 SS, Base, Cheyenne, LS, Scottsdale, Silverado, WT6 Cyl 4.3 L GAS, 8 Cyl 5.0 L GAS, 8 Cyl 5.7 L CNG, 8 Cyl 5.7 L GAS, 8 Cyl 6.2 L DIESEL, 8 Cyl 6.5 L DIESEL, 8 Cyl 7.4 L GAS
    1992-1999 Chevrolet C1500 SuburbanBase, LS, LT, Silverado8 Cyl 5.7 L GAS, 8 Cyl 6.5 L DIESEL
    1988-2000 Chevrolet C2500Base, Cheyenne, LS, Scottsdale, Silverado, WT6 Cyl 4.3 L GAS, 8 Cyl 5.0 L GAS, 8 Cyl 5.7 L CNG, 8 Cyl 5.7 L GAS, 8 Cyl 6.2 L DIESEL, 8 Cyl 6.5 L DIESEL, 8 Cyl 7.4 L GAS
    1992-1999 Chevrolet C2500 SuburbanBase, LS, LT, Silverado8 Cyl 5.7 L GAS, 8 Cyl 6.5 L DIESEL, 8 Cyl 7.4 L GAS
    1988-2000 Chevrolet C3500Base, Cheyenne, LS, Scottsdale, Silverado8 Cyl 5.7 L CNG, 8 Cyl 5.7 L GAS, 8 Cyl 6.2 L DIESEL, 8 Cyl 6.5 L DIESEL, 8 Cyl 7.4 L GAS
    1988-1999 Chevrolet K1500Base, Cheyenne, LS, Scottsdale, Silverado, Sport, WT6 Cyl 4.3 L GAS, 8 Cyl 5.0 L GAS, 8 Cyl 5.7 L GAS, 8 Cyl 6.2 L DIESEL, 8 Cyl 6.5 L DIESEL
    1992-1999 Chevrolet K1500 SuburbanBase, LS, LT, Silverado8 Cyl 5.7 L GAS, 8 Cyl 6.5 L DIESEL
    1988-2000 Chevrolet K2500Base, Cheyenne, LS, Scottsdale, Silverado, WT6 Cyl 4.3 L GAS, 8 Cyl 5.0 L GAS, 8 Cyl 5.7 L CNG, 8 Cyl 5.7 L GAS, 8 Cyl 6.2 L DIESEL, 8 Cyl 6.5 L DIESEL, 8 Cyl 7.4 L GAS
    View More
  • Customer Questions & Expert Answers

    Q:
    Is this 19330060 designed for my car? Posted by ChevyPartsGiant Specialist
    A:
    Please Select Your Vehicle model to see if part number 19330060 is suitable before ordering.
    Posted by ChevyPartsGiant Specialist
    Q:
    How to service and repair the torsion bar on Chevrolet K3500? Posted by Customer
    A:
    The first step to service or repair the Torsion Bar requires the vehicle to be elevated. Start by removing adjustment assemblies from both torsion bars while you mark their adjustment bolt position. The Torsion Bar unloading/loading tool (J 36202) allows you to apply adjustment arm tension before removing the adjustment bolt and retaining plate under safe conditions. Once the tool is moved off the assembly you can shift the torsion bars forward to remove the adjustment arms. First remove the nuts and bolts which attach the Torsion Bar support crossmember to its position then slide the crossmember toward the back to remove the torsion bars. Note down the positioning of each bar and remember its front end locations because the left and right torsion bars differ in design. You should remove the support crossmember with its retainer and spacer and insulator from the assembly. To install the parts begin by placing the insulator and spacer and retainer onto the support crossmember before mounting the support crossmember assembly to the frame with a proper rearward position of the mounting holes. Position the correct-sided torsion bars on the support crossmember after which push the assembly forward until it supports both bars. Next, install the adjustment arms on the torsion bars, then install the bolts and nuts into the Torsion Bar support crossmember, tightening the center nut to 24 nm (18 ft. Lbs.) wrench the edge nuts to a torque value of 62 nm (46 ft. Lbs.) while maintaining a torque of 24 nm (18 ft. Lbs.) on the center nuts. First install the adjustment retainer plate and bolt on each Torsion Bar before using the Torsion Bar unloading/loading tool (J 36202) to load the Torsion Bar tension. Use the Torsion Bar unloading/loading tool (J 36202) to increase the tension on the Torsion Bar then install the retaining plate and adjustment bolt before setting the adjustment bolt to 34 mm (1.3 inch) and releasing tension when the adjustment bolt takes the load before removing the tool (J 36202), lowering the vehicle to check the z height and front wheel alignment.
    Posted by ChevyPartsGiant Specialist
    Q:
    How to replace the torsion bar on Chevrolet Silverado 2500? Posted by Customer
    A:
    Before you replace the Torsion Bar, first lift and prop up the vehicle. Handle the torsion bars carefully so as not to damage the coating, which is likely to cause premature failure. Mount the Torsion Bar unloading/loading tool (J 36202) to the adjustment arm and crossmember, and tighten head bolt on adjustment arm until the load is taken off from the adjustment bolt and adjuster nut. Take off the adjustment bolt, and the adjuster nut, making sure to mark the adjustment bolt, counting the number of turns that are necessary to remove. In the case of vehicles with mn8, mt1, and mw3, take a repeat for the removal of the adjustment bolt and adjuster nut. After the removal of the j 36202, then unloading of the Torsion Bar, slide the Torsion Bar forward in removing the adjustment arm being supported. Then remove the Torsion Bar crossmember bolts from the weld nuts (follow by top linking to the nuts and bolts and then removing the Torsion Bar crossmember and the torsion bars write down where you put them left and right as they are different. To install, start by installing the torsion bars to the lower Control Arm and the Torsion Bar crossmember from the other side by then applying the Torsion Bar crossmember bolts to the weld nuts then tightening to 95 nm (70 ft. Lbs.). Mount the upper link nuts and bolts with the nut being tighten to 95 nm (70 ft. Lbs.). With the support of the adjustment arm, slide the Torsion Bar rearward to its full engagement with the adjustment arm, reinstall the j 36202 to the adjustment arm and crossmember, increasing the tension to load the Torsion Bar. Install adjustment bolt and adjuster nut making sure the adjustment bolt is installed to readjust back the same number of turns as done while removing it. Repeat installation of both the adjustment bolt and the adjuster nut for vehicles that have mn8, mt1, and mw3. Finally remove the j 36202, release the tension on the Torsion Bar until the adjustment bolt accepts the load, take off the safety stands, lower the vehicle and where necessary adjust adjusting bolt to change the z height from a counter-clockwise position to increase and to.clockwise to decrease.
    Posted by ChevyPartsGiant Specialist
    Q:
    How to replace the torsion bar on Chevrolet Suburban 2500? Posted by Customer
    A:
    Vehicle installation requires support at a raised position before starting the Torsion Bar replacement process. Install the Torsion Bar unloading/loading tool (J36202) between the adjustment arm and crossmember while applying tension to the adjustment arm until the adjustment bolt and adjuster nut become tension-free. Record a reference mark on the adjustment bolt along with the number of turns needed to remove it. You must remove both the adjustment bolt and adjuster nut from vehicles that use mn8, mt1, and mw3 along with the other nuts and bolts. Uninstall the j36202 tool andproceed to move the Torsion Bar ahead to pass the adjustment arm with hand support on the bar. The installation requires separation of the crossmember bolts from both Torsion Bar weld nuts and upper link mounting nuts and bolts. Make note of the Torsion Bar configurations before you take the torsion bars off your vehicle. The installation process begins by placing torsion bars on the lower Control Arm while you attach the Torsion Bar crossmember. Secure the Torsion Bar crossmember bolts to their weld nuts using torque at 95 nm (70 ft. Lbs.). Fasten the upper link mounting nuts along with their bolts by tightening the nuts to 95 nm (70 ft. Lbs.). Support the adjustment arm while pushing the Torsion Bar backwards until it locks into position before reinstalling the j36202 to the adjustment arm and crossmember. Release adjustment arm tension when torqueing the bolt by a number of turns equal to the original removal. Proceed by installing both the adjustment bolt and adjuster nut alongside removal of j36202 from cars fitted with mn8, mt1, mw3 and lowering the vehicle after stand removal. Use a ruler to measure the z height before adjusting the adjustment bolt + to increase z height and - to decrease it.
    Posted by ChevyPartsGiant Specialist
    Q:
    How to replace the torsion bar on GMC C2500? Posted by Customer
    A:
    Before you change the torsion bars, lift and support the vehicle and write down the position of the adjustment bolts. Attach the j 36202 (Torsion Bar Unloading/Loading Tool) to the adjustment arm and crossmember so that the tension applied to the adjustment arm removes stress from the adjustment bolt and adjuster nut. Get rid of bolts (3) and (4) for 15 series and 25 series motors, then you can remove mounting j 36202 to relieve tension from the Torsion Bar. Push the Torsion Bar forward while you hold onto the adjustment arm as it comes off. After that, take out the Torsion Bar crossmember bolts (4) from the weld nuts (1) on the 15 series and the upper link mounting nuts (1) and bolts (2) on the 25 series and then remove the Torsion Bar crossmember. Keep in mind that the torsion bars have different positions and remove them after checking. After placing the torsion bars, fit the Torsion Bar crossmember back in position and tighten its bolts (1) to the weld nuts (4) with fasteners to 95 nm (70 ft. Lbs.). Attach the upper link mounting nuts (2) and bolts (1) on the 25 series and tighten the nut to 95 nm (70 ft. Lbs.). Move the Torsion Bar toward you by positioning it behind the adjustment arm and put the j 36202 back in place. Attach the 15 series and 25 series by raising the tension on the adjustment arm and installing both the adjustment bolt (3) and adjuster nut (4) after that. Take out j 36202, so the tension is now on the adjustment bolt; then take off the safety stands and bring the vehicle down. To finish, place a measuring tool on the linear rods and check the z height and then open or close the thumbscrew (2) to increase or decrease the z distance.
    Posted by ChevyPartsGiant Specialist
    Q:
    How to replace the torsion bar and support assembly (bushing style) on GMC Sierra 1500? Posted by Customer
    A:
    The first step to replace bushing-style Torsion Bar and support assembly requires raising and supporting the vehicle. Place the Torsion Bar unloading/loading tool j 36202 onto the crossmember and adjustment arm before beginning the procedure. Apply tension to the adjustment arm with the j 36202 until the adjuster nut and adjustment bolt become unloaded after marking the bolt position. Record the required turns needed for bolt removal. The adjustment bolt and the adjuster nut from the crossmember must be removed before taking out the j 36202 so the Torsion Bar can unload. Remove the adjustment arm and Torsion Bar crossmember bolt from its weld nut before pulling the crossmember out from its mount. Remove the Torsion Bar from the crossmember while keeping in mind that left and right bars differ by design and do not fit one another before extracting all torsion bars from the vehicle. Install the Torsion Bar into its position in the lower Control Arm before placing it on the crossmember mount. Screw the Torsion Bar crossmember bolt into the weld nut before tightening it to 95 n.m (70 lb ft). First position the adjustment arm inside the crossmember before inserting the adjuster bolt and adjuster nut. Insert the Torsion Bar completely into the adjustment arm before reinstalling the j 36202 to both the adjustment arm and crossmember. Apply torque force to the adjustment arm while using j 36202 until the Torsion Bar reaches maximum load. Use the same number of turns on the adjuster bolt as when it was removed. Use the j 36202 to measure the z height after removing it from the crossmember. Next, remove the safety stands and lower the vehicle before taking z height measurements.
    Posted by ChevyPartsGiant Specialist
    Q:
    How to replace the torsion bar on GMC Sierra 3500? Posted by Customer
    A:
    Before you replace the Torsion Bar, first lift and prop up the vehicle. Handle the torsion bars carefully so as not to damage the coating, which is likely to cause premature failure. Mount the Torsion Bar unloading/loading tool (J 36202) to the adjustment arm and crossmember, and tighten head bolt on adjustment arm until the load is taken off from the adjustment bolt and adjuster nut. Take off the adjustment bolt, and the adjuster nut, making sure to mark the adjustment bolt, counting the number of turns that are necessary to remove. In the case of vehicles with mn8, mt1, and mw3, take a repeat for the removal of the adjustment bolt and adjuster nut. After the removal of the j 36202, then unloading of the Torsion Bar, slide the Torsion Bar forward in removing the adjustment arm being supported. Then remove the Torsion Bar crossmember bolts from the weld nuts (follow by top linking to the nuts and bolts and then removing the Torsion Bar crossmember and the torsion bars write down where you put them left and right as they are different. To install, start by installing the torsion bars to the lower Control Arm and the Torsion Bar crossmember from the other side by then applying the Torsion Bar crossmember bolts to the weld nuts then tightening to 95 nm (70 ft. Lbs.). Mount the upper link nuts and bolts with the nut being tighten to 95 nm (70 ft. Lbs.). With the support of the adjustment arm, slide the Torsion Bar rearward to its full engagement with the adjustment arm, reinstall the j 36202 to the adjustment arm and crossmember, increasing the tension to load the Torsion Bar. Install adjustment bolt and adjuster nut making sure the adjustment bolt is installed to readjust back the same number of turns as done while removing it. Repeat installation of both the adjustment bolt and the adjuster nut for vehicles that have mn8, mt1, and mw3. Finally remove the j 36202, release the tension on the Torsion Bar until the adjustment bolt accepts the load, take off the safety stands, lower the vehicle and where necessary adjust adjusting bolt to change the z height from a counter-clockwise position to increase and to.clockwise to decrease.
    Posted by ChevyPartsGiant Specialist
    Q:
    How to replace the torsion bar and support assembly (bushing style) on GMC Sierra 3500 Classic? Posted by Customer
    A:
    To replace the Torsion Bar and support assembly (bushing style), commence by picking the vehicle and supporting it. Engage the Torsion Bar unloading/loading tool (J 36202) to the adjustment arm and the crossmember. Tighten the adjustment arm with the j 36202 until the adjustment bolt and adjuster nut are freed of the load and then mark the adjustment bolt and count the turns needed for removal. Then, unbolt the adjustment bolt and adjust nut from the cross member followed finally removing the j36202 for the Torsion Bar to unload. Sliding the bar forward at adjustment arm , and thereafter take Torsion Bar crossmember bolt bolt out of the weld nut followed by taking the crossmember from the crossmember mount . Finally, remove the Torsion Bar from the crossmember as well as the vehicle. In installing the Torsion Bar position it in the bottom Control Arm, position also in the crossmember on the mount of the crossmember. Mount the Torsion Bar crossmember bolt in the weld nut and tighten, using 95 n.m (70 lb ft). Next, install the adjustment arm at the crossmember with the adjustment bolt and adjuster nut being installed. Seating the Torsion Bar fully to the adjustment arm, then reattaching the j 36202 to the adjustment arm and crossmember. Tighten the adjustment arm while increasing tension to load the Torsion Bar, twist the adjuster bolt the same number of turns that it required to remove. Finally, remove the j 36202 after taking off the crossmember, the safety stands, lower the vehicle and take the z height.
    Posted by ChevyPartsGiant Specialist
    Q:
    What should be done after positioning the torsion bar for the 2009 Chevrolet Silverado 1500? Posted by Customer
    A:
    Install the torsion bar crossmember bolt in the weld nut and tighten it to 110 Nm (81 lb ft).
    Posted by ChevyPartsGiant Specialist
    See expert answers on similar Torsion Bar
    Q:
    What is the first step for installation of the torsion bar for the 2008 Chevrolet Silverado 1500? Posted by Customer
    A:
    Position the torsion bar in the lower control arm and install it in the support assembly.
    Posted by ChevyPartsGiant Specialist
    See expert answers on similar Torsion Bar
    Q:
    How do you adjust the Z height for the 2007 Chevrolet Silverado 3500 Classic? Posted by Customer
    A:
    Adjust the adjustment bolt clockwise to increase the Z height or counterclockwise to lower it.
    Posted by ChevyPartsGiant Specialist
    See expert answers on similar Torsion Bar
    Q:
    What is the first step in the installation process for the 2009 Chevrolet Silverado 1500? Posted by Customer
    A:
    Position the torsion bar in the lower control arm and support assembly, ensuring to follow fastener cautions.
    Posted by ChevyPartsGiant Specialist
    See expert answers on similar Torsion Bar
    Q:
    What should be repeated for MN8, MT1, and MW3 for the 2004 Chevrolet Silverado 3500? Posted by Customer
    A:
    Repeat the installation of the adjustment bolt and adjuster nut.
    Posted by ChevyPartsGiant Specialist
    See expert answers on similar Torsion Bar
    Q:
    What is the first step to replace the torsion bar bushings for the 2007 Chevrolet Silverado 1500 Classic? Posted by Customer
    A:
    Raise and support the vehicle.
    Posted by ChevyPartsGiant Specialist
    See expert answers on similar Torsion Bar
    Q:
    How do you remove the bushing from the bracket for the 2007 GMC Sierra 1500 Classic? Posted by Customer
    A:
    Use a bushing driver (or equivalent) to remove the bushing.
    Posted by ChevyPartsGiant Specialist
    See expert answers on similar Torsion Bar
    Q:
    What should be done after seating the torsion bar for the 2010 GMC Sierra 1500? Posted by Customer
    A:
    Reinstall the J 36202 on the adjustment arm and support assembly to load the torsion bar.
    Posted by ChevyPartsGiant Specialist
    See expert answers on similar Torsion Bar
    Q:
    What tool is used for unloading/loading the torsion bar for the 2004 GMC Yukon XL 2500? Posted by Customer
    A:
    The Torsion Bar Unloading/Loading Tool (J 36202).
    Posted by ChevyPartsGiant Specialist
    See expert answers on similar Torsion Bar
    Q:
    How should torsion bars be handled during the replacement process for the 2010 GMC Sierra 1500? Posted by Customer
    A:
    Handle the torsion bars carefully to prevent damage to the coating, which can lead to premature failure.
    Posted by ChevyPartsGiant Specialist
    See expert answers on similar Torsion Bar
    If you have any questions about this product, please don't hesitate to ask us. We will be happy to help you!

OEM GM 19330060, Excellent Performance and Perfect Fitment

To ensure reliability, purchase GM part # 19330060 Torsion Bar, Front Driver Side. It is sometimes referred to as GM Torsion Bar. Choosing OEM parts is the optimal decision for guaranteeing superior quality and perfect performance. These components undergo stringent quality checks and are carefully constructed to comply with GM's factory specifications, ensuring a smooth installation process.

ChevyPartsGiant.com is a leading supplier of genuine GM parts such as GM 19330060 Torsion Bar, Front Driver Side. Our website boasts an extensive inventory of OEM GM parts, available at highly competitive prices in the market. Should you require any new genuine GM parts, rest assured we will deliver them swiftly and efficiently to your doorstep. Furthermore, all our parts come with the assurance of a manufacturer's warranty. For detailed Chevy parts information, click here.
Choose ChevyPartsGiant for discounted prices, exceptional service and fast delivery