Make sure this part fits

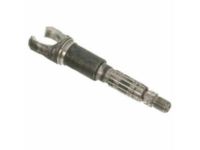
GM 26082803
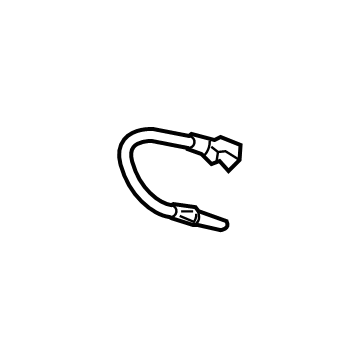
Parking Brake Cable

1999-2009 GM

Customer Questions & Expert Answers (20)
GM 26082803 Parking Brake Cable
  • Part Description
    Cable, Automatic Transmission Parking Lock
  • Manufacturer
    General Motors
  • Manufacturer's Notes
    This part is discontinued.
Make sure this part fits
  • Related Parts
  • Product Specifications
  • Vehicle Fitment
  • Customer Questions & Expert Answers
  • Product Specifications

    BrandGenuine GM
    Manufacturer Part Number26082803
    Part DescriptionCable, Automatic Transmission Parking Lock
    Other NamesCable; Cable, Transmission Control Cable
    Item Dimensions15.1 x 1.4 x 0.9 inches
    Item Weight0.40 Pounds
    ConditionNew
    Fitment TypeDirect Replacement
    ManufacturerGeneral Motors
    SKU26082803
    WarrantyThis genuine GM part is guaranteed by GM's factory warranty.
    Shipping & ReturnShipping Policy Return Policy
    Warning: California's Proposition 65
  • Vehicle Fitment

    Year Make Model Trim Engine
    2002-2006 Cadillac EscaladeBase8 Cyl 5.3 L GAS, 8 Cyl 6.0 L GAS
    2003-2006 Cadillac Escalade ESVBase8 Cyl 6.0 L GAS
    2002-2006 Cadillac Escalade EXTBase8 Cyl 6.0 L GAS
    2002-2006 Chevrolet Avalanche 1500Base, LS, LT, North Face, On Road Edition, WBH, Z66, Z718 Cyl 5.3 L FLEX, 8 Cyl 5.3 L GAS
    2002-2006 Chevrolet Avalanche 2500Base, LS, LT8 Cyl 8.1 L GAS
    2003-2009 Chevrolet Express 1500Base, LS, LT6 Cyl 4.3 L GAS, 8 Cyl 5.3 L FLEX, 8 Cyl 5.3 L GAS
    2003-2009 Chevrolet Express 2500Base, LS, LT6 Cyl 4.3 L GAS, 8 Cyl 4.8 L GAS, 8 Cyl 5.3 L GAS, 8 Cyl 6.0 L CNG, 8 Cyl 6.0 L GAS, 8 Cyl 6.6 L DIESEL
    2003-2009 Chevrolet Express 3500Base, LS, LT8 Cyl 4.8 L GAS, 8 Cyl 6.0 L CNG, 8 Cyl 6.0 L GAS, 8 Cyl 6.6 L DIESEL
    1999-2007 Chevrolet Silverado 1500Base, Hybrid, LS, LT, LTZ, SS, WT, Z71 Off-Road6 Cyl 4.3 L GAS, 8 Cyl 4.8 L GAS, 8 Cyl 5.3 L FLEX, 8 Cyl 5.3 L FULL HYBRID EV-GAS (FHEV), 8 Cyl 5.3 L GAS, 8 Cyl 6.0 L GAS
    2007 Chevrolet Silverado 1500 ClassicHybrid, LS, LT, SS, WT6 Cyl 4.3 L GAS, 8 Cyl 4.8 L GAS, 8 Cyl 5.3 L FLEX, 8 Cyl 5.3 L FULL HYBRID EV-GAS (FHEV), 8 Cyl 5.3 L GAS, 8 Cyl 6.0 L GAS
    View More
  • Customer Questions & Expert Answers

    Q:
    Can you help me check if this 26082803 is the right part for my car? Posted by ChevyPartsGiant Specialist
    A:
    Please Select Your Vehicle model to see if part number 26082803 is suitable before ordering.
    Posted by ChevyPartsGiant Specialist
    Q:
    How to replace the automatic transmission shift cable on Cadillac Escalade EXT? Posted by Customer
    A:
    One must begin replacement of the Shift Cable by positioning the Steering Column shift lever to park then removing the instrument panel knee bolster followed by the driver's seat. Start by unwinding the carpet insulation while still in the driver's area followed by the removal of the retainer that holds the cable to the Steering Column. Start by detaching the cable end from the Steering Column ball stud followed by de-pressing the tangs to extract the cable from the Steering Column bracket and finishing by removing the bolt holding the cable support to the brace but keep away from twisting or bending the Shift Cable. After that disconnect the support from the Shift Cable and extract the cable grommet from the floor panel. Climb underneath the vehicle while it remains supported at the appropriate height then unscrew the retaining clips from the cable which is anchored to the floor panel reinforcement. Fit the transmission manual shaft into mechanical park position before removing the cable retainer from the bracket and afterwards taking out the Transfer Case cable clip if it exists. Lower the vehicle with the Steering Column shift lever still in park position while detaching the end of the Shift Cable from the ball stud of the transmission range selector lever and depressing the tangs to remove it from the bracket. Start installation by putting the transmission manual shaft in mechanical park position then position and fasten the cable onto the bracket followed by connecting the Shift Cable end to the transmission range selector lever ball stud. Begin by installing the cable clip on the Transfer Case then attaching the cable to the bracket by using a retainer followed by placing the clips on the cable to the floor panel reinforcement before lowering the vehicle. Attach the cable grommet to the floor panel by preventing unnecessary cable bending or twisting as you connect it to its support system then install the cable on the support. Secure the cable support to the brace using a 10 nm (89 inch lbs.) bolt before connecting the cable to the Steering Column bracket while maintaining complete tangs insertion into the bracket. Attach the cable end to the Steering Column ball stud before attaching it with the retainer to secure the cable. Then put back the carpet and insulation in the driver's area and position the driver's seat and instrument panel knee bolster. Conclude the test by evaluating transmission shifting and make cable adjustments when shifting positions remain out of reach.
    Posted by ChevyPartsGiant Specialist
    Q:
    How to replace the automatic transmission shift cable on Chevrolet Avalanche 1500? Posted by Customer
    A:
    One must begin replacement of the Shift Cable by positioning the Steering Column shift lever to park then removing the instrument panel knee bolster followed by the driver's seat. Start by unwinding the carpet insulation while still in the driver's area followed by the removal of the retainer that holds the cable to the Steering Column. Start by detaching the cable end from the Steering Column ball stud followed by de-pressing the tangs to extract the cable from the Steering Column bracket and finishing by removing the bolt holding the cable support to the brace but keep away from twisting or bending the Shift Cable. After that disconnect the support from the Shift Cable and extract the cable grommet from the floor panel. Climb underneath the vehicle while it remains supported at the appropriate height then unscrew the retaining clips from the cable which is anchored to the floor panel reinforcement. Fit the transmission manual shaft into mechanical park position before removing the cable retainer from the bracket and afterwards taking out the Transfer Case cable clip if it exists. Lower the vehicle with the Steering Column shift lever still in park position while detaching the end of the Shift Cable from the ball stud of the transmission range selector lever and depressing the tangs to remove it from the bracket. Start installation by putting the transmission manual shaft in mechanical park position then position and fasten the cable onto the bracket followed by connecting the Shift Cable end to the transmission range selector lever ball stud. Begin by installing the cable clip on the Transfer Case then attaching the cable to the bracket by using a retainer followed by placing the clips on the cable to the floor panel reinforcement before lowering the vehicle. Attach the cable grommet to the floor panel by preventing unnecessary cable bending or twisting as you connect it to its support system then install the cable on the support. Secure the cable support to the brace using a 10 nm (89 inch lbs.) bolt before connecting the cable to the Steering Column bracket while maintaining complete tangs insertion into the bracket. Attach the cable end to the Steering Column ball stud before attaching it with the retainer to secure the cable. Then put back the carpet and insulation in the driver's area and position the driver's seat and instrument panel knee bolster. Conclude the test by evaluating transmission shifting and make cable adjustments when shifting positions remain out of reach.
    Posted by ChevyPartsGiant Specialist
    Q:
    How to replace the automatic transmission shift cable on Chevrolet Avalanche 2500? Posted by Customer
    A:
    Both pieces of the Shift Cable serve independently of each other giving technicians the ability to remove either the column end or transmission end separately. The first step to change the automatic transmission Shift Cable at the rear/transmission end is to position the steering column shift lever into park mode while raising the vehicle. First position the transmission manual shaft in mechanical park and extract the Shift Cable end from the transmission shift lever ball stud. Identify the center connection on the transmission Shift Cable before you remove the white plastic cover and lift up the lock button center tabs. Beyond placing the steering column shift lever at park the technician can maintain better reach because they radially pull on the center section of the existing e-clip for removal. To detach the Shift Cable from its bracket proceed by disconnecting its center connectors then taking out the bracket retainer followed by pushing cable tangs to free it from the bracket before extracting it if equipped from any Transfer Case clips. After you secure the rear transmission-end of the Shift Cable to the vehicle you should install it on the Transfer Case clips when present and align and install it to the bracket before putting the retainer back. To start, install a new e-clip on the cable's front half which is attached to the steering column while the transmission manual shaft lever should be placed in mechanical park. Finally, use the transmission shift lever ball stud to connect the assembly of the Shift Cable end. Use the left hand to hold the steering column end of the transmission cable while using the right hand to hold its transmission end. Place the outer diameter of cable against the inner diameter of cable. Applying constant force to cable allows cable insertion until the blue spring on cable is completely compressed. Proper execution of this action will prevent system misalignment. The technician should release cable end for blue spring tensioning while pulling back white cover from cable end then pushing natural lock button downwards to engage locking teeth on cable end. Verify the white cover hides the natural colored lock by performing the adjustment steps once again if it does not. Drive the vehicle down to check transmission shift quality before readjusting the valve if any gears remain unreachable.
    Posted by ChevyPartsGiant Specialist
    Q:
    How to replace the shift cable on Chevrolet Express 2500? Posted by Customer
    A:
    A technician needs to activate the parking brake and shift the steering column lever to park before starting the replacement of the Shift Cable. The first step is to unfasten the knee bolster bracket and the knee bolster trim panel. First detaching the shift cable from the steering column shift control together with the clip at the steering column bracket. Unlock the space under the carpeting and insulation to reach the shift cable pass-through grommet before you take out the rubber grommet from the floor panel. One should begin by raising the vehicle and removing the shift cable from its position on the stud ball then detach the locking clip on the cable from the bracket. First disconnect the cable from both retainers near the fuel lines and body and then lower the vehicle before finishing with shift cable removal. When installing the shift column check that the column shift lever and the transmission control lever are in the mechanical park position after rotating the control lever clockwise until it reaches a complete lock position. Raise the vehicle and then uninstall the black shipping tab from the shift cable end installed at the transmission. The shift cable should attach to transmission bracket while using the cable clip to hold it in position. To connect the shift cable end at the transmission shift control lever position you should first push it onto the ball stud and then activate both the primary lock and secondary lock mechanism. After reconnecting the shift cable to fuel and body clips the vehicle must be lowered before installing the rubber grommet to the floor panel when the shift lever should be in the Park position. The shift cable needs to be mounted onto the steering column shift control before locking the clip onto the bracket and adding it to the ball stud of the shift lever. Execute necessary adjustment of the shift cable before mounting the knee bolster bracket while also installing the knee bolster trim panel.
    Posted by ChevyPartsGiant Specialist
    Q:
    How to replace the Automatic Transmission Range Selector Shift Cable on Chevrolet Silverado 1500 Classic? Posted by Customer
    A:
    The first step for replacing the Shift Cable begins by moving the Steering Column shift lever to park before separating the instrument panel knee bolster and driver seat. Start cable replacement procedures by exposing the driver's area insulation and pulling back the carpet before cutting the column retention. First unretract the cable end from the Steering Column ball stud while pressing the tangs and then extract the cable from the Steering Column bracket. Use caution when removing the bolt which attaches the cable support to the brace to prevent Shift Cable deformation. Separate the support structure from the Shift Cable as well as detach and remove the cable grommet from the floor panel. Lift and stabilize the vehicle before taking off the clips that hold the cable onto the floor panel reinforcement. The transmission manual shaft must be at mechanical park before removing the retainer securing the cable to the bracket and the Transfer Case cable clip if applicable. Use your fingers to press the cable tangs while separating it from the transmission shift lever ball stud. Then remove the cable from its bracket. Proceed with lowering the vehicle but always keep the Steering Column shift lever inside the park position. The installation process requires checking the transmission manual shaft lever is in mechanical park and aligning and installing the cable to its bracket while attaching the Shift Cable end to the transmission shift lever ball stud. The installation requires the Transfer Case cable clip and the bracket cable retainer to be installed. Reinstall the cable clips to the floor panel reinforcement and lower the vehicle before installing the cable grommet on the floor panel while avoiding Shift Cable twisting or bending during the installation process. First install the Shift Cable to its support and then fasten the cable support bolt to the brace while tightening it to 10 nm (89 inch lbs.). The cable should be installed through the Steering Column bracket while allowing its tangs to rest fully in the bracket before attaching it to the Steering Column ball stud along with a retainer for the cable. Placing the carpet and insulation back into position you will then reinstall the driver seat and instrument panel knee bolster as well as testing the transmission shift functionality. The cable needs modification when any of the gear positions become unreachable.
    Posted by ChevyPartsGiant Specialist
    Q:
    How to replace the Automatic Transmission Range Selector Shift Cable on Chevrolet Silverado 3500 Classic? Posted by Customer
    A:
    The first step for replacing the Shift Cable begins by moving the Steering Column shift lever to park before separating the instrument panel knee bolster and driver seat. Start cable replacement procedures by exposing the driver's area insulation and pulling back the carpet before cutting the column retention. First unretract the cable end from the Steering Column ball stud while pressing the tangs and then extract the cable from the Steering Column bracket. Use caution when removing the bolt which attaches the cable support to the brace to prevent Shift Cable deformation. Separate the support structure from the Shift Cable as well as detach and remove the cable grommet from the floor panel. Lift and stabilize the vehicle before taking off the clips that hold the cable onto the floor panel reinforcement. The transmission manual shaft must be at mechanical park before removing the retainer securing the cable to the bracket and the Transfer Case cable clip if applicable. Use your fingers to press the cable tangs while separating it from the transmission shift lever ball stud. Then remove the cable from its bracket. Proceed with lowering the vehicle but always keep the Steering Column shift lever inside the park position. The installation process requires checking the transmission manual shaft lever is in mechanical park and aligning and installing the cable to its bracket while attaching the Shift Cable end to the transmission shift lever ball stud. The installation requires the Transfer Case cable clip and the bracket cable retainer to be installed. Reinstall the cable clips to the floor panel reinforcement and lower the vehicle before installing the cable grommet on the floor panel while avoiding Shift Cable twisting or bending during the installation process. First install the Shift Cable to its support and then fasten the cable support bolt to the brace while tightening it to 10 nm (89 inch lbs.). The cable should be installed through the Steering Column bracket while allowing its tangs to rest fully in the bracket before attaching it to the Steering Column ball stud along with a retainer for the cable. Placing the carpet and insulation back into position you will then reinstall the driver seat and instrument panel knee bolster as well as testing the transmission shift functionality. The cable needs modification when any of the gear positions become unreachable.
    Posted by ChevyPartsGiant Specialist
    Q:
    How to replace the automatic transmission shift cable on Chevrolet Silverado 2500? Posted by Customer
    A:
    The process to replace automatic transmission Shift Cable begins with setting the shift lever in park position followed by both removing the instrument panel knee bolster and driver's seat. Uncover the carpet and insulation which surrounds the driver's area then free the cable retainer attached to the Steering Column. You need to remove the Steering Column ball stud cable end by depressing the tangs to detach it from the Steering Column bracket before you take out the cable support bolt on the brace while avoiding any unnecessary Shift Cable twisting or bending. The support requires cable removal together with the floor panel grommet. After raising the vehicle support the frame you must eliminate cable retention clips from the floor panel reinforcement area. Proceed with removal of the retainer that fastens the cable to its bracket while keeping the transmission manual shaft in mechanical park position. Also remove Transfer Case cable clips if they exist. Use the transmission shift lever ball stud to detach the Shift Cable end then push down the tangs so that it will free from its bracket position before lowering the vehicle. Maintain the Steering Column shift lever in the park position for safety reasons. Begin the installation by placing the transmission manual shaft lever into mechanical park position. Then position the cable onto the bracket according to alignment before attaching the Shift Cable end to the transmission shift lever ball stud. The installation requires fitting cable clips on the Transfer Case followed by securing the cable to the bracket with the retainer and attaching the cable clips to the floor panel reinforcement before lowering the vehicle. When installing the cable grommet to the floor panel you must pay attention to avoid excessive twisting or bending of the Shift Cable during support attachment. Add the bolt that holds the cable support to the brace before tightening it to 10 nm (89 inch lbs.) and attaching the cable to the Steering Column bracket while making sure the tangs fully insert into position. Insert the cable end to the Steering Column ball stud before you fasten the cable with the retainer. Then push back the carpet and insulation in the driver's compartment followed by reinstallation of the seat, instrument panel knee bolster, and driver's seat. The transmission should be tested for proper shift operation before adapting the cable length if the gear positions are not reachable.
    Posted by ChevyPartsGiant Specialist
    Q:
    How to replace the automatic transmission shift cable on Chevrolet Suburban 2500? Posted by Customer
    A:
    Both pieces of the Shift Cable serve independently of each other giving technicians the ability to remove either the column end or transmission end separately. The first step to change the automatic transmission Shift Cable at the rear/transmission end is to position the steering column shift lever into park mode while raising the vehicle. First position the transmission manual shaft in mechanical park and extract the Shift Cable end from the transmission shift lever ball stud. Identify the center connection on the transmission Shift Cable before you remove the white plastic cover and lift up the lock button center tabs. Beyond placing the steering column shift lever at park the technician can maintain better reach because they radially pull on the center section of the existing e-clip for removal. To detach the Shift Cable from its bracket proceed by disconnecting its center connectors then taking out the bracket retainer followed by pushing cable tangs to free it from the bracket before extracting it if equipped from any Transfer Case clips. After you secure the rear transmission-end of the Shift Cable to the vehicle you should install it on the Transfer Case clips when present and align and install it to the bracket before putting the retainer back. To start, install a new e-clip on the cable's front half which is attached to the steering column while the transmission manual shaft lever should be placed in mechanical park. Finally, use the transmission shift lever ball stud to connect the assembly of the Shift Cable end. Use the left hand to hold the steering column end of the transmission cable while using the right hand to hold its transmission end. Place the outer diameter of cable against the inner diameter of cable. Applying constant force to cable allows cable insertion until the blue spring on cable is completely compressed. Proper execution of this action will prevent system misalignment. The technician should release cable end for blue spring tensioning while pulling back white cover from cable end then pushing natural lock button downwards to engage locking teeth on cable end. Verify the white cover hides the natural colored lock by performing the adjustment steps once again if it does not. Drive the vehicle down to check transmission shift quality before readjusting the valve if any gears remain unreachable.
    Posted by ChevyPartsGiant Specialist
    Q:
    How to replace the automatic transmission shift cable on Chevrolet Silverado 3500? Posted by Customer
    A:
    The process to replace automatic transmission Shift Cable begins with setting the shift lever in park position followed by both removing the instrument panel knee bolster and driver's seat. Uncover the carpet and insulation which surrounds the driver's area then free the cable retainer attached to the Steering Column. You need to remove the Steering Column ball stud cable end by depressing the tangs to detach it from the Steering Column bracket before you take out the cable support bolt on the brace while avoiding any unnecessary Shift Cable twisting or bending. The support requires cable removal together with the floor panel grommet. After raising the vehicle support the frame you must eliminate cable retention clips from the floor panel reinforcement area. Proceed with removal of the retainer that fastens the cable to its bracket while keeping the transmission manual shaft in mechanical park position. Also remove Transfer Case cable clips if they exist. Use the transmission shift lever ball stud to detach the Shift Cable end then push down the tangs so that it will free from its bracket position before lowering the vehicle. Maintain the Steering Column shift lever in the park position for safety reasons. Begin the installation by placing the transmission manual shaft lever into mechanical park position. Then position the cable onto the bracket according to alignment before attaching the Shift Cable end to the transmission shift lever ball stud. The installation requires fitting cable clips on the Transfer Case followed by securing the cable to the bracket with the retainer and attaching the cable clips to the floor panel reinforcement before lowering the vehicle. When installing the cable grommet to the floor panel you must pay attention to avoid excessive twisting or bending of the Shift Cable during support attachment. Add the bolt that holds the cable support to the brace before tightening it to 10 nm (89 inch lbs.) and attaching the cable to the Steering Column bracket while making sure the tangs fully insert into position. Insert the cable end to the Steering Column ball stud before you fasten the cable with the retainer. Then push back the carpet and insulation in the driver's compartment followed by reinstallation of the seat, instrument panel knee bolster, and driver's seat. The transmission should be tested for proper shift operation before adapting the cable length if the gear positions are not reachable.
    Posted by ChevyPartsGiant Specialist
    Q:
    How to replace the automatic transmission shift cable on GMC Sierra 3500? Posted by Customer
    A:
    The first step to replace the Shift Cable begins by placing the Steering Column shift lever to park and unbolting the instrument panel knee bolster. Begin by taking out the driver's seat and unfolding the carpet along with insulation situated near the driver's seat area. Release the Steering Column retainer before unhooking the cable end from the ball stud at the Steering Column. The cable must be slid out of the Steering Column bracket by depressing the tangs before uninstalling the supporting bolt from the brace while minimizing cable twisting and bending. Pull the Shift Cable off from its support structure and simultaneously take out the cable grommet from the floor panel. Lift and stabilize the vehicle after which you should remove the cable retention clips located on the floor panel reinforcement. Proceed with removing the transmission manual shaft retainer in mechanical park position and the bracket retaining cable before taking off any Transfer Case cable clip when present. Disengage the Shift Cable end from the transmission range selector lever ball stud by pushing the tangs downward then take away the cable from the bracket. Lower the vehicle while the Steering Column shift lever stays in park position. The first step of installation requires positioning the transmission manual shaft lever into mechanical park before aligning and mounting the cable to the bracket then connecting the Shift Cable end to the transmission range selector lever ball stud. First install the cable clip onto the Transfer Case followed by attaching the retainer between the cable and bracket then fasten the cable clips onto the floor panel reinforcement. Install the cable grommet to the floor panel after lowering the vehicle while preventing Shift Cable damage through excessive cable bend or twist. Fasten the Shift Cable onto the support before installing and securing the bolt that holds the cable support to the brace. Apply torque of 10 nm (89 inch lbs.) to the bolt. The cable installation process begins with attaching the cable to the bracket where all tangs should fully rest into the sides of the Steering Column bracket. Then connect the cable to the ball stud on the Steering Column before securing it with a retainer. Place insulation and carpet material in the driver area before reinstalling the instrument panel knee bolster followed by the driver seat. Examine transmission shift operations while testing and adjust the cable if transmission fails to move between all gear positions.
    Posted by ChevyPartsGiant Specialist
    Q:
    How to replace the automatic transmission shift cable on GMC Sierra 1500? Posted by Customer
    A:
    The process to replace automatic transmission Shift Cable begins with setting the shift lever in park position followed by both removing the instrument panel knee bolster and driver's seat. Uncover the carpet and insulation which surrounds the driver's area then free the cable retainer attached to the Steering Column. You need to remove the Steering Column ball stud cable end by depressing the tangs to detach it from the Steering Column bracket before you take out the cable support bolt on the brace while avoiding any unnecessary Shift Cable twisting or bending. The support requires cable removal together with the floor panel grommet. After raising the vehicle support the frame you must eliminate cable retention clips from the floor panel reinforcement area. Proceed with removal of the retainer that fastens the cable to its bracket while keeping the transmission manual shaft in mechanical park position. Also remove Transfer Case cable clips if they exist. Use the transmission shift lever ball stud to detach the Shift Cable end then push down the tangs so that it will free from its bracket position before lowering the vehicle. Maintain the Steering Column shift lever in the park position for safety reasons. Begin the installation by placing the transmission manual shaft lever into mechanical park position. Then position the cable onto the bracket according to alignment before attaching the Shift Cable end to the transmission shift lever ball stud. The installation requires fitting cable clips on the Transfer Case followed by securing the cable to the bracket with the retainer and attaching the cable clips to the floor panel reinforcement before lowering the vehicle. When installing the cable grommet to the floor panel you must pay attention to avoid excessive twisting or bending of the Shift Cable during support attachment. Add the bolt that holds the cable support to the brace before tightening it to 10 nm (89 inch lbs.) and attaching the cable to the Steering Column bracket while making sure the tangs fully insert into position. Insert the cable end to the Steering Column ball stud before you fasten the cable with the retainer. Then push back the carpet and insulation in the driver's compartment followed by reinstallation of the seat, instrument panel knee bolster, and driver's seat. The transmission should be tested for proper shift operation before adapting the cable length if the gear positions are not reachable.
    Posted by ChevyPartsGiant Specialist
    Q:
    How to replace the shift cable on an Allison automatic transmission on GMC Sierra 3500 Classic? Posted by Customer
    A:
    To mount the range selector lever cable on an allison automatic transmission, make sure that the steering column shift lever is in park, and elevate the vehicle. Unbolt and remove the cable range selector heat shield and heat shield using a special tool to koil the transmission so that the manual shaft is in mechanical park. Remove the end of the range selector cable from the transmission range selector lever stud and remove the security retainer securing the cable to the bracket. Follow up by pressing the tangs to break the cable from the range selector cable bracket. Pull the cable clips off the floor panel reinforcement, and out of the Transfer Case if present. Lower the vehicle and ensure that the steering column shift lever stays in the park position. Pull back the carpet and insulation in the drivers area, remove the instrument panel knee bolster, and remove the retainer securing the cable to the steering column. Depress the tangs to pull the cable out of the steering column bracket, then take out the cable end from the steering column ball stud, don't twist or bend the cable unawares. Next, remove the range selector cable, support, cable grommet from the floor panel. For the installation, place the cable in the vehicle and install the vehicle the grommet to the floor panel without twisting the cable or bending out of shape. Connect the range selector cable to the assistance and verify the transmission manual shaft lever is in mechanical park. Feed the cable to the steering column bracket ensuring that it seats fully into the tangs, and connect the leading end to the ball stud of the steering column and apply the retainer. Reposition the carpet and insulation back, put the instrument panel knee bolster back. Raise the vehicle once more and mount the cable clips to the Transfer Case if there is one, and to the floor panel reinforcement. Check the transmission manual shaft is in mechanical park and attach range selector cable to the range selector cable bracket and secure by retainer. Join one end of the range selector cable to the transmission range selector lever stud, reposition the heat shield, and hand tighten before mechanically tightening the front bolt first and the rear bolt final to prevent its slipping. Tighten the bolts on the front and rear to 25n.m (18 lb ft) bring down the vehicle, and test and set the transmission for correct shift operation aligning the cable if the gear positions cannot be accessed in all of them.
    Posted by ChevyPartsGiant Specialist
    Q:
    How to replace the shift cable on GMC Savana 1500? Posted by Customer
    A:
    The first step to change the Shift Cable includes deployment of the parking brake followed by shifting the steering column lever to park position. Disassembly starts by taking away the knee bolster trim panel alongside its bracket. Begin by unclipping the shift cable from the steering column bracket and afterward disconnect the shift cable from the steering column shift control. Locate the shift cable pass-through grommet by pulling back carpeting along with insulation then take out the rubber grommet from the floor panel. Lift the vehicle before taking out the shift cable from the stud ball and its locking clip from the bracket area. Disable cable retainers from the fuel lines and body section and then lower the vehicle while removing the shift cable. The installation process requires setting both the column shift lever and transmission control lever into mechanical park by rotating them clockwise until full engagement. Raising the vehicle enables installment of the transmission end of the shift cable to its bracket after removing its black shipping tab at that location. Use the clip to secure the cable before attaching its end to the transmission shift control lever stud ball and locking both primary and secondary locks. Proceed by attaching the shift cable to its positions on the fuel line and body clips while lowering the vehicle then installing the rubber grommet to the floor panel with the shift lever resting in Park position. Use the clip to connect the shift cable across the steering column shift control before fixing it to both the steering column bracket and shift lever ball stud. To complete the installation correct the shift cable before integrating the knee bolster bracket followed by the knee bolster trim panel.
    Posted by ChevyPartsGiant Specialist
    Q:
    How to replace the Automatic Transmission Range Selector Shift Cable on GMC Sierra 1500 Classic? Posted by Customer
    A:
    The first step for replacing the Shift Cable begins by moving the Steering Column shift lever to park before separating the instrument panel knee bolster and driver seat. Start cable replacement procedures by exposing the driver's area insulation and pulling back the carpet before cutting the column retention. First unretract the cable end from the Steering Column ball stud while pressing the tangs and then extract the cable from the Steering Column bracket. Use caution when removing the bolt which attaches the cable support to the brace to prevent Shift Cable deformation. Separate the support structure from the Shift Cable as well as detach and remove the cable grommet from the floor panel. Lift and stabilize the vehicle before taking off the clips that hold the cable onto the floor panel reinforcement. The transmission manual shaft must be at mechanical park before removing the retainer securing the cable to the bracket and the Transfer Case cable clip if applicable. Use your fingers to press the cable tangs while separating it from the transmission shift lever ball stud. Then remove the cable from its bracket. Proceed with lowering the vehicle but always keep the Steering Column shift lever inside the park position. The installation process requires checking the transmission manual shaft lever is in mechanical park and aligning and installing the cable to its bracket while attaching the Shift Cable end to the transmission shift lever ball stud. The installation requires the Transfer Case cable clip and the bracket cable retainer to be installed. Reinstall the cable clips to the floor panel reinforcement and lower the vehicle before installing the cable grommet on the floor panel while avoiding Shift Cable twisting or bending during the installation process. First install the Shift Cable to its support and then fasten the cable support bolt to the brace while tightening it to 10 nm (89 inch lbs.). The cable should be installed through the Steering Column bracket while allowing its tangs to rest fully in the bracket before attaching it to the Steering Column ball stud along with a retainer for the cable. Placing the carpet and insulation back into position you will then reinstall the driver seat and instrument panel knee bolster as well as testing the transmission shift functionality. The cable needs modification when any of the gear positions become unreachable.
    Posted by ChevyPartsGiant Specialist
    Q:
    How to replace the shift cable in a 4L60-E automatic transmission on GMC Yukon XL 1500? Posted by Customer
    A:
    For replacing the shift cable of a 4L60-E automatic transmission start by positioning the steering column shift lever to park and performing vehicle elevation. First position the transmission manual shaft into mechanical park mode before removing the bracket retainer holding the shift cable to the transmission bracket and disconnecting the shift cable terminal shaft from the transmission shift lever ball stud. Push the shift cable from the transmission bracket by pushing the conduit end fitting towards the vehicle's rear after you have depressed its double tangs. Slide the transmission shift cable toward the vehicle's middle section until the center connector appears. Then remove the white plastic cover and activate the lock button's center tabs. Next separate the shift cable center connector ends to free both halves from vehicle service. Toss the unused E-clip into the garbage. First install a new E-clip onto the shift cable end while positioning the steering column shift lever to park then strip away the steering column shroud and the driver's seat. First remove the driver's area floor covering combined with insulation then free the shift cable from its column retainer and disconnect the ball stud shaped cable end from the steering column. Connectors on the shift cable conduit end fitting should come out of the steering column bracket while preventing both twisting and bending of the shift cable. The support receives the shift cable before the grommet receives removal from the floor panel. Lift the vehicle a second time to detach the two retaining clips on the shift cable from its reinforcement point in the floor panel. Remove the E-clip from the transmission manual shaft ball stud terminal end fitting while disconnecting this fitting at the cable terminal end. Discard the E-clip as you proceed. A new front section of the shift cable ships ready with an installed E-clip. Unscrew the center connector ends of the shift cable to remove the cable half from the vehicle. Place the steering column shift lever to the park position before inserting the transmission manual shaft lever into mechanical park. Attach shift cable clips to the floor panel reinforcement then feed the cable through the panel's hole before placing a grommet. The shift cable conduit end fitting must be suspended at its lowest point before installing it on the steering column bracket while double-checking that all tangs are properly seated. Secure the shift cable terminal shaft end to the steering column ball stud through the retainer. Secure the shift cable support bolt to the brace at 10 Nm tension (89 inch lbs.). After installing carpet and insulation along with replacing the driver seat and steering column shroud. Grip the transmission cable's front and back halves separately while ensuring proper alignment before pushing the cable tip to fully squeeze its blue compression spring. After letting go of the shift cable end the blue spring should adjust the system's position. To activate the locking teeth push the natural lock button down after pulling back the white cover. Double-check that the white cover successfully hides the lock mechanism. You need to re-evaluate your steps until successful completion. After lowering the vehicle you should perform transmission functionality tests while adjusting the shift cable when some gears become unreachably limited. The shift lever pin needs inspection for corrosion signs. Replace it when corrosion appears.
    Posted by ChevyPartsGiant Specialist
    Q:
    What should be done with the shift cable support for the 2000 Chevrolet Suburban 1500? Posted by Customer
    A:
    Remove the bolt securing the shift cable support to the brace, avoiding unnecessary twisting or bending of the shift cable.
    Posted by ChevyPartsGiant Specialist
    See expert answers on similar Shift Cable
    Q:
    What does the shift cable for the 4L80-E Automatic Transmission consist of for the 2000 Chevrolet Tahoe? Posted by Customer
    A:
    It consists of two halves, allowing for the removal of either the front half (column end) or rear half (transmission end) independently.
    Posted by ChevyPartsGiant Specialist
    See expert answers on similar Shift Cable
    Q:
    How do you attach the shift cable terminal shaft end for the 2001 Chevrolet Suburban 1500? Posted by Customer
    A:
    Attach it to the steering column ball stud and secure it with the retainer.
    Posted by ChevyPartsGiant Specialist
    See expert answers on similar Shift Cable
    Q:
    What should be done after lowering for the 2001 GMC Yukon XL 1500? Posted by Customer
    A:
    Attach the conduit end fitting to the steering column bracket, ensuring the tangs fully seat, connect the shift cable terminal shaft end to the steering column ball stud, and secure it with the retainer.
    Posted by ChevyPartsGiant Specialist
    See expert answers on similar Shift Cable
    If you have any questions about this product, please don't hesitate to ask us. We will be happy to help you!

OEM GM 26082803, Excellent Performance and Perfect Fitment

To ensure reliability, purchase GM part # 26082803 Parking Brake Cable. It is sometimes referred to as GM Shift Cable. Choosing OEM parts is the optimal decision for guaranteeing superior quality and perfect performance. These components undergo stringent quality checks and are carefully constructed to comply with GM's factory specifications, ensuring a smooth installation process.

ChevyPartsGiant.com is a leading supplier of genuine GM parts such as GM 26082803 Parking Brake Cable. Our website boasts an extensive inventory of OEM GM parts, available at highly competitive prices in the market. Should you require any new genuine GM parts, rest assured we will deliver them swiftly and efficiently to your doorstep. Furthermore, all our parts come with the assurance of a manufacturer's warranty. For detailed Chevy parts information, click here.
Choose ChevyPartsGiant for discounted prices, exceptional service and fast delivery