Make sure this part fits

GM 21997874
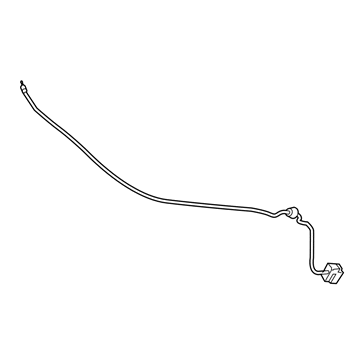
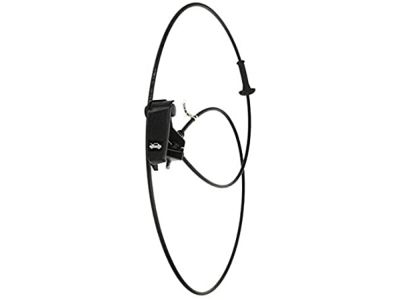
Release Cable

2002-2009 GM

Customer Questions & Expert Answers (10)
GM 21997874 Release Cable
  • Part Description
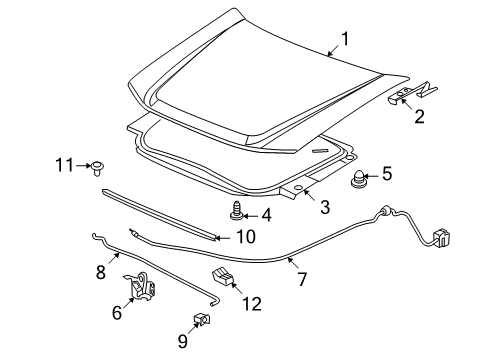
    Cable, Hood Latch; Hood Release Cable
  • Replaces
    15160712
  • Manufacturer
    General Motors
Make sure this part fits
$39.07 MSRP: $61.16
You Save: $22.09 (37%)
Ships in 1-3 Business Days
1
ADD TO CART
  • Related Parts
  • Product Specifications
  • Vehicle Fitment
  • Customer Questions & Expert Answers
  • Product Specifications

    BrandGenuine GM
    Manufacturer Part Number21997874
    Part DescriptionCable, Hood Latch; Hood Release Cable
    Item Dimensions10.2 x 10.1 x 4.2 inches
    Item Weight2.30 Pounds
    ConditionNew
    Fitment TypeDirect Replacement
    Replaces15160712
    ManufacturerGeneral Motors
    SKU21997874
    WarrantyThis genuine GM part is guaranteed by GM's factory warranty.
    Shipping & ReturnShipping Policy Return Policy
    Warning: California's Proposition 65
  • Vehicle Fitment

    Year Make Model Trim Engine
    2004-2007 Buick RainierCXL, CXL Plus6 Cyl 4.2 L GAS, 8 Cyl 5.3 L GAS
    2003-2006 Chevrolet SSRBase8 Cyl 5.3 L GAS, 8 Cyl 6.0 L GAS
    2002-2009 Chevrolet TrailblazerBase, LS, LT, LTZ, North Face, SS6 Cyl 4.2 L GAS, 8 Cyl 5.3 L GAS, 8 Cyl 6.0 L GAS
    2002-2006 Chevrolet Trailblazer EXTLS, LT, North Face6 Cyl 4.2 L GAS, 8 Cyl 5.3 L GAS
    2002-2009 GMC EnvoyDenali, SLE, SLT6 Cyl 4.2 L GAS, 8 Cyl 5.3 L GAS
    2002-2006 GMC Envoy XLDenali, SLE, SLT6 Cyl 4.2 L GAS, 8 Cyl 5.3 L GAS
    2004-2005 GMC Envoy XUVSLE, SLT6 Cyl 4.2 L GAS, 8 Cyl 5.3 L GAS
    2002-2004 Oldsmobile BravadaBase6 Cyl 4.2 L GAS
  • Customer Questions & Expert Answers

    Q:
    Can you help me check if this 21997874 is the right part for my car? Posted by ChevyPartsGiant Specialist
    A:
    Please Select Your Vehicle model to see if part number 21997874 is suitable before ordering.
    Posted by ChevyPartsGiant Specialist
    Q:
    How to replace the Release Hood Cable on Buick Rainier? Posted by Customer
    A:
    Start the cable change process by disconnecting the left front door sill plate followed by left closeout/insulator panel then grille then Hood Latch. First release the Hood Cable from the Hood Latch assembly before attaching mechanic's wire to the outside cable end for later route installation. Free the retaining straps securing the cable to the inner fender then thread the cable toward the outside between the headlamp housing panel and the Radiator plate. Push the bulkhead opening through the vehicle's interior using the cable grommet. Separate the hood release handle from its cowl trim panel attachment nut positions on the left-hand side before unconnecting its cable from the handle itself. The cowl panel and sound insulation area now serve as your cable's entry point. Disconnect the mechanic's wire from the cable position to help in future installation procedures. Pull out the cable from your vehicle's exterior. For cable installation, secure the mechanic's wire to the new cable's outside end to guide it beneath the sound insulation while the exterior section passes through the cowl panel. Please install cable to your release handle before grommetting the cable-fitment to your cowl panel. Set the release handle in the left kick panel while tightening the nut to 7 n.m (62 lb in). Follow previous routing instructions by guiding the cable between the headlamp housing panel and core support then secure it to the inner fender retainers. Attach the cable to the Hood Latch assembly before continuing with Hood Latch installation followed by grille fitting then left closeout/insulator panel and left front door sill plate installation.
    Posted by ChevyPartsGiant Specialist
    Q:
    How to replace the Release Hood Cable on Chevrolet SSR? Posted by Customer
    A:
    Start your Hood Cable replacement process by taking off the left front door sill panel followed by removing the left closeout/insulator panel then moving to the upper grille applique and lastly the engine splash shield. Before beginning the process detach the Hood Latch and pull out the Hood Cable from its position on the Hood Latch assembly. Mark the mechanics wire route for future assembly and secure it to the cable's exterior end. Feed the cable out from between the headlamp panel and Radiator then over the top of the battery tray until the cable grommet exits the bulkhead into the car's interior. You should remove the left side cowl trim panel nut that holds the hood release handle in place and detach the cable from its attachment point. Pull the cable through the bulkhead before extracting the mechanics wire from the cable which should remain in position for support. Proceed to remove the cable from the vehicle. The installation begins by securing the mechanics wire to the outside of the new cable which directs the wire underneath the sound insulation and through the bulkhead. The cable needs installation at the release handle before placing the grommet at the bulkhead. Securely tighten the nut to 7 n.m (62 lb in) on the release handle before reattaching it to the left side cowl panel. Route the cable according to the initial steps starting above the battery tray before attaching it to the retainers next to the wheelhouse and the hood hold open rod bracket. Follow this installation order: install the cable to the Hood Latch assembly and then the Hood Latch followed by the engine splash shield while next installing the upper grille applique before you reach the left closeout/insulator panel followed by the left front door sill panel.
    Posted by ChevyPartsGiant Specialist
    Q:
    How to replace the Hood Cable for the Primary Latch Release on GMC Envoy? Posted by Customer
    A:
    Start the hood primary latch cable replacement by removing the left front door sill plate and then the left closeout/insulator panel before moving on to the grille. Separate the Hood Latch and detach the Hood Cable from the Hood Latch assembly. Mark down the cable route while affixing mechanic's wire to the outer conclusion of the cable. Lift the inner fender retainers which hold the cable next to the headlamp housing panel and Radiator before pulling out the cable between them. Push the grommet casing through the bulkhead before removing the hood release handle attachment nut from its position on the left cowl trim panel to detach the cable from the release handle. Pull the cable through the cowl panel opening behind the sound insulation while detaching the mechanic's wire for easy installation guidance. The cable needs extraction from the automobile. Use the mechanic's wire to lead the new cable underneath sound insulation before passing through the cowl panel from its exterior side. Connect the cable to the handle but install the grommet onto the panel before attaching it to the cowl. Secure the release handle in its left side kick panel installation by using the nut which needs to be tightened at 7 nm (62 lb in). Follow the established cable path to the inner fender retainers where you should attach the cable before installing it to the Hood Latch assembly. Finish the installation by reattaching the Hood Latch followed by the grille and then the left closeout/insulator panel and left front door sill plate.
    Posted by ChevyPartsGiant Specialist
    Q:
    How to replace the Hood Cable on GMC Envoy? Posted by Customer
    A:
    In order to replace the Hood Cable, start by taking out the left front door sill plate, then the left closeout/insulator panel and finally the grille. Second, remove the Hood Latch latch and pull down the Hood Cable from the Hood Latch assembly. Add a section of mechanic's wire to the outer end of the cable while remembering the arrangements for later usage, and loosen the retainers handy holding the cable and the inner fender. Feed the cable from between the headlamp housing panel and the Radiator, then push the cable grommet into the panels of the vehicle' interior. Remove the nut that hooks the hood release handle to the cowl trim panel on the left hand side, then remove the cable from the release handle and pull it through the panel cowl, to remove it at the back of sound insulation. Disconnect the mechanic's wire from the cable and leave it in place for an installation assist and remove the cable from the vehicle. For installation, the mechanic's wire should be connected to the external part of the new cable, and follow it on through the sound insulation, coming out through the cowl panel on the exterior part. Mount the cable to the release handle and seat the cable grommet to the cowl panel. Replace the release handle back into the left side kick panel and fasten it with the nut tight to 7 n.m (62 lb in). Mock the cable through the previous mentioned path between the head lamp housing panel to the core supports, secure it to the retainers on the inner fender, and attach it to the Hood Latch assembly. Lastly, replace the Hood Latch, grille, left closeout/insulator panel and left front door sill plate.
    Posted by ChevyPartsGiant Specialist
    Q:
    How to replace the Hood Cable on Chevrolet Trailblazer? Posted by Customer
    A:
    The Hood Cable replacement requires starting with the removal of left front door sill, left closeout/insulator panel and grille and Hood Latch. Lift the Hood Latch assembly cable to detach it then thread a mechanic's wire beyond that cable endpoint for later reinstallation by marking the cable's route. Before moving forward you must remove the cable retention from the hood hold open rod bracket and pass the cable through the Radiator and headlamp panel gap to find its position across the battery tray. Force the bulkhead cable grommet through to reach the interior section of the vehicle. Pull the hood release handle's cable through the bulkhead after detaching it from the left cowl trim panel nut and releasing the handle from the hood mechanism. The mechanic's wire will stay linked to the cable to steer installation while remaining attached to its current location. Attach the mechanic's wire at the new cable's outer end then position the wire to lead the cable beneath the sound insulation before routing the outer segment through the bulkhead hole. Wire the cable onto the release handle before installing the cable grommet onto the bulkhead. Fasten the release handle through the left side cowl panel using the nut tightened to 7 n.m (62 lb in). Guide the cable through the cord guide path above the battery tray and between the front Radiator and headlamp panel assembly before routing it to the wheelhouse retainers and hood hold open rod bracket. The installation sequence includes cable attachment points to Hood Latch assembly followed by Hood Latch then front grille and left closeout/insulator panel before left front door sill panel.
    Posted by ChevyPartsGiant Specialist
    Q:
    What is the next step after removing the panels for the 2004 Chevrolet SSR? Posted by Customer
    A:
    Remove the hood latch and release the hood latch release cable from the hood latch assembly.
    Posted by ChevyPartsGiant Specialist
    See expert answers on similar Hood Cable
    Q:
    How should the cable be routed after securing the release handle for the 2006 Chevrolet SSR? Posted by Customer
    A:
    Route the cable over the battery tray and between the headlamp panel assembly and the radiator.
    Posted by ChevyPartsGiant Specialist
    See expert answers on similar Hood Cable
    Q:
    What should be done after passing the new cable through the bulkhead for the 2003 Chevrolet SSR? Posted by Customer
    A:
    Install the cable to the release handle and seat the cable grommet to the bulkhead.
    Posted by ChevyPartsGiant Specialist
    See expert answers on similar Hood Cable
    Q:
    What should be done with the cable after securing the release handle for the 2008 GMC Envoy? Posted by Customer
    A:
    Route the cable as previously noted between the headlamp housing panel and the core support, attach it to the retainers on the inner fender, and connect it to the hood latch assembly.
    Posted by ChevyPartsGiant Specialist
    See expert answers on similar Hood Cable
    If you have any questions about this product, please don't hesitate to ask us. We will be happy to help you!

OEM GM 21997874, Excellent Performance and Perfect Fitment

To ensure reliability, purchase GM part # 21997874 Release Cable. It is sometimes referred to as GM Hood Cable. Choosing OEM parts is the optimal decision for guaranteeing superior quality and perfect performance. These components undergo stringent quality checks and are carefully constructed to comply with GM's factory specifications, ensuring a smooth installation process.

ChevyPartsGiant.com is a leading supplier of genuine GM parts such as GM 21997874 Release Cable. Our website boasts an extensive inventory of OEM GM parts, available at highly competitive prices in the market. Should you require any new genuine GM parts, rest assured we will deliver them swiftly and efficiently to your doorstep. Furthermore, all our parts come with the assurance of a manufacturer's warranty. For detailed Chevy parts information, click here.
Choose ChevyPartsGiant for discounted prices, exceptional service and fast delivery