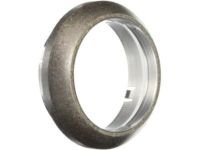
Make sure this part fits

GM 19420109
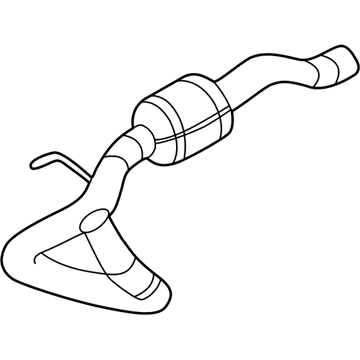
Catalytic Converter

2001-2007 GM

Customer Questions & Expert Answers (22)
GM 19420109 Catalytic Converter
  • Part Description
    Converter Assembly, 3Way Catalytic (W/Exhaust Manifold Pipe) "Kit"
  • Replaces
    10395214, 15755464, 15754087
  • Manufacturer
    General Motors
Make sure this part fits
$933.52 MSRP: $1389.07
You Save: $455.55 (33%)
Core Charge: $400.00
Ships in 1-3 Business Days
1
ADD TO CART
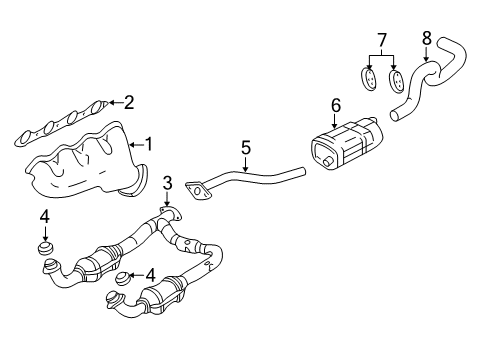
  • Related Parts
  • Product Specifications
  • Vehicle Fitment
  • Customer Questions & Expert Answers
  • Product Specifications

    BrandGenuine GM
    Manufacturer Part Number19420109
    Part DescriptionConverter Assembly, 3Way Catalytic (W/Exhaust Manifold Pipe) "Kit"
    Other NamesFront Pipe; Converter & Pipe; Converter, Catalytic Converter; Converter, Exhaust Pipe
    ConditionNew
    Replaces10395214, 15755464, 15754087
    ManufacturerGeneral Motors
    SKU19420109
    WarrantyThis genuine GM part is guaranteed by GM's factory warranty.
    Shipping & ReturnShipping Policy Return Policy
    Warning: California's Proposition 65
  • Vehicle Fitment

    Year Make Model Trim Engine
    2002-2006 Cadillac EscaladeBase8 Cyl 5.3 L GAS, 8 Cyl 6.0 L GAS
    2003-2006 Cadillac Escalade ESVBase8 Cyl 6.0 L GAS
    2006, 2002 Cadillac Escalade EXTBase8 Cyl 6.0 L GAS
    2006, 2002 Chevrolet Avalanche 2500Base, LS, LT8 Cyl 8.1 L GAS
    2006-2007, 2003 Chevrolet Silverado 1500LT, LTZ, SS8 Cyl 6.0 L GAS
    2007 Chevrolet Silverado 1500 ClassicLT, SS8 Cyl 6.0 L GAS
    2006, 2003 Chevrolet Silverado 1500 HDLS, LT8 Cyl 6.0 L GAS
    2007 Chevrolet Silverado 1500 HD ClassicLT8 Cyl 6.0 L GAS
    2003 Chevrolet Silverado 2500Base, LS, LT8 Cyl 6.0 L GAS
    2007, 2003 Chevrolet Silverado 2500 HDBase, LS, LT, LTZ, WT8 Cyl 6.0 L CNG, 8 Cyl 6.0 L GAS
    View More
  • Customer Questions & Expert Answers

    Q:
    Is this 19420109 designed for my car? Posted by ChevyPartsGiant Specialist
    A:
    Please Select Your Vehicle model to see if part number 19420109 is suitable before ordering.
    Posted by ChevyPartsGiant Specialist
    Q:
    How to replace the exhaust pipe on 6.0L and 8.1L engines on Cadillac Escalade EXT? Posted by Customer
    A:
    Vehicle elevation and correct support must be accomplished as the first step for replacing exhaust manifold pipes on 6.0l and 8.1l engines. A suitable transmission jack will support the transmission for you to remove the transmission mount to transmission support nuts then lift the transmission off its support. Start by removing the transmission support crossmember bolts before taking out the crossmember then you should detach the exhaust Muffler. The removal process starts with disconnecting the clip from both engine harness and Oxygen Sensor pigtail before separating the connector position assurance (CPA) retainer and Oxygen Sensor electrical connector to remove the Oxygen Sensor. Lower the transmission with the jack and remove the exhaust manifold pipe by discarding its old seal while disconnecting the exhaust manifold pipe nuts. A fresh exhaust manifold pipe seal should be positioned onto the exhaust manifold pipe before securing the pipe through installation. After lifting the transmission with the jack, ensure the exhaust manifold pipe nuts reach 50 nm torque (39 ft. Lbs.). Apply gm p/n 12377953 anti-seize compound or equivalent to the threads of a reused Oxygen Sensor before tightening it to 42 nm (31 ft. Lbs.). The Oxygen Sensor electrical connector and cpa retainer must be connected before installing the clip that wraps around the engine harness and Oxygen Sensor pigtail. Begin by installing the transmission support crossmember with its bolts to a torque of 95 nm (70 ft. Lbs.). After installing the exhaust Muffler you can proceed with putting back the transmission support crossmember and tightening its bolts to 95 nm (70 ft. Lbs.). Screw the transmission mount onto the transmission support nuts until they reach 40 nm (30 ft. Lbs.). Follow the last step by taking away the transmission jack before dropping the vehicle to the floor.
    Posted by ChevyPartsGiant Specialist
    Q:
    How to replace the exhaust pipe on 6.0L and 8.1L engines on Cadillac Escalade ESV? Posted by Customer
    A:
    Vehicle elevation and correct support must be accomplished as the first step for replacing exhaust manifold pipes on 6.0l and 8.1l engines. A suitable transmission jack will support the transmission for you to remove the transmission mount to transmission support nuts then lift the transmission off its support. Start by removing the transmission support crossmember bolts before taking out the crossmember then you should detach the exhaust Muffler. The removal process starts with disconnecting the clip from both engine harness and Oxygen Sensor pigtail before separating the connector position assurance (CPA) retainer and Oxygen Sensor electrical connector to remove the Oxygen Sensor. Lower the transmission with the jack and remove the exhaust manifold pipe by discarding its old seal while disconnecting the exhaust manifold pipe nuts. A fresh exhaust manifold pipe seal should be positioned onto the exhaust manifold pipe before securing the pipe through installation. After lifting the transmission with the jack, ensure the exhaust manifold pipe nuts reach 50 nm torque (39 ft. Lbs.). Apply gm p/n 12377953 anti-seize compound or equivalent to the threads of a reused Oxygen Sensor before tightening it to 42 nm (31 ft. Lbs.). The Oxygen Sensor electrical connector and cpa retainer must be connected before installing the clip that wraps around the engine harness and Oxygen Sensor pigtail. Begin by installing the transmission support crossmember with its bolts to a torque of 95 nm (70 ft. Lbs.). After installing the exhaust Muffler you can proceed with putting back the transmission support crossmember and tightening its bolts to 95 nm (70 ft. Lbs.). Screw the transmission mount onto the transmission support nuts until they reach 40 nm (30 ft. Lbs.). Follow the last step by taking away the transmission jack before dropping the vehicle to the floor.
    Posted by ChevyPartsGiant Specialist
    Q:
    How to replace the catalytic converter on 6.01- and 8.11- engines on Chevrolet Avalanche 2500? Posted by Customer
    A:
    To change the Catalytic Converter for 6.01- and 8.11- engines, firstly, raise and support the vehicle. The engine shield bolts and shield if a need arises followed by oil pan skid plate bolts and plate if necessary. Next, remove the Muffler. Remove the connector position assurance (CPA) retainers and the Oxygen Sensor electrical connectors (1, 2). Discard the left exhaust manifold pipe nuts and then remove the Catalytic Converter, sliding the Catalytic Converter hanger off the exhaust pipe hanger bracket. Replace the Catalytic Converter and apply anti-seize compound gm pn 12377953 or equivalent to the threads of the old oxygen sensors and install the ones previously installed, tightening to 42 nm (31 ft. Lbs). Install a new exhaust seal to the exhaust manifold, followed by Catalytic Converter, making sure the hanger slides into the exhaust pipe hanger bracket. Reinstall the left exhaust manifold pipe nuts and tighten them to 50 nm (39 ft. Lbs.) of torque, connect the bank one o2 sensor electrical connectors (1, 2) and the cpa retainers. The Muffler, oil pan skid plate and bolts if necessary must be reinstalled (20 Nm (15 ft. Lbs.)), also the engine shield and bolts if necessary (same force: 20 Nm (15 ft.lbs.)) must be reinstalled. Finally, lower the vehicle.
    Posted by ChevyPartsGiant Specialist
    Q:
    How to replace the exhaust pipe on 6.01 and 8.1 engines on Chevrolet Avalanche 2500? Posted by Customer
    A:
    The replacement of exhaust manifold pipes on engines 6.01 and 8.1 begins with proper support of the vehicle during the work. After you remove the skid plate bolts of the oil pan and the plate itself, you should use a transmission jack to support the transmission. After removing the transmission mount to transmission support nuts, we should raise the transmission off its support component. Disassemble the bolts that hold the transmission support crossmember as well as the complete crossmember removal. First, remove any necessity of exhaust Muffler, then detach the engine harness clip with the Oxygen Sensor pigtail followed by disconnecting the connector position assurance (CPA) retainer and Oxygen Sensor electrical connector. The maintenance process requires Oxygen Sensor removal together with exhaust manifold pipe nuts and the pipe itself until the hanger slides from its bracket and disposal of the exhaust manifold pipe seal. Installation requires users to first position a fresh exhaust manifold pipe seal onto the exhaust manifold pipe followed by fitting the pipe while adding lubricant to the Exhaust Pipe hanger bracket for aid in installation. After placing the exhaust manifold pipe hanger within the bracket, you should install the exhaust manifold pipe nuts before torquing them to 50 nm (39 ft. lbs.). The replacement exhaust manifold pipe requires anti-seize compound GM P/N 12377953 or equivalent, which should be applied to threads of the old Oxygen Sensor before installing with a torque of 42 nm (31 ft. lbs.). The procedure for uninstalled pipes involves connecting the Oxygen Sensor electrical connector while also installing the CPA retainer and applying the clip over the engine harness and Oxygen Sensor pigtail. After installing the exhaust Muffler, you should reinstall the transmission support crossmember and bolts while torquing them to 70 nm (52 ft. lbs.). After lowering the transmission onto its support, you should mount the transmission mount at the transmission support nuts while applying 40 nm (30 ft. lbs.) torque. Replace the transmission jack while reinstalling the oil pan skid plate with its bolts to a torque of 20 nm (15 ft. lbs.). After that, lower the vehicle into position.
    Posted by ChevyPartsGiant Specialist
    Q:
    How to replace the exhaust pipe on 6.01 and 8.1 engines on Chevrolet Suburban 2500? Posted by Customer
    A:
    The replacement of exhaust manifold pipes on engines 6.01 and 8.1 begins with proper support of the vehicle during the work. After you remove the skid plate bolts of the oil pan and the plate itself, you should use a transmission jack to support the transmission. After removing the transmission mount to transmission support nuts, we should raise the transmission off its support component. Disassemble the bolts that hold the transmission support crossmember as well as the complete crossmember removal. First, remove any necessity of exhaust Muffler, then detach the engine harness clip with the Oxygen Sensor pigtail followed by disconnecting the connector position assurance (CPA) retainer and Oxygen Sensor electrical connector. The maintenance process requires Oxygen Sensor removal together with exhaust manifold pipe nuts and the pipe itself until the hanger slides from its bracket and disposal of the exhaust manifold pipe seal. Installation requires users to first position a fresh exhaust manifold pipe seal onto the exhaust manifold pipe followed by fitting the pipe while adding lubricant to the Exhaust Pipe hanger bracket for aid in installation. After placing the exhaust manifold pipe hanger within the bracket, you should install the exhaust manifold pipe nuts before torquing them to 50 nm (39 ft. lbs.). The replacement exhaust manifold pipe requires anti-seize compound GM P/N 12377953 or equivalent, which should be applied to threads of the old Oxygen Sensor before installing with a torque of 42 nm (31 ft. lbs.). The procedure for uninstalled pipes involves connecting the Oxygen Sensor electrical connector while also installing the CPA retainer and applying the clip over the engine harness and Oxygen Sensor pigtail. After installing the exhaust Muffler, you should reinstall the transmission support crossmember and bolts while torquing them to 70 nm (52 ft. lbs.). After lowering the transmission onto its support, you should mount the transmission mount at the transmission support nuts while applying 40 nm (30 ft. lbs.) torque. Replace the transmission jack while reinstalling the oil pan skid plate with its bolts to a torque of 20 nm (15 ft. lbs.). After that, lower the vehicle into position.
    Posted by ChevyPartsGiant Specialist
    Q:
    How to replace the catalytic converter on 4.3L, 4.8L, and 5.3L engines on Chevrolet Silverado 1500 Classic? Posted by Customer
    A:
    To replace 4.3l, 4.8l, and 5.3l engines' Catalytic Converter, first raise and supporting the vehicle. If present, unclip the Oxygen Sensor connection from the floor reinforcement and disconnect the Oxygen Sensor electric connector and unclip the clips from the frame. Pull off the connector position assurance (CPA) retainers and Oxygen Sensor electrics. Unclip the Oxygen Sensor electrical connectors at the hose clip and transmission crossmember, and remove the cpa retainers and the Oxygen Sensor electrical connectors (1, 2). Remove the left and right exhaust manifold pipe nuts, nuts to the exhaust muffler and then remove the Catalytic Converter. If needed, take out the oxygen sensors. For installation, as needed, install the oxygen sensors and apply the anti-seize compound gm p/n 12377953 or equivalent to the threads of the old oxygen sensors before installation and tight to 42 nm (31ft. Lbs.). Replace new exhaust manifold pipe seals to the exhaust manifolds and then replace the right and left exhaust manifold pipe nuts neatly to 50 nm (39 ft. Lbs.). Mount the exhaust muffler nuts and tighten them to 40 nm (30 ft. Lbs.). Connect the Oxygen Sensor electrical connectors (1, 2) and retainers to the cpa retainers and clip the Oxygen Sensor electrical connectors to the hose clip and transmission cross member. Connect the Oxygen Sensor electrical connectors and cpa retainers, as well as install the clip around the engine harness and the Oxygen Sensor pigtail and connect the Oxygen Sensor electrical connector. If available, clip the Oxygen Sensor connection to the floor reinforcement, despite lowering the vehicle.
    Posted by ChevyPartsGiant Specialist
    Q:
    How to replace the catalytic converter on 4.8L, 5.3L, 6.0L, or 6.2L engines on Chevrolet Silverado 1500? Posted by Customer
    A:
    A vehicle repair process starts with suspension and support followed by skid plate bolt removal and optional skid plate removal and finally removing the transmission crossmember. First disconnect the right front heated Oxygen Sensor (HO2S) electrical connector from the engine wiring harness before removing the right front and rear connector position assurance (CPA) retainers. First detach and clip the right rear ho2s electrical connector before moving onto the left rear ho2s connector. Vehicles with 4l60-e/4l70-e automatic transmissions require left front cpa retainer removal for access to disconnect the left front ho2s electrical connector. There are two different sets of instructions depending on which model of vehicle you have. For vehicles under the 1500 variant you need to remove the Catalytic Converter to Muffler nuts whereas 2500/3500 series owners should remove Muffler to Catalytic Converter nuts instead. To access the exhaust components on 2500/3500 series vehicles, users should first disassemble the Muffler to Catalytic Converter nuts. First disconnect the ho2s and the Catalytic Converter to Exhaust Manifold nuts before separating the Catalytic Converter assembly from both the exhaust manifolds and Muffler. To replace a Catalytic Converter assembly it's necessary to remove both exhaust seals and ho2s components from the assembly. Anti-seize compound gm p/n 12377953 should be applied to the ho2s threads when using old sensors before installing the ho2s to the Catalytic Converter assembly at 42 n.m (31 lb ft) torque. New exhaust seals must be installed if needed and the Catalytic Converter assembly requires attachment to both the Muffler and exhaust manifolds with manifold nut torques set to 50 n.m (37 lb ft). Install the ho2s before applying the required nuts according to the vehicle's series designation (2500/3500 or 1500). Torque all nuts to 45 n.m (33 lb ft). Vehicle owners with 4l60-e/4l70-e automatic transmission need to clip the ho2s electrical connector before wiring the engine harness to the device then install both cpa retainers. Connect the left and right rear ho2s connectors once more before you reattach the transmission crossmember and oil pan skid plate by tightening bolts to 28 n.m (21 lb ft) prior to vehicle floor lowering.
    Posted by ChevyPartsGiant Specialist
    Q:
    How to replace the catalytic converter on a 4.3L engine on GMC Sierra 1500? Posted by Customer
    A:
    A 4.3l engine requires three steps before replacing the Catalytic Converter including raising and supporting the vehicle followed by skid plate and transmission crossmember removal. The right front connector position assurance (CPA) retainer needs removal before disconnecting the right front heated Oxygen Sensor (HO2S) electrical connector from the engine wiring harness. Initial steps require disconnecting the right rear cpb retainer then removing the engine wiring harness electrical connector from right rear ho2s electrical connector before extracting the right rear ho2s clip from the engine harness clip. Continue this procedure for the left rear and left front ho2s connectors by removing both cpa retainers and their associated clips. First disconnect all required sensors before you remove the nuts from the Catalytic Converter to Muffler interface and the Catalytic Converter to Exhaust Manifold interface. Finally, separate the Catalytic Converter assembly from the exhaust manifolds and Muffler. When you plan to replace the entire Catalytic Converter assembly make sure to remove the exhaust seals along with sensors from the assembly. Before you install the ho2s to the Catalytic Converter assembly, treat the ho2s threads with anti-seize compound gm p/n 12377953 then tighten everything to 42 n.m (31 lb ft). A new exhaust seal installation may be necessary before you fasten the Catalytic Converter assembly to Muffler and exhaust manifolds by torquing nuts to 50 n.m (37 lb ft) and 45 n.m (33 lb ft). When installing the left front ho2s on 4wd vehicles connect the engine wiring harness electrical connector to the operating sensor then install the retainer clamp before fastening the ho2s connector. The right side sensor connection process continues while the transmission crossmember is installed with the oil pan skid plate positioned correctly before tightening its bolts to 28 n.m (21 lb ft). Once completed, lower the vehicle.
    Posted by ChevyPartsGiant Specialist
    Q:
    How to replace the catalytic converter on 6.0L and 8.1L engines on GMC Yukon XL 2500? Posted by Customer
    A:
    To replace Catalytic Converter on 6.0l and 8.1l engines, lift and support vehicle and remove Muffler. Remove the retainer and the pipeline heater from the connector position assurance (CPA) (1, 2). After that, unfasten the left Exhaust Manifold pipe nuts and the Catalytic Converter, sliding the Catalytic Converter hanger out of the position of the exhaust pipe hanger bracket. Remove the oxygen sensors if replacing the Catalytic Converter. While installing a new Catalytic Converter apply some anti-seize compound gm p/n 12377953 or similar provided to the thread of the old oxygen sensors and install them then tighten up to 42 nm (31 ft. Lbs.). Replace a new seal to the Exhaust Manifold, then you can install the Catalytic Converter by sliding the hanger into the exhaust pipe hanger bracket. Reinstall the left Exhaust Manifold pipe nuts and tighten them up to 50 nm (39 ft. Lbs.) and reconnect the Oxygen Sensor electrical connectors (1, 2) as well as the cpa retainers. At last, reinstall the Muffler and lower the vehicle.
    Posted by ChevyPartsGiant Specialist
    Q:
    How to replace the exhaust pipe on 6.0L and 8.1L engines on GMC Yukon XL 2500? Posted by Customer
    A:
    Vehicle elevation and correct support must be accomplished as the first step for replacing exhaust manifold pipes on 6.0l and 8.1l engines. A suitable transmission jack will support the transmission for you to remove the transmission mount to transmission support nuts then lift the transmission off its support. Start by removing the transmission support crossmember bolts before taking out the crossmember then you should detach the exhaust Muffler. The removal process starts with disconnecting the clip from both engine harness and Oxygen Sensor pigtail before separating the connector position assurance (CPA) retainer and Oxygen Sensor electrical connector to remove the Oxygen Sensor. Lower the transmission with the jack and remove the exhaust manifold pipe by discarding its old seal while disconnecting the exhaust manifold pipe nuts. A fresh exhaust manifold pipe seal should be positioned onto the exhaust manifold pipe before securing the pipe through installation. After lifting the transmission with the jack, ensure the exhaust manifold pipe nuts reach 50 nm torque (39 ft. Lbs.). Apply gm p/n 12377953 anti-seize compound or equivalent to the threads of a reused Oxygen Sensor before tightening it to 42 nm (31 ft. Lbs.). The Oxygen Sensor electrical connector and cpa retainer must be connected before installing the clip that wraps around the engine harness and Oxygen Sensor pigtail. Begin by installing the transmission support crossmember with its bolts to a torque of 95 nm (70 ft. Lbs.). After installing the exhaust Muffler you can proceed with putting back the transmission support crossmember and tightening its bolts to 95 nm (70 ft. Lbs.). Screw the transmission mount onto the transmission support nuts until they reach 40 nm (30 ft. Lbs.). Follow the last step by taking away the transmission jack before dropping the vehicle to the floor.
    Posted by ChevyPartsGiant Specialist
    Q:
    How to replace the catalytic converter on GMC Yukon XL 1500? Posted by Customer
    A:
    To replace the Catalytic Converter, first lift and properly suspend the vehicle. If available, unplug the Oxygen Sensor connection from the floor reinforcement and unplug the Oxygen Sensor electrical connector. Remove the sensor clips off of the frame, disconnect connector position assurance retainers, and disconnect Oxygen Sensor electrical connectors. Unclip the electrical connectors of the oxygen sensors from the hose clip and the transmission crossmember and disconnect the cpa retainers and the Oxygen Sensor electrical connectors (1,2). Loosen the left and right exhaust manifold pipe nuts, exhaust muffler nuts, and remove the Catalytic Converter. If necessary, remove the oxygen sensors. Installation should top off fluids, install gas sensors after applying anti-seize compound such as gm p/n 12377953 or equivalent to the threads of old gas sensors and tighten to 42 nm (31 ft. Lbs.). Install the Catalytic Converter and new exhaust manifold pipe seals to the exhaust manifolds. Mount the right and left exhaust manifold pipe nuts until they are tight and afterward tighten them up to 50 nm (39 ft. Lbs). Attach the exhaust muffler nuts by tightening 40 nm (30 ft. Lbs.). Connect the Oxygen Sensor's electrical connectors (1, 2) and cpa retainers followed by clipming the oxygen sensors' electrical connectors to the hose clip and the transmission crossmember. Connect the Oxygen Sensor electrical connectors and cpa retainers, install the clip around the engine harness and the Oxygen Sensor pig tail, and the connect the Oxygen Sensor electrical connector. If available, have the Oxygen Sensor connection clipped to the floor reinforcement and drop the vehicle.
    Posted by ChevyPartsGiant Specialist
    Q:
    What should be applied to the threads of the old oxygen sensors during installation for the 2007 Chevrolet Silverado 3500 Classic? Posted by Customer
    A:
    Apply anti-seize compound GM P/N 12377953 or equivalent.
    Posted by ChevyPartsGiant Specialist
    See expert answers on similar Catalytic Converter
    Q:
    What is the next step after connecting the oxygen sensor for the 2007 Chevrolet Silverado 3500 Classic? Posted by Customer
    A:
    Install the exhaust pipe/catalytic converter, followed by the exhaust system hangers.
    Posted by ChevyPartsGiant Specialist
    See expert answers on similar Exhaust Pipe
    Q:
    What should be done after positioning the exhaust pipe to the turbocharger for the 2006 Chevrolet Silverado 1500? Posted by Customer
    A:
    Position the exhaust pipe with a NEW gasket to the exhaust manifold, aligning the tab to face outward, and loosely install the bolts.
    Posted by ChevyPartsGiant Specialist
    See expert answers on similar Exhaust Pipe
    Q:
    What is the next step after disconnecting the oxygen sensor electrical connectors for the 2007 GMC Sierra 1500 Classic? Posted by Customer
    A:
    Remove the left and right exhaust manifold pipe nuts, followed by the exhaust muffler nuts, and then remove the catalytic converter.
    Posted by ChevyPartsGiant Specialist
    See expert answers on similar Catalytic Converter
    Q:
    What is the first step to replace the exhaust manifold pipe on 6.0L, 6.6L, and 8.1L engines for the 2006 GMC Sierra 1500? Posted by Customer
    A:
    First, raise and support the vehicle, then support the transmission with a suitable transmission jack.
    Posted by ChevyPartsGiant Specialist
    See expert answers on similar Exhaust Pipe
    Q:
    What should be done after tightening the exhaust components for the 2007 GMC Sierra 3500 Classic? Posted by Customer
    A:
    Position the transmission support crossmember and install the bolts, tightening them to 95 N.m (70 lb ft).
    Posted by ChevyPartsGiant Specialist
    See expert answers on similar Exhaust Pipe
    Q:
    How do you disconnect the oxygen sensor for the 2006 GMC Sierra 1500? Posted by Customer
    A:
    Disconnect the oxygen sensor electrical connector and remove the oxygen sensor clips from the frame.
    Posted by ChevyPartsGiant Specialist
    See expert answers on similar Catalytic Converter
    Q:
    What is the first step to replace the exhaust manifold pipe on 6.0L and 8.1L engines for the 2006 GMC Yukon? Posted by Customer
    A:
    Raise and support the vehicle appropriately.
    Posted by ChevyPartsGiant Specialist
    See expert answers on similar Exhaust Pipe
    Q:
    What are the last steps to finish the job for the 2007 GMC Sierra 3500 Classic? Posted by Customer
    A:
    Lower the transmission onto the support, install the transmission mount to transmission support nuts, tightening them to 95 N.m (70 lb ft), remove the support from the transmission, and finally lower the vehicle.
    Posted by ChevyPartsGiant Specialist
    See expert answers on similar Catalytic Converter
    Q:
    What should be done for the 2500/3500 series after attaching the catalytic converter for the 2007 GMC Sierra 3500 Classic? Posted by Customer
    A:
    Reinstall the HO2S, and install the muffler to catalytic converter nuts, tightening them to 45 N.m (33 lb ft).
    Posted by ChevyPartsGiant Specialist
    See expert answers on similar Catalytic Converter
    If you have any questions about this product, please don't hesitate to ask us. We will be happy to help you!

OEM GM 19420109, Excellent Performance and Perfect Fitment

To ensure reliability, purchase GM part # 19420109 Catalytic Converter. It is sometimes referred to as GM Catalytic Converter, GM Exhaust Pipe. Choosing OEM parts is the optimal decision for guaranteeing superior quality and perfect performance. These components undergo stringent quality checks and are carefully constructed to comply with GM's factory specifications, ensuring a smooth installation process.

ChevyPartsGiant.com is a leading supplier of genuine GM parts such as GM 19420109 Catalytic Converter. Our website boasts an extensive inventory of OEM GM parts, available at highly competitive prices in the market. Should you require any new genuine GM parts, rest assured we will deliver them swiftly and efficiently to your doorstep. Furthermore, all our parts come with the assurance of a manufacturer's warranty. For detailed Chevy parts information, click here.
Choose ChevyPartsGiant for discounted prices, exceptional service and fast delivery