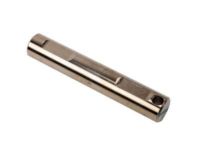
Make sure this part fits

GM 19244836
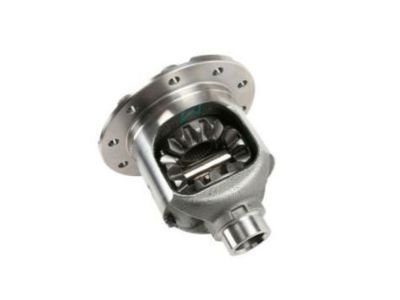
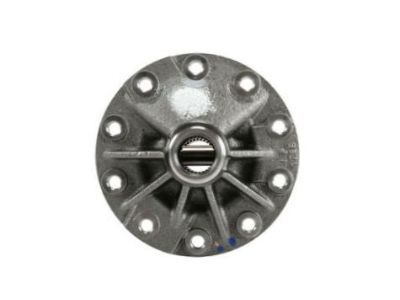
Differential Case, Front Rear

1999-2011 GM

Customer Questions & Expert Answers (7)
GM 19244836 Differential Case, Front Rear
  • Part Description
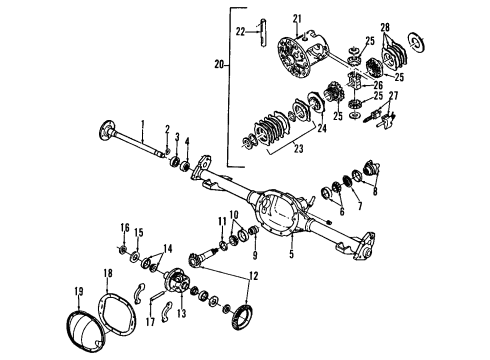
    Case, Front/Rear Differential And Planet
  • Position
    Front Rear
  • Replaces
    12471540, 26060748
  • Manufacturer
    General Motors
Make sure this part fits
$673.85 MSRP: $1065.05
You Save: $391.20 (37%)
1
ADD TO CART
  • Related Parts
  • Product Specifications
  • Vehicle Fitment
  • Customer Questions & Expert Answers
  • Product Specifications

    BrandGenuine GM
    Manufacturer Part Number19244836
    Part DescriptionCase, Front/Rear Differential And Planet
    Other NamesDifferential
    Item Dimensions15.2 x 12.3 x 11.7 inches
    Item Weight17.30 Pounds
    PositionFront Rear
    ConditionNew
    Fitment TypeDirect Replacement
    Replaces12471540, 26060748
    ManufacturerGeneral Motors
    SKU19244836
    WarrantyThis genuine GM part is guaranteed by GM's factory warranty.
    Shipping & ReturnShipping Policy Return Policy
    Warning: California's Proposition 65
  • Vehicle Fitment

    Year Make Model Trim Engine
    2004-2007 Buick RainierCXL, CXL Plus6 Cyl 4.2 L GAS, 8 Cyl 5.3 L GAS
    2002-2008 Cadillac EscaladeBase, Platinum8 Cyl 5.3 L GAS, 8 Cyl 6.0 L GAS, 8 Cyl 6.2 L GAS
    2003-2006 Cadillac Escalade ESVBase8 Cyl 6.0 L GAS
    2002-2008 Cadillac Escalade EXTBase8 Cyl 6.0 L GAS, 8 Cyl 6.2 L GAS
    2007-2008 Chevrolet AvalancheLS, LT, LTZ8 Cyl 5.3 L FLEX, 8 Cyl 5.3 L GAS, 8 Cyl 6.0 L GAS
    2002-2006 Chevrolet Avalanche 1500Base, LS, LT, North Face, On Road Edition, WBH, Z66, Z718 Cyl 5.3 L FLEX, 8 Cyl 5.3 L GAS
    2002-2006 Chevrolet Avalanche 2500Base, LS, LT8 Cyl 8.1 L GAS
    2000-2005 Chevrolet BlazerBase, LS, LT, Trailblazer, Xtreme, ZR26 Cyl 4.3 L GAS
    2003-2011 Chevrolet Express 1500Base, LS, LT6 Cyl 4.3 L GAS, 8 Cyl 5.3 L FLEX, 8 Cyl 5.3 L GAS
    2003-2011 Chevrolet Express 2500Base, LS, LT6 Cyl 4.3 L GAS, 8 Cyl 4.8 L FLEX, 8 Cyl 4.8 L GAS, 8 Cyl 5.3 L GAS, 8 Cyl 6.0 L CNG, 8 Cyl 6.0 L FLEX, 8 Cyl 6.0 L GAS, 8 Cyl 6.6 L DIESEL
    View More
  • Customer Questions & Expert Answers

    Q:
    Is this 19244836 designed for my car? Posted by ChevyPartsGiant Specialist
    A:
    Please Select Your Vehicle model to see if part number 19244836 is suitable before ordering.
    Posted by ChevyPartsGiant Specialist
    Q:
    How to assemble the differential case on Buick Rainier? Posted by Customer
    A:
    To build the Differential case, one should first lubricate the pinion and side gears with proper axle lubricant. Mount the Differential side gear thrust washers to the Differential side gears and insert the side gears and washers into Differential case back to their original positions if they are reused. Then, add the first pinion gear just in the middle of the Differential side gears, and the second one installment will also be located right opposite to the first one. Rotate the side gears until pinion gears come over into the opening of the Differential case, then install the thrust washers putting them in as pinion were rotated towards the opening. Install pinion gear shaft and fasten it using new pinion gear shaft lock pin with the hammer and brass drift. Before installing the ring gear with left-hand thread bolts, make sure that the mating surface of the ring gear and Differential case is clean. Hand-start all new ring gear bolts to ensure proper installation and tighten the bolts alternately and in grades to a torque of 83 nm (61ft. Lbs.). Lastly, install the Differential side bearings by inserting the j 8107-2 in the case backwards from the bearing installation and use the j 33790 Differential side bearing installer (J33790) and the j 8092 universal driver handle (J8092) to install the bearings.
    Posted by ChevyPartsGiant Specialist
    Q:
    How to disassemble the differential case assembly on Buick Rainier? Posted by Customer
    A:
    To pull apart the differential case assembly, secure the differential case to a vise. Use the J 22888-D Side Bearing Remover Kit, in conjunction with the J 22888-20A , and J 8107-2 tool to remove the differential side bearings. Note that the ring gear bolts have left-hand threads which are to be removed carefully so that the ring gear does not get loosened, damaging the same in the process. If necessary, knock the ring gear off with a brass drift. Now, take out pinion shaft lock bolt and then the pinion shaft. Lastly, pull out the differential pinion gears and differential side gears while making sure that you roll the differential pinion out with its pinion thrust washers and pull the side gears out with its side gear thrust washers and mark the top and bottom or left and right of each differential pinion gear and differential side gears respectively for resetting.
    Posted by ChevyPartsGiant Specialist
    Q:
    How to replace the Differential Carrier Assembly on a 4.2L In-Line Six Cylinder on Chevrolet Trailblazer? Posted by Customer
    A:
    In order to replace the Differential carrier assembly on a 4.2l in-line six cylinder, remove the front tires and the wheels, and later on, the engine protection shield. Remove the engine oil and front drive axle, followed by disconnecting the front propeller shaft from front axle. It wraps the bearing caps with tape in order to prevent loss of roller bearings and removes the abs wiring harness of the retainers, the brake hose retaining bolts, and the front drive axle vent hose. Then, remove the left and right upper ball pinch bolt and nut, the left and right upper shock module retaining nuts, and the front stabilizer bar links from frame. Remove the front drive axle of each front wheel drive along the output of the front drive axle, secure each front wheel drive of the front drive axle to the frame with mechanics wire or hook to suspend the front shock module and Steering Knuckle. Unscrew the power steering gear assembly, the inner shaft of the front drive axle, and the front drive axle from the Oil Pan, then take off the Oil Pan and front drive axle out of the vehicle. For installation, begin by securing the front drive axle to the frame and install the Oil Pan. Mount the front drive axle to the Oil Pan and make sure the front drive axle mounting bolts have been installed properly and secured to a torque of 85 nm (63 ft. Lbs.). Next, place the inner axle to the front drive axle and to power steering gear. Take the left and right front wheel drive shafts out of the frame, then take off the left and right shock module and steering knuckles from its support. Mount the right and left front wheel drive shafts to the front drive axle, the vent hose at the front drive axle and the left and right shock modules at the frame and tighten the upper shock module retaining nuts to 100 nm (74 ft. Lbs.). Take the Steering Knuckle, join it with the upper Control Arm, put on the upper ball joint pinch bolt and nut, while tightening the upper side of the shock module bolts to 40 nm (30 ft. Lbs.). Connect the front stabilizer bar links to the frame, the brake hose retaining bolts (to 25 Nm (18 ft. Lbs.)), and the right and left abs wiring harness to the retainers. Lastly, replace the front propeller shaft from the front axle, refilling the front drive axle with, and engine fluids, proper, install the engine protection shield, and replace the tires and wheels.
    Posted by ChevyPartsGiant Specialist
    Q:
    How to replace the Differential Carrier Assembly on GMC Envoy? Posted by Customer
    A:
    Prior to replacing the Differential carrier assembly, the tire and wheel assembly will be removed and then drain the front Differential assembly. Next, take the front propeller shaft and the front wheel drive shafts, followed by the electrical connector for the electric motor actuator and the vent hose. Support the front Differential assembly by the transmission jack stand or any suitable support and remove the mounting bracket and front Differential assembly from the vehicle. For lifting in use and installation, lift the front Differential into position and install mounting bracket onto the Differential housing and the vent hose. See to it that the electric motor actuator is tightened to 22 nm (16 ft. Lbs) prior to installation and the electrical connector. Finally, install front wheel drive shafts, front propeller shaft, fill front Differential assembly with fluid, and reinstall front tires and wheels.
    Posted by ChevyPartsGiant Specialist
    Q:
    How to disassemble the differential carrier assembly on Chevrolet Trailblazer? Posted by Customer
    A:
    In order to disassemble the Differential carrier assembly, first remove the drain from the axle and drain the axle lubricant, check the oil and case for metal chips to identify where the problems are. Use an inch-pound torque wrench to measure the rotating torque of the pinion and Differential case. Start the disassembly process by installing the j 29369-1/ j 02619-1/ to the inboard side seal and remove the seal by pulling the j 02619-1. Repeating the same process for the outboard side seal using the j 29369-2 and ja 02619-1. Then unbolt the half for the Differential carrier and take the halves off to get to the Differential case assembly. Remove the left side Differential bearing adjuster using the tool j 42213 (Adjuster Sleeve Socket) labeling it, followed by the removal of the left side Differential bearing cup. Do the same for the right side with j 45224 (Side Bearing Adjustment Wrench) to unbolt the right side of the Differential bearing adjuster and cup. Take the rotating torque of the drive pinion and note it down. Attach the j 8614-01 (Flange and Pulley Holding Tool) unto the pinion yoke and unfasten the pinion nut while gripping it. Remove the pinion yoke, washer, and the drive pinion using the j 45234, (Pinion Remover). Carefully remove the dust deflator from the pinion yoke and pinion oil seal along with the outer Pinion Bearing incident to the removal. First, install the j 22912-01 (Split-Plate Bearing Puller) between the Pinion Bearing and pinion gear and remove the inner Pinion Bearing using the j 22912-01 and h bundle hydraulic press. Take out the pinion gear selectable shim and install the j 45228-4 (Pinion Bearing Cup Remover/Installer) to the Pinion Bearing cup. Remove the outer Pinion Bearing cup with the help of the j 45228-1 and j 45228-5 by turning the latter clockwise. Lastly install the j 45228-4 on the inner Pinion Bearing cup and with the help of j 45228-1 and j 45228-5 to remove the outer Pinion Bearing cup rotating the j45228-5 clockwise.
    Posted by ChevyPartsGiant Specialist
    Q:
    How to replace the Differential Carrier Assembly on GMC Savana 1500? Posted by Customer
    A:
    To change the Differential carrier assembly, raise the vehicle, and then use a jack stand to support the rear axle. Drain the fluid from the Differential carrier assembly and remove the propeller shaft disconnecting it while supporting it as needed. Remove the engine protection shield and the front engine cross member. In order to secure the Differential carrier assembly use a transmission jack and mark out the alignment in between the wheel drive shafts and the inner shaft flanges. Loosen the wheel drive shaft to inner shaft bolts and disconnect the left and right side wheel drive shafts as well as the Differential carrier assembly vent hose. Next, take off the upper inner shaft housing mounting bolt and the upper Differential carrier assembly mounting bolt to pull the Differential carrier assembly out. For installation purposes, align the Differential carrier assembly back on the vehicular body and join the vent hose, and install the upper mounting bolt and nut without tightening. Mount the inner shaft upper mounting bolt and nut also without tightening them, and then mount the front engine cross member. Tighten upper Differential carrier assembly and inner shaft housing mounting bolts to 85 nm (63 lb ft). Mount the left-side wheel drive shaft to the inner shaft flange by aligning the marks made during removal and before mounting of the wheel drive shaft to the inner shaft bolts and uninstall any original adhesive, wipe with denatured alcohol and apply the gm bolt gm application p/n 12345382 to the bolt threads 10953489 (Canada). Mount the left wheel drive shaft of the inner shaft with tightening of bolts to 50 nm (37 lb ft), then do the same for the right side wheel drive shaft. Reinstall the engine protection shield and connect the propeller shaft to Differential carrier assembly. This Differential carrier assembly requires to be filled with proper lubricant by removing the jack or utility stands, lowering the vehicle, inspect the vehicle z height by adjustment if needed.
    Posted by ChevyPartsGiant Specialist
    If you have any questions about this product, please don't hesitate to ask us. We will be happy to help you!

OEM GM 19244836, Excellent Performance and Perfect Fitment

To ensure reliability, purchase GM part # 19244836 Differential Case, Front Rear. It is sometimes referred to as GM Differential. Choosing OEM parts is the optimal decision for guaranteeing superior quality and perfect performance. These components undergo stringent quality checks and are carefully constructed to comply with GM's factory specifications, ensuring a smooth installation process.

ChevyPartsGiant.com is a leading supplier of genuine GM parts such as GM 19244836 Differential Case, Front Rear. Our website boasts an extensive inventory of OEM GM parts, available at highly competitive prices in the market. Should you require any new genuine GM parts, rest assured we will deliver them swiftly and efficiently to your doorstep. Furthermore, all our parts come with the assurance of a manufacturer's warranty. For detailed Chevy parts information, click here.
Choose ChevyPartsGiant for discounted prices, exceptional service and fast delivery