Make sure this part fits

GM 10390404
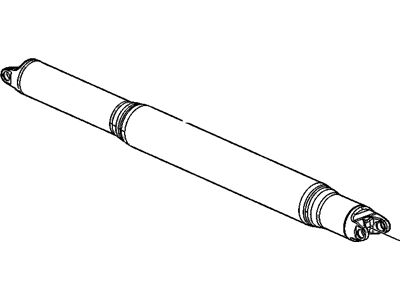
Slip Yoke

2000-2006 GM

Customer Questions & Expert Answers (10)
GM 10390404 Slip Yoke
  • Part Description
    Shaft Assembly-Propeller; Driveshaft
  • Replaces
    15075236, 15090206
  • Manufacturer
    General Motors
Make sure this part fits
$1400.33 MSRP: $1802.26
You Save: $401.93 (23%)
Ships in 1-3 Business Days
1
ADD TO CART
  • Related Parts
  • Product Specifications
  • Vehicle Fitment
  • Customer Questions & Expert Answers
  • Product Specifications

    BrandGenuine GM
    Manufacturer Part Number10390404
    Part DescriptionShaft Assembly-Propeller; Driveshaft
    Other NamesDrive Shaft Assembly; Shaft, Propeller
    Item Dimensions82.7 x 8.1 x 8.2 inches
    Item Weight21.00 Pounds
    ConditionNew
    Fitment TypeDirect Replacement
    Replaces15075236, 15090206
    ManufacturerGeneral Motors
    SKU10390404
    WarrantyThis genuine GM part is guaranteed by GM's factory warranty.
    Shipping & ReturnShipping Policy Return Policy
    Warning: California's Proposition 65
  • Vehicle Fitment

    Year Make Model Trim Engine
    2002 Cadillac EscaladeBase8 Cyl 5.3 L GAS, 8 Cyl 6.0 L GAS
    2003-2006 Cadillac Escalade ESVBase8 Cyl 6.0 L GAS
    2002 Chevrolet Avalanche 1500Base, On Road Edition8 Cyl 5.3 L GAS
    2000-2006 Chevrolet Suburban 1500Base, LS, LT, LTZ, Z718 Cyl 5.3 L FLEX, 8 Cyl 5.3 L GAS, 8 Cyl 6.0 L GAS
    2000-2006 Chevrolet Suburban 2500Base, LS, LT8 Cyl 6.0 L GAS, 8 Cyl 8.1 L GAS
    2000-2006 GMC Yukon XL 1500Denali, SL, SLE, SLT8 Cyl 5.3 L FLEX, 8 Cyl 5.3 L GAS, 8 Cyl 6.0 L GAS
    2000-2006 GMC Yukon XL 2500SLE, SLT8 Cyl 6.0 L GAS, 8 Cyl 8.1 L GAS
  • Customer Questions & Expert Answers

    Q:
    Is this 10390404 designed for my car? Posted by ChevyPartsGiant Specialist
    A:
    Please Select Your Vehicle model to see if part number 10390404 is suitable before ordering.
    Posted by ChevyPartsGiant Specialist
    Q:
    How to replace the rear Drive Shaft on Cadillac Escalade? Posted by Customer
    A:
    Replacing the rear propeller shaft begins with properly referencing driveline components to the propeller shaft and axles before taking them apart including propeller shafts and drive axles together with pinion flanges and output shafts requiring the same component assembly relation as removal steps along with published specifications and torque values. First raise the vehicle then make distinctive marks which connect the propeller shaft to the transmission or Transfer Case and rear axle pinion yoke. Eliminate the bolts as well as yoke retainers which fasten the pinion yoke to the rear axle. Do not harm the injection joints by using hammers against yoke ears or tools between the yoke and Universal Joint while removing parts. Start the propeller shaft sliding toward the front to detach it from the rear axle pinion yoke and keep sliding toward the back to disconnect it from the transmission or Transfer Case before extracting it from the vehicle. Examine the Slip Yoke splines to determine if they have enough lubricant before adding gm p/n 12345879 (Canadian P/N 10953511) or an equivalent compound that satisfies gm specification 9985830 (RWD w/ Automatic Transmission). The propeller shaft installation requires fitting into the transmission or Transfer Case followed by alignment of removal marks before connecting it to the rear axle pinion yoke through reference mark alignment. Secure the yoke retainers in place along with their bolts before screwing them until they reach 25 nm (19 ft.lbs.) torque and returning the vehicle to the ground.
    Posted by ChevyPartsGiant Specialist
    Q:
    How to replace the front drive shaft on Cadillac Escalade ESV? Posted by Customer
    A:
    The replacement process for the front propeller shaft starts with acquiring clamp pliers - narrow jaw (J 43218). Your first step should be to make precise reference markings between propeller shafts and axles as well as between propeller shafts and wheel drive shafts and pinion flanges and output shafts to ensure proper remanufacturing of the original component relation. You should first apply the proper Transfer Case model procedure to eliminate the shield before lifting the vehicle to continue. A double clamp style boot on the vehicle requires removal of the Transfer Case clamp by using a flat-bladed tool to pry up its exposed end. When removing the propeller shaft it is necessary to make reference marks which show position relationships with the front axle pinion yoke and to prevent damage to the injection joints. Disconnect the propeller shaft from the front axle pinion yoke by removing its bolts and yoke retainers while protecting bearing roller loss through tape application on the bearing caps. Remove the propeller shaft forward by detaching the boot from the Transfer Case output shaft according to need. The Transfer Case output shaft splines need an inspection for proper lubrication state because insufficient lubrication requires application of gm p/n 12345879 or canadian p/n 10953511 which meets gm specification 9985830. Installation requires you to put a new clamp into the propeller shaft boot groove before adding the propeller shaft splines to the Transfer Case output shaft. A user can easily put single clamp style boot splices onto the Transfer Case output shaft. Reattach the propeller shaft to the front axle pinion yoke by positioning its reference marks as before and fasten it with yoke retainers and bolts while torquing them to 25 nm (18 ft. Lbs.). Once the boot covers the Transfer Case output shaft groove, follow with putting on the Transfer Case shield if needed and using clamp pliers - narrow jaw (J 43218) to crimp the clamp (if required) before lowering the vehicle.
    Posted by ChevyPartsGiant Specialist
    Q:
    How to replace the Drive Shaft on Chevrolet Suburban 1500? Posted by Customer
    A:
    A hoist should be used to lift the vehicle first before starting propeller shaft replacement work. First remove the Transfer Case shield and pry the clamp at the Transfer Case free by lifting the exposed clamp end with a flat bladed tool. All driveline components should receive proper reference marks before disassembly relative to the propeller shaft and axles for both propeller shafts and wheel drive shafts and pinion flanges and output shafts to restore their original assembly relations. Mark the propeller shaft's position relative to the front axle flange before you remove bolts and yoke retainers from the front axle flange. Apply gentle motion on the propeller shaft while disconnecting it by sliding it backward and forward before ensuring no bearing cap assemblies from the yoke end drop. All propeller shaft damage should be examined before proceeding. To install the Transfer Case seek approval from teflon grease which matches gm p/n 9985830. Position the new clamp inside the propeller shaft boot's groove while inserting the propeller shaft splines through the Transfer Case output shaft followed by boot application onto the output shaft until it locks into the output shaft od groove. Crimp the clamp with the j 43218 clamp plier (J 43218) while following specified crimping requirements to mount the propeller shaft against the front axle flange by using reference marks made beforehand. Position and fasten the yoke retainers along with their corresponding bolts but adjust bolt torque to 25 nm (19 ft. Lbs.). Lower the vehicle before installing the Transfer Case shield.
    Posted by ChevyPartsGiant Specialist
    Q:
    How to replace the front drive shaft on Chevrolet Suburban 2500? Posted by Customer
    A:
    Use the clamp pliers narrow jaw (J 43218) as well as other necessary tools to replace the front propeller shaft. Establish clear markings on all driveline parts which include propeller shafts and wheel drive shafts and pinion flanges and output shafts. Mark the relationships of these elements before start of disassembly process. A vehicle lift procedure should begin by removing the transfer case shield when present. Use a flat-bladed tool to pry open the exposed end of the clamp at the transfer case before removing it. Start by taking off the bolts alongside the yoke retainers installed on the front axle pinion yoke. Disconnect the propeller shaft properly from its position at the front axle pinion yoke but maintain safe control of the bearing cap assemblies. Glide the propeller shaft forward to take it out from the transfer case output shaft. Use the gm p/n 12345879 (Canadian P/N 10953511) or equivalent lubricant to service the splined area of the transfer case output shaft. The recommended gm specification is 9985830. Fit the new clamp inside the propeller shaft boot groove before sliding the propeller shaft splines through the transfer case output shaft to join it with the front axle pinion yoke keeping reference marks in place from removal. Secure the yoke retainers in place using bolts that require torquing to 25 nm (19 ft. Lbs. Tighten the Clamp Pliers Narrow Jaw (J 43218) to crimp the clamp while it is attached to the transfer case output shaft until it enters into the boot groove. To complete the installation the transfer case shield and lower the vehicle if present.
    Posted by ChevyPartsGiant Specialist
    Q:
    How to replace the rear Drive Shaft on GMC Yukon XL 2500? Posted by Customer
    A:
    Prior to removing the rear propeller shaft technicians must reference-mark the driveline components concerning the propeller shaft and axles including propeller shafts and drive axles and pinion flanges and output shafts so the components can be reassembled in their original arrangement. After lifting the vehicle implement a marking process to link the propeller shaft with rear axle pinion yoke and transmission or Transfer Case. Through the process disconnect the bolts and the retainers from the rear axle pinion yoke. A tool should never be placed between the yoke and Universal Joint to prevent injection joints from breaking because of the potential damage to the yoke ears during propeller shaft removal. To detach the propeller shaft users should first direct it forward away from the rear axle pinion yoke and secondly slide it toward the transmission or Transfer Case for separation before removing the shaft entirely from the vehicle. Check if the Slip Yoke splines have proper lubrication levels, apply gm p/n 12345879 (Canadian P/N 10953511) lubricant or equivalent gm specification 9985830 (ROOD w/ Automatic Transmission). The installation process of the propeller shaft starts with feeding it through the transmission or Transfer Case while matching reference marks from removal. Subsequently, the shaft slides into rear axle location to join with the pinion yoke through proper alignment of reference points. Lower the vehicle after installing the yoke retainers along with bolts while placing the yoke retainer bolts at 25 nm (19 ft. Lbs. Torque).
    Posted by ChevyPartsGiant Specialist
    Q:
    How to replace a one-piece Drive Shaft on GMC Yukon XL 1500? Posted by Customer
    A:
    The replacement of a one-piece propeller shaft requires you to measure all driveline components relative to the propeller shaft and axles before disassembly for the propeller shafts, drive axles, pinion flanges, and output shafts including reference marking operations to preserve their original relationships. The first step involves lifting the vehicle during which you should mark the propeller shaft to match the pinion yoke of the rear axle and the transmission or Transfer Case. The rear axle pinion yoke requires removal of its retaining bolts before its yoke retainers can come out. The yoke ears alongside Universal Joint should remain free from damage because both hitting them with tools or applying force directly will break the injection joints. The skilled installer should first move the propeller shaft in the forward position to eliminate the front connection between the rear axle pinion yoke before shifting it to the rear position for disconnection from transmission or Transfer Case before the vehicle receives its final shaft removal. Check if the Slip Yoke splines have enough grease before installation; if not present, use gm p/n 12345879 or equivalent grease as specified in 2w/d w/ a. T. Only. Only). The propeller shaft installation requires alignment of reference marks from removal before building a connection between the transmission or Transfer Case and the rear axle pinion yoke. During this step normalize the reference marks alignment. Put the yoke retainers into place followed by their bolts , tight them with 25 nm (19 ft. Lbs.) torque then restore the vehicle to the ground.
    Posted by ChevyPartsGiant Specialist
    Q:
    How to replace the front drive shaft on GMC Yukon XL 1500? Posted by Customer
    A:
    The necessary tool for front propeller shaft replacement is Clamp Plier (J 43218). Begin by lifting the vehicle while also removing the transfer case shield when present. Test the position of the propeller shaft in relation to the front pinion yoke before you break open the transfer case clamp using a flat-bladed tool on the exposed end. Following steps start with removing bolts as well as yoke retainers from the front axle pinion yoke. Prevent damage to the injection joints by not applying strong force when removing the propeller shaft from the front axle pinion yoke. Use tape to cover the bearing caps so roller bearing loss is avoided during the removal operation of the propeller shaft from the transfer case output shaft by pushing it forwards. Before installation inspectors should check if the transfer case output shaft splines have enough grease. They should use GM P/N 12345879 or equivalent grease for necessary lubrication. First install the new clamp into the propeller shaft boot's groove before inserting the propeller shaft splines into the transfer case output shaft to connect them with the front axle pinion yoke by lining up reference mark indications from removal. Seal the yoke retainers into place with bolts before tightening them to 25 Nm (19 ft. lbs.). Insert the boot onto the transfer case output shaft until it snaps into position before crimping the clamp with the Clamp Plier (J 43218) and reinstalling the transfer case shield when present and lowering the vehicle.
    Posted by ChevyPartsGiant Specialist
    Q:
    What is the process to disconnect the propeller shaft for the 2003 Chevrolet Suburban 1500? Posted by Customer
    A:
    Slide the propeller shaft forward to disconnect it from the rear axle pinion yoke, then slide it rearward to disconnect it from the transmission or transfer case.
    Posted by ChevyPartsGiant Specialist
    See expert answers on similar Drive Shaft
    Q:
    How do you remove the rear propeller shaft for the 2001 GMC Yukon XL 1500? Posted by Customer
    A:
    Remove the bolts and yoke retainers from the rear axle pinion yoke, slide the rear propeller shaft forward to disconnect it from the rear axle pinion yoke, then rearward to disconnect it from the front propeller shaft stub shaft, and finally remove it from the vehicle.
    Posted by ChevyPartsGiant Specialist
    See expert answers on similar Drive Shaft
    If you have any questions about this product, please don't hesitate to ask us. We will be happy to help you!

OEM GM 10390404, Excellent Performance and Perfect Fitment

To ensure reliability, purchase GM part # 10390404 Slip Yoke. It is sometimes referred to as GM Drive Shaft. Choosing OEM parts is the optimal decision for guaranteeing superior quality and perfect performance. These components undergo stringent quality checks and are carefully constructed to comply with GM's factory specifications, ensuring a smooth installation process.

ChevyPartsGiant.com is a leading supplier of genuine GM parts such as GM 10390404 Slip Yoke. Our website boasts an extensive inventory of OEM GM parts, available at highly competitive prices in the market. Should you require any new genuine GM parts, rest assured we will deliver them swiftly and efficiently to your doorstep. Furthermore, all our parts come with the assurance of a manufacturer's warranty. For detailed Chevy parts information, click here.
Choose ChevyPartsGiant for discounted prices, exceptional service and fast delivery