ChevyParts
My Garage
My Account
Cart
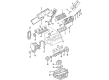
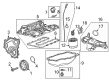
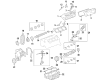
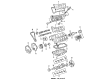
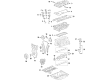
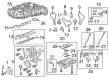
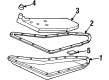
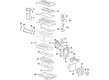
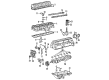
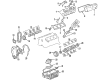
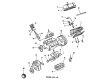
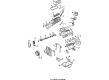
OEM Buick Oil Pan
Oil Drain Pan- Select Vehicle by Model
- Select Vehicle by VIN
Select Vehicle by Model
orMake
Model
Year
Select Vehicle by VIN
For the most accurate results, select vehicle by your VIN (Vehicle Identification Number).
70 Oil Pans found

Buick Oil Pan Part Number: 12603135
$408.09 MSRP: $642.10You Save: $234.01 (37%)Ships in 1-3 Business DaysProduct Specifications- Other Name: Pan, Engine Oil

Buick Oil Pan Part Number: 28289985
$116.56 MSRP: $183.36You Save: $66.80 (37%)Ships in 1-3 Business DaysProduct Specifications- Other Name: Upper Oil Pan; Pan, Engine Oil
- Replaces: 25202733, 25201776, 12692501, 12692498

Buick Oil Pan Part Number: 25204805
$100.05 MSRP: $156.72You Save: $56.67 (37%)Ships in 1-2 Business DaysProduct Specifications- Other Name: Extension Assembly, Lower Crankcase
- Replaces: 25203904, 55515928

Buick Oil Pan Part Number: 12719108
$163.67 MSRP: $257.47You Save: $93.80 (37%)Ships in 1-3 Business DaysProduct Specifications- Other Name: Pan, Engine Oil; Upper Oil Pan
- Replaced by: 12735951

Buick Oil Pan Part Number: 24508996
$187.21 MSRP: $294.57You Save: $107.36 (37%)Ships in 1-3 Business DaysProduct Specifications- Other Name: Pan, Engine Oil
Buick Oil Pan Part Number: 25204203
$40.34 MSRP: $63.19You Save: $22.85 (37%)Ships in 1-3 Business DaysProduct Specifications- Other Name: Pan, Engine Oil
- Position: Lower
Buick Oil Pan Part Number: 12716560
$183.53 MSRP: $288.71You Save: $105.18 (37%)Product Specifications- Other Name: Pan, Engine Oil; Upper Oil Pan
- Replaced by: 12740763
- Replaces: 12711492, 12679232, 12702893, 12688958, 12671427

Buick Oil Pan Part Number: 12593455
$140.49 MSRP: $220.95You Save: $80.46 (37%)Ships in 1-3 Business DaysProduct Specifications- Other Name: Pan, Engine Oil; Engine Oil Pan
- Replaces: 12581555

Buick Oil Pan Part Number: 12603201
$190.70 MSRP: $299.93You Save: $109.23 (37%)Ships in 1-3 Business DaysProduct Specifications- Other Name: Pan, Engine Oil; Engine Oil Pan
Buick Oil Pan Part Number: 12564803
$408.03 MSRP: $586.50You Save: $178.47 (31%)Ships in 1-2 Business DaysProduct Specifications- Other Name: Pan, Engine Oil; Engine Oil Pan
- Replaces: 12604016, 03537183, 3537183


Buick Oil Pan Part Number: 25521991
$38.76 MSRP: $55.46You Save: $16.70 (31%)


Buick Oil Pan Part Number: 55590832
$104.22 MSRP: $163.25You Save: $59.03 (37%)Product Specifications- Other Name: Pan, Engine Oil


Buick Oil Pan Part Number: 12666374
$179.01 MSRP: $281.67You Save: $102.66 (37%)Product Specifications- Other Name: Pan, Engine Oil; Engine Oil Pan
- Replaces: 12609875, 12575368, 12636673, 12638371


Buick Transmission Pan Part Number: 8643574
Product Specifications- Other Name: Pan-Automatic Transmission Oil; Automatic Transmission Oil Pan; Pan, Transmission Oil Pan


Buick Oil Pan Part Number: 12647251
Product Specifications- Other Name: Pan, Engine Oil
- Replaces: 55563937

Buick Oil Pan Part Number: 12584321
$221.43 MSRP: $348.26You Save: $126.83 (37%)Product Specifications- Other Name: Pan, Engine Oil; Engine Oil Pan

Buick Oil Pan Part Number: 12577512
$23.44 MSRP: $36.72You Save: $13.28 (37%)Product Specifications- Other Name: Pan, Engine Oil

Buick Oil Pan Part Number: 25536865
Product Specifications- Other Name: Pan, Engine Oil

Buick Oil Pan Part Number: 25530716
Product Specifications- Other Name: F-Pan Assembly

Buick Oil Pan Part Number: 25522384
Product Specifications- Other Name: Pan, Engine Oil
| Page 1 of 4 |Next >
1-20 of 70 Results
Buick Oil Pan
Choose OEM Oil Pan, you're making the optimal decision for superior quality and perfect performance. You can feel confident because each component goes through stringent quality checks. Every part is carefully built to comply with Buick's factory specifications. You'll enjoy a smooth, worry-free installation that fits just right. At ChevyPartsGiant.com, you'll find it easy to get top-quality OEM Buick Oil Pan. You can shop at highly competitive prices and protect your budget. All our genuine Buick parts include a dependable manufacturer's warranty. You'll also appreciate our straightforward return policy and swift delivery services for extra convenience.
Buick Oil Pan Parts and Q&A
- Q: How to Service and Repair the Oil Pan on Buick Enclave?A:To replace the Oil Pan, drain off the engine oil first and then remove the Oil Filter. Secondly, take out the exhaust flexible pipe and the engine, and then the engine front cover. Then, unscrew the Oil Pan bolts and pry off the rtv sealant with the pry points along the edge Oil Pan before lifting off the Oil Pan from the block. Clean Oil Pan and the surface of the engine block gasket. For installation, the 8 mm (0.315 in) guides from the (EN 46109), insert them into the center Oil Pan rail bolt hole on each side of the engine block; after that, run a 3 mm (0.118 in) bead of rtv sealant, gm p/n 12378521 (Canadian P/N 88901148), or equivalent on the block pan rail and the crankshaft rear oil seal housing. Place the Oil Pan on the block and take out the (EN 46109) guides. Tightly loosen the Oil Pan bolts, making sure to tighten them in an order specified: 8 mm bolts (1-11) and torque to 23 nm (17 lb ft) and 6 mm bolts (12, 13) and torque to 10 nm (89 lb in). Lastly, the engine front cover, engine, and exhaust flexible pipe need to be reinstalled and the engine oil needs to be refilled.
- Q: How to Properly Service and Replace the Oil Pan on Buick Regal?A:To demolish the Oil Pan, have the required tools: engine support adapters (J 28467-9OA), universal engine support fixture (J 28467-B), engine support adapter leg set (J 36462-A). Start by disconnecting negatively cable from the battery and remove fuel injector sight shield. Then, disconnect the intake air temperature (IAT) sensor electric connector, and take off air inlet duct from the Throttle Body and Drive Belt. Then, after the removal of the right and left engine mount struts, install the engine support fixture and raise the vehicle. Ditch the right exhaust manifold pipe studs nuts from the Catalytic Converter, right front tire and wheel, right side engine splash shield retainers and splash shield. Drain out the engine oil and take out the Oil Filter, remove the A/C Compressor nuts and the A/C Compressor without releasing the a/c system and reposition it later on. Unscrew the guide bracket A/C Compressor bolts, the power steering oil cooler pipes brackets from the frame and disconnect the oil level sensor electrical connection. Remove the oil level sensor wiring sanitary bolt and make way for the wire harness, then unstability the engine mount downpan nuts. Lower the vehicle and lift the engine using the engine support fixture and bring it up before raising the vehicle once more to take off the left and right engine mount bracket bolts. Support the frame with jackstands and loosen the left side frame bolts along with removing the right side frame bolts and bring the right side frame for engine mount bracket removal. Take out the engine mount bracket and torque converter cover and then take out the oil level sensor before you drive in the Oil Pan bolts and place out the Oil Pan. Take off the oil pump pipe as well as the screen-assembled oil pump and Oil Pan Gasket, and clean the Oil Pan flanges along with the Oil Pan rail, front cover and rear main bearing cap, and the threaded holes. The Oil Pan Gasket is to be installed along with the oil pump pipe, and screen assembly and secured by oil pump pipe and screen bolts that are tightened to 15 nm (11 ft. Lbs.). Install the Oil Pan, clean the Oil Pan bolts, and apply one drop of thread lock compound gm p/n 12345382 or equivalent on threads. Tighten the Oil Pan bolts to 14 nm (125 inch lbs) and install the oil level sensor and tighten to 20 nm (15 ft. Lbs). Mount the torque converter cover, engine mount bracket, and loosely mount the right and left engine mount bracket bolts and tighten it to 102 nm (75 lb. Ft.). By means of the jacks, raise the frame to a previous position, and fasten the right side frame bolts, tightening the latter ones, both on the right and left sides, to 180 nm (133 ft. Lbs.). Take off the jackstands and bring the vehicle down, and then use the engine support fixture to bring down the engine. Jack up the vehicle once more to put in the engine mount lower nuts tightening them to 78 nm (58 ft. Lbs.). Mount the oil level sensor wiring harness and the bolt and tighten the bolt to 10 nm (89 inch lbs) and then attach the oil level sensor electrical connector. Mount the power steering oil cooler pipe brackets, a/c compressor bracket, and bolts, tightening the screw brackets on the A/C Compressor bracket to 50 nm (37 ft. Lbs.)) and the A/C Compressor nuts to 30 nm (22 ft. Lbs.)). Change a new Oil Filter, tighten the Oil Pan drain plug to 30 nm (22 ft. Lbs.), right side engine splash shield, and retainers, right front tire and wheel, and right exhaust manifold pipe stud nut also, tighten it to 32 nm (24 ft. Lbs.). Lower the vehicle and remove its engine support fixture, then put right and left engine mount struts, the Drive Belt, and the air inlet duct to the Throttle Body. Hook up the intake air temperature (IAT) sensor, electric connection, fill the crankcase with engine oil, install the fuel injector sight shield, and finish the process, with the negative Battery Cable, checking for leakage during the process.


Related Buick Parts
 Buick Timing Belt
 Buick Balance Shaft Bearing Set
 Buick Crankshaft Pulley
 Buick Crankshaft Thrust Washer Set
 Buick Engine Mount
 Buick Motor And Transmission Mount
 Buick Oil Drain Plug Gasket
 Buick Pushrod
 Buick Timing Belt Tensioner
 Buick Timing Cover Gasket
 Buick Valve Cover Grommet
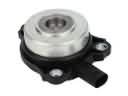 Buick Variable Timing Adjuster Magnet