ChevyParts
My Garage
My Account
Cart
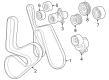
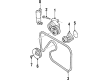
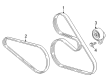
OEM Cadillac Drive Belt
Serpentine Belt- Select Vehicle by Model
- Select Vehicle by VIN
Select Vehicle by Model
orMake
Model
Year
Select Vehicle by VIN
For the most accurate results, select vehicle by your VIN (Vehicle Identification Number).
93 Drive Belts found


Cadillac Serpentine Belt Part Number: 12676726
$50.15 MSRP: $89.58You Save: $39.43 (45%)Product Specifications- Other Name: Belt-Supercharge (Service); Serpentine Belt Drive Kit; Drive Belt; V-Belt; Supercharger Belt; Belt; Belt, Drive
- Replaces: 12625035, 12636227, 12628026


Cadillac Serpentine Belt Part Number: 12578062
$32.98 MSRP: $58.90You Save: $25.92 (45%)Ships in 1-3 Business DaysProduct Specifications- Other Name: Belt, Generator; Serpentine Belt Drive Kit; Accessory Drive Belt; Drive Belt; V-Belt; Alternator Belt; Belt, Drive


Cadillac Serpentine Belt Part Number: 12638664
$37.99 MSRP: $67.84You Save: $29.85 (44%)Ships in 1-2 Business DaysProduct Specifications- Other Name: Belt, Drive; Serpentine Belt Drive Kit; Accessory Drive Belt; Drive Belt; V-Belt
- Replaces: 12618792


Cadillac Serpentine Belt Part Number: 12646194
$43.55 MSRP: $77.78You Save: $34.23 (45%)Ships in 1-2 Business DaysProduct Specifications- Other Name: Belt-Generator & A/C Compressor & Power Steering Pump; Serpentine Belt Drive Kit; Drive Belt; V-Belt; Belt, Drive
- Replaces: 12589908, 12616673


Cadillac Serpentine Belt Part Number: 12621991
$48.34 MSRP: $105.53You Save: $57.19 (55%)Ships in 1-2 Business DaysProduct Specifications- Other Name: Belt, Drive; Serpentine Belt Drive Kit; Accessory Drive Belt; Drive Belt; V-Belt; Alternator Belt
- Replaces: 12578002


Cadillac Serpentine Belt Part Number: 55567786
$16.14 MSRP: $28.82You Save: $12.68 (44%)Ships in 1-3 Business DaysProduct Specifications- Other Name: Belt, Water Pump & A/C Compressor & Generator & Power Steering Pump; Belt, Drive


Cadillac Serpentine Belt Part Number: 12628027
$39.16 MSRP: $69.92You Save: $30.76 (44%)Ships in 1-2 Business DaysProduct Specifications- Other Name: Belt; Serpentine Belt Drive Kit; Accessory Drive Belt; Drive Belt; V-Belt; Belt, Drive
- Replaces: 12612517


Cadillac Serpentine Belt Part Number: 12576453
$51.65 MSRP: $105.92You Save: $54.27 (52%)Ships in 1-2 Business DaysProduct Specifications- Other Name: Belt, Fan, Water Pump, A/C Compressor, Generator, Power Steering Pump; Serpentine Drive Kit.; Fan Belt; Belt; Belt, Drive
- Replaces: 12557719, 12550111, 12564761, 12569350

Cadillac Serpentine Belt Part Number: 12688041
$19.78 MSRP: $35.32You Save: $15.54 (44%)Ships in 1-3 Business DaysProduct Specifications- Other Name: Belt-Accessory Drive Primary; Serpentine Belt Drive Kit; Drive Belt; V-Belt; Belt, Drive

Cadillac Supercharger Belt Part Number: 12668317
$82.91 MSRP: $148.06You Save: $65.15 (44%)Ships in 1-3 Business DaysProduct Specifications- Other Name: Belt, Drive; Serpentine Belt Drive Kit; Accessory Drive Belt; Serpentine Belt; Drive Belt; V-Belt; Belt

Cadillac Serpentine Belt Part Number: 12645921
$29.06 MSRP: $51.89You Save: $22.83 (44%)Ships in 1-3 Business DaysProduct Specifications- Other Name: Belt, Drive; Serpentine Belt Drive Kit; Accessory Drive Belt; Drive Belt; V-Belt

Cadillac Serpentine Belt Part Number: 12648981
$29.15 MSRP: $52.06You Save: $22.91 (45%)Ships in 1-3 Business DaysProduct Specifications- Other Name: Belt, Drive; Serpentine Belt Drive Kit; Accessory Drive Belt; Drive Belt; V-Belt

Cadillac Serpentine Belt Part Number: 12575425
$38.65 MSRP: $69.02You Save: $30.37 (44%)Ships in 1-3 Business DaysProduct Specifications- Other Name: Belt, Generator & A/C Compressor & Power Steering Pump; Serpentine Belt Drive Kit; Drive Belt; V-Belt; Belt, Drive

Cadillac Serpentine Belt Part Number: 12731926
$15.02 MSRP: $26.83You Save: $11.81 (45%)Ships in 1-2 Business DaysProduct Specifications- Other Name: Belt-Accessory Drive Primary; Belt, Drive

Cadillac Serpentine Belt Part Number: 12678130
$13.65 MSRP: $24.38You Save: $10.73 (45%)Ships in 1-3 Business DaysProduct Specifications- Other Name: Belt-Accessory Door Auxiliary; Serpentine Belt Drive Kit; Drive Belt; V-Belt; Alternator Belt; Belt, Drive
- Replaces: 12652764

Cadillac Serpentine Belt Part Number: 12685913
$45.93 MSRP: $82.02You Save: $36.09 (44%)Ships in 1-2 Business DaysProduct Specifications- Other Name: Belt, Drive; Supercharger Belt

Cadillac Water Pump Belt Part Number: 19370621
$1.96 MSRP: $3.50You Save: $1.54 (44%)Ships in 1-3 Business DaysProduct Specifications- Other Name: Belt, Water Pump; Serpentine Belt Drive Kit; Serpentine Belt; Drive Belt; V-Belt; Belt, Drive
- Replaces: 01647464, 03539156, 3539156, 1647464

Cadillac Serpentine Belt Part Number: 93181720
$49.26 MSRP: $87.96You Save: $38.70 (44%)Ships in 1-3 Business DaysProduct Specifications- Other Name: Belt, Generator & A/C Compressor & Power Steering Pump; Belt, Drive
- Replaces: 09118620, 9118620, 90528761

Cadillac Serpentine Belt Part Number: 12654891
$61.13 MSRP: $109.16You Save: $48.03 (44%)Ships in 1-3 Business DaysProduct Specifications- Other Name: Belt, Drive; Serpentine Belt Drive Kit; Accessory Drive Belt; Drive Belt; V-Belt

Cadillac Serpentine Belt Part Number: 55488926
$14.24 MSRP: $25.42You Save: $11.18 (44%)Ships in 1-3 Business DaysProduct Specifications- Other Name: Belt, Drive; Serpentine Belt Drive Kit; Drive Belt; V-Belt
- Replaced by: 12732747
| Page 1 of 5 |Next >
1-20 of 93 Results
Cadillac Drive Belt
Want to cut long-term maintenance and repair costs? Choose OEM Drive Belt. Those parts deliver top durability you can trust. On our site, you'll find a huge catalog of genuine Cadillac parts. Prices are unbeatable, so you can keep more in your pocket. Every OEM Cadillac Drive Belt includes a manufacturer's warranty. You can also get an easy return policy that keeps buying risk free. Fast delivery, get your car on the road quickly. It's simple to search, compare, and order. Stop guessing about quality or fit. Order today and save with parts that last.
Cadillac Drive Belt Parts and Q&A
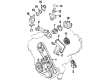
- Q: How to replace the air conditioning compressor and power steering pump drive belt on Cadillac CTS?A:The first task in changing the air conditioning compressor together with the power steering pump belt starts with removing the generator and water pump Drive Belt. After you should detach the air cleaner outlet duct from the system. The Drive Belt tensioner requires clockwise rotation to let go of tension so the Drive Belt can be successfully extracted from the power steering pulley while the tensioner is released gradually. The required step is to extract the Drive Belt from the accessory drive pulleys. The new Drive Belt installation process requires first positioning it on the Crankshaft Pulley and idler pulley together with the A/C Compressor before rotating the tensioner clockwise to put the belt around the power steering pulley while releasing the tensioner slowly. The Drive Belt needs to be correctly positioned inside the accessory drive pulley grooves. After finishing installation complete the procedure by putting back the air cleaner outlet duct together with the generator and water pump Drive Belt.
- Q: How to replace the A/C Drive Belt on Cadillac Escalade?A:Begin by detaching the accessory Drive Belt followed by raising the vehicle properly before starting the a/c Drive Belt replacement. Start by removing both bolts that secure the engine shield and then removing the shield from its position. The ratchet should be inserted into the a/c belt tensioner adapter opening for clockwise tensioner rotation before extracting the belt from all pulleys. Use a wrench to depress the a/c belt tensioner before removing the ratchet tool. The staff should then clean and check each pulley belt surface. To fit the a/c belt you must first wrap it around the crankshaft balancer and after that you can install the ratchet into the a/c Drive Belt tensioner adapter opening to turn the tensioner clockwise. Install the a/c belt first on the idler pulley and then circle it around the a/c compressor pulley followed by carefully releasing tension from the a/c belt tensioner before removing the ratchet. Before installing the engine shield check the installed a/c belt sits correctly and the engine shield bolts need to be tightened to 20 nm (15 ft. Lbs.). After the process, lower the car down while placing the accessory Drive Belt back into position.