ChevyParts
My Garage
My Account
Cart
OEM Chevrolet Camaro Timing Cover
Engine Timing Cover- Select Vehicle by Model
- Select Vehicle by VIN
Select Vehicle by Model
orMake
Model
Year
Select Vehicle by VIN
For the most accurate results, select vehicle by your VIN (Vehicle Identification Number).
19 Timing Covers found


Chevrolet Camaro Timing Cover Part Number: 12633906
$110.64 MSRP: $188.36You Save: $77.72 (42%)


Chevrolet Camaro Timing Cover, Front Part Number: 12691692
$40.76 MSRP: $98.27You Save: $57.51 (59%)Ships in 1-2 Business Days


Chevrolet Camaro Front Cover Part Number: 12600326
$46.75 MSRP: $73.23You Save: $26.48 (37%)Ships in 1-2 Business Days


Chevrolet Camaro Front Cover Part Number: 12598293
$105.28 MSRP: $164.92You Save: $59.64 (37%)Ships in 1-3 Business Days
Chevrolet Camaro Timing Cover, Front Part Number: 12594939
$45.81 MSRP: $78.00You Save: $32.19 (42%)Ships in 1-3 Business Days
Chevrolet Camaro Timing Cover Part Number: 25203062
$392.77 MSRP: $946.98You Save: $554.21 (59%)Ships in 1-2 Business Days
Chevrolet Camaro Front Cover Part Number: 12704638
$216.44 MSRP: $340.56You Save: $124.12 (37%)Ships in 1-3 Business Days
Chevrolet Camaro Water Pump, Front Part Number: 12698371
$363.26 MSRP: $571.56You Save: $208.30 (37%)Ships in 1-3 Business Days

Chevrolet Camaro Timing Cover Part Number: 12576033


Chevrolet Camaro Timing Cover Part Number: 10044603
Chevrolet Camaro Timing Cover Part Number: 12600325
Chevrolet Camaro Timing Cover, Front Part Number: 12655856
$532.78 MSRP: $841.74You Save: $308.96 (37%)
Chevrolet Camaro Timing Cover Part Number: 12552427
Chevrolet Camaro Timing Cover Part Number: 12552426
Chevrolet Camaro Timing Cover Part Number: 12551636

Chevrolet Camaro Timing Cover Part Number: 12523974

Chevrolet Camaro Timing Cover Part Number: 10243967

Chevrolet Camaro Timing Cover Part Number: 10151670

Chevrolet Camaro Timing Cover, Front Part Number: 10049009
Chevrolet Camaro Timing Cover
Want to cut long-term maintenance and repair costs? Choose OEM Timing Cover. Those parts deliver top durability you can trust. On our site, you'll find a huge catalog of genuine Chevrolet Camaro parts. Prices are unbeatable, so you can keep more in your pocket. Every OEM Chevrolet Camaro Timing Cover includes a manufacturer's warranty. You can also get an easy return policy that keeps buying risk free. Fast delivery, get your car on the road quickly. It's simple to search, compare, and order. Stop guessing about quality or fit. Order today and save with parts that last.
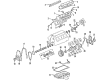
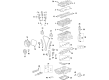
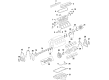
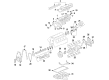
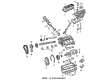
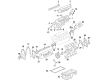
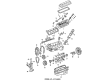
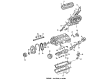
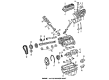
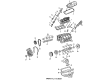
The Timing Cover in Chevrolet Camaro automobiles plays a vital duty of protecting the automobiles' timing system that includes the timing belt, timing chain or cam belt. Made out of aluminum, plastics or steel the Timing Cover shields the fragile teeth of these parts from more damage by debris. Some of the Chevrolet Camaro Timing Covers come with gasket that adds to the safety of the timing belt. Based on the model's years of production, there have been different styles of Timing Covers used on the Chevrolet Camaro body in its effort to achieve certain level of performances and endurance. Nevertheless, even the most high-styled Timing Covers can break at any time and that is why its change should be carried out only in the working process to avoid any dangerous situation on the road.
Chevrolet Camaro Timing Cover Parts and Q&A
- Q: How to replace the engine front timing cover on Chevrolet Camaro?A:In order to replace engine front cover, one must remove the engine cover and Intake Manifold before removing the cam shaft covers. Drain out the engine coolant, disconnect the purge vent hose from the water outlet, in removing the water hose using Radiator Hose. Afterward, remove the accessory Drive Belts, the A/C Compressor, and power steering belts tensioner, then the generator bracket, generator, and belt tensioner without detaching the powersteering pipes or drain the fluid. Move the power steering fluid reservoir to make room, unfasten the upper front bolt of the Power Steering Pump, and loosen the other bolts. Take off the crankshaft balancer and Camshaft Position Sensors and then the camshaft position actuator solenoid valves from the front cover. Remove front cover of the engine with the Water Pump and disassemble it trying to clean the surfaces of the sealing without using sharp and metal scrapers. Use compressed air to push out any engine coolant that might be present in the cooling channels and also oil pan scraper. Mount the engine front cover using the en 46109. Mount camshaft position actuator solenoid valves, camshaft position sensors, crankshaft balancer, power steering pump and Power Steering Pump pulley. Replace the power steering fluid reservoir and the generator bracket with the generator and belt tensioner, a/c compressor, and the accessory Drive Belt. Lastly, install the water outlet, reattach the purge vent hose, refill the cooling system, and reinstall the camshaft covers, Intake Manifold, and engine cover, making sure you refill the cooling system again.
- Q: How to service and repair the timing cover on Chevrolet Camaro?A:Start servicing or repairing the Timing Cover by emptying engine oil and coolant before removing the intake air temperature (IAT) sensor connection cables and air intake pipe. First remove the drive belt tensioner along with the Power Steering Pump then loosen the coolant pump pulley bolts. First lift and securely stabilize the vehicle before removing the crankshaft balancer and disconnecting the Crankshaft Position Sensor electrical connector. First remove the Crankshaft Position Sensor shield then its studs along with the sensor. Following this remove all Oil Pan to front cover bolts. The installation of the front cover requires loose Oil Pan bolts for adequate clearance until you can lower the vehicle. Start by removing bolts from both the coolant pump pulley and the pulley itself then detach the radiator outlet hose from the front cover. To begin the front cover removal process you should first take out the engine front cover studs and bolts followed by extraction of the engine front cover with its gasket. Carefully remove the front cover's coolant pump bolts and coolant pump and frong cover gasket before removing the coolant pump . When changing the front cover you must separate the oil pump gear set , camshaft sensor , oil filter adapter along with its gasket and oil pressure relief valve along with its spring. Clean both block surfaces and front cover surfaces after you remove the crankshaft front oil seal. The j 36660-a torque angle meter and j 35354 seal installer tools are required during installation. Mount the oil pump gear set together with the camshaft sensor and new gasket and oil filter adapter to your assembly followed by the oil pressure relief valve with its spring in place. Install a new crankshaft front oil seal and the coolant pump gasket to the front cover after which install the coolant pump . The j36660-a torque angle meter helps tighten the coolant pump bolts to 15 nm (11 ft. Lbs.) while achieving an additional 80 degrees of torque. Install engine front cover gasket to engine block before installing the front engine cover. Use gm p/n 12346004 or equivalent sealant on engine front cover bolts and stud before installation. Torque these components to 20 nm (15 ft. Lbs.), while applying additional 40 degrees torque using the j 36660-a torque multiplier. Secure the radiator outlet hose after first installing the coolant pump pulley while tightening its bolts to 13 nm (115 inch lbs.). After raising the vehicle once more lift it to position both Oil Pan and front cover bolts in place before tightening them to 14 nm (10 ft. Lbs.). Apply gm p/n 12346004 or an equivalent sealant to Crankshaft Position Sensor studs before tightening them to 20 nm (15 ft. Lbs.) and completing an extra 40-degree torque application using the j 36660-a tool. Mount the Crankshaft Position Sensor shield afterward installing its electrical connector while also reinstalling the crankshaft balancer. After lowering the vehicle install the Power Steering Pump and drive belt tensioner and air intake duct and reconnect the iat sensor electrical connector. Releasing engine oil and coolant should be completed as the last step.


Related Chevrolet Camaro Parts
 Chevrolet Camaro Camshaft Bearing
 Chevrolet Camaro Crankshaft
 Chevrolet Camaro Crankshaft Gear
 Chevrolet Camaro Cylinder Head
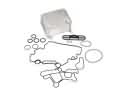 Chevrolet Camaro Engine Oil Cooler
 Chevrolet Camaro Oil Filler Cap
 Chevrolet Camaro Oil Pan
 Chevrolet Camaro Oil Pan Gasket
 Chevrolet Camaro Piston Ring
 Chevrolet Camaro Pushrod
 Chevrolet Camaro Rocker Arm
 Chevrolet Camaro Timing Belt Tensioner