ChevyParts
My Garage
My Account
Cart
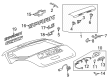
OEM Chevrolet Parking Assist Distance Sensor
Parking Assist Distance Sensor Guide- Select Vehicle by Model
- Select Vehicle by VIN
Select Vehicle by Model
orMake
Model
Year
Select Vehicle by VIN
For the most accurate results, select vehicle by your VIN (Vehicle Identification Number).
39 Parking Assist Distance Sensors found


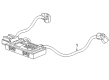
Chevrolet Reverse Sensor Part Number: 19115806
$209.42 MSRP: $307.58You Save: $98.16 (32%)Ships in 1-2 Business DaysProduct Specifications- Other Name: Sensor Kit, Front And Rear Bumper/Fascia Face; Parking Sensors
- Position: Rear
- Replaced by: 20908127


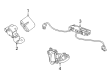
Chevrolet Distance Sensor Part Number: 88891836
$242.53 MSRP: $350.04You Save: $107.51 (31%)Ships in 1-3 Business DaysProduct Specifications- Other Name: Sensor, Theft Deterrent Or Front/Rear/Side Object; Parking Sensors; Reverse Sensor; Sensor Kit for Theft Deterrent or Object Detection; Front/Rear Bumper/Fascia.
- Position: Rear
- Replaces: 88956561

Chevrolet Antitheft Module, Front Rear Part Number: 13437064
$47.13 MSRP: $92.26You Save: $45.13 (49%)Ships in 1-3 Business DaysProduct Specifications- Other Name: Sensor, Theft Deterrent Or Front/Rear/Side Object; Sensor; Sensor,Theft Deterrent Or Front/Rear/Side/Intake Object
- Position: Front Rear

Chevrolet Antitheft Module Part Number: 23298802
$46.27 MSRP: $82.62You Save: $36.35 (44%)Ships in 1-3 Business DaysProduct Specifications- Other Name: Sensor Assembly-Content Theft Deterrent; Sensor; Sensor,Theft Deterrent Or Front/Rear/Side/Intake Object

Chevrolet Antitheft Module Part Number: 23271609
$81.68 MSRP: $145.86You Save: $64.18 (44%)Ships in 1-3 Business DaysProduct Specifications- Other Name: Sensor Assembly-Content Theft Deterrent; Sensor; Sensor,Theft Deterrent Or Front/Rear/Side/Intake Object

Chevrolet Sensor, Front Rear Part Number: 13247188
$98.26 MSRP: $175.46You Save: $77.20 (44%)Ships in 1-3 Business DaysProduct Specifications- Other Name: Sensor, Theft Deterrent Or Front/Rear/Side Object; Sensor,Theft Deterrent Or Front/Rear/Side/Intake Object
- Position: Front Rear

Chevrolet Control Module, Front Rear Part Number: 84761801
$16.80 MSRP: $26.29You Save: $9.49 (37%)Product Specifications- Other Name: Module, Theft Deterrent Or Front/Rear/Side Object; Module; Module,Theft Deterrent Or Front/Rear/Side/Intake Object
- Position: Front Rear
Chevrolet Control Module, Front Rear Part Number: 84761799
$46.96 MSRP: $95.09You Save: $48.13 (51%)Ships in 1-3 Business DaysProduct Specifications- Other Name: Module, Theft Deterrent Or Front/Rear/Side Object; Module; Module,Theft Deterrent Or Front/Rear/Side/Intake Object
- Position: Front Rear

Chevrolet Parking Sensor Part Number: 25947184
$307.98 MSRP: $448.39You Save: $140.41 (32%)Ships in 1-2 Business DaysProduct Specifications- Other Name: Sensor Kit, Front And Rear Bumper/Fascia Face; Parking Sensors; Reverse Sensor; Sensor
- Position: Rear
- Replaced by: 23202663

Chevrolet Parking Sensor, Front Rear Part Number: 23370672
$110.93 MSRP: $160.10You Save: $49.17 (31%)Ships in 1-2 Business DaysProduct Specifications- Other Name: Sensor Kit, Theft Deterrent Or Front/Rear/Side Object; Parking Sensors; Sensor; Sensor Kit,Theft Deterrent Or Front/Rear/Side/Intake Object; Sensor Kit, Front And Rear Bumper/Fascia Face
- Position: Front Rear

Chevrolet Parking Sensor Part Number: 84586218
$41.48 MSRP: $60.40You Save: $18.92 (32%)Product Specifications- Other Name: Sensor Assembly-Parking Assist Alarm *Paint To Mat; Parking Sensors; Reverse Sensor; Theft Deterrent for Front/Rear/Side Objects; Front and Rear Bumper Sensor

Chevrolet Alarm Switch Part Number: 22815632
$24.79 MSRP: $28.16You Save: $3.37 (12%)Ships in 1-2 Business DaysProduct Specifications- Other Name: Switch, Theft Deterrent Or Front/Rear/Side Object; Switch; Switch,Theft Deterrent Or Front/Rear/Side/Intake Object
- Position: Rear
Chevrolet Alarm Switch Part Number: 15859233
$19.81 MSRP: $47.77You Save: $27.96 (59%)Product Specifications- Other Name: Switch, Theft Deterrent Or Front/Rear/Side Object; Switch; Switch,Theft Deterrent Or Front/Rear/Side/Intake Object
- Position: Rear


Chevrolet Sensor Part Number: 10444928
Product Specifications- Other Name: Sensor Assembly-Theft Deterrent Shock; Sensor,Theft Deterrent Or Front/Rear/Side/Intake Object
- Replaces: 10440241, 10268461

Chevrolet Distance Sensor Part Number: 88891837
$51.11 MSRP: $76.07You Save: $24.96 (33%)Product Specifications- Other Name: Sensor, Theft Deterrent Or Front/Rear/Side Object; Parking Sensors; Sensor Kit,Theft Deterrent Or Front/Rear/Side/Intake Object; Sensor Kit, Front And Rear Bumper/Fascia Face
- Position: Rear

Chevrolet Distance Sensor Part Number: 89047102
Product Specifications- Other Name: Sensor Kit, Front And Rear Bumper/Fascia Face; Parking Sensors; Sensor Kit,Theft Deterrent Or Front/Rear/Side/Intake Object
- Position: Rear

Chevrolet Sensor Part Number: 10448904
Product Specifications- Other Name: Sensor Assembly-Theft Deterrent Shock; Sensor,Theft Deterrent Or Front/Rear/Side/Intake Object
- Replaces: 10402864, 10246081, 10431699

Chevrolet Switch Part Number: 15062424
Product Specifications- Other Name: Switch, Ignition Switch Warning, Lock, Headlamp, Theft Deterrent Or Front/Rear/Side Object; Switch,Theft Deterrent Or Front/Rear/Side/Intake Object
- Position: Rear

Chevrolet Switch Part Number: 15830573
Product Specifications- Other Name: Switch, Theft Deterrent Or Front/Rear/Side Object; Switch,Theft Deterrent Or Front/Rear/Side/Intake Object
- Position: Rear
- Replaces: 15763185

Chevrolet Parking Sensor Part Number: 90805836
Product Specifications- Other Name: Sensor, Parking Assist Alarm; Parking Sensors; Sensor; Sensor,Theft Deterrent Or Front/Rear/Side/Intake Object; Sensor, Front And Rear Bumper/Fascia Face
| Page 1 of 2 |Next >
1-20 of 39 Results
Chevrolet Parking Assist Distance Sensor
Want to cut long-term maintenance and repair costs? Choose OEM Parking Assist Distance Sensor. Those parts deliver top durability you can trust. On our site, you'll find a huge catalog of genuine Chevrolet parts. Prices are unbeatable, so you can keep more in your pocket. Every OEM Chevrolet Parking Assist Distance Sensor includes a manufacturer's warranty. You can also get an easy return policy that keeps buying risk free. Fast delivery, get your car on the road quickly. It's simple to search, compare, and order. Stop guessing about quality or fit. Order today and save with parts that last.
Chevrolet Parking Assist Distance Sensor Parts Questions & Experts Answers
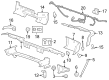
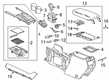
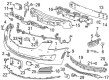
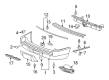
- Q: How to service and repair the Parking Assist Distance Sensor on Chevrolet Silverado 1500?A:First disconnect the electrical connector of the sensor before proceeding with replacement. Raise each locking tab on the housing before the sensor can be removed. New sensor installation must avoid refinishing previously painted sensors because such buildups will make the sensor unusable. Basecoat/Clearcoat Paint Systems should be used to paint the rear object sensor while keeping the paint layer under 6 mils thin by using a non-ferrous metal-friendly paint thickness gauge (Paint Gages). Assume the following positioning: put the sensor into its housing while attaching the electrical connector to the rear object sensor.
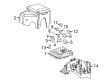
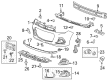
- Q: How to replace the rear Parking Assist Distance Sensor on Chevrolet Uplander?A:Start the replacement of the rear object sensor by removing the rear bumper fascia. Unlock the tabs holding the housing to extract the rear object sensor from its position. Pull the spring's sides while detaching it from the housing before opening the housing tabs for removal. Remove first the rear object sensor bezel from the rear fascia. Application starts with painting the new rear object sensor while avoiding refinishing of pre-existing sensors. Employ a suitable paint thickness gauge for non-ferrous metals to measure paint layer thickness until it reaches 6 mm. Properly place the keyhole against the key before pushing the rear object sensor bezel firmly against the fascia. Attache the fascia bezel housing by connecting its cutouts from behind the fascia before permanently attaching the spring to the housing with the spring keys set at the housing's upper and lower sections. Before assembly you must install the decoupling ring to the sensor while sliding the sensor into the housing so that its connector points towards the passenger side of the fascia. The last step involves attaching the electrical connector while returning the rear bumper fascia in place.
- Q: How to replace the rear Parking Assist Distance Sensor on Chevrolet Venture?A:The rear bumper fascia needs removal as the first step before replacing the rear object sensor. The locking tabs on the housing need to be lifted before pulling out the rear object sensor . The spring should be squeezed first before the housing tabs allow you to remove the components. Push the rear object sensor bezel out from the fascia opening to complete the bezel removal. When installing the new rear object sensor it is necessary to paint it while avoiding any touch-up work on previously painted sensors. Make sure the non-ferrous metal paint thickness reaches at most 6 mils by using an appropriate gauge for these materials. Apply the keyhole of the key to its position and gently drive the rear object sensor bezel until it rests evenly with the fascia surface. Place the housing into cutouts on the bezel after turning the fascia backward while placing spring keys at the bottom and top of the housing. Place the spring into the housing before putting on the decoupling ring to the sensor. Insert the sensor through the housing until its connector reaches the passenger side of the fascia while pressing its tabs into the housing cutouts. To finish the repair process connect the electrical connector followed by installation of the rear bumper fascia.


Related Chevrolet Parts
 Chevrolet TPMS Sensor
 Chevrolet Brake Light Switch
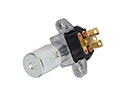 Chevrolet Dimmer Switch
 Chevrolet Engine Control Module
 Chevrolet Horn
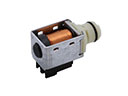 Chevrolet Shift Solenoid
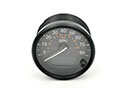 Chevrolet Speedometer
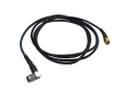 Chevrolet Antenna Cable
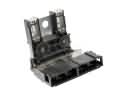 Chevrolet Battery Fuse
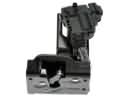 Chevrolet Tailgate Lock Actuator Motor
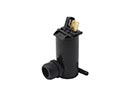 Chevrolet Washer Pump
 Chevrolet Wiper Pivot
Browse Chevrolet Parking Assist Distance Sensor by Models
Colorado Tahoe Cruze Malibu Camaro Equinox Impala SS Avalanche Silverado 1500 Silverado 2500 HD Suburban Traverse Blazer Sonic Volt Spark Trax Trailblazer Corvette Bolt EUV Bolt EV City Express Express 1500 Express 2500 Express 3500 Uplander Venture Suburban 1500 Avalanche 1500 Avalanche 2500 Captiva Sport Cruze Limited Malibu Limited Silverado 1500 LD Silverado 1500 LTD Silverado 3500 HD Suburban 2500