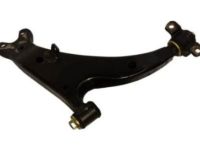
Make sure this part fits

GM 25918964
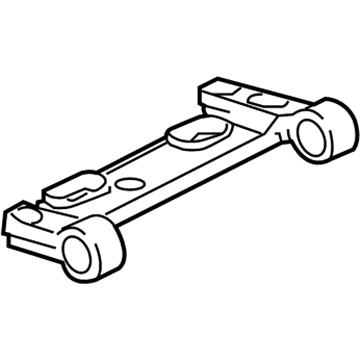
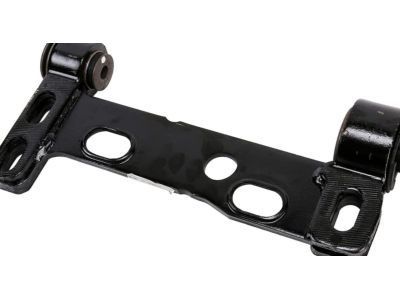
Mount Bracket, Driver Side

2002-2009 GM

Customer Questions & Expert Answers (7)
GM 25918964 Mount Bracket, Driver Side
  • Part Description
    Bracket, Shock Absorber/Strut; Suspension Control Arm Bracket; Control Arm Bracket
  • Position
    Driver Side
  • Replaces
    15198624, 25786779, 15091391, 15280281
  • Manufacturer
    General Motors
Make sure this part fits
$139.61 MSRP: $237.68
You Save: $98.07 (42%)
Ships in 1-2 Business Days
1
ADD TO CART
  • Related Parts
  • Product Specifications
  • Vehicle Fitment
  • Customer Questions & Expert Answers
  • Product Specifications

    BrandGenuine GM
    Manufacturer Part Number25918964
    Part DescriptionBracket, Shock Absorber/Strut; Suspension Control Arm Bracket; Control Arm Bracket
    Other NamesLink; Bracket, Steering Knuckle Upper And Lower Control Arm
    Item Dimensions7.7 x 3.2 x 15.2 inches
    Item Weight10.80 Pounds
    PositionDriver Side
    ConditionNew
    Fitment TypeDirect Replacement
    Replaces15198624, 25786779, 15091391, 15280281
    ManufacturerGeneral Motors
    SKU25918964
    WarrantyThis genuine GM part is guaranteed by GM's factory warranty.
    Shipping & ReturnShipping Policy Return Policy
    Warning: California's Proposition 65
  • Vehicle Fitment

    Year Make Model Trim Engine
    2004-2007 Buick RainierCXL, CXL Plus6 Cyl 4.2 L GAS, 8 Cyl 5.3 L GAS
    2003-2004 Chevrolet SSRBase8 Cyl 5.3 L GAS
    2002-2009 Chevrolet TrailblazerBase, LS, LT, LTZ, North Face, SS6 Cyl 4.2 L GAS, 8 Cyl 5.3 L GAS, 8 Cyl 6.0 L GAS
    2002-2006 Chevrolet Trailblazer EXTLS, LT, North Face6 Cyl 4.2 L GAS, 8 Cyl 5.3 L GAS
    2002-2009 GMC EnvoyDenali, SLE, SLT6 Cyl 4.2 L GAS, 8 Cyl 5.3 L GAS
    2002-2006 GMC Envoy XLDenali, SLE, SLT6 Cyl 4.2 L GAS, 8 Cyl 5.3 L GAS
    2004-2005 GMC Envoy XUVSLE, SLT6 Cyl 4.2 L GAS, 8 Cyl 5.3 L GAS
    2002-2004 Oldsmobile BravadaBase6 Cyl 4.2 L GAS
  • Customer Questions & Expert Answers

    Q:
    Can you help me check if this 25918964 is the right part for my car? Posted by ChevyPartsGiant Specialist
    A:
    Please Select Your Vehicle model to see if part number 25918964 is suitable before ordering.
    Posted by ChevyPartsGiant Specialist
    Q:
    How to replace the lower control arm bracket on Buick Rainier? Posted by Customer
    A:
    To replace the lower Control Arm Bracket, first, lift and secure the vehicle, then take the tire and wheel off. Then remove the stabilizer shaft link lower retaining nut, and separate stabilizer shaft link and washer from the lower Control Arm. Unscrew the lower Control Arm to lower Control Arm Bracket mounting nuts and bolts while placing in writing in which direction the bolts are being removed for reassembly. Pivot the lower Control Arm outward and downward to have access to the lower Control Arm Bracket while ensuring the Axle Shaft remains hooked up to the transmission balances. Take out the lower Control Arm Bracket mounting bolts from the frame and remove the lower Control Arm Bracket. For installation, install lower Control Arm Bracket to the vehicle and secure to frame using mounting bolts, rotational front lower Control Arm Bracket mounting bolts to 265 nm (195 ft. Lbs.) and rotational rear lower Control Arm Bracket mounting bolts to 240 nm (177 ft. Lbs.). Next, mount the lower Control Arm to the lower Control Arm Bracket followed by mounting bolts and nuts, tighten the nuts to 110 nm (81 ft. Lbs.) while aligning the lower Control Arm to the bracket to align the bushings. Next, install the stabilizer shaft link and washer to the lower Control Arm by using a washer made from hardened steel with felt inner liner, and install the stabilizer shaft link retaining nut to 145 nm (107 ft. Lbs.). Lastly, replace the tire and wheel, turn the vehicle-lowering the overnight, and check the front-wagon alignment.
    Posted by ChevyPartsGiant Specialist
    Q:
    How to replace the lower control arm bracket on Chevrolet SSR? Posted by Customer
    A:
    To replace the lower Control Arm Bracket do the following; first remove the tire and wheel, raise the vehicle and support it. Next, unscrew the stabilizer shaft link lower retaining nut and remove the stabilizer shaft link and the washer from the lower Control Arm. Take off the lower Control Arm to lower Control Arm Bracket mounting nuts, marking the direction of the bolts for an easy re-installation later followed by the removal of the lower Control Arm to lower control loop arm bracket mounting bolts. Pivot the lower Control Arm outward and downward to expose the lower Control Arm Bracket, then remove the lower Control Arm Bracket attaching bolt from the frame and remove the lower Control Arm Bracket from the vehicle. For installation, bolt on the lower Control Arm Bracket onto vehicle while you are guided by the fastener notice. Tighten the lower Control Arm Bracket mounting bolts to the frame to 260 nm (192 ft. Lbs. For the front lower Control Arm Bracket mounting bolt) and 240 (177 ft. Lbs. For rear lower Control Arm Bracket mounting bolts). Then, install the lower Control Arm to the lower Control Arm Bracket while making sure that it is parallel while installing and tightening the lower Control Arm mounting bolts and nuts that keep the lower Control Arm bushings properly aligned. Attach the lower Control Arm to lower Control Arm Bracket mounting nuts by tightening them to the specification of 110 nm (81 ft. L BS). A washer should be replaced between the stabilizer shaft link and the lower Control Arm with the washer of the same type, since standard washers should not be used. Then, install the stabilizer shaft link and washer to the lower Control Arm, then install the stabilizer shaft link retaining nut that must tighten to 145 nm (107 ft. Lbs.). Lastly, reinstall the tire and wheel, bring the vehicle down and check the alignment of the front wheel.
    Posted by ChevyPartsGiant Specialist
    Q:
    How to replace the lower control arm bracket on Chevrolet Trailblazer? Posted by Customer
    A:
    Start by raising the vehicle to a comfortable working height then provide support. Separate the tire from the wheel before you disconnect the stabilizer shaft link from the lower Control Arm but keep the lower Control Arm joined to the knuckle assembly. Before continuing replace the lower Control Arm from its bracket to record where the spacer sits on the front bushing before extracting the lower Control Arm bracket from the vehicle's frame. Before mounting the lower Control Arm bracket to the vehicle you must properly position the spacer on the front bushing. Mount the lower Control Arm bracket bolts onto the frame and torque the front lower Control Arm bracket bolt to 260 nm (192 lb ft) but the rear lower Control Arm bracket bolts to 230 nm (170 lb ft). First secure the lower Control Arm to its bracket followed by reconnecting the stabilizer shaft link to this arm. After setting the tire and wheel in position lower the vehicle down and perform a wheel alignment check.
    Posted by ChevyPartsGiant Specialist
    Q:
    How to Properly Service and Repair the Control Arm Bracket on a Chevrolet Trailblazer? Posted by Customer
    A:
    To replace the lower Control Arm bracket, first lift and support the vehicle, and then remove the tire and wheel. Next, remove the stabilizer shaft link lower retaining nut and disconnect stabilizer shaft link and its washer from the lower Control Arm. Remove the lower Control Arm to lower Control Arm bracket mounting nuts and bolts, paying attention to the direction of the bolts for reinstallation purposes. Pivot out and down the lower Control Arm for access to the lower Control Arm bracket, while being careful not to disengage the Axle Shaft from the transmission. Unscrew the lower Control Arm bracket mounting bolts from the frame and not adverting to the position of spacer on front bushing, then remove lower Control Arm bracket from the vehicle. To install, position the lowers Control Arm bracket in its correct position, the spacer should be in place on the front bush, install the lowers Control Arm bracket mounting bolts to the frame, tighten front bolt to 265 nm (195 ft. Lbs.), and the rear bolts to 240 nm (177 ft. Lbs.). Then, connect the lower Control Arm to the lower Control Arm bracket located there, then the mounting bolts and nuts and tighten the nuts to 130 nm (96 ft. Lbs.) making sure that the lower Control Arm is parallel to the bracket so as to align the bushings in its place. Replace the stabilizer shaft link and washer to the lower Control Arm using only an identical hardened steel washer with felt inner liner before getting the stabilizer shaft link retaining nut to 155 nm (114 ft. Lbs.). Lastly, replace the tire and the wheel, lower the vehicle, and check on the alignment of the front wheel.
    Posted by ChevyPartsGiant Specialist
    Q:
    What should be done with the lower control arm to lower control arm bracket mounting nuts for the 2004 Buick Rainier? Posted by Customer
    A:
    Install the lower control arm to lower control arm bracket mounting nuts and tighten them to 110 Nm (81 ft. lbs.).
    Posted by ChevyPartsGiant Specialist
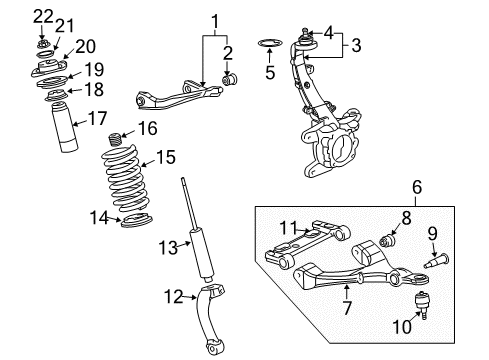
    See expert answers on similar Control Arm Bracket
    Q:
    What should be noted when removing the lower control arm to lower control arm bracket mounting nuts for the 2007 GMC Envoy? Posted by Customer
    A:
    The direction of the bolts for re-installation.
    Posted by ChevyPartsGiant Specialist
    See expert answers on similar Control Arm Bracket
    If you have any questions about this product, please don't hesitate to ask us. We will be happy to help you!

OEM GM 25918964, Excellent Performance and Perfect Fitment

To ensure reliability, purchase GM part # 25918964 Mount Bracket, Driver Side. It is sometimes referred to as GM Control Arm Bracket. Choosing OEM parts is the optimal decision for guaranteeing superior quality and perfect performance. These components undergo stringent quality checks and are carefully constructed to comply with GM's factory specifications, ensuring a smooth installation process.

ChevyPartsGiant.com is a leading supplier of genuine GM parts such as GM 25918964 Mount Bracket, Driver Side. Our website boasts an extensive inventory of OEM GM parts, available at highly competitive prices in the market. Should you require any new genuine GM parts, rest assured we will deliver them swiftly and efficiently to your doorstep. Furthermore, all our parts come with the assurance of a manufacturer's warranty. For detailed Chevy parts information, click here.
Choose ChevyPartsGiant for discounted prices, exceptional service and fast delivery