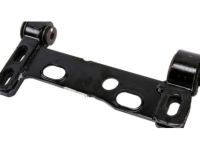
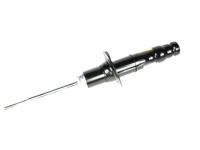
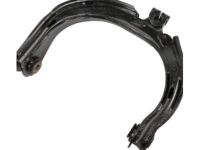
Make sure this part fits

GM 19133555
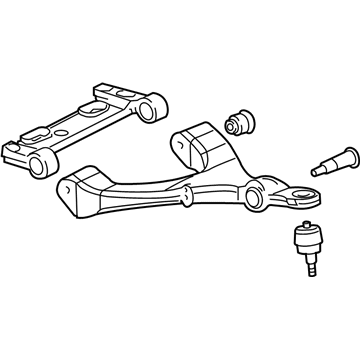
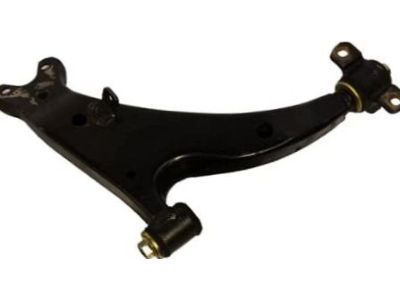
Lower Control Arm, Driver Side

2004-2007 GM

Customer Questions & Expert Answers (15)
GM 19133555 Lower Control Arm, Driver Side
  • Part Description
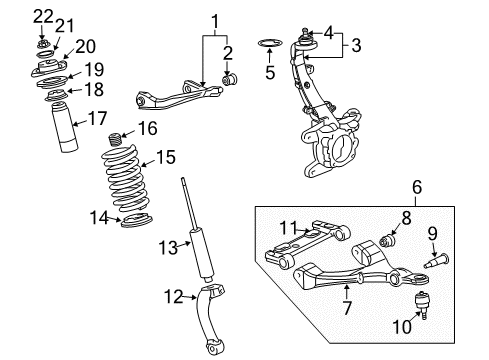
    Arm, Steering Knuckle Control Arm and Ball Joint Assembly; Suspension Control Arm Assembly.
  • Position
    Driver Side
  • Replaces
    89060578
  • Manufacturer
    General Motors
Make sure this part fits
$230.28 MSRP: $392.03
You Save: $161.75 (42%)
Ships in 1-2 Business Days
1
ADD TO CART
  • Vehicle Fitment

    Year Make Model Trim Engine
    2004-2007 Buick RainierCXL, CXL Plus6 Cyl 4.2 L GAS, 8 Cyl 5.3 L GAS
    2004 Chevrolet SSRBase8 Cyl 5.3 L GAS
    2004-2007 Chevrolet TrailblazerLS, LT, North Face, SS6 Cyl 4.2 L GAS, 8 Cyl 5.3 L GAS, 8 Cyl 6.0 L GAS
    2004-2006 Chevrolet Trailblazer EXTLS, LT, North Face6 Cyl 4.2 L GAS, 8 Cyl 5.3 L GAS
    2004-2007 GMC EnvoyDenali, SLE, SLT6 Cyl 4.2 L GAS, 8 Cyl 5.3 L GAS
    2004-2006 GMC Envoy XLDenali, SLE, SLT6 Cyl 4.2 L GAS, 8 Cyl 5.3 L GAS
    2004-2005 GMC Envoy XUVSLE, SLT6 Cyl 4.2 L GAS, 8 Cyl 5.3 L GAS
    2004 Oldsmobile BravadaBase6 Cyl 4.2 L GAS
    Warning: California's Proposition 65
  • Customer Questions & Expert Answers

    Q:
    Is this 19133555 designed for my car? Posted by ChevyPartsGiant Specialist
    A:
    Please Select Your Vehicle model to see if part number 19133555 is suitable before ordering.
    Posted by ChevyPartsGiant Specialist
    Q:
    How to replace the rear axle lower control arm on Buick Rainier? Posted by Customer
    A:
    Rear axle lower control arm replacement requires users to lift the vehicle while securing both components at specified D-height levels per Trim Height Specifications. Affiliated vehicles with air suspension need to experience air suspension system depressurization. Begin by removing the rear axle lower control arm through this process: disconnect the mounting nut and bolt from the axle then loosen the frame mounting nut and bolt to extract the control arm. Installation begins with the lower control arm followed by mounting the rear axle to the frame with its mounting nut and bolt and finally attaching it to the axle with its mounting bolt and nut. Secure the lower control arm mounting bolts to 100 Nm while following the Fastener Notice in Service Precautions instructions. Afterwards lower the vehicle by removing the rear axle support.
    Posted by ChevyPartsGiant Specialist
    Q:
    How to replace the rear axle lower control arm on GMC Envoy? Posted by Customer
    A:
    First to replace the rear axle lower Control Arm, lift and hold the vehicle; then lift and hold the rear axle at the designed d - height. If the vehicle has air suspension, depressurize the air suspension system. Next, after you remove the axle mounting nut and bolt, from which you also remove the frame mounting nut and bolt, then you remove the lower Control Arm from the rear axle. For installation, first you install the lower Control Arm, then you fix the rear axle lower Control Arm to the frame and mounting nut and bolt, and finally fix the axle mounting bolt and nut. Tighten the lower Control Arm mounting bolts to 100 nm (74 ft. Lbs.), making sure that you refer to the fastener notice in service precautions. Finally, take out the rear axle support and lower the vehicle.
    Posted by ChevyPartsGiant Specialist
    Q:
    What is the first step in the installation process for the 2005 Buick Rainier? Posted by Customer
    A:
    Position the rear axle upper control arm and secure it with the frame mounting bolt.
    Posted by ChevyPartsGiant Specialist
    See expert answers on similar Control Arm
    Q:
    What should be done after securing the upper ball joint for the 2006 Buick Rainier? Posted by Customer
    A:
    Reinstall the tire and wheel.
    Posted by ChevyPartsGiant Specialist
    See expert answers on similar Control Arm
    Q:
    How do you secure the upper ball joint to the upper control arm for the 2005 Buick Rainier? Posted by Customer
    A:
    Install the upper ball joint to upper control arm pinch bolt and nut, tightening it to 40 Nm (30 ft. lbs.).
    Posted by ChevyPartsGiant Specialist
    See expert answers on similar Control Arm
    Q:
    What bolts need to be removed to take out the rear axle upper control arm for the 2007 Buick Rainier? Posted by Customer
    A:
    The rear axle upper control arm to axle mounting bolt and nut, followed by the rear axle upper control arm to frame mounting bolt.
    Posted by ChevyPartsGiant Specialist
    See expert answers on similar Control Arm
    Q:
    What should you do after disconnecting the lower ball joint for the 2004 Buick Rainier? Posted by Customer
    A:
    Pivot the lower control arm outward and downward to disconnect it from the lower control arm bracket, then remove the lower control arm from the steering knuckle.
    Posted by ChevyPartsGiant Specialist
    See expert answers on similar Control Arm
    Q:
    What is the torque specification for tightening the mounting bolts for the 2004 Chevrolet SSR? Posted by Customer
    A:
    131 Nm (97 ft. lbs.).
    Posted by ChevyPartsGiant Specialist
    See expert answers on similar Control Arm
    Q:
    How do you disconnect the shock module yoke from the lower control arm for the 2004 Chevrolet SSR? Posted by Customer
    A:
    Remove the shock module yoke lower mounting nut and use the Steering Linkage and Tie Rod Puller (J 24319-B).
    Posted by ChevyPartsGiant Specialist
    See expert answers on similar Control Arm
    Q:
    What is the first step in the installation process for the 2004 Chevrolet Trailblazer? Posted by Customer
    A:
    Install the lower control arm.
    Posted by ChevyPartsGiant Specialist
    See expert answers on similar Control Arm
    Q:
    What is the first step for installation of the lower control arm for the 2005 Chevrolet Trailblazer? Posted by Customer
    A:
    Install the lower control arm to the steering knuckle.
    Posted by ChevyPartsGiant Specialist
    See expert answers on similar Control Arm
    Q:
    How do you disconnect the outer tie rod from the steering knuckle for the 2007 GMC Envoy? Posted by Customer
    A:
    Discard the outer tie rod retaining nut and use the Steering Linkage and Tie Rod Puller (J 24319-B).
    Posted by ChevyPartsGiant Specialist
    See expert answers on similar Control Arm
    Q:
    What are the final steps after the installation is complete for the 2006 GMC Envoy? Posted by Customer
    A:
    Remove the rear axle support, install the wheelhouse panel, put the tire and wheel back on, and finally lower the vehicle.
    Posted by ChevyPartsGiant Specialist
    See expert answers on similar Control Arm
    Q:
    What should you note when removing the lower control arm to lower control arm bracket mounting nuts and bolts for the 2006 GMC Envoy? Posted by Customer
    A:
    Note the direction of the bolts for installation.
    Posted by ChevyPartsGiant Specialist
    See expert answers on similar Control Arm
    If you have any questions about this product, please don't hesitate to ask us. We will be happy to help you!

OEM GM Lower Control Arm, Driver Side 19133555 Designed for Proper Fit and Performance

Original OEM GM parts deliver superior quality and meet all performance standards needed for optimal automotive operation. The authentic part identified by 19133555 Lower Control Arm, Driver Side is available in the market under the name GM Control Arm. This genuine product has a full warranty coverage from the manufacturer available at all authorized GM dealers throughout the United States. This part 19133555 Lower Control Arm, Driver Side fits certain Chevrolet SSR, Trailblazer, Trailblazer EXT models, as well as GMC Envoy, Envoy XL, Envoy XUV. Additionally, it is compatible with Buick Rainier and Oldsmobile Bravada models.
The original GM component designated by manufacturer part number 19133555 maintains top performance when functioning as the Arm, Steering Knuckle Control Arm and Ball Joint Assembly; Suspension Control Arm Assembly. unit at its Driver Side. The component 19133555 is constructed from durable material and its dimensions span 18.1 x 16.6 x 4.7 inches while weighing 18.50 Pounds. The Direct Replacement component is ready in New condition to ensure full compatibility with your vehicle system. The part 19133555 has available replacement options 89060578. GM manufacturer provides a warranty that ensures reliable operation of this product. The Shipping Policy and Return Policy pages outline complete details regarding shipping procedures and return processes.
If you want to save money in the long run on maintenance and repairs, you should choose OEM products because they're of the top level of durability. Are you on the quest of finding GM parts, our site is worth a visit. We stock an endless selection of high-quality GM components including things like ignition coils all the way through to fan shrouds and all at prices that can not be matched. You have nothing to worry about because all our OEM parts are covered with a manufacturer warranty, which guarantees superior quality and value.