Make sure this part fits

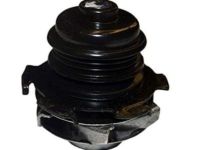
GM 12463003
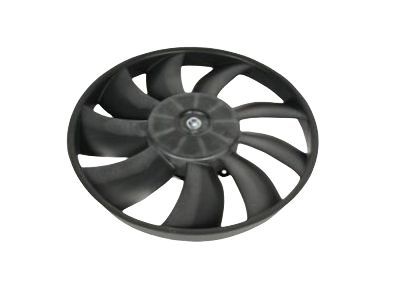
Fan Blade

1998-2005 GM

Customer Questions & Expert Answers (8)
GM 12463003 Fan Blade
  • Part Description
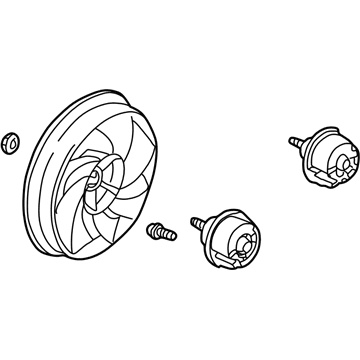
    Fan Kit, Engine Air Cooling; Dual Radiator and Condenser Fan Assembly; Cooling Fan Motor.
  • Manufacturer
    General Motors
  • Manufacturer's Notes
    This part is discontinued.
Make sure this part fits
  • Related Parts
  • Product Specifications
  • Vehicle Fitment
  • Customer Questions & Expert Answers
  • Product Specifications

    BrandGenuine GM
    Manufacturer Part Number12463003
    Part DescriptionFan Kit, Engine Air Cooling; Dual Radiator and Condenser Fan Assembly; Cooling Fan Motor.
    Other NamesFan & Motor; Fan Assembly; Fan Kit, Engine Air Cooling(Electrical)
    Item Dimensions21.1 x 21.0 x 7.9 inches
    Item Weight7.60 Pounds
    ConditionNew
    Fitment TypeDirect Replacement
    ManufacturerGeneral Motors
    SKU12463003
    WarrantyThis genuine GM part is guaranteed by GM's factory warranty.
    Shipping & ReturnShipping Policy Return Policy
    Warning: California's Proposition 65
  • Vehicle Fitment

    Year Make Model Trim Engine
    2000-2005 Cadillac DeVilleBase, DHS, DTS, Protection Series8 Cyl 4.6 L GAS
    1998-2004 Cadillac SevilleSLS, STS8 Cyl 4.6 L GAS
    2001-2003 Oldsmobile AuroraBase6 Cyl 3.5 L GAS, 8 Cyl 4.0 L GAS
    2004-2005 Pontiac BonnevilleGXP8 Cyl 4.6 L GAS
  • Customer Questions & Expert Answers

    Q:
    Is this 12463003 designed for my car? Posted by ChevyPartsGiant Specialist
    A:
    Please Select Your Vehicle model to see if part number 12463003 is suitable before ordering.
    Posted by ChevyPartsGiant Specialist
    Q:
    How to properly install a radiator fan on Cadillac DeVille? Posted by Customer
    A:
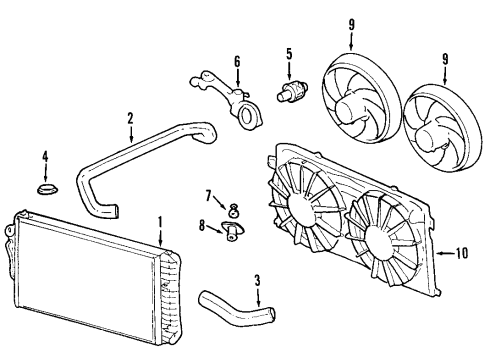
    The replacement of a Radiator fan begins with disconnecting the negative Battery Cable and removing the upper Radiator support and draining the cooling system. Beginning with air deflector removal users should also disband both the engine oil cooler pipe retaining clip and bolt from the Fan Shroud. Ensure the vehicle is set at its lowest point before installing the j 37097-a (J 37097-A). The upper engine oil cooler pipe needs to be disconnected from its position on the Radiator before removing the bolt holding the upper transaxle oil cooler pipe to the Fan Shroud. The j 41623-b (J 41623-B) tool enables the removal of the upper transaxle oil cooler pipe from the Radiator after sliding off its plastic cap from the quick connect fitting. The vehicle's Radiator Fan Motor electrical connectors should be disconnected while the wiring harness clips are untied from the Fan Shroud and the two a/c discharge hose retainers must also be removed. The procedure requires removal of two Radiator fan mounting bolts which should be done while protecting the lower attachment areas of both the Radiator fan assembly and Radiator. The Radiator fan assembly needs to be taken off by first directing it to the left side of the vehicle and then pulling the right side upward and moving the fan to the right before pulling it upward. Install the Radiator fan assembly by sliding it behind the Radiator then move it to the right before pushing down the right side and positioning the Fan Shroud mounting tabs onto the Radiator feet. Screw in the Radiator fan mounting bolts while tightening them until they reach 6 nm (53 inch lbs.). Start by adding the two retainers to the a/c discharge hose while connecting the wiring harness electrical connectors to the Radiator fan motors along with attaching the wiring harness retaining clips to the Fan Shroud. When installing the upper transaxle oil cooler pipe to the Radiator quick connect fitting apply force until you hear a "click" sound and use gentle pulling on the pipe to confirm proper retention. The installation process requires attaching the upper transaxle oil cooler pipe retaining bolt to the Fan Shroud and tightening it to 6 nm (53 inch lbs.). Afterward, slide the plastic cap over the quick connect joint. The connection between the upper engine oil cooler pipe and the Radiator must be tightened to achieve 18 nm torque. Guiding the j 37097-a tool connects the inlet Radiator Hose to the Radiator through a fitting clamp. Lift the vehicle by using proper jack stands before mounting the engine oil cooler pipe retaining clip and its bolt to the Fan Shroud. Secure the bolt to 6 nm (53 inch lbs.). The air deflector needs installation followed by vehicle lowering for upper Radiator support addition then filling the cooling system before connecting the battery negative cable and checking engine oil level.
    Posted by ChevyPartsGiant Specialist
    Q:
    How to replace the radiator fan on Cadillac Seville? Posted by Customer
    A:
    The electric Radiator fan replacement process begins with disconnecting the battery negative cable before draining the cooling system. You should first disassemble the Fan Shroud by removing its air deflector and retaining bolt plus engine oil cooler pipe along with the retainer. Then drop the vehicle to the ground. The Radiator service requires the upper and lower engine oil pipes to disconnect while setting them aside. Then remove the hood latch support and headlamps before disconnecting both pipe types. The hose clamp remover/installer (J37097-A) helps with inlet Radiator Hose removal from the Radiator before placing the hose over the engine area. Free the Fan Shroud by taking away the air cleaner assembly together with the upper transaxle oil cooler pipe retaining bolt. Unscrew the upper transaxle oil cooler pipe plastic cap through the quick connect fitting and remove it from the Radiator using tool j41623-b cooler quick connect tool. Follow the procedure once again to disconnect the outlet Radiator Hose from the Radiator using the hose clamp remover/installer (J37097-A) and then remove its lower transaxle oil cooler pipe from the Radiator. First disconnect the Radiator bracket mounting bolts while simultaneously removing the mounting brackets as well. The procedure for taking off the Fan Shroud begins by lifting the Radiator/a/c condenser assembly from the lower Radiator support pads then tilting the top forward. Begin the procedure by disconnecting wires from the fan motors and then remove the brackets that link the harness to the Fan Shroud and disconnect the a/c charge hose retainer coupling. Unfasten the two mounting bolts of electric Radiator fans while being mindful of the lower attachment points. To remove the Radiator fan assembly route it first to the right position and then use upward force on the right aspect before shifting it left for final removal from the vehicle. Start by placing the Radiator fan assembly at the rear of the Radiator and move it left with a downward motion on right side until you correctly position the Fan Shroud lower feet at the Radiator mounting tabs. You must install the electric Radiator fan mounting bolts at 6 nm (53 inch lbs.) before attaching the retaining clip of the a/c discharge hose alongside the wiring harness electrical connectors to the Radiator fan motors. The Radiator mount brackets should be installed after positioning the assembly on the below Radiator support pads. Install the Radiator mounting bolts with torque at 9 nm and attach Fan Shroud wiring harness clips. Position the lower transaxle oil cooler pipe toward the upper direction before tightening it to 35 nm (26 ft. Lbs.). Use hose clamp remover/installer (J37097-A) to join the outlet Radiator Hose with the Radiator before pushing the upper transaxle oil cooler pipe into the quick connect fitting of the Radiator until a 'click' is heard. Then install the plastic cap over the joint. The top transaxle oil cooler pipe retention bolt must connect to the Fan Shroud and its tightening torque should be set to 6 nm (53 inch lbs.). Lastly, install the air cleaner assembly. Using the hose clamp remover/installer (J37097-A) conduct the Radiator Hose inlet connection to the Radiator followed by connecting both engine oil cooler pipes which should be tightened up to 18 nm (13 ft. Lbs.). To finish complete the installation you must first install the headlamps then install the hood latch support followed by vehicle raising and support before adding the engine oil cooler pipe retaining clip and bolt to the Fan Shroud where the retaining bolt will be tightened to 6 nm (53 inch lbs.) after which the air deflector and vehicle lowering occur next to complete filling the cooling system then connecting the battery negative cable with a final engine oil check.
    Posted by ChevyPartsGiant Specialist
    Q:
    How to replace the radiator fan on Cadillac DeVille? Posted by Customer
    A:
    Begin the electric cooling fan replacement by discharging the battery negative cable followed by eliminating the upper Radiator support. Empty the cooling system then strip off the air deflector from the vehicle. Start by taking off the engine oil cooler pipe retaining clip and bolt from the Fan Shroud before lowering the vehicle. Apply the hose clamp remover/installer (J 37097-A) model to detach the inlet Radiator Hose from the Radiator housing. The upper engine oil cooler pipe needs removal from the Radiator before taking out the upper transaxle oil cooler pipe retaining bolt from the Fan Shroud. Use the cooler quick connect tool (J 41623-A) to remove the upper transaxle oil cooler pipe from the Radiator while detached from the plastic cap on its quick connect fitting. First disconnect the harness electrical connections of the Radiator fan motors before removing the clips that affix the harness to the Fan Shroud. The two retainers connecting the a/c discharge hose need removal before the two electric Radiator fan mounting bolts get extracted. Position the Radiator fan assembly to the left side of the vehicle before lifting at the right side until it removes completely in a rightward direction. Position the Radiator fan assembly behind the Radiator and move it towards the right side before pressing downward on the right side until the lower feet of the Fan Shroud match the Radiator mounting tabs. The electric Radiator fan mounting bolts need installation followed by tightening to 6 nm (53 inch lbs.). Insert the connectors of both retainer devices into the outer end of the A/C Hose and reattach all wiring harness plugs to the motors before installing Fan Shroud clips. Insert the upper transaxle oil cooler pipe into the Radiator quick connect fitting while pushing until it clicks before gently checking retention and placing the plastic cap on the connector. Screw the upper transaxle oil cooler pipe retaining bolt into the Fan Shroud position with 6 nm (53 inch lbs.) torque specification. Connect the upper pipe supplying engine oil coolant to the Radiator by tightening its fitting to 18 nm torque. The hose clamp remover/installer (J 37097-A) should be used to attach the inlet Radiator Hose to the Radiator before lifting and supporting the vehicle. Put in the engine oil cooler pipe retaining clip along with bolt to Fan Shroud and fasten the bolt at 6 nm (53 inch lbs.). Put back the air deflector together with lowering the vehicle to install the upper Radiator support. To complete this procedure fill the cooling system then reconnect the battery negative cable and verify engine oil level.
    Posted by ChevyPartsGiant Specialist
    Q:
    What should be done after reinstalling the headlamps and hood latch support for the 2001 Cadillac Seville? Posted by Customer
    A:
    Raise and support the vehicle, install the engine oil cooler pipe retaining clip and bolt to the fan shroud, tighten the bolt to 6 Nm (53 inch lbs.), install the air deflector, lower the vehicle, fill the cooling system, reconnect the battery negative cable, and check the engine oil level.
    Posted by ChevyPartsGiant Specialist
    See expert answers on similar Radiator fan
    Q:
    How do you remove the electric cooling fan assembly for the 2004 Cadillac DeVille? Posted by Customer
    A:
    Remove the two electric cooling fan mounting bolts, then position the assembly towards the left side, pull upward on the right side, position it towards the right side, and finally pull upward to remove it.
    Posted by ChevyPartsGiant Specialist
    See expert answers on similar Radiator fan
    Q:
    How do you reinstall the radiator/A/C assembly for the 2002 Cadillac Seville? Posted by Customer
    A:
    Position it back onto the lower radiator support pads, install the radiator mounting brackets and bracket mounting bolts, tightening them to 9 Nm (80 inch lbs.).
    Posted by ChevyPartsGiant Specialist
    See expert answers on similar Radiator fan
    Q:
    What should be done to remove the fan shroud for the 2004 Cadillac Seville? Posted by Customer
    A:
    Lift the radiator/A/C condenser assembly from the lower radiator support pads and tilt the top forward.
    Posted by ChevyPartsGiant Specialist
    See expert answers on similar Radiator fan
    If you have any questions about this product, please don't hesitate to ask us. We will be happy to help you!

OEM GM 12463003, Excellent Performance and Perfect Fitment

To ensure reliability, purchase GM part # 12463003 Fan Blade. It is sometimes referred to as GM A/C Condenser Fan, GM Fan Blade, GM Radiator fan. Choosing OEM parts is the optimal decision for guaranteeing superior quality and perfect performance. These components undergo stringent quality checks and are carefully constructed to comply with GM's factory specifications, ensuring a smooth installation process.

ChevyPartsGiant.com is a leading supplier of genuine GM parts such as GM 12463003 Fan Blade. Our website boasts an extensive inventory of OEM GM parts, available at highly competitive prices in the market. Should you require any new genuine GM parts, rest assured we will deliver them swiftly and efficiently to your doorstep. Furthermore, all our parts come with the assurance of a manufacturer's warranty. For detailed Cadillac parts information, click here.
Choose ChevyPartsGiant for discounted prices, exceptional service and fast delivery