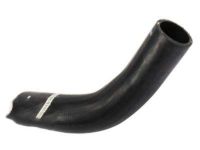
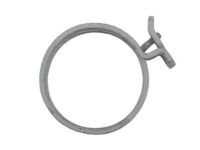
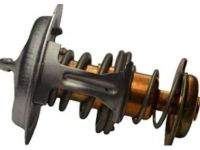
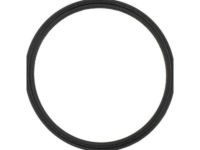
Make sure this part fits

GM 1647540
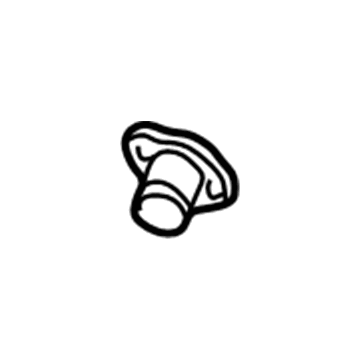
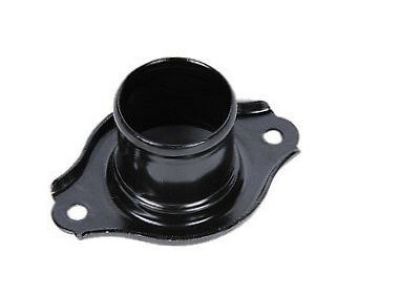
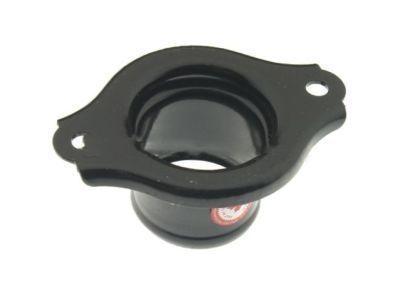
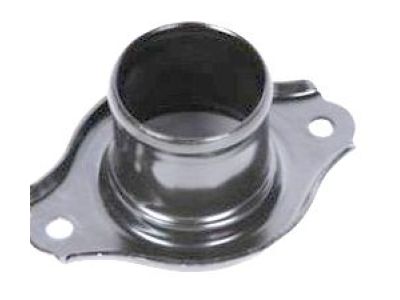
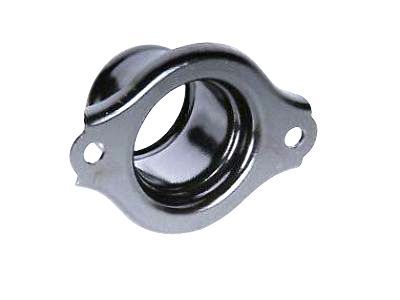
Thermostat Housing

1993-2011 GM

Customer Questions & Expert Answers (24)
GM 1647540 Thermostat Housing
  • Part Description
    Housing E; Thermostat Housing Cover
  • Manufacturer
    General Motors
Make sure this part fits
$11.19 MSRP: $21.01
You Save: $9.82 (47%)
Ships in 1-2 Business Days
1
ADD TO CART
  • Vehicle Fitment

    Year Make Model Trim Engine
    2006-2011 Buick LucerneCXL, CXS, Super8 Cyl 4.6 L GAS
    1993 Cadillac AllanteBase, Indianapolis 500 Pace Car, Value Leader8 Cyl 4.6 L GAS
    2006-2011 Cadillac DTSBase, Livery, Luxury, Platinum, Premium8 Cyl 4.6 L GAS
    1994-2005 Cadillac DeVilleBase, Concours, d'Elegance, DHS, DTS, Protection Series8 Cyl 4.6 L GAS
    1993-2002 Cadillac EldoradoBase, ESC, ETC, Sport, Touring8 Cyl 4.6 L GAS
    1993-2004 Cadillac SevilleSLS, STS8 Cyl 4.6 L GAS
    2001-2003, 1995-1999 Oldsmobile AuroraBase8 Cyl 4.0 L GAS
    2004-2005 Pontiac BonnevilleGXP8 Cyl 4.6 L GAS
    Warning: California's Proposition 65
  • Customer Questions & Expert Answers

    Q:
    Is this 1647540 designed for my car? Posted by ChevyPartsGiant Specialist
    A:
    Please Select Your Vehicle model to see if part number 1647540 is suitable before ordering.
    Posted by ChevyPartsGiant Specialist
    Q:
    How to replace the thermostat on Cadillac Eldorado? Posted by Customer
    A:
    To replace the Thermostat, start to drain the cooling system with leaving it half full of the coolant and then remove the air cleaner assembly. Remove radiator outlet hose from Thermostat Housing using hose clamp pliers (J 38185). Next, get rid of the bolts securing the Thermostat Housing to the water pump inlet, and pull out Thermostat and the gasket from the water pump housing. For installation, insert the new gasket and Thermostat into the water pump housing, install the Thermostat Housing back and tighten its bolts to 10 nm (89 inch lbs.drv). Reconnect the radiator outlet hose to the Thermostat Housing using the hose clamp piers (J 38185), replace the air cleaner assembly, and lastly, fill up the cooling system.
    Posted by ChevyPartsGiant Specialist
    Q:
    How to service and repair the thermostat on Cadillac DeVille? Posted by Customer
    A:
    To service and repair the Thermostat, start first by partially draining the cooling system. Following this, remove the air cleaner assembly. Put off the clamp by the use of hose clamp pliers (J38185) and eliminate the outlet Radiator Hose from the Thermostat Housing. Afterwards, pull out the bolts that fasten the Thermostat Housing to the inlet of the water pump and then take it along with the gasket out of the water pump housing. To install, put in the new gasket and Thermostat into the water pump housing, then follow it with Thermostat Housing. Mount the Thermostat Housing with the help of the bolts and tighten it to 10 nm (89 inch lbs). Connect the hose of the outlet radiator to the housing of the Thermostat with the hose clamp pliers (J38185) and screw back the air cleaner assembly. Finally, fill the cooling system.
    Posted by ChevyPartsGiant Specialist
    Q:
    How to service and repair the thermostat housing and replace the water crossover on Cadillac Eldorado? Posted by Customer
    A:
    To service and repair the Thermostat Housing and replace the water crossover, first drain the cooling system off the Thermostat Housing, and make sure to remove the air cleaner assembly, fuel injector sight shield, and the brake booster vacuum tube from the water housing crossover. Remove the fuel regulator vacuum tube and the secondary air solenoid vacuum tube, and take off the Throttle Body, left engine mount strut bracket and EGR Valve. Remove the egr inlet pipe nut from the exhaust crossover, and remember that the EGR Valve inlet pipe has to be replaced if loosened from the water crossover. Unbolt the egr inlet pipe bolt and flange and remove it from the water crossover and throw the egr inlet pipe away. Next, take off the evap emission canister purge valve, disconnect the electrical connector from the MAP Sensor, and remove the MAP Sensor. When using the j 38185 hose clamp plier (J 38185) remove the radiator inlet hose and outlet hose respectively from the water housing crossover and Thermostat Housing. Unbolt the Water Pump belt tensioner from the water crossover, then detach it from the Water Pump and the two bolts that hold it to the Water Pump belt tensioner. Remove the cable harness clip from the water housing crossover and set it to the side, remove the heater hose from the water housing crossover, and remove the water housing crossover from the engine. Clean and inspect the water housing crossover and install it by inserting all eight crossover retaining bolts along to slant on putting the water housing crossover gaskets on the bolts. Put the water housing crossover on place and hand start the bolts then tighten them from top to bottom until you reach 25 nm (18 ft. Lbs.). Connect heater hose and cable harness clip to the water housing crossover, then bolt 2 in place holding Water Pump belt tensioner to the water crossover; tighten to 10 nm (89 inch lbs.). Install the Water Pump then with the j 38185 (J 38185) connect the radiator outlet hose to the Thermostat Housing and the radiator inlet hose to the water housing crossover. Mount the MAP Sensor and fit the electrical connect to it and install the EGR Valve. Hand start the new egr inlet pipe to crossover pipe nut to preclude crossthreading and tighten to 60 nm (44 ft. Lbs.). Attach egr inlet pipe flange to water crossover and install egr inlet pipe-to-water crossover flange bolt, torquing to 25 nm (18 ft. Lbs.). Lastly, connect the evap emission canister purge valve, the left engine mount strut bracket, connect the secondary air solenoid vacuum tube, fuel regulator vacuum tube, and brake booster vacuum tube before you install the Throttle Body, fuel injector sight shield and the air cleaner assembly, and fill the coolant system.
    Posted by ChevyPartsGiant Specialist
    Q:
    How to service and repair the thermostat housing and replace the water crossover on Cadillac DeVille? Posted by Customer
    A:
    To service and repair Thermostat Housing replacing the water crossover drain off cooling system and remove air cleaner assembly, fuel injector sight shield, and disconnect brake booster vacuum tube from the water housing crossover. Next, unplug the fuel regulator vacuum tube, air solenoid vacuum tube and unbolt the Throttle Body. Remove the fuel rail bracket retaining nut at rear lift bracket, the surge tank inlet hose from the fitting and the surge tank inlet fitting, rear lift bracket bolt and rear lift bracket. The EGR Valve has to be removed also, and its egg inlet pipe nut has to be loosened from the exhaust crossover while at the same time, the egg valve inlet pipe must always be left behind in respect to the water crossover. Deflate the egr inlet pipe bolt and flange from the water crossover, and then dispose of the egr inlet pipe. Pull out the evap emission canister purge valve, detach the electrical connector for the MAP Sensor, and pull out the MAP Sensor. Use j 38185 hose clamp pliers (J38185) to remove the inlet Radiator Hose and outlet Radiator Hose hoses from the water housing crossover and Thermostat Housing, respectively. Remove the Water Pump and the 2 bolts that are fastening the Water Pump belt tensioner to the water crossover and remove the Water Pump belt tensioner. Remove the cable harness clip from the water housing crossover and set it to one side and remove the heater hose from the water housing crossover and remove the water housing crossover from the engine. Clean and inspect the water housing crossover that is to be assembled, by sliding the upper and lower water housing crossover gaskets onto the 8 crossover retaining bolts, positioning the water housing crossover, and then hand starting the bolts. Tighten up the water housing crossover bolts, to 25 nm (18ft. Lbs.), then connect the heater hose and cable harness clip (to the water housing crossover) and install the 2 bolts fastening the Water Pump belt tensioner to the water crossover, and tighten same tightly to 10 nm (89 inch lbs.). Mount the Water Pump, then thread the outlet Radiator Hose to the Thermostat Housing and inlet Radiator Hose to the water housing crossover using j 38185 . Mount the MAP Sensor, connect the electrical clamp to the MAP Sensor, and install the EGR Valve by ascertaining to hand start the new egr inlet pipe-to-crossover pipe nut to avoid crossthreading then tighting to 60 nm (44 ft. Lbs.); then install the exhaust gas temperature sensor at option to accomplish the installation sequence; and finally, replace the upper brake master cylinder and attach the upper control arm and wheel with the correct assembly. Connect the egr inlet pipe flange to the water crossover and insert the egr inlet pipe-to-water crossover flange bolt, tighten bolt to 25 nm (18 ft. Lbs.). Mount the evap emission canister purge valve and neatly place the rear lift bracket at the water crossover and mount it with its bolt that should be tightened to 24 nm (18 ft. Lbs.). Mount the surge tank inlet fitting using 47 nm (35 ft. Lbs) pressure, attach the surge tank inlet hose to the fitting, and attach the fuel rail bracket retaining nut to the rear lift bracket and tighten to 4 nm (35 inch lbs.). Finally make the connections of air solenoid vac tube, fuel regulator vac tube and brake booster vac tube and set the Throttle Body, fuel injector sight shield assembly and air cleaner assembly and filling the cooling system.
    Posted by ChevyPartsGiant Specialist
    Q:
    How to service and repair the thermostat housing on Cadillac Seville? Posted by Customer
    A:
    Must start with draining the cooling system when servicing and repairing the Thermostat Housing. After removing the air cleaner assembly, remove the two nuts from intake manifold sight shield, and remove the latter from its position on the engine. Upper motor mount bolts are 16mm. The second step is to pull off the airflow Throttle Body and its connecting nut at the back lift bracket, the surge tank inlet hose from the fitting, and the generator coolant hose from the heater pipe. Then, take out the surge tank inlet fitting, the rear lift bracket bolt, and the rear lift bracket. Virtually, unscrew the EGR Valve and pry loose the egr inlet pipe nut at the point where it connects to the crossover of the exhaust - replace the egr inlet pipe if it comes off from the water crossover. Unbolt and remove the egr inlet pipe bolt and flange from the water crossover and dump the egr inlet pipe to waste. Remove mo evap emission canister purge valve and remove the electrical connector from MAP Sensor before removing MAP Sensor. Using the hose clamp pliers (J 38185), remove the inlet and outlet radiator hoses from the water housing crossover and Thermostat Housing respectively. Remove the two bolts holding the Water Pump belt tensioner to the water crossover and disconnect the Water Pump from its place, then remove the Water Pump belt tensioner. Remove the cable harness clip that is inside the water housing crossover and the heater that is connected to the water housing crossover and the next step would be to remove the water housing crossover from the engine. Clean and check the water housing crossover, then install the new gaskets onto the crossover retaining bolts, positioning them properly. Put the water housing crossover in place and hand start bolts and tighten them in sequence to 25 nm (18 ft. Lbs.). Mount the heater hose and cable harness clip to the water housing crossover, then bolt the Water Pump belt tensioner to the water crossover with the two bolts, and tighten to 10 nm (89 inch lbs.). Mount the Water Pump and attach the outlet Radiator Hose to the Thermostat Housing and the inlet Radiator Hose to the water housing crossover with the hose clamp pliers (J 38185). Install the MAP Sensor and solder the electrical connector. Mount the EGR Valve and make sure to hand start the new egr inlet pipe-to-crossover pipe nut to avoid crossthread it and tighten it 60 nm (44 ft. Lbs). Join the egr inlet pipe flange to the water crossover and tighten in place with a 25 nm (18 ft. Lbs) bolt on the egr inlet pipe to the water crossover flange bolt. Mount the evap emission canister purge valve, position rear lift bracket to the water x-over, and install the rear lift bracket bolt with 24 nm (18 ft. Lbs.). Install the surge tank inlet fitting & tighten to 47 nm (35 ft. Lbs.), connect surge tank inlet hose to fitting, generator coolant hose to heater pipe and fuel rail bracket retaining nut to rear lift bracket, tightn to 4 nm (35 inch lbs). Link the air solenoid vacuum tube and fuel regulator vacuum tube, followed by the brake booster vacuum tube. Mount the Throttle Body, align the intake manifold sight shield to the engine, and screw the two intake manifold sight shield nuts, wrenching them to 3 nm (27 inch lbs.). Finally, place the air cleaner assembly, and fill the cooling system.
    Posted by ChevyPartsGiant Specialist
    Q:
    How to service and repair the thermostat housing for the Thermostat Bypass Pipes Replacement (RPO L26) on Buick Lucerne? Posted by Customer
    A:
    For the service and repair of thermostat housing for the Thermostat Bypass Pipes Replacement (RPO L26), first remove the drive belt tensioner and then remove the thermostat bypass upper and lower pipes. For installation, seal the thermostat bypass upper and lower pipe seals with engine coolant before mounting the upper and lower pipes onto the tensioner, and finally reinstall the drive belt tensioner.
    Posted by ChevyPartsGiant Specialist
    Q:
    What should be removed from the thermostat housing after repositioning the hose clamp for the 2007 Buick Lucerne? Posted by Customer
    A:
    Remove the radiator inlet hose from the thermostat housing.
    Posted by ChevyPartsGiant Specialist
    See expert answers on similar Thermostat
    Q:
    What tool is used to reposition the hose clamp at the thermostat housing for the 2008 Buick Lucerne? Posted by Customer
    A:
    Utilize the Hose Clamp Pliers (J 38185).
    Posted by ChevyPartsGiant Specialist
    See expert answers on similar Thermostat
    Q:
    What is the torque specification for the thermostat housing bolts for the 2010 Cadillac DTS? Posted by Customer
    A:
    Tighten the thermostat housing bolts to 10 Nm (89 lb in).
    Posted by ChevyPartsGiant Specialist
    See expert answers on similar Thermostat
    Q:
    What should be done with the MAP sensor and EGR valve for the 2002 Cadillac Eldorado? Posted by Customer
    A:
    Install the MAP sensor, connect the electrical connector to it, and install the EGR valve, ensuring to replace the EGR valve inlet pipe if disconnected.
    Posted by ChevyPartsGiant Specialist
    See expert answers on similar Thermostat Housing
    Q:
    What is the final step after replacing the thermostat for the 2001 Cadillac Eldorado? Posted by Customer
    A:
    Reinstall the air cleaner assembly and fill the cooling system.
    Posted by ChevyPartsGiant Specialist
    See expert answers on similar Thermostat
    Q:
    What is the first step to replace the thermostat for the 2001 Cadillac DeVille? Posted by Customer
    A:
    Partially drain the cooling system and remove the air cleaner assembly.
    Posted by ChevyPartsGiant Specialist
    See expert answers on similar Thermostat
    Q:
    How do you fill the cooling system after reassembly for the 2009 Cadillac DTS? Posted by Customer
    A:
    Use either the Vac-N-Fill or static fill method.
    Posted by ChevyPartsGiant Specialist
    See expert answers on similar Thermostat
    Q:
    What is the final step after installing the thermostat for the 2007 Cadillac DTS? Posted by Customer
    A:
    Reattach the radiator outlet hose to the thermostat housing, use the Hose Clamp Pliers (J 38185) to position the radiator outlet hose clamp, fill the cooling system, and reinstall the air cleaner.
    Posted by ChevyPartsGiant Specialist
    See expert answers on similar Thermostat
    Q:
    What should be removed from the thermostat housing for the 2008 Cadillac DTS? Posted by Customer
    A:
    The radiator outlet hose.
    Posted by ChevyPartsGiant Specialist
    See expert answers on similar Thermostat
    Q:
    What should be placed after the new thermostat housing gasket for the 2006 Cadillac DTS? Posted by Customer
    A:
    Place the thermostat, followed by installing the thermostat housing.
    Posted by ChevyPartsGiant Specialist
    See expert answers on similar Thermostat
    Q:
    What should be removed after draining the coolant for the 2000 Cadillac Eldorado? Posted by Customer
    A:
    Remove the air cleaner assembly, disconnect the radiator hose, and take off the thermostat housing.
    Posted by ChevyPartsGiant Specialist
    See expert answers on similar Thermostat
    Q:
    What is the first step to replace the thermostat for the 2002 Cadillac DeVille? Posted by Customer
    A:
    Partially drain the cooling system and remove the air cleaner assembly.
    Posted by ChevyPartsGiant Specialist
    See expert answers on similar Thermostat
    Q:
    What is the first step in the installation process for the 2000 Cadillac Seville? Posted by Customer
    A:
    Place the new gasket and thermostat into the water pump housing.
    Posted by ChevyPartsGiant Specialist
    See expert answers on similar Thermostat
    Q:
    How do you detach the radiator outlet hose for the 2001 Cadillac Seville? Posted by Customer
    A:
    Use the Hose Clamp Pliers (J 38185) to detach the radiator outlet hose from the thermostat housing.
    Posted by ChevyPartsGiant Specialist
    See expert answers on similar Thermostat
    Q:
    What is the installation process for the new thermostat for the 2002 Cadillac Seville? Posted by Customer
    A:
    Place the new gasket and thermostat into the water pump housing, then reinstall the thermostat housing and secure it with the thermostat housing bolts, tightening them to 10 Nm (89 inch lbs.).
    Posted by ChevyPartsGiant Specialist
    See expert answers on similar Thermostat
    Q:
    What should be done with the MAP sensor and EGR valve for the 2002 Cadillac Seville? Posted by Customer
    A:
    Install the MAP sensor, connect the electrical connector to the MAP sensor, and install the EGR valve, ensuring to replace the EGR valve inlet pipe if disconnected.
    Posted by ChevyPartsGiant Specialist
    See expert answers on similar Thermostat Housing
    Q:
    What should be removed after repositioning the hose clamp for the 2006 Buick Lucerne? Posted by Customer
    A:
    Remove the radiator inlet hose from the thermostat housing.
    Posted by ChevyPartsGiant Specialist
    See expert answers on similar Thermostat
    If you have any questions about this product, please don't hesitate to ask us. We will be happy to help you!

OEM GM Thermostat Housing 1647540 Designed for Proper Fit and Performance

Original OEM GM parts deliver superior quality and meet all performance standards needed for optimal automotive operation. The authentic part identified by 1647540 Thermostat Housing is available in the market under the name GM Thermostat, Thermostat Housing. This genuine product has a full warranty coverage from the manufacturer available at all authorized GM dealers throughout the United States. This part 1647540 Thermostat Housing fits certain Cadillac Allante, DTS, DeVille models, as well as Buick Lucerne. Additionally, it is compatible with Pontiac Bonneville and Oldsmobile Aurora models.
The original GM component designated by manufacturer part number 1647540 maintains top performance when functioning as the Housing E; Thermostat Housing Cover unit. The component 1647540 is constructed from durable material and its dimensions span 4.4 x 4.3 x 2.2 inches while weighing 0.50 Pounds. The Direct Replacement component is ready in New condition to ensure full compatibility with your vehicle system. This component receives the designation of Water Outlet; Housing, Engine Coolant Thermostat. The part 1647540 has available replacement options. GM manufacturer provides a warranty that ensures reliable operation of this product. The Shipping Policy and Return Policy pages outline complete details regarding shipping procedures and return processes.
If you want to save money in the long run on maintenance and repairs, you should choose OEM products because they're of the top level of durability. Are you on the quest of finding GM parts, our site is worth a visit. We stock an endless selection of high-quality GM components including things like ignition coils all the way through to fan shrouds and all at prices that can not be matched. You have nothing to worry about because all our OEM parts are covered with a manufacturer warranty, which guarantees superior quality and value.