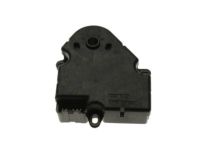
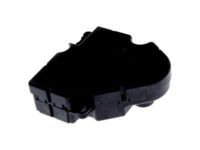
Make sure this part fits

GM 3033879
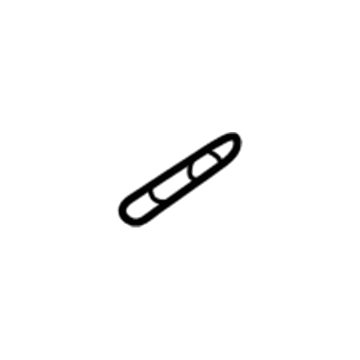
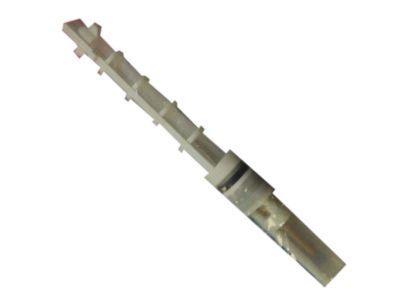
Evaporator Core Connector

1984-2024 GM

Customer Questions & Expert Answers (32)
GM 3033879 Evaporator Core Connector
  • Part Description
    Orifice, A/C Evaporator Tube; A/C Evaporator Core Repair Kit; A/C Accumulator Tube Outlet; A/C Orifice Tube
  • Manufacturer
    General Motors
Make sure this part fits
$9.91 MSRP: $17.69
You Save: $7.78 (44%)
Ships in 1-2 Business Days
1
ADD TO CART
  • Related Parts
  • Product Specifications
  • Vehicle Fitment
  • Customer Questions & Expert Answers
  • Product Specifications

    BrandGenuine GM
    Manufacturer Part Number3033879
    Part DescriptionOrifice, A/C Evaporator Tube; A/C Evaporator Core Repair Kit; A/C Accumulator Tube Outlet; A/C Orifice Tube
    Other NamesA/C Line Screen; Tube; Strainer; Inlet Orifice; A/C Expansion Refrigerant; Gasket, A/C Evaporator
    Item Dimensions4.1 x 1.0 x 0.6 inches
    Item Weight0.30 Pounds
    ConditionNew
    Fitment TypeDirect Replacement
    ManufacturerGeneral Motors
    SKU3033879
    WarrantyThis genuine GM part is guaranteed by GM's factory warranty.
    Shipping & ReturnShipping Policy Return Policy
    Warning: California's Proposition 65
  • Vehicle Fitment

    Year Make Model Trim Engine
    1997-1998, 1984-1989 Buick CenturyCustom, Estate Wagon, Limited, T-Type4 Cyl 2.5 L GAS, 6 Cyl 2.8 L GAS, 6 Cyl 3.0 L GAS, 6 Cyl 3.1 L GAS, 6 Cyl 3.3 L GAS, 6 Cyl 3.8 L GAS, 6 Cyl 4.3 L DIESEL
    1992-1996 Buick Park AvenueBase, Ultra6 Cyl 3.8 L GAS
    1992-1998 Buick Regal25th Anniversary Edition, Custom, Gran Sport, GS, Limited, LS, Olympic Gold Edition6 Cyl 3.1 L GAS, 6 Cyl 3.8 L GAS
    1995-1999 Buick RivieraBase6 Cyl 3.8 L GAS
    1984-1988 Buick SkyhawkCustom, Limited, SE, Sport, T-Type4 Cyl 1.8 L GAS, 4 Cyl 2.0 L GAS
    1993 Cadillac 60 SpecialBase8 Cyl 4.9 L GAS
    1984-1988 Cadillac CimarronBase, d'Oro4 Cyl 2.0 L GAS, 6 Cyl 2.8 L GAS
    2000-2005, 1992-1996 Cadillac DeVilleBase, Concours, d'Elegance, DHS, DTS, Protection Series, Touring8 Cyl 4.6 L GAS, 8 Cyl 4.9 L GAS
    1992 Cadillac Fleetwood60 Special, Base, d'Elegance8 Cyl 4.9 L GAS
    1998-2004, 1992-1995 Cadillac SevilleBase, SLS, STS8 Cyl 4.6 L GAS, 8 Cyl 4.9 L GAS
    View More
  • Customer Questions & Expert Answers

    Q:
    Is 3033879 compatible with my car? Posted by ChevyPartsGiant Specialist
    A:
    Please Select Your Vehicle model to see if part number 3033879 is suitable before ordering.
    Posted by ChevyPartsGiant Specialist
    Q:
    How to replace the A/C Orifice Tube in an A/C system on Cadillac Seville? Posted by Customer
    A:
    The first step in replacing an A/C Orifice Tube requires the A/C Refrigerant Recovery and Recharging System (J 39500-B). This system will extract the refrigerant from the system. The O-ring joint requires loosening before splitting the tubing into halves so you can remove the A/C Orifice Tube. Install the A/C Orifice Tube after applying 525 refrigerant to the O-ring and attach the O-ring joint next. Tighten the dual O-ring joint with the Dual O-Ring Tube Separator (J 38042) to 24 N.m (18 lb ft). After returning the tube to its original position the technician should recharge the refrigerant system while performing final leak testing with the Electronic Halogen Leak Detector (J 39400-A).
    Posted by ChevyPartsGiant Specialist
    Q:
    How to replace the A/C Orifice Tube in an A/C system on Cadillac DeVille? Posted by Customer
    A:
    The first step for replacing an A/C Orifice Tube consists of removing refrigerant from the system. Recover the refrigerant from the system before loosening the 0-ring joint with the j 39500-b. Then remove the A/C Orifice Tube from the a/c tube by separating the tubing halves. Use 525 refrigerant to lubricate a new 0-ring before placing the A/C Orifice Tube inside the a/c line before it binds into the 0-ring joint. Use the j 39500-b to tighten the dual 0-ring joint until it reaches 24 n.m (18 lb ft) torque level. Then reposition the line into the plastic hold-down clamp. The objective entails refrigerant recharge of the system followed by leak testing of repaired or reinstalled component fittings through the combination of j 39400 electronic halogen leak detector and j 38042 dual 0-ring tube separator.
    Posted by ChevyPartsGiant Specialist
    Q:
    How to replace the A/C Orifice Tube in a refrigerant system on Cadillac DeVille? Posted by Customer
    A:
    The process to replace the A/C Orifice Tube begins with recovering all refrigerant from the system. Detach the discharge hose at the evaporator inlet fitting with the J 39500-B then disconnect the fitting to remove the A/C Orifice Tube from the evaporator hose assembly. The O-ring needs refrigerant oil lubrication before installing the A/C Orifice Tube into the evaporator hose assembly. Then attach the discharge hose to the evaporator inlet line fitting. Tighten the discharge hose to the evaporator inlet line fitting until it reaches 24 N.m (18 lb ft) torque and restore the line within its original position secured by the plastic hold-down clamp. The system requires recharging while technicians perform a leak test on the fittings of repaired components through the combination of J 39400 Electronic Halogen Leak Detector and J 38042 Dual 0-Ring Tube Separator.
    Posted by ChevyPartsGiant Specialist
    Q:
    How to replace the A/C Orifice Tube in a refrigerant system on Cadillac Seville? Posted by Customer
    A:
    The first step to replace the A/C Orifice Tube requires recovering the refrigerant from the system. A Dual O-Ring Tube Separator (J 38042) facilitates O-ring joint loosening and tubing half separation prior to removing the A/C Orifice Tube. Place 525 refrigerant on the new O-ring before installing the A/C Orifice Tube by connecting both ends of the O-ring joint. Use 24 N.m (18 lb ft) of torque to fasten the dual O-ring joint before putting the tube back into its normal position. The refrigeration system needs recharge followed by component leakage testing through the Electronic Halogen Leak Detector (J 39400) at the repaired or new parts' fittings.
    Posted by ChevyPartsGiant Specialist
    Q:
    How to replace the A/C Orifice Tube in an A/C system on Chevrolet Express 3500? Posted by Customer
    A:
    You must recover refrigerant from the a/c system before installing a new A/C Orifice Tube. The Evaporator case bolt needs removal while you detach the Evaporator tube from its placement on the Evaporator. The A/C Orifice Tube remover and installer (J 26549-E) should be used to pull out the A/C Orifice Tube. Use a heat gun or hairdryer to heat the inlet pipe dimple area at 7 mm distance but do not heat the pipe excessively. Apply the A/C Orifice Tube remover and installer tool (J 26549-E) for a restricted A/C Orifice Tube with removed debris when possible. A turning and push-pull motion using the A/C Orifice Tube remover and installer (J 26549-E) will help extract the A/C Orifice Tube while performing heat application. The installation of this part begins by placing the shorter screen end first into the Evaporator and then applying 525 viscosity refrigerant oil to the o-ring seal. Install the new A/C Orifice Tube by using A/C Orifice Tube remover and installer (J 26549-E) before connecting the Evaporator tube to the Evaporator while maintaining a 19 n.m (14 lb ft) torque. The bolt will be used to settle the Evaporator tube into position on the Evaporator cover. The a/c system evacuation and recharging process should be completed before performing testing on the component fittings through the halogen leak detector (J 39400-A).
    Posted by ChevyPartsGiant Specialist
    Q:
    How to replace the A/C Orifice Tube in an A/C system on Chevrolet Blazer? Posted by Customer
    A:
    The first step to replace an A/C Orifice Tube requires refrigerant recovery from the system followed by evaporator tube removal from the evaporator. Discard the o-ring seal during this process. The orifice tube remover and installer (J 26549-E) should be used to remove the A/C Orifice Tube. The installer and remover tool (J 26549-E) helps extract the A/C Orifice Tube. Users must first clean all blocked materials then direct a heat gun (hair dryer, epoxy dryer, or equivalent) at the inlet dimples with a 7 mm (0.25 in) distance while being cautious to maintain pipe temperature within safe levels and avoiding pressure switches nearby. When heating the A/C Orifice Tube you must use the orifice tube remover and installer (J 26549-E) for both pushing and turning motions to remove it. When installing the new A/C Orifice Tube use the orifice tube remover and installer (J 26549-E) which should have its shorter screen end inserted first into the evaporator. Take 525 viscosity refrigerant oil to coat the new o-ring seal before installing both the new o-ring and the evaporator tube to the evaporator. Tighten the evaporator tube to 28 n.m (21 lb ft). The customer must evacuate and recharge the a/c system before conducting a leak test on fittings through the use of the halogen leak detector (J 39400-A).
    Posted by ChevyPartsGiant Specialist
    Q:
    How to replace the A/C Orifice Tube in an A/C system on Chevrolet Express 1500? Posted by Customer
    A:
    The initial step for replacing the A/C Orifice Tube requires the recovery of a/c system refrigerant. Before starting to replace the A/C Orifice Tube, it's necessary to remove the Evaporator hose retaining nut from the Evaporator and then utilize the orifice tube remover and installer (J 26549-E). The A/C Orifice Tube will become loose if you carefully apply heat to the inlet pipe dimples through a heat gun or hair dryer at 7 mm (0.25 in) distance. Avoid overheating the pipe during this process. During heat application, the orifice tube remover and installer (J 26549-E) should be used to grip the A/C Orifice Tube so you can loosen it through a combination of turning and pushing while pulling motions. Use the orifice tube remover and installer (J 26549-E) to install the A/C Orifice Tube but start with the shorter screen end on the Evaporator while applying 525 viscosity refrigerant oil for sealing. After installing new washer seals on the Evaporator tube, you should connect the Evaporator hose to the Evaporator before tightening the retaining nut to 16 n.m (12 lb ft). Ending the process involves evacuation of the a/c system followed by recharging through the procedure together with a halogen leak detector (J 39400-A) check for component fittings.
    Posted by ChevyPartsGiant Specialist
    Q:
    How to replace the A/C Orifice Tube on Chevrolet Lumina? Posted by Customer
    A:
    Start the replacement of the A/C Orifice Tube by detaching the air cleaner and duct assembly then recovering the refrigerant. Disconnect both the abs modulator electrical connector together with the electrical connector from the a/c pressure sensor switch. Start by removing the bracket along with its bolt from the liquid/suction line followed by loosening the nut from the A/C Orifice Tube. The A/C Orifice Tube should be replaced after you clean all residues from it. Heat the inlet pipe dimples by using a heat gun (hair dryer, epoxy dryer or similar device) with one inch targeted distance while avoiding excessive heat exposure to the pipe. Use needle-nose pliers to hold the A/C Orifice Tube before you apply careful turning pressure while performing pushing actions to free the obstructed tube away. The system requires a 30 ml (1 oz) amount of polyalkylene glycol (PAG) synthetic refrigerant oil while the A/C Orifice Tube needs to be lubricated with mineral base 525 viscosity refrigerant oil on its new o-ring seals before its installation with correct alignment of the smaller screen. Mineral base 525 viscosity refrigerant oil should coat the new o-ring seals before installation along with inserting the new A/C Orifice Tube that uses the shorter screen on its first end. To install the liquid line nut at the a/c orifice position tighten the nut to 27 n.m (20 lb ft). Fasten the liquid/suction line bracket with its bolt while tightening the bolt to 6 n.m (54 lb ft). The electrical connectors will be restored between the abs modulator and the a/c pressure sensor switch. Complete the evacuation and charging procedure of the a/c system and perform leak tests. At the end of the procedure install the air cleaner alongside the duct assembly.
    Posted by ChevyPartsGiant Specialist
    Q:
    How to replace the A/C Orifice Tube in an A/C system on Chevrolet S10? Posted by Customer
    A:
    Before installation of the A/C Orifice Tube, recover refrigerant first then remove the evaporator tube from the evaporator unit while discarding the o-ring seal. The technicians should use the orifice tube remover and installer (J 26549-E) to pull out the A/C Orifice Tube. Remove any blocked material from the tube starting from the dimples up to the inlet then carefully detach the nearby pressure switch to avoid damaging the tube while heating. Use a heat gun or equivalent heating device that includes either a hair dryer or epoxy dryer to warm the inlet pipe at a distance of 7 mm (0.25 in) from its dimples while employing the j 26549-e tube holder. A pushing motion combined with turning motions can help you free and remove the lodged tube. Begin by inserting first the shorter end of the new A/C Orifice Tube with j 26549-e tool into the evaporator unit. Then coat the o-ring seal with 525 viscosity oil before installation. Attach the evaporator tube to the evaporator by tightening it to 28 n.m (21 lb ft). The evacuation and recharging process should be performed on the a/c system before testing the fittings with the halogen leak detector (J 39400-A).
    Posted by ChevyPartsGiant Specialist
    Q:
    How to replace the A/C Orifice Tube on a long wheel base on Chevrolet Trailblazer? Posted by Customer
    A:
    The refrigerant recovery procedure must start before you replace the expansion (orifice) tube of a long wheel base vehicle. Take away both the accumulator and Coolant Reservoir from the vehicle. First loosen the Evaporator tube nut installed on the Evaporator while removing the Evaporator tube from its position on the Evaporator. Before continuing remove the nut of the Evaporator tube block then disconnect the Evaporator tube at its block fitting . The expansion tube requires removal with the orifice tube remover (J 26549-E). Dispose of the original o-ring seal. Insert the smaller end of the expansion tube to the Evaporator tube before using the orifice tube remover (J 26549-E) for installation. First place the new o-ring seal and then put together the Evaporator tube with block fitting before tightening the nut to 28 n.m (21 lb ft) on the Evaporator tube block. Pair the Evaporator tube along with its nut to the Evaporator and apply 28 n.m (21 lb ft) of torque to both components. The last step includes reattaching the Coolant Reservoir with the accumulator and recharging the refrigerant system followed by inspecting for leaks with the halogen leak detector (J 39400-A).
    Posted by ChevyPartsGiant Specialist
    Q:
    How to replace the A/C Orifice Tube in an A/C system on Chevrolet Express 2500? Posted by Customer
    A:
    The first step to replace the A/C Orifice Tube requires a refrigerant recovery process from the complete a/c system. The Evaporator tube must be detached from the Evaporator after removing the bolt that secures the Evaporator case. The orifice tube remover and installer (J 26549-E) should be employed to pull out the A/C Orifice Tube. Heat the inlet pipe slowly starting from 7 mm (0.25 in) distance away from the dimples while using a heat gun or hairdryer to remove restriction deposits from the A/C Orifice Tube if present. To loosen and extract the A/C Orifice Tube during heating use the orifice tube remover and installer tool (J 26549-E) while executing a combining rotational and force application. The shorter end of the screen must be placed first into the Evaporator while applying 525 viscosity refrigerant oil to the o-ring seal before installation. The A/C Orifice Tube requires installation by using the orifice tube remover and installer (J 26549-E). Then connect the Evaporator tube to the Evaporator using a torque of 19 n.m (14 lb ft). The bolt should be installed to fasten the Evaporator tube into its position on the Evaporator cover. The a/c system evacuation procedure concludes after recharging the system while the halogen leak detector (J 39400-A) authenticates component fittings.
    Posted by ChevyPartsGiant Specialist
    Q:
    How to replace the A/C Orifice Tube on Chevrolet Trailblazer? Posted by Customer
    A:
    The first step to replace an A/C Orifice Tube requires refrigerant recovery. The accumulator with the Coolant Reservoir needs to be detached from the system. Start the replacement by first loosening the Evaporator tube nut on the Evaporator device. After that remove the Evaporator tube. Use proper tools to remove the o-ring seal from the Evaporator tube block fitting while extracting the nut from its position before separating the tubes at the block fitting. The j 26549-e (Orifice Tube Remover) serves to extract the A/C Orifice Tube from inside the Evaporator tube. Follow procedure using j 26549-e to first place the shorter screened end of new A/C Orifice Tube inside Evaporator tube. Apply a new o-ring seal on the tubes before assembling them while tightening the Evaporator tube nut to 28 nm (21 lb ft). Pull the Evaporator tube to the Evaporator then fasten it with the nut before tightening to 28 nm (21 lb ft). Put the Coolant Reservoir along with the accumulator back into position before refilling the refrigeration system with refrigerant. The j 39400-a (Halogen Leak Detector) must complete a final test for checking leaks on all component fittings.
    Posted by ChevyPartsGiant Specialist
    Q:
    How to replace the A/C Orifice Tube in an A/C system on GMC Jimmy? Posted by Customer
    A:
    The replacement process for the A/C Orifice Tube begins by recuperating refrigerant from the system then removing the Evaporator tube from the Evaporator. The o-ring seal gets discarded as the technician uses the A/C Orifice Tube remover and installer (J 26549-E) to take out the A/C Orifice Tube. Before installing the new tube, remove all restricted or blocked material from it first and take out the existing pressure switch in this area to avoid damage. Through the use of a heat gun on the inlet pipe dimples a distance of 7 mm (0.25 inches), carefully direct soft heat to the A/C Orifice Tube while using the A/C Orifice Tube remover and installer (J 26549-E) for tube handling. Follow a series of rotating movements combined with forward and backward pressure to extricate and pull out the entrapped tube. The installation process should begin with feeding the shorter screen section of the new A/C Orifice Tube into the Evaporator through the use of the A/C Orifice Tube remover and installer (J 26549-E). First, apply 525 viscosity refrigerant oil to the new o-ring seal before installing it onto the Evaporator along with attaching the Evaporator tube with minimal torque set to 28 n.m (21 lb ft). The a/c system evacuation and recharging process follows after which you should test all fittings using the halogen leak detector (J 39400-A).
    Posted by ChevyPartsGiant Specialist
    Q:
    How to replace the A/C Orifice Tube in an A/C system on GMC Savana 2500? Posted by Customer
    A:
    The replacement of the A/C Orifice Tube must begin with collecting all refrigerant from the a/c system. Use the A/C Orifice Tube remover and installer tool (J 26549-E) to disconnect the A/C Orifice Tube after the removal of its retaining nut from the Evaporator. Obtain the stuck A/C Orifice Tube then use both a heat gun and hair dryer to apply heat on the inlet pipe at 7 mm (0.25 in) from each dimple while ensuring the pipe remains at a safe temperature. The A/C Orifice Tube remover and installer (J 26549-E) will enable you to hold the A/C Orifice Tube as you implement both twisting and push-pull actions to extract it during heat application. Safety measures begin with placing the shorter screen segment first inside the Evaporator while applying 525 viscosity refrigerant oil to the o-ring seal. Select the A/C Orifice Tube remover and installer (J 26549-E) to put in the A/C Orifice Tube followed by new sealing washers for the Evaporator tube before reattaching the Evaporator hose to the Evaporator. Fasten the Evaporator hose retaining nut to the Evaporator before tightening it to 16 n.m (12 lb ft). Evacuation and recharge procedures following a leak test on components fittings will be completed using the halogen leak detector (J 39400-A).
    Posted by ChevyPartsGiant Specialist
    Q:
    How to replace the A/C Orifice Tube on GMC Jimmy? Posted by Customer
    A:
    The procedure of replacing an A/C Orifice Tube begins with recovering all refrigerant from the system. The evaporator receiving tube needs removal from its mount while discarding its o-ring sealing component. The A/C Orifice Tube remover and installer (J 26549-E) should be used for A/C Orifice Tube removal. When cleaning impacted residue from a restricted or plugged tube users should eliminate as much material as possible while also removing any pressure switch near the tube to shield it from damage during heat application. Heat the dimpled areas of the inlet pipe by using a heat gun or equivalent tools at 7 mm (0.25 in) distance without subjecting them to excessive heat. During the heat application process use the A/C Orifice Tube remover and installer (J 26549-E) to unscrew and withdraw the A/C Orifice Tube by performing a turning motion combined with pushing and pulling actions while holding the tube. Use A/C Orifice Tube remover and installer (J 26549-E) to put the shorter screened end of the new A/C Orifice Tube into the evaporator initially. The new o-ring seal requires 525 viscosity refrigerant oil for coating prior to installation. Fasten the evaporator tube to the evaporator before securing it with torque of 28 n.m (21 lb ft). Complete the process by evacuating then recharging the system.
    Posted by ChevyPartsGiant Specialist
    Q:
    How to replace the A/C Orifice Tube in an A/C system on GMC Savana 3500? Posted by Customer
    A:
    The first step when it comes to replacing an A/C Orifice Tube involves recovering the refrigerant from the a/c system. The A/C Orifice Tube remover and installer (J 26549-E) enables expansion tube extraction after Evaporator hose retaining nut removal from the Evaporator. You must recover refrigerant from the system before starting. Remove the Evaporator hose retaining nut first and then use the A/C Orifice Tube remover and installer (J 26549-E) to remove the expansion tube. Stick-up expansion tubes can be softened with an appropriate heat source 7 mm (0.25 in) from the dimples on the inlet pipe and only heat the pipe up to a safe temperature to remove the stuck-up residue. The procedure requires the use of the A/C Orifice Tube remover and installer (J 26549-E) which should be used to secure the expansion tube and loosen it by turning and pushing while pulling it out. To install the expansion tube you should utilize the A/C Orifice Tube remover and installer (J 26549-E), beginning with the short-screened end at the Evaporator entrance and lubricate the o-ring seal with 525 viscosity refrigerant oil. Install new sealing washers onto the Evaporator tube before attaching the Evaporator hose to the Evaporator component and tightening the Evaporator hose retaining nut to the Evaporator at 16 n.m (12 lb ft). The halogen leak detector (J 39400-A) will check for leaks on all component fittings before evacuation and recharging of the system.
    Posted by ChevyPartsGiant Specialist
    Q:
    How to replace the A/C Orifice Tube on a short wheelbase on GMC Envoy? Posted by Customer
    A:
    You need to begin A/C Orifice Tube replacement on short wheelbase vehicles by recovering coolant then taking out the accumulator. The first task involves disconnecting the evaporator tube nut from the evaporator while you pull away the evaporator tube. After discarding the o-ring seal you must remove the evaporator tube block fitting nut and open the evaporator tubes (4,6) at this fitting. The A/C Orifice Tube remover (J26549-E) helps professionals properly extract the A/C Orifice Tube out of the evaporator tube. The shorter screen end of the A/C Orifice Tube needs to enter the evaporator tube first during installation while using a tool called the A/C Orifice Tube remover (J26549-E). Use a new o-ring while reassembling evaporator tubes (4,6), torquing the evaporator tube nut to 28 n.m (21 lb ft). Lightly attach the evaporator tube to its fitting component using a nut that requires the proper torque amount. The process ends with Coolant Reservoir and accumulator reinstallation and refrigerant system recharging followed by checking fittings with the halogen leak detector (J39400-A).
    Posted by ChevyPartsGiant Specialist
    Q:
    How to Properly Service and Replace an A/C Orifice Tube in the A/C System on GMC Savana 2500? Posted by Customer
    A:
    Start the replacement process of the expansion (orifice) tube by recovering all refrigerant from the a/c system. The Evaporator hose retaining nut on the Evaporator needs removal before using the (J 26549-E) to extract the expansion tube. The expansion tube may be loosened with the j 26549-e tool by applying gentle heat 7mm (0.25in) away from the inlet pipe dimples followed by rotating motions to free the tube. Begin installation by putting the shorter screen side into the Evaporator while applying 525 viscosity refrigerant oil to the o-ring seal. After installation with the (J 26549-E) the expansion tube gets fitted into position, afterwards install new sealing washers to the Evaporator tube. Speak caution when installing the Evaporator hose to the Evaporator to reduce the risk of vehicle damage. Fasten the Evaporator hose retaining nut to the component before tightening it to 16 nm (12 lb ft). Performing a leak test on the components' fittings using (J 39400-A) should be the last step after evacuating and recharging the a/c system.
    Posted by ChevyPartsGiant Specialist
    Q:
    How to replace the A/C Orifice Tube in an A/C system on GMC Savana 1500? Posted by Customer
    A:
    Rerecovery of refrigerant must take place before expansion (A/C orifice) tube replacement. First disconnect the Evaporator hose retaining nut followed by using the A/C Orifice Tube remover and installer (J 26549-E) to extract the expansion tube. Use the acquired heat from a heat gun or hair dryer pointing 7 mm (0.25 in) away from the inlet pipe dimples, nevertheless keep the pipe temperature below unsafe levels before using the A/C Orifice Tube remover and installer (J 26549-E) to remove the stuck expansion tube. The A/C Orifice Tube remover and installer (J 26549-E) combined with turning motions should be used to loosen and remove the expansion tube while heating the unit. Start by putting the short end of the screen into the Evaporator while applying 525 viscosity refrigerant oil onto the o-ring seal. The A/C Orifice Tube remover and installer (J 26549-E) enables you to install the new expansion tube before you apply new sealing washers to the Evaporator tube followed by reconnecting the Evaporator hose to the Evaporator. Secure the Evaporator hose retaining nut to a torque of 16 n.m using a 12 lb ft force. The a/c system evacuation and recharging process includes a fitting leak test through utilization of the halogen leak detector (J 39400-A).
    Posted by ChevyPartsGiant Specialist
    Q:
    How to Service and Repair the A/C Orifice Tube on a GMC Envoy? Posted by Customer
    A:
    Start by recovering refrigerant from the system before removing the accumulator and the Coolant Reservoir for short wheelbase vehicle A/C Orifice Tube replacement. The Evaporator tube nut needs to be unfastened from the Evaporator before removing the Evaporator tube. The Evaporator tubes (4,6) are detached from the block fitting after discarding the o-ring seal and unfastening the nut from the Evaporator tube block fitting. The A/C Orifice Tube remover (J 26549-E) allows professionals to extract the A/C Orifice Tube from the Evaporator tube. The installation requires placing the shorter screen end of the A/C Orifice Tube into the Evaporator tube first through the use of an A/C Orifice Tube remover (J 26549-E). The installation requires a new o-ring before attaching the Evaporator tube nut while applying torque to 28 n.m (21 lb ft). You should add the Evaporator tube to the Evaporator and fasten it with nut while tightening it to 28 n.m (21 lb ft). The technician should reinstall the Coolant Reservoir and accumulator followed by refrigerant recharge and finishing with a leak test on fittings using the halogen leak detector (J 39400-A).
    Posted by ChevyPartsGiant Specialist
    Q:
    How to replace the A/C Orifice Tube in an A/C system on GMC Sonoma? Posted by Customer
    A:
    The first step to replace an A/C Orifice Tube requires refrigerant recovery from the system followed by evaporator tube removal from the evaporator. Discard the o-ring seal during this process. The orifice tube remover and installer (J 26549-E) should be used to remove the A/C Orifice Tube. The installer and remover tool (J 26549-E) helps extract the A/C Orifice Tube. Users must first clean all blocked materials then direct a heat gun (hair dryer, epoxy dryer, or equivalent) at the inlet dimples with a 7 mm (0.25 in) distance while being cautious to maintain pipe temperature within safe levels and avoiding pressure switches nearby. When heating the A/C Orifice Tube you must use the orifice tube remover and installer (J 26549-E) for both pushing and turning motions to remove it. When installing the new A/C Orifice Tube use the orifice tube remover and installer (J 26549-E) which should have its shorter screen end inserted first into the evaporator. Take 525 viscosity refrigerant oil to coat the new o-ring seal before installing both the new o-ring and the evaporator tube to the evaporator. Tighten the evaporator tube to 28 n.m (21 lb ft). The customer must evacuate and recharge the a/c system before conducting a leak test on fittings through the use of the halogen leak detector (J 39400-A).
    Posted by ChevyPartsGiant Specialist
    Q:
    What is the next step after connecting the evaporator hose for the 2005 Cadillac DeVille? Posted by Customer
    A:
    Position the evaporator hose on the accumulator cover and press to engage.
    Posted by ChevyPartsGiant Specialist
    See expert answers on similar A/C Orifice Tube
    Q:
    What is the first step to replace the expansion (orifice) tube for the 2000 Cadillac DeVille? Posted by Customer
    A:
    Recover the refrigerant from the system using the A/C Refrigerant Recovery, Recycling and Recharging System (J 39500-B).
    Posted by ChevyPartsGiant Specialist
    See expert answers on similar A/C Orifice Tube
    Q:
    How do you loosen the evaporator hose fitting for the 2004 Cadillac DeVille? Posted by Customer
    A:
    Loosen the evaporator hose fitting at the expansion tube location.
    Posted by ChevyPartsGiant Specialist
    See expert answers on similar A/C Orifice Tube
    Q:
    What is the final step after the installation for the 2002 Cadillac Seville? Posted by Customer
    A:
    Recharge the refrigerant system and perform a leak test on the fittings using the Electronic Halogen Leak Detector (J 39400).
    Posted by ChevyPartsGiant Specialist
    See expert answers on similar A/C Orifice Tube
    Q:
    What should be done after repositioning the line into the original position for the 2003 Cadillac DeVille? Posted by Customer
    A:
    Recharge the refrigerant system and perform a leak test on the fittings of the repaired or reinstalled component using the J 39400 (J 39400 Electronic Halogen Leak Detector).
    Posted by ChevyPartsGiant Specialist
    See expert answers on similar A/C Orifice Tube
    Q:
    What tool is used to separate the tubing halves for the 2004 Cadillac Seville? Posted by Customer
    A:
    Use the Dual O-Ring Tube Separator (J 38042) to separate the tubing halves.
    Posted by ChevyPartsGiant Specialist
    See expert answers on similar A/C Orifice Tube
    Q:
    What tool is used to remove the expansion tube for the 2010 Chevrolet Express 3500? Posted by Customer
    A:
    Use the (J 26549-E) to remove the expansion tube.
    Posted by ChevyPartsGiant Specialist
    See expert answers on similar A/C Orifice Tube
    Q:
    What are the final steps after installation for the 2008 Chevrolet Express 3500? Posted by Customer
    A:
    Evacuate and recharge the A/C system and perform a leak test on the fittings of the components using the Halogen Leak Detector (J 39400-A).
    Posted by ChevyPartsGiant Specialist
    See expert answers on similar A/C Orifice Tube
    Q:
    What are the final steps after connecting the evaporator tube for the 2006 Chevrolet Trailblazer? Posted by Customer
    A:
    Reinstall the coolant reservoir and the accumulator, recharge the refrigerant system, and perform a leak test on the fittings using the Halogen Leak Detector (J 39400-A).
    Posted by ChevyPartsGiant Specialist
    See expert answers on similar A/C Orifice Tube
    Q:
    What should you do after installing the expansion tube for the 2000 GMC Savana 3500? Posted by Customer
    A:
    Install the evaporator tube to the evaporator, tightening it to 19 N.m (14 lb ft).
    Posted by ChevyPartsGiant Specialist
    See expert answers on similar A/C Orifice Tube
    If you have any questions about this product, please don't hesitate to ask us. We will be happy to help you!

OEM GM 3033879, Excellent Performance and Perfect Fitment

To ensure reliability, purchase GM part # 3033879 Evaporator Core Connector. It is sometimes referred to as GM A/C Orifice Tube. Choosing OEM parts is the optimal decision for guaranteeing superior quality and perfect performance. These components undergo stringent quality checks and are carefully constructed to comply with GM's factory specifications, ensuring a smooth installation process.

ChevyPartsGiant.com is a leading supplier of genuine GM parts such as GM 3033879 Evaporator Core Connector. Our website boasts an extensive inventory of OEM GM parts, available at highly competitive prices in the market. Should you require any new genuine GM parts, rest assured we will deliver them swiftly and efficiently to your doorstep. Furthermore, all our parts come with the assurance of a manufacturer's warranty. For detailed Chevy parts information, click here.
Choose ChevyPartsGiant for discounted prices, exceptional service and fast delivery